Table of Contents
Advertisement
AC Smart
Advanced Control Smart
Installation/Owner's Manual
PQCSW320A0E
Note
• Please read this installation/use manual before installing
the product.
• Install the product with an expert installation engineer with
proper qualifications.
• Even after reading this manual, please store this manual
so that you can refer to it during operations.
LG
Advertisement
Table of Contents

Related Manuals for LG AC Smart


Summary of Contents for LG AC Smart
- Page 1 AC Smart Advanced Control Smart Installation/Owner's Manual PQCSW320A0E Note • Please read this installation/use manual before installing the product. • Install the product with an expert installation engineer with proper qualifications. • Even after reading this manual, please store this manual...
-
Page 2: Table Of Contents
• Setting PI485 DIP switch....................2-7 • Connecting 2PIN connector ..................2-9 • Connecting RS485 line to PI485 ................2-11 Installing AC Smart and connecting line ..............2-14 Logging in of the AC Smart..................2-16 • Logging in as installation professional................2-18 • Logging in as administrator ..................2-19 •... - Page 3 3. AC SMART MENU ...........3-1 Control/Monitoring menu ....................3-1 • Zone information screen....................3-2 • Group information screen.....................3-6 • Unit information screen ....................3-10 Schedule menu......................3-18 • Schedule main screen....................3-19 • Edit weekly pattern screen ..................3-24 • Edit schedule detail screen ..................3-32 History menu .........................3-40 •...
- Page 4 4. OPERATING AC SMART........4-1 Logging in of the AC Smart....................4-1 • Logging in as installation professional................4-2 • Logging in as administrator ..................4-3 • Logging in as general user ...................4-4 Control/Monitoring......................4-5 • Controlling the unit .......................4-6 • Controlling the unit in detail ..................4-10 Schedule ........................4-15...
- Page 5 Environment setting ....................4-145 • Checking the S/W version information ..............4-146 • Setting the password....................4-147 • Setting the language by country................4-150 • Setting the time ......................4-153 • Calibrating the screen ....................4-154 • Setting the screen saver...................4-157 • Setting the network information................4-158 •...
-
Page 6: Safety Precautions
• It will cause electric shock • It can cause an accident, • Use of non standard parts or fire due to heat electric shock, explosion or can cause electric shock, generation. injury. explosion, injury, breakdown. AC Smart... - Page 7 Safety Precautions While re-installing the Do not use the power cord Do not disjoint randomly or established product, notify near Flammable gas or repair and remodel the the service center or combustibles, such as product. establishment specialty gasoline, benzene, thinner, store.
- Page 8 . • I am responsible for fire and • It can cause accident and • I am responsible for breakdown in electric shock. product breakdown. case of shock to product. AC Smart...
- Page 9 Safety Precautions CAUTION I During usage Clean by soft hands using a Use touch screen with a pen Do not place any live part on cleaning material like a soft that product offers. the surface having water. cloth. • It can result in fire and product •...
-
Page 10: Ac Smart Introduction
Group management AC Smart can manage the installed air conditioners by zone and group. When you use the zone or group setting, you can classify the air conditioner by type, location etc. Through these functions, you can conveniently control the air conditioner and by assigning each name to the set group, you can manage the groups intuitively. - Page 11 Upgrading the software to the recent version The AC Smart offers the function to upgrade the software to the recent version, by which the AC Smart can be stably operated and a new function can be added.
-
Page 12: Ac Smart Exterior
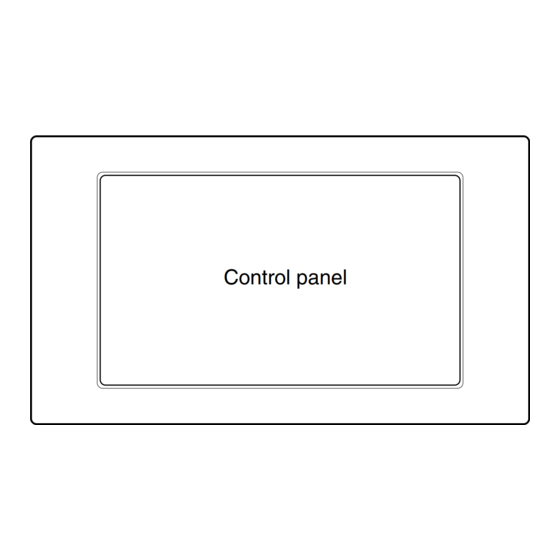
1. AC Smart Introduction AC Smart exterior AC Smart is composed in the following shape. Backlight button and keyboard button Stylus pen and stylus pen holder Control panel 217mm Reset button USB port Note: Using the external button to compensate the screen The screen compensation function can be executed by pressing the keyboard button at the top of the AC Smart and then the backlight button. -
Page 13: Control Panel
AC Smart. Stylus pen This is the exclusive pen used by the user to operate AC Smart. It is good to use the exclusive pen so that it does not damage the control panel of AC Smart. -
Page 14: Ac Smart Components
1. AC Smart Introduction AC Smart components The following components are included in the box of AC Smart as shown below. Open the AC Smart box and check whether all components are included. AC Smart Power adapter Quick Guide Power cord... -
Page 15: Ac Smart Product Specifications
1. AC Smart Introduction AC Smart product specifications The product specifications of AC Smart are as follows. Item Specifications VRender3D VR3611F 32bit RISC microprocessor Memory DDR-SDRAM 128MB (32MB x 4ea) Boot ROM & Storage NAND Flash 256MB 7.0" WVGA (800 x 480) TFT LCD •... -
Page 16: Ac Smart Installation
If you have any questions or requests related to installation, please consult the service center or installers designated by our company. To use AC Smart, you must construct an environment where AC Smart can communicate with the unit (Indoor unit and ventilator) and register the indoor units. -
Page 17: Before Installing Ac Smart
A single AC Smart can connect 64 units (indoor unit and ventilator) at maximum. It can also connect 128 units via the extension kit. For this, AC Smart must be connected to PI485, and PI485 must be connected to the outdoor unit connected to the unit. -
Page 18: Setting Unit Address
First, you must assign the address to each unit so that the address of each unit (Indoor unit and ventilator) is not duplicated by considering the overall installation composition connected to AC Smart. The address of the unit can be set in hexadecimal from 00 to FF. -
Page 19: Setting Address With Wired Remote Controller
2. AC Smart Installation Setting address with wired remote controller AUTO SWING OPERATION SET TEMP FAN SPEED SUB FUNCTION Room Temp AUTO Heater Preheat Defrost Humidify Filter Out door Time 1 2 3 4 ZONE Timer Operation unit Program set Set no. -
Page 20: Setting Address With Wireless Remote Controller
2. AC Smart Installation Setting address with wireless remote controller You can set the address of the indoor unit through the wireless remote controller that controls the indoor unit. To set the address of the indoor unit with the wireless remote controller, proceed as follows. - Page 21 2. AC Smart Installation Information: Checking the set address You can check the set address by using the wireless remote controller. To check the set address, proceed as follows. . With the [Wind Up/Down] button pressed, press the [RESET] button. The [Wind Up/Down] button must be pressed for more than 3 seconds.
-
Page 22: Setting Pi485 And Connecting Line
Setting PI485 and connecting line After setting the address of the unit, you must install PI485 and set the DIP switch. And then you must connect the RS485 line to communication with AC Smart. Reference: PI485 installation The installation of PI485 may differ by the product of the outdoor unit. Therefore, refer to PI485 manual or installation technology information to proceed. - Page 23 2. AC Smart Installation Reference: PCB part # MPS static speed applied product with common PCB applied must have the PCB part # as shown as follows. • PCB P/NO. : 6871A20910A ~ Z • PCB P/NO. : 6871A20917A ~ Z •...
-
Page 24: Connecting 2Pin Connector
2. AC Smart Installation Connecting 2PIN connector To use the individual lock function that sets the mode, fan level and temperature lock function through central control, you must connect the 2PIN connector to the CN_DRY terminal of PI485 depending on the type of the outdoor unit. - Page 25 The next pictures is an example that shows central control method when the 2PIN connector is connected to the CN_DRY terminal. 1) Through the central controller, such as AC Smart, you can command the 'Cool operation, 20°C setting, high fan level, temperature lock' function. This command can be provided by the remote controller.
-
Page 26: Connecting Rs485 Line To Pi485
2. AC Smart Installation Connecting PI485 to RS485 line To connect PI485 and AC Smart, two RS485 lines must be connected to BUS_A and BUS_B of PI485. Refer to the following figure to connect the RS485 line. 2-11 AC Smart... - Page 27 2. AC Smart Installation The following figure is an example of several units of PI485 connected to AC Smart. AC Smart 2-12 Installation/Owner's Manual...
- Page 28 Information: Connection setting when using simple central controller with AC Smart You can use a simple central controller with AC Smart. When you want to use a simple central controller with AC Smart, connect the simple central controller in the order shown as follows.
-
Page 29: Installing Ac Smart And Connecting Line
RS485 line near by. . Fixate the rear panel of AC Smart on the wall top of the RS485 line. Fixate the panel using a driver. You can fixate the panel as shown below, depending on the installation location. - Page 30 When connecting the RS485 communication cable, be careful not to mix the polarities of the two lines. . Connect the UTP cable that can be connected to Internet from the rear panel of AC Smart to the LAN port. 2-15...
- Page 31 Smart. . Assemble the main unit of AC Smart on the rear penal installed on the wall. After hanging the top holes of the top of the main unit to the top of the rear panel, push forward and slide in the bottom of the main unit.
-
Page 32: Logging In Of The Ac Smart
2. AC Smart Installation Logging in of the AC Smart When the power is applied to the AC Smart, the AC Smart automatically operates. When the AC Smart operates, the LG logo screen is initially displayed and then chanted to the login screen. -
Page 33: Logging In As Installation Professional
The password is ‘digital21’ which cannot be changed. When you correctly enter the password and press [OK] button, you are logged in and can set all functions of the AC Smart. You can all functions of the AC Smart... -
Page 34: Logging In As Administrator
Logging in as administrator When you press ‘Administrator’ button, the password screen is displayed to enter the password. Enter the password and press [OK] button. When you log into the AC Smart for the first time, the password is not set. -
Page 35: Logging In As General User
2. AC Smart Installation Logging in as general user When you press ‘General user’ button, it is directly logged into the AC Smart with no password input procedure. Logging in with no password input by press [General user] button When logged into the AC Smart, only the functions of the ‘Control/Monitoring’ menu can be used and other menus cannot be selected. -
Page 36: Registering The Unit
Note: Login right for registering a unit In order to register a unit to the AC Smart, you should log in as installation professional. This menu is not displayed on the screen when logging in as administrator or general user. - Page 37 [Yes] button . The process to search for and register the indoor unit and the ventilator connected to the AC Smart proceeds. When this process is finished, the registered unit is added and displayed at the table located at the bottom of the screen.
- Page 38 2. AC Smart Installation . Temporarily store the searched unit. When you press [OK] button, the ‘Confirm’ screen for confirming saving is displayed. When you press ‘Yes’ button, saving is done and it returns to the previous screen. To apply to system click on...
- Page 39 2. AC Smart Installation . Current setting will be applied to the system and the message saying that the setting has been saved will be displayed. Click on the [OK] button to complete the registration. When it is saved, click on [OK] button...
-
Page 40: Directly Registering The Unit
2. AC Smart Installation Directly registering the unit You can directly register the unit connected to AC Smart. To register the unit, proceed in the order as follows. . Select ‘System setting’ menu from the AC Smart menu. When it is selected, the following screen is displayed. - Page 41 2. AC Smart Installation . ‘Unit Management’ screen is displayed to register a unit. Enter the unit information and press [Add] button. See the following table for the information to enter. After entering unit information, click on [Add] button Item...
- Page 42 2. AC Smart Installation . The information of the added unit is displayed in the table. Register all the units to add by repeating the same procedure. To save the registered units, click on the [OK] button. If you want to cancel the setting up to now, click on the [Cancel] button.
- Page 43 2. AC Smart Installation . Finally, the temporarily saved unit setting should be registered to the system. When [Save] button is pressed, ‘Confirm’ screen to check whether to apply the current setting to the system is displayed. Press [Yes] button.
-
Page 44: Setting The Emergency Stop Interlocking
AC Smart as shown below. Terminal connected to external fire detection sensor When the fire sensor generates the ON signal, the AC Smart stops the operation of all indoor units. 2-29 AC Smart... -
Page 45: Ac Smart Menu
• Auto control • System • Setup This chapter describes the menu and screen composition of AC Smart you must know to operate AC Smart. Control/Monitoring menu Control/Monitoring menu is for easily managing many units (air conditioner, ventilator, On/Off device) possible to commonly control as one unit. -
Page 46: Zone Information Screen
3. AC Smart Menu Zone information screen The screen displaying the zone information is composed as follows. Zone information Zone information displays the currently set zone. Zones are displayed in various colors depending on the status of the current group. The status description of the zone by color is described as follows. - Page 47 3. AC Smart Menu Zone information is displayed basically in icon form. However, when you change ‘Icon’ at the combo box at the top right of the screen to ‘List’ or ‘Detailed list’, the icon-type information can be changed to the list-type information.
- Page 48 3. AC Smart Menu Monitoring The bottom left corner of the zone information displays the status information of the zone. When you select the zone from the icon or list view, the unit information included in the applicable zone is displayed.
- Page 49 The ‘Detailed control’ screen is displayed where the unit can be [Details] controlled in detail. Apply the set items to the AC Smart and the unit. [Apply] Reference: Zone control operation method For operation of zone control, refer to the ‘Control/Monitoring’ section on page 4-5.
-
Page 50: Group Information Screen
3. AC Smart Menu Group information screen The screen that displays the information of the group is composed as follows. Group information Group information displays the currently set group. Groups are displayed in various colors depending on the status of the current unit. The status description of the group by color is described as follows. - Page 51 3. AC Smart Menu Group information is displayed basically in icon form. But if you change from 'Icon' to 'List' from the combo box at the top right corner of the screen, the information will change from icon view to list view.
- Page 52 3. AC Smart Menu Monitoring The bottom left corner of the group information displays the status information of the group. When you select the group from the icon or list view, the unit information included in the applicable group will be displayed.
- Page 53 The ‘Detailed control’ screen is displayed where the unit can be [Details] controlled in detail. Apply the set items to the AC Smart and the unit. [Apply] Reference: Group control operation method For operation on group control, refer to the section on ‘Control/Monitoring’ on page 4-5.
-
Page 54: Unit Information Screen
3. AC Smart Menu Unit information screen This is the minimum unit AC Smart can control. The screen that displays the information of the unit is composed as follows. Unit information The unit is classified into air conditioner, ventilator and On/Off device. - Page 55 3. AC Smart Menu The current status of the unit is differently displayed depending on the color as shown at the following table. Unit type Normal running Stopped Alarm generated Indoor unit Ventilator On/Off device Also, when the indoor unit and the ventilator are currently running, the icon shows the running mode.
- Page 56 3. AC Smart Menu Unit information is displayed basically in icon form. But if you change from 'Icon' to 'List' from the combo box at the top right corner of the screen, the information will change from icon view to list view.
- Page 57 3. AC Smart Menu The following information is displayed at the detailed list. Control item Description Name of unit is displayed. Name Type of unit is displayed. - Indoor unit: Unit that controls the indoor temperature through cool/heat Product type - Ventilator: Unit that maintains clear air through air circulation - On/Off device: Device to be operated by turning on/off the power.
- Page 58 3. AC Smart Menu Caution: Temperature lock When you have transmitted the temperature lock command at the temperature exceeding the set range of the desired temperature, the unit may not operate normally to the set temperature. Therefore, please set the temperature lock to the temperature within the set range of the desired temperature.
- Page 59 3. AC Smart Menu Monitoring As the status information, the displayed information is as follows. Displayed item Description The operating mode of the unit is displayed. - Cool: When the unit is in cool operation - Heat: When the unit is in heat operation...
- Page 60 3. AC Smart Menu When you click on the [Detail] button, detailed unit status information is displayed in the 'Monitoring' window. The details shown in the 'Monitoring' window are as follows. Displayed item Description This displays whether the mode lock function to disable the user...
- Page 61 The ‘Detailed control’ screen is displayed where the unit can be [Details] controlled in detail. [Apply] Apply the set items to the AC Smart and the unit. Reference: Unit control operation method For operation on unit control, refer to the section on ‘Control/Monitoring’ on page 4-5. 3-17...
-
Page 62: Schedule Menu
Schedule is the function to execute the reserved operation at specific time by predesignating the operation of the air conditioner. In AC Smart, you can set the group to commonly apply the schedule. Also by introducing the pattern concept, you can easily apply the repeated schedule in week or day unit. -
Page 63: Schedule Main Screen
3. AC Smart Menu Schedule main screen Schedule main screen is the first screen displayed when the user selects the schedule menu. In schedule main screen, you can check the schedule applied to the specific schedule group. Also by applying the pattern and period to the schedule group, you can set the schedule to operate the air conditioner at specific time. - Page 64 3. AC Smart Menu 2. Apply weekly pattern In '2. Apply weekly pattern', you can check the currently set weekly pattern and set the weekly pattern. In '2-1. Select weekly pattern', you can apply the currently set pattern to the group. When you click on the [Edit] button, the 'Edit weekly pattern' screen to create a new weekly pattern is displayed.
- Page 65 3. AC Smart Menu Control item Description 'Edit schedule detail' screen where the specific day of the schedule can be directly edited in the current screen is displayed. 'Copy schedule' screen where you can copy the schedule set for a specific group to a different group is displayed.
- Page 66 3. AC Smart Menu Group 'Group' displays the list of schedule group created up to now. Also you can create a new schedule group and delete or rename existing group. At the bottom of the 'Group', there are 4 buttons as shown as follows.
- Page 67 Save and close button When you press the [Save] button, the current setting information will be applied to AC Smart. When you do not save the information, the applicable information will all be canceled. When you press the [Save] button, it will ask whether to save, and you must press the [Yes] button to save the information.
-
Page 68: Edit Weekly Pattern Screen
3. AC Smart Menu Edit weekly pattern screen 'Edit weekly pattern' screen is the screen displayed when you press the [Edit] button from '2-1. Select weekly pattern' from the main screen of schedule. From the 'Edit weekly pattern' screen, you can create the weekly pattern and set the operation event and time for each pattern. - Page 69 3. AC Smart Menu Button Description You can create a new weekly pattern. You can rename specific weekly pattern currently set. You can delete specific weekly pattern currently set. 2. Add event In '2. Add event', you can create an vent to apply to the newly created weekly pattern.
- Page 70 3. AC Smart Menu Item Setting Description You can set the desired indoor temperature to Set temperature maintain. You can set the operation to turn on the power of Operation the unit included in a specific group. You can set the operation to turn off the power of Stop the unit included in a specific group.
- Page 71 3. AC Smart Menu When you click on the [Detail] button, you can set the control command in more detail. You can set the following control command for the indoor unit. Item Description You can set the desired indoor temperature.
- Page 72 Mode lock, fan level lock, set temperature lock and maximum/minimum temperature setting may not be displayed according to the setting when registering the unit to AC Smart. To use individual lock function and maximum/minimum temperature setting function, you must check the ‘Detail lock function model’...
- Page 73 3. AC Smart Menu In the ventilator, you can set the following control command. Item Description You can set the operation and stopping of the ventilator. Operation - Operation: You can operate the ventilator. - Stop: You can stop the operation of the ventilator.
- Page 74 3. AC Smart Menu From '2-3. Add event', you can check the list of currently set events, and you can view the time when each event occurred. When you set the applicable information in '2-1. Edit date and time' and '2-2. Select control command or daily pattern', and click on the [Add] button, the applicable information will be saved as event.
- Page 75 When you press the [Save] button, currently set event is composed as a pattern and this pattern will be saved in AC Smart. When it is not saved, the applicable information will all be canceled. When you click on the [Save] button, it will ask to confirm whether to save. You must press the [Yes] button to save the setting.
-
Page 76: Edit Schedule Detail Screen
3. AC Smart Menu Edit schedule detail screen In Edit schedule detail screen, you can directly edit the schedule applied to a specific group without using the schedule pattern. Also you can apply the daily pattern to weekly pattern or set exception days for pattern of a specific day within the weekly pattern. - Page 77 3. AC Smart Menu The description on the control command that can be set is as follows. Item Setting Description You can set the desired indoor temperature you Set temperature want to maintain. You can set the operation so that the power of the Operation units included in a specific group can be turned on.
- Page 78 3. AC Smart Menu When you click on the [Detail] button, you can set the control command in more detail. You can set the following control command for the indoor unit. Item Description Set temperature You can set the desired indoor temperature.
- Page 79 Mode lock, fan level lock, set temperature lock and maximum/minimum temperature setting may not be displayed according to the setting when registering the unit to AC Smart. To use individual lock function and maximum/minimum temperature setting function, you must check the ‘Detail lock function model’...
- Page 80 3. AC Smart Menu In the ventilator, you can set the following control command. Item Description Operation You can set the operation and stopping of the ventilator. - Operation: You can operate the ventilator. - Stop: You can stop the operation of the ventilator.
- Page 81 3. AC Smart Menu From 'Add event', you can check the list of currently set events, and you can view the time when each event occurred. When you set the applicable information in 'Edit date and time' and 'Select control command or daily pattern', and click on the [Add] button, the applicable information will be saved as event.
- Page 82 3. AC Smart Menu 2. Edit and save schedule detail In '2. Edit and save schedule detail', you can check the set event. Also you can directly edit or reset the set event. On tope of the '2. Edit and save schedule detail', the operating period in week unit when the designated event is operating is displayed.
- Page 83 3. AC Smart Menu 3. Exception day setting In '3. Exception day setting', the list of applied exception day is shown and you can add or delete the set exception day. At the bottom of '3. Exception day setting', there are 2 buttons as follows.
-
Page 84: History Menu
• When the auto operation function such as Auto change over operation or temperature limit operation is executed and completed • When there is an error in the indoor unit or ventilator • When controlling and monitoring AC Smart by accessing remotely When you select the history menu, the following screen is displayed. 3-40... - Page 85 3. AC Smart Menu History list This shows various types of event information that occurs in the indoor unit or ventilator on the screen in a list format. The type of information shown on screen is as follows. Item Description...
- Page 86 3. AC Smart Menu In the 'History survey condition' screen, you can classify the history by type or period as follows. Type Item Description This sets the history list to display the event related Error to error. This sets the history list to display the event related Condition to condition change.
-
Page 87: Usage View Screen
3. AC Smart Menu Usage view screen You can use the ‘Usage view’ screen to view the total running time by zone, group and unit. Also, you can view the running time for a specific period and display the running time in percentage and the average indoor temperature. - Page 88 3. AC Smart Menu Set Condition button When you press [Set Condition] button, ‘Usage view condition’ screen is displayed for selecting to view the usage information according to the user’s preference. You can see the history at the ‘Usage view condition’ screen by the display unit or the period as...
-
Page 89: Auto Control Menu
3. AC Smart Menu Auto control menu The AC Smart can automatically control the indoor unit, the ventilator and the On/Off device interconnected via the network with various methods. Auto control menu provides 3 functions, as follows, as the auto control function. -
Page 90: Temperature Limit Operation
3. AC Smart Menu Temperature limit operation Temperature limit operation is the function to maintain the temperature of the space the air conditioner is installed at a certain range (+4°C~ -4°C). Temperature limit operation function automatically controls the indoor temperature so that the indoor temperature does not exceed the set maximum and minimum temperature limit based on the indoor temperature. - Page 91 3. AC Smart Menu Temperature limit operation list Temperature limit operation list shows the set information of the of the temperature limit operation. The information displayed in the temperature limit operation list is as follows. Item Description Name of temperature limit operation group is displayed.
- Page 92 3. AC Smart Menu Edit group button When you press the [Edit group] button, the 'Edit group' screen where you can create, edit and delete the temperature limit operation group is displayed. Reference: Temperature limit operation method For method of creating, editing and deleting the temperature limit operation group, refer to ‘Managing temperature limit operation group’...
-
Page 93: Auto Change Over Operation
3. AC Smart Menu Auto change over operation Auto change over operation is the function of automatically switching the operating mode of the air conditioner by the indoor temperature in the large location where the temperature difference between day and night without user setting. That is, Auto change over operation operates the heat function to raise the temperature when the current temperature is lower than the temperature difference based on the temperature difference range set by the user. - Page 94 3. AC Smart Menu Auto change over operation list Auto change over operation list displays the set information of Auto change over operation by group. The information displayed in Auto change over operation list is as follows. Item Specifications Group name Name of Auto change over operation group is displayed.
- Page 95 3. AC Smart Menu Edit group button When you press the [Edit group] button, 'Edit group' screen that can create, edit and delete the Auto change over operation group is displayed. Reference: Automatic change over operation method For method of creating, editing and deleting the automatic change over operation group, refer to ‘Managing automatic change over operation group’...
-
Page 96: Time-Limited Running
3. AC Smart Menu Time-limited running The time-limited running automatically stops running after the specified time by controlling the operation time of indoor unit, ventilator and On/Off device. For example, when a student leaves the air conditioner turned on at the weekend, the power may be wasted by the beginning of the next week. - Page 97 3. AC Smart Menu Unit status within group The unit status within group shows the status information of each unit included at the group selected at the group setting status. The information displayed at the unit status within group is as follows:...
-
Page 98: Setting Menu
System tree System tree displays the composition of zone and group of AC Smart in tree structure. Also when you select each unit from the system tree, the group and unit included are displayed on the right side of the screen. - Page 99 3. AC Smart Menu [Add], [Delete] and [Rename] buttons are located below the system tree. Button Description You can create new zone or group. You can delete the zone or group. You can rename the zone or group. Reference: Zone and group setting method For method of creating, deleting and changing the zone or group, refer to the ‘Setting’...
- Page 100 3. AC Smart Menu Check box for the model to be locked in detail If the unit is the model supporting the detailed lock function, check the check box of the ‘model to be locked in detail’. When this function is set, you can set the following detailed lock function at ‘Control/Monitoring’ menu and ‘Schedule’...
-
Page 101: Register Unit Screen
3. AC Smart Menu Register unit screen When you click on the [Unit] located at the bottom of the setting main screen, 'Edit unit' screen to manage the unit is displayed. You can register a newly connected unit or change/delete the existing unit at ‘Unit management’... - Page 102 When you select the unit information and press this button, you can edit the existing unit information. The AC Smart and the ACP can be interconnected to be operated. In this case, the ACP operates as master while the AC Smart operates as slave.
-
Page 103: Other Setting Menu
3. AC Smart Menu Other setting menu To use AC Smart correctly, the user must set the security and network information of AC Smart. Also the user needs the function to adjust the screen and set the backlight for convenience purposes. In other setting menu, you can execute various functions to set the environment needed to operate AC Smart as follows. -
Page 104: Version Information
3. AC Smart Menu Version information AC Smart can upgrade the software by using the network and USB memory. Therefore, the user can check the current version of the software and must be able to upgrade the software version, if necessary. -
Page 105: Password Setting
3. AC Smart Menu Password setting Only the user with the right should be able to set and control the AC Smart. The AC Smart can be logged in with three rights. • Installation professional: He/she can use all functions with the fixed password. -
Page 106: Language
The language for the country where the AC Smart is installed can be set at ‘Language setting’ screen. When you set the supported language at the Language setting screen, all menus and messages offered at the AC Smart screen are displayed with the language of the set country. -
Page 107: Time Setting
3. AC Smart Menu Time setting AC Smart operates the indoor unit and ventilator by the schedule set by the user, and accurate time setting is required to record the occurred history information. In the 'Time setting' menu, you can set the date and time for setting and control of indoor unit and ventilator. -
Page 108: Screen Adjustment
Screen adjustment In AC Smart, the user sets all the information by the touch screen method of the of the LCD panel. If the coordinate the user is operating and the coordinate of the LCD panel are not aligned, you can reset the coordinate of the screen through touch screen adjustment. -
Page 109: Screen Saver
3. AC Smart Menu Screen saver The AC Smart offers the 7-inch LCD panel for displaying the information. The screen saver for protecting the LCD can be set at the ‘Screen saver’ menu. Also, in order to minimize the power consumption, the LCD can be set to be turned off when there is no time input for a specific time and the brightness of the LCD panel can be set. -
Page 110: Network
3. AC Smart Menu Network The AC Smart can send/receive the information to/from other external systems via the network. • SVAC Smart: Send/receive the history information and the current status information of the unit connect to the AC Smart • PC Client: Remote client computer for monitoring and controlling the air conditioner by using the web server function of the AC Smart •... - Page 111 Remote service setting The information for sending/receiving the history information and the current status information of the AC Smart via the SVCNet can be set at the Remote service setting. The following items should be set for setting the remote service.
- Page 112 Adapter network setting In order to use the web server function of the AC Smart, the IP information should be set at the AC Smart. When you click [Ñ] button next to ‘Adapter network setting’ at ‘Network’ screen, it is switched to the following screen.
-
Page 113: E-Mail Setting
The AC Smart offers the function for notifying the administrator of the critical error information of the AC Smart by the e-mail even when the administrator is absent. The e-mail can be set to notify the administrator at the outside of the error information of the AC Smart at the ‘E-mail’ sub-menu. - Page 114 3. AC Smart Menu Account management When you press [Account management] button at the top right of the ‘E-mail setting’ screen, ‘E-mail account setting’ screen is displayed for setting the account to send the e-mail. If the administrator uses the mail server (SMTP), the said information can be set at the ‘E-mail account setting’ screen.
-
Page 115: S/W Upgrade
Connect the USB memory containing the S/W image of the AC Smart to the USB of the AC Smart. And then, when you select ‘S/W upgrade’ menu from the sub-menus of the Environment setting menu, the window for upgrading the software is displayed. -
Page 116: Db Management
3. AC Smart Menu DB management The AC Smart can back up the critical database of the AC Smart to the USB memory or restore the database stored at the USB memory to the AC Smart. Note: Limit the right to set The ‘DB management’... -
Page 117: Web Server Function
3. AC Smart Menu Web server function The AC Smart offers the web server function to remotely access the AC Smart via the network, by which the administrator can monitor and control the air conditioner at the other place. In order to use the web server function, the network information should be set at the AC Smart. - Page 118 Note: Manual for Web server Refer to the manual for the AC Smart web server supplied with this manual for the detailed method to control and monitor the unit by accessing the web server function of the AC Smart.
-
Page 119: Operating Ac Smart
Smart. Logging in of the AC Smart When the power is applied to the AC Smart, the AC Smart automatically operates. When the AC Smart operates, the LG logo screen is initially displayed and then chanted to the login screen. -
Page 120: Logging In As Installation Professional
The password is ‘digital21’ which cannot be changed. When you correctly enter the password and press [Confirm] button, you are logged in and can set all functions of the AC Smart. You can all functions of the AC Smart... -
Page 121: Logging In As Administrator
Logging in as administrator When you press ‘Administrator’ button, the password screen is displayed to enter the password. Enter the password and press [Confirm] button. When you log into the AC Smart for the first time, the password is not set. -
Page 122: Logging In As General User
4. Operating AC Smart Logging in as general user When you press ‘General user’ button, it is directly logged into the AC Smart with no password input procedure. Logging in with no password input by press [General user] button When logged into the AC Smart, only the functions of the ‘Control/Monitoring’ menu can be used and other menus cannot be selected. -
Page 123: Control/Monitoring
The Control/Monitoring menu offers the function to check the status of the unit (indoor unit, ventilator, On/Off device) and to be directly controlled by the user via this group and zone. This section describes how to operate the AC Smart function in order by using the control/monitoring menu. -
Page 124: Controlling The Unit
4. Operating AC Smart Controlling the unit There is a function to control the function of the unit in the Control/Monitoring screen, which displays the zone, group and unit information. The function provided in each screen is the same. But when you select the zone or group and execute the control function of the unit, you can execute the control function simultaneously for all the units included in the applicable zone or group. - Page 125 4. Operating AC Smart To set the function of the unit, proceed according to the following description. . Select 'Control/Monitoring' menu from the menu of AC Smart. When you select the 'Control/Monitoring' menu, the following Control/Monitoring screen is displayed. Designate the target to execute the various function of the unit from the screen with zone, group or unit displayed.
- Page 126 This sets the lock function. When the lock function is set, all functions of the unit installed indoor can be Lock controlled using only AC Smart. This cancels the lock function. When the lock function is canceled, the unit installed indoor can be individually controlled.
- Page 127 4. Operating AC Smart Caution: Temperature lock When you have transmitted the temperature lock command at the temperature exceeding the set range of the desired temperature, the unit may not operate normally to the set temperature. Therefore, please set the temperature lock to the temperature within the set range of the desired temperature.
-
Page 128: Controlling The Unit In Detail
The detailed control function can be set to air conditioner, ventilator and On/Off device. Follow the instruction to set the detailed function of air conditioner, ventilator and On/Off device. . Select 'Control/Monitoring' menu from the menu of AC Smart. When you select the 'Control/Monitoring' menu, the following Control/Monitoring screen is displayed. - Page 129 4. Operating AC Smart . 'Detail control' screen is displayed. After clicking on the button of the function to set, click on the [OK] button. Refer to the following chart for the description of each function. In order to use the individual lock function and the upper/lower temperature setting function, you should check ‘Model to be locked in detail’...
- Page 130 4. Operating AC Smart Description Type Displayed item Button Button description The user can set the desired indoor temperature. Set temperature You can operate or stop the unit. This operates the unit. Power This stops the unit. You can set the operating mode of the unit.
- Page 131 4. Operating AC Smart Description Type Displayed item Button Button description You can set the lock function of the indoor unit. This enables the lock function so that the user cannot change all functions of the indoor unit. Lock This disables the lock function so that the user cannot change all functions of the indoor unit.
- Page 132 4. Operating AC Smart Description Type Displayed item Button Button description You can adjust the level by considering the indoor level of contamination. This sets the fan level of the ventilator to low. This sets the fan level of the ventilator to high.
-
Page 133: Schedule
‘Schedule’ is the function to run the reserved operation at the specific time by previously specifying the operation of air conditioner, ventilator and On/Off device. In AC Smart, you can set the group to commonly apply the schedule. Also by introducing the pattern concept, you can easily apply the repeated schedule in week or day unit. - Page 134 4. Operating AC Smart . 'Edit group' screen is displayed. To create a new schedule group, click on the [Add] button. 'Group name' screen to enter the name of the schedule group to create is displayed. When you click on [Add] button, "Group name"...
- Page 135 4. Operating AC Smart . Check whether the applicable schedule group has been created in 'Group'. Now, select the unit to be added to the schedule group from the unit list on the right, and press the [ ] button to add to the schedule group.
- Page 136 4. Operating AC Smart . Saving process is completed. When the saving process is completed, the [Save] button is deactivated and then reactivated when information is changed. Click on the [Close] button to return to the prior screen. Click on [Close] button...
- Page 137 4. Operating AC Smart Information: Schedule group setting using the basic group setting button When you click on the [Basic group setting] button located at the bottom left corner of the ‘Edit group’ screen, you can create the same group as the basic control group set for control and monitoring from the ‘Setting’...
- Page 138 To rename the schedule group, proceed in the following order. . Select the 'Schedule' menu from the menu of AC Smart. When you select the 'Schedule' menu, the following schedule screen is displayed. To rename the schedule group, click on the [Edit] button.
- Page 139 4. Operating AC Smart . After entering the name of the schedule group to change, click on the [OK] button. After entering the schedule group name, click on [OK] button . Check whether the name of the applicable schedule group has changed in 'Group', and click on the [Save] button to save the current setting.
- Page 140 4. Operating AC Smart . Saving process is completed. When the saving process is completed, the [Save] button is deactivated and then reactivated when information is changed. Click on the [Close] button to return to the prior screen. Click on [Close]...
- Page 141 To delete the schedule group, proceed in the following order. . Select the 'Schedule' menu from the menu of AC Smart. When you select the 'Schedule' menu, the following schedule screen is displayed. To delete the schedule group, click on the [Edit] button.
- Page 142 4. Operating AC Smart . Check whether the applicable schedule group has been deleted from 'Group', click on the [Save] button to save the current setting. When the 'Information' screen to check the saving process is displayed, click on the [Yes] button.
-
Page 143: Applying Schedule
To apply the schedule, proceed in the following order. . Select the 'Schedule' menu from the menu of 'AC Smart'. When you select the 'Schedule' menu, the following schedule screen is displayed. Select the group to set the schedule to from '1. Select group'. - Page 144 4. Operating AC Smart . Select the schedule pattern to operate the schedule group from 'Select weekly pattern'. And then set the period to apply the pattern from 'Select date to apply period'. Click on the button to use the calendar to set the dates.
- Page 145 4. Operating AC Smart . When you click on the [Add] button in 'Apply weekly schedule', the applied period is displayed. When you click on the period to apply, the period and schedule to apply are displayed in '3. Edit and save schedule'.
- Page 146 4. Operating AC Smart Information: Copying schedule You can copy the schedule set to a specific schedule group to a different schedule group. 1. To copy the schedule, click on the [Copy] button from '3. Edit and save schedule'. 'Copy schedule' screen is displayed.
-
Page 147: Creating Schedule Pattern
You can create a schedule pattern according to the following description. . Select the 'Schedule' menu from the menu of AC Smart. When you select the 'Schedule' menu, the following schedule screen is displayed. To create a schedule pattern, click on the [Edit] button located in '2. - Page 148 4. Operating AC Smart . 'Edit weekly pattern' screen is displayed. To create a new weekly pattern, click on the [Add] button located at the bottom of '1. Select weekly pattern'. 'Add weekly pattern' screen to enter the name of the new weekly pattern is displayed.
- Page 149 4. Operating AC Smart . Check whether the weekly pattern name has been created. Next you must add an event. Set the date and time to start the event from 'Edit date and time'. After checking whether the weekly pattern name has been created, set the event date and time .
- Page 150 4. Operating AC Smart Information: Delete event If you want to delete all existing events and prepare a new one, you can easily delete all the events by clicking on the [Delete all weekly event]. You can also delete the event in daily unit.
- Page 151 4. Operating AC Smart . When you want to set the operation of the unit in detail from 'Control command', click on the [Advanced] button. 'Detail control' screen to set the detail operation is displayed. After selecting the event operation, click on the [OK] button. Refer to the following chart for the operations you can select from 'Detail control'.
- Page 152 Mode lock, fan level lock, set temperature lock and maximum/minimum temperature setting may not be displayed according to the setting when registering the unit to AC Smart. To use the individual lock function and maximum/minimum temperature function, you must check the ‘Detail lock function model’...
- Page 153 4. Operating AC Smart Ventilator Item Description You can set the operation and stopping of the ventilator. Operation - Operation: You can operate the ventilator. - Stop: You can stop the operation of the ventilator. You can designate the operating mode of the ventilator.
- Page 154 4. Operating AC Smart . When you click on the [Add] button, you can add an event. Check whether the set event is displayed in 'Add event' and '3. Save weekly pattern'. If you have more schedule planned, repeat the process to continuously add the set event.
- Page 155 4. Operating AC Smart . When you have set all planned events, you must save the set events in weekly pattern. Click on the [Save] button to display saving progress and the current setting will be saved. When saving weekly pattern has been completed, it will return to the prior screen.
- Page 156 4. Operating AC Smart Information: Designating same event on several days When you want to designate one event over several days, designate the time to start the operation in the event and press the [Add event consistently] button to easily apply the setting.
- Page 157 You can save the event for a specific day in daily pattern. To save the event for one day in daily pattern, proceed in the following order. . Select the 'Schedule' menu from the menu of AC Smart. When you select the 'Schedule' menu, the following schedule screen is displayed. To create the schedule pattern, click on the [Pattern] button in '2.
- Page 158 4. Operating AC Smart . 'Edit daily pattern' screen is displayed. To create new daily pattern, click on [Add] button located at the bottom of '1. Select daily pattern'. 'Add daily pattern' screen to enter the name of new daily pattern is displayed.
- Page 159 4. Operating AC Smart . Check whether the name of daily pattern has been created. Next you must add an event. Set the time to start the event from 'Edit time'. After checking whether name of daily pattern is created, set event time .
- Page 160 4. Operating AC Smart Item Description Set temperature You can set the desired indoor temperature. Operation/Stop You can set the operation and stopping of the indoor unit. You can set the operating mode of the indoor unit. - Cool: This operates the indoor unit to run cool operation. Execute when the indoor temperature is high.
- Page 161 4. Operating AC Smart Indoor unit Item Description You can set the desired indoor temperature. Set temperature You can set the operation and stopping of the indoor unit. - Operation: It operates the indoor unit. Operation - Stop: It stops the operation of the indoor unit.
- Page 162 Mode lock, fan level lock, set temperature lock and maximum/minimum temperature setting may not be displayed according to the setting when registering the unit to AC Smart. To use the individual lock function and maximum/minimum temperature function, you must check the ‘Detail lock function model’...
- Page 163 4. Operating AC Smart Item Description You can designate the additional operating method of the ventilator. - Enable plasma: This enables the plasma function. Current this cannot be designated. - Disable plasma: This disables the plasma function. Currently this cannot be designated.
- Page 164 4. Operating AC Smart . Check whether the set event is displayed in 'Add event' and '3. Save weekly pattern'. If you have any planned schedule to add, repeat the current process and add the set event continuously. Can check set event .
- Page 165 To create the schedule by directly setting the event in the schedule group, proceed in the following order. . Select 'Schedule' menu from the menu of 'AC Smart'. When you select the 'Schedule' menu, the following schedule screen is displayed.
- Page 166 4. Operating AC Smart . You must add the event. Set the starting date and time of the event from 'Edit date and time'. Set event date and time . You can set the control command to designate which operation to execute or select daily pattern and apply as event for the unit.
- Page 167 4. Operating AC Smart Item Description You can set the desired indoor temperature. Set temperature You can set the operation and stopping of the indoor unit. Operation/stop You can set the operating mode of the indoor unit. - Cool: This operates the indoor unit to run cool operation. Execute when the indoor temperature is high.
- Page 168 4. Operating AC Smart Indoor unit Item Description You can set the desired indoor temperature. Set temperature You can set the operation and stopping of the indoor unit. - Operation: It operates the indoor unit. Operation - Stop: It stops the operation of the indoor unit.
- Page 169 Mode lock, fan level lock, set temperature lock and maximum/minimum temperature setting may not be displayed according to the setting when registering the unit to AC Smart. To use the individual lock function and maximum/minimum temperature function, you must check the ‘Detail lock function model’...
- Page 170 4. Operating AC Smart Item Description You can set the lock function so that the user cannot operate the ventilator individually. Lock - All lock: This is set so that the ventilator cannot be operated. - All unlock: This is set so that the ventilator can be operated.
- Page 171 4. Operating AC Smart . When you click on [Add] button, you can add the event. If you have any planned schedule to add, repeat the current process and add the set event continuously. Click on [Add] button, you check the set event .
- Page 172 4. Operating AC Smart Information: Saving event as exception date You can set and save the exception day pattern for the event that occurs on a date when the unit must operate exceptionally such as anniversary or holiday etc. From ‘2. Edit and save schedule detail’ of ‘Schedule detail edit’, select the day to designate as exception day and click on [Add] button from ‘3 Exception day setting’.
-
Page 173: History
Select the history menu from the menu of LCD panel. When you select the history menu, the following history screen is displayed. In history screen, the setting and changed information of AC Smart are displayed in the table format. The displayed information is as follows. -
Page 174: Browsing Specific History
. Select the 'History' menu from the menu of AC Smart. When you select the 'History' menu, the following screen is displayed. Click on the [Condition setting] button. 'Record search condition' to classify and search the event by history code and period is displayed. - Page 175 4. Operating AC Smart Type Item Description Error This sets the history list to display the event related to error. Condition This sets the history list to display the event related to condition change. History This sets the history list to display the event directly set by the user with...
- Page 176 4. Operating AC Smart TIP: Refreshing with latest information While the history information is displayed in the history screen, the setting information and changes can occur. This information is not immediately reflected to the history screen currently displayed. To view the latest history information, click on the [Refresh] button. The history displayed on the screen is refreshed to the latest information.
-
Page 177: Usage View
4. Operating AC Smart Usage view You can check the running time and the average time information of the air conditioner and the ventilator. When you click [Usage view] button at the History menu, the following screen is displayed. The following information about the usage is displayed with the table type. - Page 178 The condition for the periodical statistics of the Usage view screen can be set by pressing [Set Condition] button. Follow the following steps to view the usage information by period and type. . Select ‘History’ menu from the AC Smart menu. When ‘History’ menu is displayed, the following history screen is displayed. Press [Usage view] button.
- Page 179 4. Operating AC Smart . Set the unit and the period to view and click [Confirm] button. See the following table for the detailed description about the setting item. After setting the condition, Click [OK] button Type Item Description View by zone Usage by zone.
- Page 180 4. Operating AC Smart . The information about the usage meeting the specified condition is displayed on the screen. 4-62 AC Smart...
-
Page 181: Auto Control
4. Operating AC Smart Auto control AC Smart can automatically control the indoor unit and ventilator connected to the network based on current temperature and set temperature automatically. Auto control menu provides 3 functions, as follows, as the auto control function. - Page 182 When the set value or temperature reference changes during the auto change over operation function, the changed setting is reflected when operating mode (Cool, heat) changes. This chapter will describe the method and order of operating the function of AC Smart by using the Auto control menu.
- Page 183 4. Operating AC Smart Time-limited running The time-limited running automatically stops the operation of the unit after the specified time. The time-limited running can reduce the waste of energy by limiting the individually used time of the unit within a specific time when the administrator is absent.
-
Page 184: Setting Temperature Limit Operation
Creating temperature limit operation group in Chapter 4-69 and create a new group before proceeding. . Select 'Auto control' menu from the menu of AC Smart. When you select the 'Auto control' menu, the following auto control screen is displayed. Click on the [Condition setting] button. - Page 185 4. Operating AC Smart . The ‘Condition setting’ screen is displayed. Select the temperature limit operation group to set the temperature limit operation function and set each item. For detailed description on the setting item, refer to the following table.
- Page 186 4. Operating AC Smart . When you have completed all the setting, click on the [Save] button. The ‘Information’ screen to ask to save will be displayed. Click on the [Yes] button. After clicking on [Save] button, when the 'Information'...
-
Page 187: Managing Temperature Limit Operation Group
To create a new temperature limit operation group, proceed in the following order. . Select 'Auto control' menu from the menu of AC Smart. When you select the 'Auto control' menu, the following auto control screen is displayed. Click on the [Edit group] button. - Page 188 4. Operating AC Smart . 'Edit group' screen is displayed. Click on the [Add] button to create a new temperature limit operation group. 'Group name' screen to enter the name of the group to create is displayed. When you click on [Add] button, 'Group name' screen is displayed .
- Page 189 4. Operating AC Smart . Check whether the applicable temperature limit operation group has been created in 'Group'. Now select the unit to include in the group from the right unit list, and click on the [ ] button to include the units.
- Page 190 4. Operating AC Smart . Saving process is completed. When the saving process is completed, the [Save] button is deactivated and then reactivated when information is changed. Click on the [Close] button to return to the prior screen. Click on [Close] button to...
- Page 191 4. Operating AC Smart Reference: Setting temperature limit operation group by using group setting button When you click on the [Basic group setting] button located at the left bottom of the ‘Edit group’ screen, you can create the same group as the basic control group set from the ‘Setting’ menu for control and monitoring as temperature limit operation group.
- Page 192 To delete the temperature limit operation group, proceed in the following order. . Select 'Auto control' menu from the menu of AC Smart. When you select the 'Auto control' menu, the following auto control screen is displayed. Click on the [Edit group] button.
- Page 193 4. Operating AC Smart . Check whether the temperature limit operation group has been deleted from 'Group', and click on the [Save] button to save the current setting. When the 'Information' screen to check the saving process is displayed, click on the [Yes] button.
- Page 194 To rename the temperature limit operation group, proceed in the following order. . Select 'Auto control' menu from the menu of AC Smart. When you select the 'Auto control' menu, the following auto control screen is displayed. Click on the [Edit group] button to create a new temperature limit operation group.
- Page 195 4. Operating AC Smart . After entering the name of the temperature limit operation group to rename, click on the [OK] button. After clicking on the group name, click on [OK] button . Check whether the name of the applicable temperature limit operation group has been renamed in 'Group', and click on the [Save] button to save the current setting.
- Page 196 4. Operating AC Smart . Saving process is completed. When the saving process is completed, the [Save] button is deactivated and then reactivated when information is changed. Click on the [Close] button to return to the prior screen. Click on [Close] button to...
-
Page 197: Setting Auto Change Over Operation
If not, it can cause a different mode operation error. (Error code : 7) . Select 'Auto control' menu from the menu of AC Smart. When you select the 'Auto control' menu, the following auto control screen is displayed. Click on 'Auto change over operation' from the sub menu on the left side of the screen. - Page 198 4. Operating AC Smart . When the 'Auto change over operation' screen appears, click on [Condition setting] button to set auto change over operation. When you click on [Set condition] button, 'Condition setting' screen will be displayed . Set each item of the ‘Condition setting’ screen. For detailed description on the setting item, refer to the following table.
- Page 199 4. Operating AC Smart Item Description This sets whether to execute the auto change over operation function or not. Apply/Not apply - Apply: Executes the auto change over operation function. - Not apply: Does not execute the auto change over operation function.
-
Page 200: Managing Auto Change Over Operation Group
To create a new auto change over operation group, proceed in the following order. . Select 'Auto control' menu from the menu of AC Smart. When you select the 'Auto control' menu, the following auto control screen is displayed. Click on 'Auto change over operation' from the sub menu on the left side of the screen. - Page 201 4. Operating AC Smart . When the 'Auto change over operation' screen appears, click on the [Edit group] button to create a new auto change over operation group. Click on [Edit group] button . 'Edit group' screen is displayed. To create a new auto change over operation group, click on the [Add] button.
- Page 202 4. Operating AC Smart . Enter the name of the auto change over operation group to create and then click on the [OK] button. After entering group name click on [OK] button . Check whether the applicable auto change over group has been created in 'Group'. New select the unit to include in the created group from the right unit list and click on the [ ] button to include the units to the group.
- Page 203 4. Operating AC Smart . Click on the [Save] button to save the current setting. 'Information' screen to confirm saving is displayed. Click on [Yes] button. After clicking [Save] button, when 'Information' screen is displayed, click on [Yes] button . Saving process is completed. When the saving process is completed, the [Save] button is deactivated and then reactivated when information is changed.
- Page 204 To delete the auto change over operation group, proceed in the following order. . Select 'Auto control' menu from the menu of AC Smart. When you select the 'Auto control' menu, the following auto control screen is displayed. Click on 'Auto change over operation' from the sub menu on the left side of the screen.
- Page 205 4. Operating AC Smart . 'Edit group' screen is displayed. Select the auto change over operation group to delete and click on the [Delete] button. Applicable group is deleted. After selecting the auto change over operation group to delete, click on [Delete] button .
- Page 206 4. Operating AC Smart . Saving process is completed. When the saving process is completed, the [Save] button is deactivated and then reactivated when information is changed. Click on the [Close] button to return to the prior screen. Click on [Close] button to...
- Page 207 To rename the auto change over operation group, proceed in the following order. . Select 'Auto control' menu from the menu of AC Smart. When you select the 'Auto control' menu, the following auto control screen is displayed. Click on 'Auto change over operation' from the sub menu on the left side of the screen.
- Page 208 4. Operating AC Smart . 'Edit group' screen is displayed. Select the auto power operation group to rename and click on the [Rename] button. 'Group name' screen to enter the name of the group to rename is displayed. When you click on [Rename]...
- Page 209 4. Operating AC Smart . Check whether the name of the applicable auto power operation group has bee changed from 'Group', and click on the [Save] button to save the current setting. When the 'Information' screen to check the saving process is displayed, click on the [Yes] button.
-
Page 210: Setting The Time-Limited Running
“Creating the time-limited running group” at Page 4-95. . Select ‘Automatic control’ menu from the AC Smart menu. When ‘Automatic control’ menu is selected, the following Automatic control screen is displayed. Press ‘Time-limited running’ at the sub-menu at the left side of the screen. - Page 211 4. Operating AC Smart . When ‘Time-limited running’ screen is displayed, click [Set Condition] button to set the time-limited running. ‘Set Condition’ screen is displayed. Select the group to set the time-limited running. When [Set Condition] button is clicked, 'Set Condition' screen is displayed.
- Page 212 4. Operating AC Smart . When finishing all settings, press [Save] button. ‘Information’ screen to conform saving is displayed. Press [Yes] button. When 'Confirm' screen is displayed after clicking [Save] button, click [Yes] button. . Saving is finished. When saving is finished, [Save] button is deactivated, and when the current information is changed, it is activated again.
-
Page 213: Managing The Time-Limited Running Group
Creating the time-limited running group Perform the following steps to create a new time-limited running group. . Select ‘Automatic control’ menu from the AC Smart menu. When ‘Automatic control’ menu is selected, the following Automatic control screen is displayed. Press ‘Time-limited running’ at the sub-menu at the left side of the screen. - Page 214 4. Operating AC Smart . When ‘Time-limited running’ screen is displayed, click [Edit Group] button to create a new time- limited running group. Click [Edit group] button . ‘Edit Group’ screen is displayed. Press [Add] button to create a new time-limited running group.
- Page 215 4. Operating AC Smart . Enter the name of the time-limited running group to create, and press [Confirm] button. After entering the group name, click [Confirm] button . Make sure that the said time-limited running group is created at ‘Group’. And, select the unit to be included to the created group from the unit light at the right side, and click [ ] button to include it to the group.
- Page 216 4. Operating AC Smart . Press [Save] button to save the current setting. ‘Information’ screen to confirm saving is displayed. Press [Yes] button. When 'Confirm' screen is displayed after clicking [Save] button, click [Yes] button. . Saving is finished. When saving is finished, [Save] button is deactivated, and when the current information is changed, it is activated again.
- Page 217 4. Operating AC Smart Information: Setting the time-limited running group by using [Set Default group] button When you click [Set Default group] button at the top right of ‘Edit Group’ screen, the group same to the default control groups set for controlling and monitoring at ‘System setting’ menu is created as Time-limited running group.
- Page 218 Deleting Time-limited running group Keep the following steps to delete the time-limited running group. . Select ‘Automatic control’ menu from the AC Smart menu. When ‘Automatic control’ menu is selected, the following Automatic control screen is displayed. Press ‘Time-limited running’ at the sub-menu at the left side of the screen.
- Page 219 4. Operating AC Smart . 'Edit Group’ screen is displayed. Select the time-limited running group to delete, and press [Delete] button. The said group is deleted. After selecting the group to delete, click [Delete] button . Make sure that the said time-limited running group is deleted, and press [Save] to save the current setting.
- Page 220 4. Operating AC Smart . Saving is finished. When saving is finished, [Save] button is deactivated, and when the current information is changed, it is activated again. Click [Close] button to return to the previous screen. Click [Close] button to...
- Page 221 Renaming the time-limited running group Perform the following steps to rename the time-limited running group. . Select ‘Automatic control’ menu from the AC Smart menu. When ‘Automatic control’ menu is selected, the following Automatic control screen is displayed. Press ‘Time-limited running’ at the sub-menu at the left side of the screen.
- Page 222 4. Operating AC Smart . ‘Edit Group’ screen is displayed. Select the time-limited running group to rename and press [Rename] button. ‘Rename Group’ screen is displayed for getting the name of the group to rename. When [Rename] button is clicked, 'Group name' screen is displayed .
- Page 223 4. Operating AC Smart . Make sure that the said time-limited running group is renamed at ‘Group’, and press [Save] to save the current setting. When ‘Confirm’ screen to confirm saving is displayed, press [Yes] button. When 'Confirm' screen is...
-
Page 224: Setting
Registering unit When first installing AC Smart, you must register the unit to connect to AC Smart. You can register the unit by automatically registering the unit or directly entering the unit information. This section describes both methods of registering the unit. - Page 225 4. Operating AC Smart . It automatically searches and registers the indoor unit and ventilator connected to AC Smart. Registered units will be added to the below table. Registered unit is displayed . Save the searched unit. When you click on the [OK] button, an ‘Information’ screen to check whether to apply the current setting will be displayed.
- Page 226 4. Operating AC Smart . Lastly, you must register the unit setting that has been temporarily saved to the system. When you click on the [Save] button, an ‘Information’ screen to check whether to apply the current setting will be displayed. Click on the [Yes] button.
- Page 227 4. Operating AC Smart Directly registering new unit The user can directly register the unit connected to AC Smart. To register the unit, proceed in the following order. . Select the 'Setting' menu from the menu of AC Smart. When you select the 'Setting' menu, the following screen is displayed.
- Page 228 4. Operating AC Smart Item Description Enter the type of unit. - Air conditioner Product type - Ventilator - On/Off Device Enter the name of the unit. You can enter up to 20 characters. Name Enter the physical address of the unit. The physical address value is between 00 and Address FF, and cannot be duplicated.
- Page 229 4. Operating AC Smart . 'Information' screen to save the current setting temporarily is displayed. When you click on the [Yes] button, 'Edit unit' screen will be closed and it will return to the prior screen. To apply to system click on [Yes] button .
-
Page 230: Managing Zone
To create a new zone, proceed in the following order. . Select the 'Setting' menu from the menu of AC Smart. When you select the 'Setting' menu, the following screen is displayed. To create a new zone, click on 'AC Smart', which is the highest node of the 'System tree'. - Page 231 4. Operating AC Smart . Click on the [Add] button in the system tree screen. 'Zone name' screen to enter the name of the new zone to create is displayed. To apply to system click on [OK] button . After entering the name of the zone to create, click on the [OK] button.
- Page 232 4. Operating AC Smart . Check whether the applicable zone has been created at the lower node of AC Smart node. Check whether zone has been created . Click on the [Save] button to save the setting. Message confirming to save will be displayed on screen.
- Page 233 4. Operating AC Smart . After the setting process is displayed on the screen, the save complete message is displayed. When you click on the [OK] button, the save process will be completed. Click on [OK] button to complete saving...
- Page 234 To delete the zone, proceed in the following order. . Select the 'Setting' menu from the menu of AC Smart. When you select the 'Setting' menu, the following screen is displayed. Select the zone to delete from the 'System tree' and click on the [Delete] button.
- Page 235 4. Operating AC Smart . Click on the [Save] button to save the setting. Message confirming to save will be displayed on screen. Click on the [Yes] button. After clicking on [Save] button, when "Information screen" is displayed, click on [Yes] button .
- Page 236 Renaming zone To rename the zone, proceed in the following order. . Select the 'Setting' menu from the menu of AC Smart. When you select the 'Setting' menu, the following screen is displayed. Select the zone to rename from 'System tree'.
- Page 237 4. Operating AC Smart . After renaming the zone, click on the [OK] button. After renaming the zone click on [OK] button . Check whether the applicable zone has been renamed in 'System tree'. Check whether zone has been renamed...
- Page 238 4. Operating AC Smart . Click on the [Save] button to save the changes. Message confirming to save will be displayed on screen. Click on the [Yes] button. After clicking on [Save] button when "Information" screen is displayed, click on [Yes] button .
-
Page 239: Managing Group
To reset the group, proceed in the following order. . Select the 'Setting' menu from the menu of AC Smart. When you select the 'Setting' menu, the following screen is displayed. Click on the name of the zone to reset the group from the 'System tree'. - Page 240 4. Operating AC Smart . Reset the group. 'Registered unit' displays group current zone is included and 'Unregistered unit' includes the group not assigned to any zone. Use the [ ] and [ ] button to include or delete the group.
- Page 241 4. Operating AC Smart . Click on the [ ] button to include the designated group to 'Registered unit'. Applicable group is moved and displayed in 'Registered unit'. Click on [ ] button to move designated group. Applicable group displayed in "Registered unit"...
- Page 242 4. Operating AC Smart . After the setting process is displayed on the screen, the save complete message is displayed. When you click on the [OK] button, the save process will be completed. Click on [OK] button to complete saving...
- Page 243 To create a new group, proceed in the following order. . Select the 'Setting' menu from the menu of AC Smart. When you select the 'Setting' menu, the following screen is displayed. Select the zone to include the new group to from the 'System tree'.
- Page 244 4. Operating AC Smart . After entering the name of the group to create, click on the [OK] button. After entering the group name click on [OK] button . Check whether the applicable group is created in the lower node of the selected zone.
- Page 245 4. Operating AC Smart . Click on the [Save] button to save the setting. Message confirming to save will be displayed on screen. Click on the [Yes] button. After clicking on [Save] button, when "Information" screen is displayed, click on [Yes] button .
- Page 246 To delete the group, proceed in the following order. . Select the 'Setting' menu from the menu of AC Smart. When you select the 'Setting' menu, the following screen is displayed. Select the group to delete from 'System tree', and click on the [Delete] button.
- Page 247 4. Operating AC Smart . Click on the [Save] button to save the setting. Message confirming to save will be displayed on screen. Click on the [Yes] button. After clicking on [Save] button, when "Information" screen is displayed, click on [Yes] button .
- Page 248 To rename the group, proceed in the following order. . Select the 'Setting' menu from the menu of AC Smart. When you select the 'Setting' menu, the following screen is displayed. Select the group to rename from the 'System tree'.
- Page 249 4. Operating AC Smart . After renaming the group, click on the [OK] button. After renaming group click on [OK] button . Check whether the name of the applicable group has been renamed in the 'System tree'. Check whether the group has been renamed...
- Page 250 4. Operating AC Smart . Click on the [Save] button to save the setting. Message confirming to save will be displayed on screen. Click on the [Yes] button. After clicking on [Save] button, when "Information" screen is displayed, click on [Yes] button .
-
Page 251: Managing The Unit
To reset the unit, proceed in the following order. . Select the 'Setting' menu from the menu of AC Smart. When you select the 'Setting' menu, the following screen is displayed. Click on the name of the group to reset the unit from the 'System tree'. - Page 252 4. Operating AC Smart . Rest the unit. The unit included in the current group is displayed in 'Registered unit' list and the unit not assigned to any group is displayed in the 'Unregistered unit' list. Press the [ ] and [ ] button, to add or delete the unit.
- Page 253 4. Operating AC Smart . Press the [ ] button, to add the designated group to 'Registered unit'. The applicable unit will be moved and displayed in the 'Registered unit' list. Press the [ ] to move the designated unit. Applicable unit will be displayed in the "Registered unit".
- Page 254 4. Operating AC Smart . After the setting process is displayed on the screen, the save complete message is displayed. When you click on the [OK] button, the save process will be completed. Click on [OK] button to complete the save process...
- Page 255 . Select the 'Setting' menu from the menu of AC Smart. When you select the 'Setting' menu, the following screen is displayed. Click on the [Register unit] button located on the right side of the screen.
- Page 256 4. Operating AC Smart . To save the unit you have deleted, click on the [OK] button. 'Information' screen to temporarily save the current setting is displayed. When you click on the [Yes] button, the 'Edit unit' screen will end and return to the prior screen.
- Page 257 4. Operating AC Smart . After the setting process is displayed on the screen, the save complete message is displayed. When you click on the [OK] button, the save process will be completed. Click on [OK] button to complete save...
- Page 258 . Select the 'Setting' menu from the menu of AC Smart. When you select the 'Setting' menu, the following screen is displayed. Click on the [Register] unit located on the right side of the screen.
- Page 259 4. Operating AC Smart Item Description Enter the type of unit. - Air conditioner Product type - Ventilator - On/Off Device Name Enter the name of the unit. You can enter up to 20 characters. Enter the physical address of the unit. The physical address value is Address between 00 and FF, and cannot be duplicated.
- Page 260 4. Operating AC Smart . Click on the [OK] button to save the changes. 'Information' screen to temporarily save the current setting is displayed. When you click on the [Yes] button, the 'Edit unit' screen will end and return to the prior screen.
- Page 261 In this case, the external central controller operates as master while the AC Smart operates as slave. When the external central controller operates as master, the external central controller gets the right to control some functions. So, when the AC Smart operates as slave, you cannot use schedule, automatic control and detailed lock functions.
- Page 262 When interconnecting with the external central controller, in order to automatically register the unit at the AC Smart, the address range should be specified not to conflict with the address set the other controller. When you [Automatic setting] button, the screen to specify the range is displayed.
-
Page 263: Environment Setting
4. Operating AC Smart Environment setting You can check and perform the environment setting function necessary for operating the AC Smart at the Environment setting menu. The following functions can be set at the Environment setting menu. • Check the S/W version information of the AC Smart •... -
Page 264: Checking The S/W Version Information
Checking the S/W version information The AC Smart can use the USB memory to upgrade the software. Therefore, the user should be able to check the version of the current software and upgrade the version of the software when necessary. -
Page 265: Setting The Password
4. Operating AC Smart Setting the password Only the user with the right to access the AC Smart should be able to set and control the AC Smart. Keep the following steps to set a new password. . Select ‘Environment setting’ from the AC Smart menu. Press ‘Set Password’ menu from the sub- menus at the left side. - Page 266 4. Operating AC Smart . When you enter the information about each item and press [OK] button, it returns to the previous screen and the password is set. Refer to the following table for the detailed description about each item.
- Page 267 4. Operating AC Smart . The message that the password is changed is displayed. Click [OK] button to finish setting the password. Click [Conform] button to finish setting the password 4-149 Installation/Owner's Manual...
-
Page 268: Setting The Language By Country
• Korean, English, Chinese, Dutch, French, German, Italian, Russian, Spanish When you set the supported language, all menus and messages offered at the AC Smart screen are displayed with the language of the set country. Also, the temperature unit (Centigrade, Fahrenheit) can be specified according to the said country. - Page 269 4. Operating AC Smart . Select the language and the temperature unit to set at the AC Smart and press [OK] button. After selecting the language, click [OK] button . In order to change the language and the temperature unit to display, the AC Smart should be restarted.
- Page 270 4. Operating AC Smart . After the AC Smart is restarted, the login screen is displayed. The login screen of the said language is displayed according to the language setting. 4-152 AC Smart...
-
Page 271: Setting The Time
Setting the time The AC Smart needs the correct time setting to drive the air conditioner and the ventilator according to the schedule set by the user or to record the history information about the occurred event. You can set the date and the time for setting and controlling the air conditioner and the ventilator at the time setting. -
Page 272: Calibrating The Screen
4. Operating AC Smart Calibrating the screen In order to use the AC Smart, the user should set all information by the touch screen method. If the coordinate operated by the user does not meet the coordinate displayed on the LCD panel, the coordinate should be reset by calibrating the touch screen. - Page 273 4. Operating AC Smart . The crosshair is displayed at the bottom left of the screen. Use the touch pen to press the crosshair. This procedure is repeated by the order of bottom left, bottom right, top right and then top left.
- Page 274 4. Operating AC Smart . It returns to the previous ‘Stylus attribute’ screen. When you press [OK] button, setting the screen calibration is finished and it returns to the initial screen of the ‘Environment setting’ menu. When [OK] button is clicked, the screen calibration...
-
Page 275: Setting The Screen Saver
Setting the screen saver The user uses the 7-inch LCD panel to control the AC Smart. The screen saver can be set to extend the life of the LCD at the Screen saver menu. Also, you can control the brightness of the backlight and set the backlight of the LCD to be turned off after a specific time to minimize the unnecessary consumption of the power. -
Page 276: Setting The Network Information
• PC Client: Remote client computer for monitoring and controlling the air conditioner by using the web server function of the AC Smart So, the network setting of the AC Smart consists of the remote service setting for the SVCNet connection and the adapter network setting for the IP setting. - Page 277 Adapter network setting . Select ‘Environment setting’ from the AC Smart menu. Press ‘Network’ menu from the sub-menus at the left side. ‘Network’ screen is displayed for setting the network. Click [Ñ] button next to ‘Adapter network setting’.
- Page 278 4. Operating AC Smart . It is switched to the screen to set the network information. When you double click ‘ENDS4ISA1’ icon, the ‘CS8900 Ethernet Driver’ setting screen to set the network is displayed. When you click 'ENDS4ISA1' icon 'CS8900 Ethernet Driver'screen is displayed .
- Page 279 4. Operating AC Smart Item Description IP address Enter the IP address to be set at the AC Smart. Subnet mask Enter the subnet mask for the IP address. Default gateway Enter the IP address of the gateway. . Press ‘Name server’ tab to select whether to set the IP address of the additional DNS (Domain Name Server).
- Page 280 4. Operating AC Smart . Press [OK] button to apply the current network information setting to the system. ‘CS8900 Ethernet Driver setting’ screen is ended and it returns to the previous adapter network setting screen. Finally, when you press [X] button at the top right on the screen, setting the adapter network is finished.
-
Page 281: Setting The E-Mail
4. Operating AC Smart Setting the E-mail The E-mail notifies the administrator of the critical error information of the AC Smart by the e-mail when the administrator is absent. The information about the e-mail to be sent to the user can be set and the account of the e-mail can be set at the ‘E-mail’... - Page 282 4. Operating AC Smart . And then, set the account to send the e-mail. When you press [Account management] button, ‘E- mail account setting’ screen is displayed. Enter the e-mail account information. Refer to the following table for the description about each item to set.
- Page 283 4. Operating AC Smart . Press [Account setting test] to make sure that the set account is correct. Setting the e-mail account can be finished by passing this test. Click [Account setting test] button . When the account setting test is successfully performed, the finish message is displayed. Press [OK] button to end testing.
- Page 284 4. Operating AC Smart . When it returns to ‘E-mail account setting’ screen, press [Save] button to save the set account information. Click [Save] button . When it returns to ‘E-mail setting’ screen, the set e-mail information should be saved. When you press [OK] button, ‘E-mail setting’...
-
Page 285: S/W Upgrade
4. Operating AC Smart S/W upgrade The AC Smart can use the USB memory to upgrade the software of the AC Smart. Keep the following steps to upgrade the software of the AC Software. Note: Before upgrading the software Before upgrading the software, the left USB port of the AC Smart should be connected to the USB device containing the software update image. - Page 286 4. Operating AC Smart . The message showing that it takes some time to upgrade the software is displayed. Press [OK] button. Click [OK] button . The progress of the S/W update is displayed with the graph and the percentage.
- Page 287 . When the procedure of the S/W upgrade is finished, the message showing that the system is to be restarted is displayed. When you press [OK] button, upgrading is ended. And then, the AC Smart is restarted and the Login screen is displayed.
-
Page 288: Backing Up And Restoring The Database
4. Operating AC Smart Backing up and restoring the database The AC Smart can back up the critical database to the external USB memory. Also, it can also retrieve the saved database from the external USB memory to restore. Note: Before backing up and restoring the database Before backing up and restoring the database, the left USB port of the AC Smart should be connected to the USB device containing the database. - Page 289 Restoring the database Keep the following steps to import the database into the AC Smart. . Select ‘Environment setting’ from the AC Smart menu. Press ‘DB management’ menu from the sub- menus at the left side to display ‘DB management’ screen.
- Page 290 'Update' screen and 'Upgrader' screen are displayed Click [Yes] button to upgrade the software . When the database is successfully restored, the AC Smart program is restarted and the Login screen is displayed. 4-172 AC Smart...
- Page 291 P/No.: MFL37115808 Printed in Korea After reading this manual, keep it in a place easily accessible to the user for future reference.