Sony cyber-shot DSC-HX10 Instruction Manual
Hide thumbs
Also See for cyber-shot DSC-HX10:
- Instruction manual (223 pages) ,
- Service manual (29 pages) ,
- User manual (273 pages)

Related Manuals for Sony cyber-shot DSC-HX10


Summary of Contents for Sony cyber-shot DSC-HX10
- Page 1 4-412-225-22(1) Digital Still Camera / Instruction Manual Cámara fotografía digital / Manual de instrucciones Downloaded from ManualsCamera.com Manuals DSC-HX10/HX10V...
-
Page 2: Checking The Supplied Items
User Guide”) “Cyber-shot User Guide” is an on-line manual. Refer to it for in-depth instructions on the many functions of the camera. 1 Access the Sony support page. http://www.sony.net/SonyInfo/Support/ 2 Select your country or region. 3 Search for the model name of your camera within the support page. -
Page 3: Important Safety Instructions
Owner’s Record The model and serial numbers are located on the bottom. Record the serial number in the space provided below. Refer to these numbers whenever you call your Sony dealer regarding this product. Model No. DSC-HX10/DSC-HX10V Serial No. _____________________________ Model No. -
Page 4: Battery Pack
• Be sure to charge the battery pack using a genuine Sony battery charger or a device that can charge the battery pack. • Keep the battery pack out of the reach of small children. • Keep the battery pack dry. -
Page 5: For Customers In The U.s.a
The number below is for the FCC related matters only. Regulatory Information Declaration of Conformity Trade Name: SONY Model No.: DSC-HX10V Responsible Party: Sony Electronics Inc. Address: 16530 Via Esprillo, San Diego, CA 92127 U.S.A. Telephone No.: 858-942-2230 This device complies with Part15 of the FCC Rules. Operation is subject to the... -
Page 6: For Customers In Canada
For Customers in Europe Hereby, Sony Corporation, declares that this DSC-HX10V Digital Still Camera is in compliance with the essential requirements and other relevant provisions of the Directive 1999/5/EC. For details, please access the following URL: http://www.compliance.sony.de/... - Page 7 If the plug supplied with this equipment has a detachable fuse cover, be sure to attach the fuse cover after you change the fuse. Never use the plug without the fuse cover. If you should lose the fuse cover, please contact your nearest Sony service station. Downloaded from ManualsCamera.com Manuals...
-
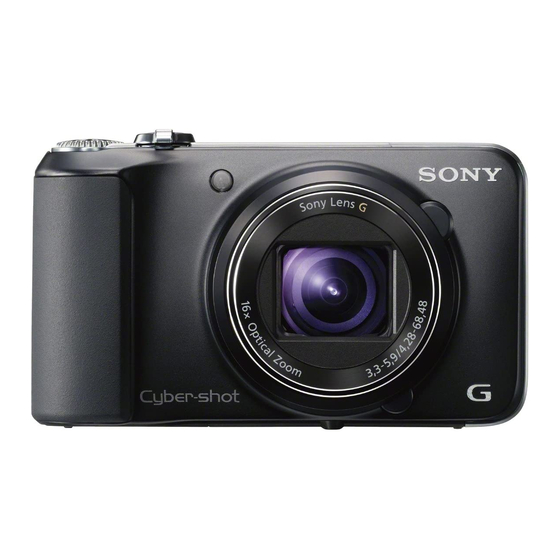
Page 8: Identifying Parts
Identifying parts A Shutter button B Mode dial (Intelligent Auto)/ (Superior Auto)/ (Background Defocus)/ (Program Auto)/ (Scene Selection)/ (Manual Exposure Shooting)/ (iSweep Panorama)/ (Movie Mode)/ (3D Shooting) C For shooting: W/T (Zoom) lever For viewing: (Index) lever/ (Playback zoom) lever D Self-timer lamp/Smile Shutter lamp/AF illuminator E ON/OFF (Power) button... -
Page 9: Inserting The Battery Pack
U Micro USB connector (In-Camera Guide/Delete) button (TransferJet™) mark S MENU button W Memory card slot T Tripod receptacle X Battery/memory card cover • Use a tripod with a screw less Y Battery eject lever than 5.5 mm (7/32 inches) long. Z Battery insertion slot Otherwise, you cannot firmly wj Access lamp... -
Page 10: Charging The Battery Pack
Charging the battery pack For customers in the USA and Canada Power cord (Mains lead) Power/Charge lamp Lit: Charging Off: Charging finished For customers in countries/regions Flashing: other than the USA and Canada Charging error Charging paused due to overheating Connect the camera to the AC Adaptor (supplied), using the micro USB cable (supplied). -
Page 11: Charging Time (Full Charge)
(wall socket) immediately to disconnect from the power source. • When charging is finished, disconnect the AC Adaptor from the wall outlet (wall socket). • Be sure to use only genuine Sony brand battery packs, micro USB cable (supplied) and AC Adaptor (supplied). Charging time (Full charge) The charging time is approximately 175 min. -
Page 12: Charging By Connecting To A Computer
Charging by connecting to a computer The battery pack can be charged by connecting the camera to a computer using a micro USB cable. Note • Note the following points when charging via a computer: – If the camera is connected to a laptop computer that is not connected to a power source, the laptop battery level decreases. - Page 13 • The number of images that can be recorded is for shooting under the following conditions: – Using Sony “Memory Stick PRO Duo” (Mark2) media (sold separately) – The battery pack is used at an ambient temperature of 25°C (77°F).
-
Page 14: Supplying Power
Supplying power The camera can be supplied with power from the wall outlet (wall socket) by connecting to the AC Adaptor, using the micro USB cable (supplied). You can import images to a computer without worrying about draining the battery pack by connecting the camera to a computer using the micro USB cable. -
Page 15: Memory Cards That Can Be Used
Memory cards that can be used Memory card For still images For movies a (Mark2 only) Memory Stick PRO Duo Memory Stick PRO-HG Duo Memory Stick Duo — Memory Stick Micro (M2) — Memory Stick Micro (Mark2) a (Class 4 or faster) SD memory card SDHC memory card a (Class 4 or faster) -
Page 16: Setting The Clock
Setting the clock ON/OFF (Power) Power/Charge lamp (green) Control wheel Select items: Set the numeric value of date and time: / Set: Press the ON/OFF (Power) button. Date & Time setting is displayed when you turn on the camera for the first time. -
Page 17: Shooting Still Images/Movies
Shooting still images/movies Shutter button MOVIE Mode dial : Intelligent Auto W/T (Zoom) : Movie Mode lever W: zoom out T: zoom in Do not cover the flash (A). Shooting still images Press the shutter button halfway down to focus. When the image is in focus, a beep sounds and the z indicator lights. -
Page 18: Viewing Images
Viewing images W: zoom out T: zoom in Control wheel (Playback) (Delete) Select images: B (next)/b (previous) or turn the control wheel Set: z Press the (Playback) button. • When images on a memory card recorded with other cameras are played back on this camera, the registration screen for the data file appears. -
Page 19: In-Camera Guide
In-Camera Guide This camera is equipped with a built-in instruction guide. This allows you to search the camera’s functions according to your needs. (In-Camera Guide) MENU Press the MENU button. Select the desired MENU item, then press the / (In- Camera Guide) button. -
Page 20: Control Wheel
Control wheel DISP (Display Setting): Allows you to change the screen display. (Cont. Shooting/Self-Timer): Allows you to use the self-timer and burst shooting mode. (Photo Creativity): Allows you to change [Brightness], [Color], [Vividness] and [Picture Effect] when shooting mode is set to [Intelligent Auto] or [Superior Auto]. - Page 21 When [Partial Color] is selected in Picture Effect, selects Extracted Color the color to extract. When [Watercolor] is selected in Picture Effect, sets the Watercolor Effect effect level. When [Illustration] is selected in Picture Effect, sets the Illustration Effect effect level. Adjust the exposure manually.
- Page 22 Viewing Slideshow Select a method of continuous playback. Send by Transfer data by closely aligning two products equipped TransferJet with TransferJet. Delete Delete an image. Retouch Retouch an image using various effects. Picture Effect Add various texture on images. 3D Viewing Set to play back images shot in 3D mode on a 3D TV.
-
Page 23: Setting Items
Setting items If you press the MENU button while shooting or during playback, (Settings) is provided as a final selection. You can change the default settings on the (Settings) screen. Movie format/AF Illuminator/Grid Line/Clear Image Zoom/Digital Zoom/Wind Noise Reduct./Micref Level/ Shooting Settings Red Eye Reduction/Blink Alert/Write Date/Disp. -
Page 24: Install Pc Application (Windows)
• “PlayMemories Home” is not compatible to Mac OS. If you play back images on a Mac, use the applications that are installed on your Mac. For details, see http://www.sony.co.jp/imsoft/Mac/ Features of “PlayMemories Home” Below are examples of the functions available when you use “PlayMemories Home”. -
Page 25: Number Of Still Images And Recordable Time Of Movies
Number of still images and recordable time of movies The number of still images and recordable time may vary depending on the shooting conditions and the memory card. Still images (Units: Images) Capacity Internal memory Memory card Approx. 19 MB 2 GB Size 6400... -
Page 26: Notes On Using The Camera
Notes on using the camera Functions built into this camera • This manual describes each of the functions of TransferJet compatible/ incompatible devices, 1080 60i-compatible devices and 1080 50i-compatible devices. – To determine whether your camera supports the GPS function, check the model name of your camera. - Page 27 Notes on recording/playback • Before you start recording, make a trial recording to make sure that the camera is working correctly. • The camera is neither dust-proof, nor splash-proof, nor water-proof. • Avoid exposing the camera to water. If water enters inside the camera, a malfunction may occur.
- Page 28 Unauthorized recording of such materials may be contrary to the provisions of the copyright laws. No compensation for damaged content or recording failure Sony cannot compensate for failure to record or loss or damage of recorded content due to a malfunction of the camera or recording media, etc. Cleaning the camera surface Clean the camera surface with a soft cloth slightly moistened with water, then wipe the surface with a dry cloth.
-
Page 29: Specifications
Effective pixel number of camera: AVCHD format Ver. 2.0 Approx. 18.2 Megapixels compatible Lens: Sony G 16× zoom lens Video: MPEG-4 AVC/H.264 f = 4.28 mm – 68.48 mm (24 mm – Audio: Dolby Digital 2ch, 384 mm (35 mm film equivalent)) equipped with Dolby Digital Stereo F3.3 (W) –... - Page 30 AC Adaptor AC-UB10/UB10B/ [Input and Output connectors] UB10C/UB10D HDMI connector: HDMI mini jack Power requirements: AC 100 V to Micro USB connector: 240 V, 50 Hz/60 Hz, 70 mA USB communication Output voltage: DC 5 V, 0.5 A USB communication: Hi-Speed USB Operating temperature: 0 °C to 40 °C (USB 2.0) (32 °F to 104 °F)
- Page 31 Printed on 70% or more recycled paper • “AVCHD” and “AVCHD” logotype using VOC (Volatile Organic are trademarks of Panasonic Compound)-free vegetable oil based Corporation and Sony Corporation. ink. • Windows is registered trademark of Microsoft Corporation in the United States and/or other countries.
-
Page 32: Comprobación De Los Artículos Suministrados
La “Guía del usuario de Cyber-shot” es un manual on-line. Consúltela para ver instrucciones exhaustivas sobre las muchas funciones de la cámara. 1 Acceda a la página de atención al cliente de Sony. http://www.sony.net/SonyInfo/Support/ 2 Seleccione su país o región. - Page 33 • No la incinere ni la arroje al fuego. • No manipule baterías de iones de litio dañadas o con fugas. • Asegúrese de cargar la batería con un cargador de baterías original de Sony o con un dispositivo que pueda cargarla.
- Page 34 El fabricante de este producto es Sony Corporation, 1-7-1 Konan Minato-ku Tokyo, 108-0075, Japón. El representante autorizado en lo referente al cumplimiento de la directiva EMC y a la seguridad de los productos es Sony Deutschland GmbH, Hedelfinger Strasse 61, 70327 Stuttgart, Alemania. Para resolver cualquier asunto relacionado con el soporte técnico o la garantía, consulte las direcciones que se indican en los documentos de...
- Page 35 Tratamiento de los equipos eléctricos y electrónicos al final de su vida útil (aplicable en la Unión Europea y en países europeos con sistemas de tratamiento selectivo de residuos) Este símbolo en el equipo o en su embalaje indica que el presente producto no puede ser tratado como residuos doméstico normal.
-
Page 36: Identificación De Las Partes
Identificación de las partes A Botón del disparador B Dial de modo (Inteligente Auto)/ (Automático superior)/ (Desenfoque del fondo)/ (Programa automático)/ (Selección escena)/ (Toma con exposición)/ (iBarrido panorámico)/ (Modo película)/ (Toma C Para tomar imagen: Palanca W/T (Zoom) Para visualizar: Palanca (Índice)/Palanca (Zoom de reproducción) -
Page 37: Inserción De La Batería
M Botón U Conector micro USB (Reproducción) N Botón MOVIE (Película) V Marca (TransferJet™) O Minitoma HDMI W Ranura de tarjeta de memoria P Gancho para correa de muñeca X Tapa de la batería/tarjeta de Q Anillo de control memoria Y Palanca de expulsión de la R Botón / (Guía en la cámara/... -
Page 38: Carga De La Batería
Carga de la batería Para clientes en EE.UU. y Canadá Cable de Lámpara de alimentación/carga alimentación Iluminada: Cargando Apagada: La carga ha Para clientes en países/regiones terminado distintos de EE.UU. y Canadá Parpadea: Error de carga Se ha hecho una pausa en la carga debido al recalentamiento Conecte la cámara al adaptador de alimentación de ca... - Page 39 • Asegúrese de utilizar solamente baterías, cable micro USB (suministrado) y adaptador de alimentación de ca (suministrado) de la marca Sony genuinos. Tiempo de carga (Carga completa) El tiempo de carga es de aproximadamente 175 min (minuto) utilizando el adaptador de alimentación de ca (suministrado).
- Page 40 Carga conectando a un ordenador La batería se puede cargar conectando la cámara a un ordenador utilizando el cable micro USB. Nota • Tenga en cuenta los puntos siguientes cuando cargue a través de un ordenador: – Si conecta la cámara a un ordenador portátil que no está conectado a la fuente de corriente, el nivel de la batería del portátil disminuirá.
- Page 41 • El número de imágenes que se puede grabar es cuando las tomas se hacen en las condiciones siguientes: – Utilización de “Memory Stick PRO Duo” (Mark2) de Sony (se vende por separado) – La batería se utiliza a una temperatura ambiente de 25 °C –...
-
Page 42: Inserción De Una Tarjeta De Memoria (Se Vende Por Separado)
Notas • La alimentación no se puede suministrar cuando la batería no está insertada en la cámara. • Cuando la cámara esté conectada directamente a un ordenador o a una toma de corriente utilizando el adaptador de alimentación de ca suministrado, el suministro de alimentación estará... - Page 43 Tarjetas de memoria que se pueden utilizar Para imágenes Tarjeta de memoria Para películas fijas a (Mark2 solamente) Memory Stick PRO Duo Memory Stick PRO-HG Duo Memory Stick Duo — Memory Stick Micro (M2) — Memory Stick Micro (Mark2) a (Clase 4 o Tarjeta de memoria SD más rápida) a (Clase 4 o...
-
Page 44: Ajuste Del Reloj
Ajuste del reloj ON/OFF (Alimentación) Lámpara de alimentación/carga (verde) Anillo de control Seleccione elementos: Ajuste el valor numérico de fecha y hora: / Ajuste: Pulse el botón ON/OFF (Alimentación). Cuando encienda la cámara por primera vez se visualizará el ajuste de Fecha y Hora. -
Page 45: Toma De Imágenes Fijas/Películas
Toma de imágenes fijas/películas Botón del disparador MOVIE Dial de modo : Inteligente Auto Palanca W/T : Modo película (Zoom) W: alejar con zoom T: acercar con zoom No cubra el flash (A). Toma de imágenes fijas Pulse el botón del disparador hasta la mitad para enfocar. -
Page 46: Visualización De Imágenes
Notas • No empuje hacia abajo ni levante el flash manualmente. Ello podría ocasionar un mal funcionamiento. • El sonido del objetivo y la palanca funcionando se grabará cuando se accione la función de zoom mientras se toma una película. Es posible que también se grabe el sonido del botón MOVIE funcionando cuando termine la grabación de película. -
Page 47: Eliminación De Una Imagen
Selección de la imagen siguiente/anterior Seleccione una imagen pulsando B (siguiente)/b (anterior) del anillo de control o girando el anillo de control. Pulse z en el centro del anillo de control para ver películas. Eliminación de una imagen 1 Pulse el botón / (Borrar). -
Page 48: Presentación De Otras Funciones
Presentación de otras funciones Utilizando el anillo de control o el botón MENU de la cámara se puede hacer uso de otras funciones durante la toma o reproducción de imágenes. Esta cámara está equipada con una guía de funciones que le permite seleccionar fácilmente entre las funciones. - Page 49 Modo fácil Toma imágenes fijas utilizando el mínimo de funciones. Efecto de Ajusta el nivel del efecto de desenfoque de fondo cuando desenfoque se toma en modo Desenfoque de fondo. Tamaño img Establece el tamaño de la imagen fija tomada mientras se fija(Dual Rec) graba una película.
- Page 50 Efecto piel suave Ajusta el Efecto piel suave y el nivel del efecto. Captador de Ajusta para que la cámara accione automáticamente el sonrisas obturador cuando se detecta una sonrisa. Sensibilidad de Ajusta la sensibilidad de la función Captador de sonrisas sonrisa para detectar sonrisas.
-
Page 51: Elementos De Ajuste
Añade una marca de orden de impresión a una imagen Impresión (DPOF) fija. Rotar Gira una imagen fija hacia la izquierda. Busca funciones de la cámara de acuerdo con sus Guía en la cámara necesidades. Elementos de ajuste Si pulsa el botón MENU mientras toma una imagen o durante la reproducción, se proveerá... -
Page 52: Instalación De Aplicación De Pc (Windows)
• “PlayMemories Home” no es compatible con Mac OS. Si reproduce imágenes en un ordenador Mac, utilice las aplicaciones que hay instaladas en su ordenador Mac. Para más detalles, consulte http://www.sony.co.jp/imsoft/Mac/ Características de “PlayMemories Home” Lo de abajo son ejemplos de las funciones disponibles cuando usted utiliza “PlayMemories Home”. -
Page 53: Número De Imágenes Fijas Y Tiempo Grabable De Películas
Número de imágenes fijas y tiempo grabable de películas El número de imágenes fijas y el tiempo que se puede grabar podrán variar dependiendo de las condiciones de la toma y de la tarjeta de memoria. Imágenes fijas (Unidades: Imágenes) Capacidad Memoria interna Tarjeta de memoria... -
Page 54: Notas Sobre La Utilización De La Cámara
Notas sobre la utilización de la cámara Funciones incorporadas en esta cámara • Este manual describe cada una de las funciones de los dispositivos compatibles/ incompatibles con TransferJet, dispositivos compatibles con 1080 60i y dispositivos compatibles con 1080 50i. – Para determinar si su cámara admite la función GPS, compruebe el nombre de modelo de su cámara. - Page 55 Uso y cuidados Evite un manejo brusco, desmontaje, modificación, golpes físicos, o impactos tales como golpear, dejar caer, o pisar el producto. Sea especialmente cuidadoso con el objetivo. Notas sobre la grabación/reproducción • Antes de comenzar a grabar, haga una grabación a modo de prueba para asegurarse de que la cámara está...
- Page 56 No hay compensación por daño del contenido o fallo de grabación Sony no compensará por no poder grabar o por la pérdida o daño del contenido grabado debido a un mal funcionamiento de la cámara o el soporte de grabación, etc.
-
Page 57: Especificaciones
Vídeo: MPEG-4 AVC/H.264 Aprox. 18,2 Megapíxeles Audio: Dolby Digital 2 canales, Objetivo: Objetivo zoom G 16× de equipado con Dolby Digital Stereo Sony Creator f = 4,28 mm – 68,48 mm (24 mm – • Fabricado bajo licencia de Dolby 384 mm (equivalente a película de... - Page 58 Adaptador de alimentación de [Pantalla] ca (FUENTE DE Pantalla LCD: ALIMENTACIÓN) AC-UB10/ 7,5 cm (tipo 3,0) unidad TFT UB10B/UB10C/UB10D Número total de puntos: Requisitos de alimentación: ca 100 V a 921 600 puntos 240 V 50 Hz/60 Hz 70 mA Tensión de salida: cc 5 V 0,5 A [Alimentación, general] Temperatura de funcionamiento:...
- Page 59 • “AVCHD” y el logotipo de información adicional sobre este “AVCHD” son marcas comerciales producto y respuesta a las de Panasonic Corporation y Sony preguntas hechas con más Corporation. • Windows es una marca comercial frecuencia. registrada de Microsoft Corporation en los Estados Unidos y/u otros países.
- Page 60 Downloaded from ManualsCamera.com Manuals...
- Page 61 Downloaded from ManualsCamera.com Manuals...
- Page 62 Downloaded from ManualsCamera.com Manuals...
- Page 63 Downloaded from ManualsCamera.com Manuals...
- Page 64 ©2012 Sony Corporation Printed in China Downloaded from ManualsCamera.com Manuals...