Table of Contents
Advertisement
Quick Links
Download this manual
See also:
Owner's Manual
Advertisement
Table of Contents

Related Manuals for Uniden SSE33


Summary of Contents for Uniden SSE33
- Page 1 SSE33 Series For more exciting new products please visit our website: Australia: www.uniden.com.au...
-
Page 2: Important Safety Instructions
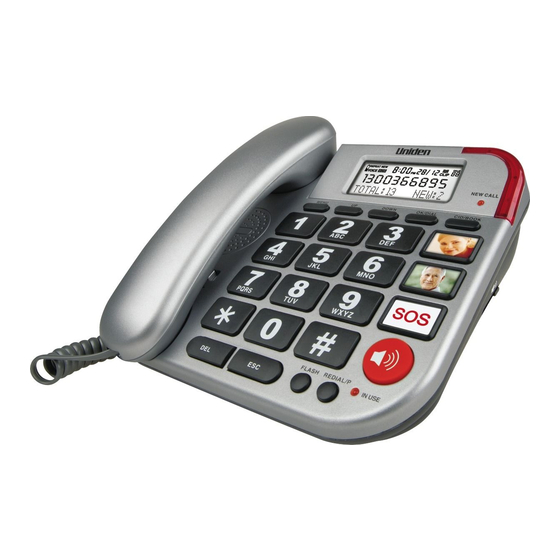
IMPORTANT SAFETY INSTRUCTIONS When using your telephone equipment, basic safety precautions should always be followed to reduce the risk of fire, electric shock and injury to persons, including the following: • This unit is NOT waterproof. DO NOT expose this unit to moisture. • DO NOT expose this unit to rain. - Page 3 WHAT’S IN THE BOX? Telephone Cord Base AC Adaptor SSE33 base with corded handset • If any item is missing or damaged, contact your place of purchase immediately. Never use damaged products! • Need help? Get answers at our website:...
-
Page 4: Table Of Contents
CONTENTS InstallIng your phone ................5 Connect the Corded Handset ........................ 5 Connect the Power and Telephone Cords gettIng to KnoW your phone ..............6 BasIC FunCtIons ..................... 8 Make a Call ..............................8 Answer a Call ............................... 8 Pre-dial Function ............................8 Last Number Redial ........................... -
Page 5: Installing Your Phone
InstallIng your phone Connect the Corded handset Use the coiled cord to connect the corded handset to the connector on the left side of the base. Connect the power and telephone Cords 1. Connect the base AC adaptor to the DC 9V/300 mA power jack and the telephone cord to the TEL LINE jack. -
Page 6: Getting To Know Your Phone
gettIng to KnoW your phone Keys Description Hook Switch MENU • In standby mode, press this button to enter menu mode. • In menu mode press this button to scroll through menu options. UP Button: • In standby, scroll up the Caller ID list. • In the Menu, scroll up the options DOWN Button: • In standby, scroll down the Caller ID list. - Page 7 Ringer LED: Flashes when there is an incoming call NEW CALL LED - Flashes when there is a call. CID/BOOK - In standby mode, press this button to switch between caller ID and phonebook list, then press UP or DOWN button to view the list.
-
Page 8: Basic Functions
BasIC FunCtIons Make a Call Pick up the handset or press the speaker button. The handset sounds a dial tone. Make a quick test call. answer a Call When there is an incoming call, the phone rings and the ringer LED flashes. If Caller ID function is available for the line, the ‘NEW CALL’... - Page 9 adjust earpiece Volume The switch to adjust the earpiece volume is found beneath the handset. Switch between ‘+’ to increase the earpiece volume and ‘-’ to decrease the earpiece volume. adjust speaker Volume The switch to adjust the speaker volume is found on the right side of the telephone, slide the switch to increase or decrease the speaker volume.
-
Page 10: Special Features
speCIal Features • Large easy-to-read buttons. • Adjustable Handsfree speaker, ringer and handset volume. • Talking numbers - announce numbers as they are being keyed in. • Voice Guide Programming - Voice prompt for the menu operations. • Talking Caller ID - announce the name or the number of the person calling in • Talking Phonebook - User can record voice to announce a contact name in the phonebook. -
Page 11: Emergency Feature
eMergenCy Feature remember: • You have to ensure that the SOS numbers have been programmed. If the emergency numbers have not been programmed, the telephone won’t dial anything, when you press and hold the SOS button. • The SOS dial-out feature is meant to be used by your personal emergency contacts - family, friends, neighbours. -
Page 12: Caller Id Management
Caller ID ManageMent This feature is available if you have subscribed the Caller Line Identification service with your network service provider. Your phone can store up to 64 answered and unanswered calls with date/time information in the call list. Caller ID sequence code is shown on the top line of the LCD display together with date and time. -
Page 13: Phonebook Management
phoneBooK ManageMent You can store up to 30 phonebook entries in the telephone memory, with maximum of 22 digits for number and 16 characters for name. When the phonebook memory is full and if you want to add another entry, the LCD will display, ‘MEMORY FULL’. -
Page 14: Store A Number As Sos Number
store a number as sos number Press CID/BOOK for 3 seconds, ‘SOS1’ is displayed on the LCD. Press OK/DIAL to key in the number, press OK/DIAL to enter the name, and then press OK/DIAL to confirm. The LCD displays ‘SAVED’. There are totally 5 SOS numbers, from SOS1-5. -
Page 15: Menu Settings
Menu settIngs In on-hook state, press MENU to enter main menu. The LCD will display the first option LCD CONTRAST, press UP and DOWN button to scroll through menu options: ENTER TIME/DATE →STORE NUMBER→NAME RECORDING→RECORD MESSAGE→CHECK MESSAGE→VOICE→SET FLASH TIME→SET DIAL MODE→LOCAL AREA CODE . When the LCD displays a menu option, press OK/DIAL button to navigate further. -
Page 16: Record Message
record Message The Menu option RECORD MESSAGE is used to record user’s own message for an SOS call. The personal message will be played from the speakerphone after the pre-recorded message ‘This is an emergency call, to accept, press the hash key on your telephone now’, when emergency call is being made. -
Page 17: One-Year Limited Warranty
SSE33 IMPORTANT Satisfactory evidence of the original purchase is required for warranty service Please refer to our Uniden website for any details or warranty durations offered in addition to those contained below. Warrantor The warrantor is Uniden Australia Pty Limited ABN 58 001 865 498 (“Uniden Aust”). - Page 18 Product does not conform with this warranty, you should deliver the Product, together with satisfactory evidence of your original purchase (such as a legible copy of the sales docket) to Uniden. Please refer to the Uniden website for address details. You should contact Uniden regarding any compensation that may be payable for your expenses incurred in making a warranty claim.
- Page 20 ©2015 Uniden Australia Pty Ltd Printed in China...