Hitachi 32PD5000 Service Manual
Hide thumbs
Also See for 32PD5000:
- Service manual (92 pages) ,
- User manual (68 pages) ,
- User manual (76 pages)
Table of Contents
Advertisement
SERVICE MANUAL
Be sure to read this manual before servicing. To assure safety from fire, electric shock, injury, harmful radiation
and materials, various measures are provided in this HITACHI Plasma display.
Be sure to read cautionary items described in the manual to maintain safety before servicing.
1. Since Panel Module and Front Filter are made of glass, handling the broken Module and Filter shall be
taken care sufficiently in order not to be injured.
2. Replacing work shall be started after the Panel Module and the AC/DC Power Supply become sufficiently
cool.
3. Special care shall be taken to the display area in order not to damage its surface.
4. The Panel Module shall not be touched with bare hand to protect its surface from stains.
5. It is recommended to use clean soft gloves during the replacing work in order to protect not only the
display area of the Panel Module but also a serviceman himself.
6. The Chip Tube of Panel Module (located upper left of the back and surrounded by frame) and flexible
cables connecting Panel glasses to drive circuit PWBs are very weak, so shall be taken care sufficiently
not to break. If you break Chip Tube, the Panel doesn't display anything forever.
1. Features --------------------------------------------------3
2. Specifications--------------------------------------------5
3. Service point ---------------------------------------------9
4. Difference table ----------------------------------------10
5. New adoption technology----------------------------12
6. Adjustment --------------------------------------------- 15
7. Troubleshooting --------------------------------------- 37
8. Self diagnosis function ------------------------------ 46
SPECIFICATIONS AND PARTS ARE SUBJECT TO CHANGE FOR IMPROVEMENT.
Caution
Service Warning
Contents
Plasma Display
October 2003 Digital Media Division
32PD5000/5100/5200/5300
42PD5000/5100/5200/5300
37PD5200
55PMA550E
9. Basic circuit diagram--------------------------------- 48
10.Printed wiring board diagram ---------------------- 47
11.Block diagram ----------------------------------------- 53
12.Connection diagram --------------------------------- 55
13.Wiring diagram ---------------------------------------- 56
14.Disassembly diagram-------------------------------- 60
15.Mechanical Measurements-------------------------60
SM005
42PMA500E
Advertisement
Table of Contents

Related Manuals for Hitachi 32PD5000


Summary of Contents for Hitachi 32PD5000
-
Page 1: Table Of Contents
Be sure to read this manual before servicing. To assure safety from fire, electric shock, injury, harmful radiation and materials, various measures are provided in this HITACHI Plasma display. Be sure to read cautionary items described in the manual to maintain safety before servicing. - Page 2 32PD5000/42PD5000 (PW1) CAUTION FOR SAFETY Please read this page before repair the monitor. This page explains to following items for keep the safety of set and prevent to accident during repair work. We explain by symbol at happen the damage or injury when took wrong repair.
-
Page 3: Features
TruBass, SRS and ( ) symbol are trademarks of SRS Labs,Inc. TruBass technology is incorporated under license from SRS Labs, Inc. [AVC MONITOR model] 42/32PD5000 ● DVI-D terminal and 8pin-DIN terminal for AVC input (Other terminals, buttons and remote control for use are all with the AVC unit.) [AV MONITOR model] 42PD5100 ●... - Page 4 37PD5200 (EU) (PW1) PRECAUTIONS ● How to clean the plasma screen panel of the monitor Before cleaning the monitor, turn off the monitor and disconnect the power plug from the power outlet. To prevent scratching or damaging the plasma screen face, do not knock or rub the surface with sharp or hard objects.
-
Page 5: Specifications
32PD5000/42PD5000 (PW1) 2. Specifications Display Approx. 32 inches (716 (H) x 399 (V) mm, diagonal 820mm) Approx. 42 inches (922 (H) x 522 (V) mm, diagonal 1059mm) dimensions Panel Resolution 852 (H) x 1024 (V) pixels 1024 (H) x 1024 (V) pixels... - Page 6 37PD5200 (EU) (PW1) 2. Specifications Display Approx. 37 inches (814 (H) x 445 (V) mm, diagonal 930mm) dimensions Panel Resolution 1024 (H) x 1024 (V) pixels Net dimensions 939 (W) x 573 (H) x 98 (D) mm (excluding Speakers/Stand) Net weight 29.0kg (excluding Speakers/Stand) Temperature...
- Page 7 55PMA550 2. Specifications ������00E ������� ������� �� ������ ����� ��� � ��� ��� ��� �������� ������� ���������� ����� ���������� ���� ��� � ��� ��� ������ ��� ���������� ���� ��� � ��� ��� � ��� ��� �� ���������� ��������������� ��� ������ ������...
-
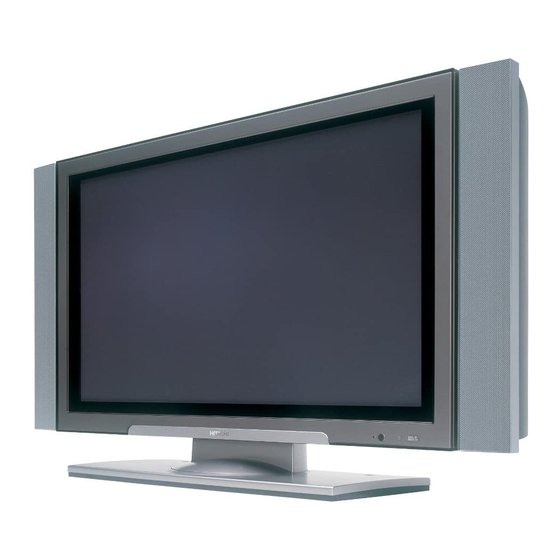
Page 8: Component Names
37PD5200 (EU) (PW1) Component names [Main unit] Remote-control receiver Indicating lamp MENU button Main power switch INPUT SELECT button VOLUME (OK button) UP/DOWN RECALL button buttons ( SELECT button) ADJUST SIZE button buttons) ( SELECT button) SUB-POWER button ( ) indicates the function while the MENU is displayed on the screen. [Remote control] CLE-958 CLE-952A... -
Page 9: Service Point
32PD5000/42PD5000 (PW1) 3. Service points Lead free solder This product uses lead free solder (unleaded) to help preserve the environment. Please read these instructions before attempting any soldering work. Caution: Always wear safety glasses to prevent fumes or molten solder from getting into the eyes. Lead free solder can splatter at high temperatures (600˚C). -
Page 10: Difference Table
32PD5000/42PD5000 (PW1) 4. Difference table PWB Ass’y Model 32/42PD5000 32/42PD5000 32/42PD5000 Symbol No. of PWB Ass'y Electric Components MAIN SW, FILTER, TACT SW, x9xx, xMxx, SP.TERMINAL(L/R), x48x, x0xx LED/RECEIVER board AUDIO board x4xx JOINT board xFxx, xHxx x2xx, x3xx, x5xx,... - Page 11 32PD5000/42PD5000 (PW1) Other components (42V) MODEL 42PD5000TA 42PD5000MA 42PD5000VA NAME SYMBOL PARTS No. DESCRIPTION PARTS No. DESCRIPTION PARTS No. DESCRIPTION #01SA 86994102 SCREW BT BIND HEAD 3X10 86994102 SCREW BT BIND HEAD 3X10 #01SB1 4525404 SCREW M3X10 T #01SB2 4525404...
-
Page 12: New Adoption Technology
32PD5000/42PD5000 (PW1) 5. New adoption technology [System control micom I001(M3062)] Pin function table Pin Name Function OSD_DATA OSD DATA OSD_CLK OSD CLOCK AC-CLOCK AC CLOCK FE.AGC_O AGC Voltage (F/E) DATA_OUT(FC) FC DATA DATA_IN(FC) FC DATA CLK(FC) FC CLOCK BYTE CNVSS... - Page 13 32PD5000/42PD5000 (PW1) Pin Name Function SCDT RESERVE : Always High-Impedance HS-DJTR Jitter Control (DVI) : Always Low AUD RST RESET for LIPSYNC IC AUD DET Detecting Connection of LIPSYNC IC (L: Yes, H: No) SPRLY SPEAKER ON/OFF Relay Control (L: ON(MUTE-OFF), H: OFF(MUTE-ON))
-
Page 14: Audio Processor
P51 P52 TUNER TYPE P53 P54 VIDEO TYPE *1�for ASIA F/E ASIA Reserve µ-COMPUTER *2�for US/CANADA F/E EUROPE VIDEO PWB (M30625) *3�for europe F/E US/CANADA RGB PWB *4�for ASIA AC-CLOCK TB4IN VIDEO.DET_1 NO TUNER NO VIDEO/RGB PWB *5�for EUROPE DSUB COMP VIDEO.DET_2 *6�Reserve RGB SW... -
Page 15: Adjustment
32PD5000/42PD5000 (PW1) 6. Adjustment ● How to get to Adjustment mode Using the front control buttons with the set turned off (standby) can activate it. Press the SUB-POWER( ) button, INPUT SELECT( ) button and button at the same time, and hold for more than 5 seconds. - Page 16 32PD5000/42PD5000 (PW1) Service adjustment items by I C-bus control (except 32/42PD5000VA : should be adjusted : should be followed previous data Function Default Changed Component Maximum ADJ. FORMATTER VIDEO TUNER Value Adjustment Items Mode 32" 42" Panel 0 R DRIVE1...
- Page 17 32PD5000/42PD5000 (PW1) : should be adjusted : should be followed previous data Default Changed Component Function Maximum ADJ. FORMATTER VIDEO TUNER Value Adjustment Items Mode 32" 42" Panel 89 AFC _ GAIN (AV2) 90 AFC _ GAIN (AV3) 91 AFC _ GAIN (AV4)
- Page 18 32PD5000/42PD5000 (PW1) : should be adjusted : should be followed previous data Function Default Changed Component Maximum ADJ. FORMATTER VIDEO TUNER Value Adjustment Items Mode 32" 42" Panel 178 Free 179 Free 180 Terminal Mode Function available 0:Not Available, 1:Available RS232C...
- Page 19 32PD5000/42PD5000 (PW1) : should be adjusted : should be followed previous data Default Changed Component Function Maximum ADJ. FORMATTER VIDEO TUNER Value Adjustment Items Mode 32" 42" Panel 267 Correction for Tracking (DCBON) TV/VIDEO-Color Temp. : COOL 268 Correction for Tracking (DCBON) TV/AV-Col.
- Page 20 32PD5000/42PD5000 (PW1) : should be adjusted : should be followed previous data Function Default Changed Component Maximum ADJ. FORMATTER VIDEO TUNER Value Adjustment Items Mode 32" 42" Panel 356 SEPA _ LEVEL _ DSUB 480i/576i 357 SEPA _ LEVEL _ DSUB...
- Page 21 32PD5000/42PD5000 (PW1) : should be adjusted : should be followed previous data Default Changed Component Function Maximum ADJ. FORMATTER VIDEO TUNER Value Adjustment Items Mode 32" 42" Panel AS[VECOR0 _ P1] 445 Vertical Coring Level (Enhancer Gain) NT1-RF AS[VECOR0 _ P2]...
- Page 22 32PD5000/42PD5000 (PW1) : should be adjusted : should be followed previous data Default Changed Component Function Maximum ADJ. FORMATTER VIDEO TUNER Value Adjustment Items Mode 32" 42" Panel [YVNLP1 _ P1] [YHHPF0 _ P1] 535 Horizontal HPF Peak Freq. SW for Y/G...
- Page 23 32PD5000/42PD5000 (PW1) : should be adjusted : should be followed previous data Function Default Changed Component Maximum ADJ. FORMATTER VIDEO TUNER Value Adjustment Items Mode 32" 42" Panel 623 Y OUT LEVEL I (6.0) For Asia 624 Y OUT LEVEL B/G (5.5) For Europe 625 Y OUT LEVEL D/K (6.5) For Europe...
-
Page 24: Factory Reset
32PD5000/42PD5000 (PW1) The Expression of input signal mode (format) Video Judgment of Video Input PAL1: RF, S and Composite of PAL/SECAM System Mode Input H.Frequency Setup PAL2: Component of PAL (YCBCR) 15.75kHz Auto PAL2 PAL3: Component of PAL (YPBPR) (576i) - Page 25 32PD5000/42PD5000/37PD5200 (PW1) Item Vs and Va VOLTAGE ADJUSTMENT Applicable Model 32PD5000, 37PD5000, 37PD5000 Preparation Procedure (1) Keep heat-run for 1 minutes or more. (1) If the difference between the printed voltage of Vs and the indicated value of Vs Voltmeter is over 0.1V, adjust the Vs ADJ VR located upward on the...
- Page 26 55PMA550/55HDM71 (PW1) ���� �� ��� �� ������� ���������� ���������� ����� ������00E ����������� ��������� ��� ���� �������� ��� � ������� �� ����� ��� �� ��� ���������� ������� ��� ������� ������� �� �� ��� ��� ��������� ����� �� �� ��������� �� ���� �����...
- Page 27 32PD5000/42PD5000 (PW1) Item AGC ADJUSTMENT Applicable Model 42PD5200, 32PD5200, 37PD5200 Preparation Procedure (1) Keep heat-run for 5 minutes or more. (1) Enter the service adjustment mode, and indicate No.289 (AGC Adjustment) and No.291 (AGC Input). (2) Receive the adjustment signal at ANT terminal.
- Page 28 32PD5000/42PD5000 (PW1) Item AUTOMATIC SIGNAL LEVEL ADJUSTMENT –RGB (1) Applicable Model 42PD5100, 42PD5200, 32PD5200, 37PD5200, 55PMA550E Preparation Procedure (1) Input the adjustment signal of VGA (60Hz) (1) Select RGB2 and enter the service adjustment format into RGB2 [D-sub] input terminal.
- Page 29 32PD5000/42PD5000 (PW1) Item AUTOMATIC SIGNAL LEVEL ADJUSTMENT –VIDEO Applicable Model 42PD5100, 42PD5200, 32PD5200, 37PD5200, 55PMA550E Preparation Procedure (1) Input the adjustment signal of 576p or 480p (1) Select AV1 and enter the service adjustment mode. format into AV1 input terminal.
- Page 30 32PD5000/42PD5000 (PW1) Item COLOR TEMPERATURE ADJUSTMENT -VIDEO Applicable Model 42PD5100, 42PD5200, 32PD5200, Preparation Procedure [Adjustment of Cool mode] (1) Set CRT COLOR ANALYZER at the center of (1) Enter the service adjustment mode, and confirm the screen panel. that No.0(R), 1(G) and 2(B) are all 255. If the some data are not, set to 255.
- Page 31 55PMA550/55HDM71 (PW1) ���� ����� ����������� ���������� ������ ���������� ����� ������00E ����������� ��������� ����������� �� ���� ����� ����� ���� ���� �� ���� ������ ��� ����� ����������� ���������� ��� �� ������ ��� ����� ��� ������� ���������� ����� ��� ������� ��� ��� ��� ����� �������� �� ��� ������ �� ����...
- Page 32 37PD5200 (EU) (PW1) Item COLOR TEMPERATURE ADJUSTMENT -VIDEO Applicable Model 37PD5200 Preparation Procedure (This item must be done before the color [Adjustment of Cool mode] temperature adjustment for PC mode.) (1) Enter the service adjustment mode, and confirm that No.0(R), 1(G) and 2(B) are all 255. If the some (1) Set CRT COLOR ANALYZER at the center of data are not, set to 255.
- Page 33 32PD5000/42PD5000 (PW1) Item COLOR TEMPERATURE ADJUSTMENT -PC Applicable Model 42PD5100, 42PD5200, 32PD5200, 37PD5200, 55PMA550E Preparation Procedure [Adjustment of Cool mode] (1) Set CRT COLOR ANALYZER at the center of (1) Enter the service adjustment mode, and confirm the screen panel.
- Page 34 32PD5000/42PD5000 (PW1) Item COLOR TEMPERATURE ADJUSTMENT -VIDEO Applicable Model 42PD5000, 32PD5000 Preparation Procedure [Adjustment of Cool mode] (1) Connect the AVC jig and set CRT COLOR (1) Enter the service adjustment mode, and confirm ANALYZER at the center of the screen panel.
- Page 35 37PD5200 (EU) (PW1) Item COLOR TEMPERATURE ADJUSTMENT -VIDEO Applicable Model 37PD5200 Preparation Procedure (This item must be done before the color [Adjustment of Cool mode] temperature adjustment for PC mode.) (1) Enter the service adjustment mode, and confirm (1) Connect the AVC jig and set CRT COLOR that No.0(R), 1(G) and 2(B) are all 255.
- Page 36 32PD5000/42PD5000 (PW1) Item COLOR TEMPERATURE ADJUSTMENT -PC Applicable Model 42PD5000, 32PD5000, 37PD5200 Preparation Procedure [Adjustment of Cool mode] (1) Connect the AVC jig and set CRT COLOR (1) Enter the service adjustment mode, and confirm ANALYZER at the center of the screen panel.
-
Page 37: Troubleshooting
32PD/42PD37PD5200 (EU) (PW1) 7. Troubleshooting How to get to Burn-in mode This mode displays the test patterns of some single color raster in turn. These signals are from built-in generator of PDP panel. So it can be presumed that maybe the panel has some trouble when the screen of Burn-in mode is abnormal. - Page 38 32PD5000/42PD5000 (PW1) Troubleshooting (POWER) Power cannot be turned on (LED does not light) Is the input voltage applied to Power supply unit? (CN61 AC Fuse Power switch Filter PWB AC inlet F901 T6.3AH 250V Are the voltages applied to CN63...
- Page 39 32PD5000/42PD5000 (PW1) Picture is not displayed (LED is lighting) Is the LED red or green/orange? green/orange Is Voltage applied to CN63 pin of the Power supply unit? Is it the power saving mode? Power supply unit Input signal Cable or Formatter PWB...
- Page 40 32PD5000/42PD5000 (PW1) Troubleshooting (PICTURE) ..for 42PD5100MA, 32/37/42PD5200, 55PMA500E [VIDEO PWB Circuit] No picture, no color or dark Single picture or Main picture Sub picture Trouble of Sub picture Are waveforms at pin1(Y), Pin3(CB) and pin5(CR) Check Formatter PWB of PYM? Are waveforms at pin 37(Y), 36(CB) Check Q205, Q206, Q207 etc.
- Page 41 32PD5000/42PD5000 (PW1) Trouble of Sub picture Are waveforms at pin1(Y), pin3(CB) and pin5(CR) Check Formatter PWB of PYS? Are waveforms at pin 33(Y), 32(CB) Check Q208, Q209, Q214, Q215, etc. and 31(CR) of I202? Component Input RF(TV) / Video Input...
- Page 42 32PD5000/42PD5000 (PW1) Trouble Shooting (Synchronization) ..for 42PD5100, 32/3742PD5200, 55PMA500E [VIDEO PWB Circuit] No Sync. Single picture or Main picture Sub picture Trouble of Sub picture Are waveform at TP01(H) and Check Formatter PWB TP02(V) ? Are waveform at pin 16(H) and...
- Page 43 32PD5000/42PD5000 (PW1) Trouble of Sub picture Are waveforms at TP03(H) and Check Formatter PWB. TP04(V) ? Are waveforms at pin 19(H) and Check I602 29(V) of I601? Component Input (without 480i/576i) / Component (480i/576i) RF(TV) / Video Input Are waveforms at pin1(H) and...
- Page 44 32PD5000/42PD5000 (PW1) Troubleshooting (TV / Teletext) ..for 32/37/42PD5000, 55PMA550E [TUNER PWB] No Picture of TV Is waveform of pin 49 of PTV2 Check Video PWB (TV.CV)? Is waveform of pin 7 of I101 Check Q106 (TV.CV)? Is waveform of...
- Page 45 32PD5000/42PD5000 (PW1) No Teletext Are waveforms Check PTV2 connector of QT03/04/05 or Video PWB (E)? Are waveforms of pin 32,33,34 Check QT03, QT04, of IT01 (TEXT)? QT05 Is waveform of pin 23 of IT01 Check around IT01 (TV, CV)? Is waveform of...
-
Page 46: Self Diagnosis Function
32PD5000/42PD5000 (PW1) 8. Self-Diagnosis Function This chassis has 2 modes of self-diagnosis function. (1) PDP panel check mode: It indicates the one latest record of the PDP panel failure with blinking of the power indication light (LED). (2) Signal circuit check mode: It indicates the check result on some points of the signal circuit and the history of them with On-Screen Display (OSD). - Page 47 32PD5000/42PD5000 (PW1) Signal circuit self-diagnosis function This function is for the failure of the signal circuit, for example the phenomenon as below: "Sometimes power turns off abnormally." "Sometimes picture disappears abnormally." To enter to this Self-Diagnosis mode, follow the next steps: Preparation: 1) The Power Cord should be connected to AC line and the Main Power switch should be turned on.
-
Page 48: Basic Circuit Diagram
32PD5000/42PD5000 (PW1) 9. Basic circuit diagram Waveform I201(MAIN.V)(44) PIN I501 YIN(3L)(44) PIN I501 YIN(3D)(5) PIN I501 CIN(3L)(43) PIN I201(SUB.V)(53) PIN 2Vp-p 1.0Vp-p 0.3Vp-p PYM(MY)(1)PIN PYM(MPB)(3)PIN PYS(SY)(1)PIN PYS(SPB)(3)PIN I501 CIN(3D)(7) PIN 1. 2Vp-p 1.4Vp-p 0.286Vp-p PYM(MPR)(5)PIN TP01(MH) TP02(MV) PYS(SPR)(5)PIN TP03(SH) TP04(SV) 5.0 Vp-p... - Page 49 32PD5000/42PD5000...
- Page 50 37P D5 00 0...
- Page 51 55PMA550...
- Page 52 32PD5000/42PD5000...
- Page 53 55PMA550/55HDM71...
- Page 54 32PD5000/42PD5000...
- Page 55 32PD5000/42PD5000...
- Page 56 32PD5000/42PD5000...
- Page 57 55PMA550/55HDM71...
- Page 58 32PD5000/42PD5000...
- Page 59 55PMA550/55HDM71...
-
Page 60: Printed Wiring Board Diagram
32PD5000/42PD5000 9.Printed wiring board diagram FILTER board LED/RECEIVER board SW board SP TERMINAL L board SP TERMINAL R board TACT SW board... - Page 61 55PMA550/55HDM71 Printed wiring board diagram FILTER board LED/RECEIVER board SPEAKER TERMINAL (R) board SW board SPEAKER TERMINAL (L) board TACT SW board...
- Page 62 32PD5000/42PD5000 AUDIO board ( side-A ) AUDIO board ( side-B ) Mainly chip parts reference table Mainly chip parts reference table Cir.No. Position Cir.No. Position Cir.No. Position Cir.No. Position D406 IC403 D401 D412 D410 IC404 D402 K405 D413 Q401 D403...
- Page 63 32PD5000/42PD5000 JOINT board ( side-A ) JOINT board ( side-B ) Mainly chip parts reference table Cir.No. Position Cir.No. Position DH98 IF08 DH99 KH101 EJF1 KH102 EJF2 LH101 EJF3 LH101A EJF4 PCL1 EJF5 PTEM1 EJF6...
- Page 64 32PD5000/42PD5000 VIDEO board ( side-A ) Mainly chip parts reference table Cir.No. Position Cir.No. Position Cir.No. Position Cir.No. Position Cir.No. Position D201 I603 L214 L315 Q206 D202 IR01 L215 L316 Q207 D501 IR02 L216 L317 Q208 I201 L201 L217 L318...
- Page 65 32PD5000/42PD5000 VIDEO board ( side-B ) Mainly chip parts reference table Cir.No. Position Cir.No. Position D301 Q217 D302 Q325 I001 Q330 I002 Q515 I203 Q516 Q001...
- Page 66 32PD5000 / 42PD5000 TUNER board ( Side-A ) TUNER board ( Side-B ) Mainly chip parts reference table Cir.No. Position Cir.No. Position Cir.No. Position Cir.No. Position I101 LC02 Q104 QN01 I102 LN01 Q105 QN02 IC01 LN02 Q106 QT01 IC02 LN03...
-
Page 67: Block Diagram
32PD5000/42PD5000 11. Block diagram... - Page 68 55PMA550E Block diagram...
- Page 69 32PD5000/42PD5000 SPRL Y LED OFF LED OFF DTC. TACT SW PWB LED/RECEIVER PWB MUTE RELAY DRIVE BU4052 SCL2 <I403> TRUBASS CONT. MUTE DRIVE SDA2 RGB2 Audio IN NJW1136 NJM2192AM TA2021B <IC401> <IC402> <IC404> Lch IN SP OUT Lch MASTER VOL.
- Page 70 55PMA550 � SPRL Y � LED OFF LED OFF � DTC. MUTE � ����������� � ���������������� WOOFER OUT � RELAY DRIVE SCL2 BU4052 <I403> � MUTE DRIVE ������������� SDA2 � RGB2 � Audio IN NJW1136 NJM2192AM TA2021B � <IC401> <IC402> <IC404>...
-
Page 71: Connection Diagram
32PD5000/42PD5000 12. Connection diagram... - Page 72 55PMA550 12. Connection diagram...
-
Page 73: Wiring Diagram
32PD5000/42PD5000 13. Wiring diagram [32PD5000] POWER UNIT CN23 No.1 CN64 PANEL Y-SUS P#GX00402 PANEL X-SUS NVS7 CN69 CN68 No.2 No.3 (*1) (*4) (To FORMATTER PWB) PANEL No.4 LOGIC To next page P#2169512 (*3) NVS5 PANEL ABUS-L PANEL ABUS-R Detail of (*4) - Page 74 32PD5000/42PD5000 [32PD5000] CNPPS (*4) Close the SP terminal Wind the wire by POWER UNIT (both L and R). 1 turn. No.6 P#2169512 NVS3 SP TERMINAL L PWB P#2169513 No.21 No.22 NVS10 No.22 PAS4 PAS3 SP TERMINAL R PWB Wind the wire by 1 turn.
- Page 75 37PD5000 Wiring diagram 37PD5000 1/2 POWER UNIT PANEL X-SUS PANEL Y-SUS To next page (To FORMATTER PWB) PANEL LOGIC PANEL ABUS-L PANEL ABUS-R Detail of (*1) Detail of (*4) Detail of (*3) No.3 20PFFC Printing part of No.3 connector should be set to module side of panel. FERRITE CORE 1) Release the lock of CN7, and insert No.3 connector in CN7.
- Page 76 37PD5200 (EU) (PW1) Wiring diagram 2/2 POWER UNIT SP TERMINAL L PWB SP TERMINAL R PWB AUDIO PWB FORMATTER UNIT FILTER To previous page POW SW LED/RECEIVER PWB TACT SW PWB Detail of (*6) Detail of (*7) Detail of (*5) Detail of (*8) Pass No.12 connector through NVS1.
- Page 77 32PD5000/42PD5000 [42PD5000] ����� ���� ���� ���� ���� ����� ����� ����� ����� ���� ���� ���� ��������� ���� ���� ��� ���� ���� ��� ��� �� ��������� ��� ��� ���� ����� ����� ��� ���� ��������� ���� �� ���� ���� ����� ������ ����� ������...
- Page 78 32PD5000/42PD5000 [42PD5000] CNPPS No.6 (*4) POWER UNIT Wind the wire by 1 turn. P#2169512 NVS3 PANEL X-SUS PANEL Y-SUS (*4) CN61 Wind the wire by 1 turn. P#2169513 NVS2 #00W3 SK binder Fix the No.7 SP TERMINAL R PWB SP TERMINAL L PWB...
- Page 79 55PMA550 Wiring diagram Wiring diagram 1/2 ����� � ������ ����� � ������ ����� � ������ ����� � ������ ���� ���� ���� ����� ���� ����� ����� ����� ����� ����� ����� ���� ��� ��������� ����� ��� ����� � ������ ����� � ������ �����...
- Page 80 55PMA550 Wiring diagram 2/2 ���� ��� ���� �� � ����� ���� ���� ���� ����� ����� ����� ���� ����� ����� ���� ����� �� ������ ���� ��� ���� �� � ����� ��� ��� ������� ���� ������ �� ���� �� ��� ���� �� ����� ����...
-
Page 81: Disassembly Diagram
32PD5000/42PD5000 14. Disassembly diagram [32PD5000] The figure of FHP Panel Module (32V) Rear view LOGIC PWB ASS’Y X-SUS PWB ASS’Y Y-SUS PWB ASS’Y The state of a panel simple substance. Manufactured at FHP factory. Manufactured at FHP factory. Attachment for packing Manufactured at FHP factory. - Page 82 32PD5000/42PD5000 Panel Module (32V) [The assembled form in a product (before servcing)] Handle Handle PANEL Y-SUS PANEL X-SUS PANEL LOGIC PANEL ABUS-L PANEL ABUS-R Panel Holder x2 Remove these holders and apply the handles / attachments for packing.
- Page 83 32PD5000/42PD5000 [42PD5000]...
- Page 84 37PD5200 37PD5000...
- Page 85 55PMA550 14. Disassembly diagram...
- Page 86 32PD5000/42PD5000 The figure of FHP Panel Module (42V) Rear view LOGIC PWB ASS’Y X-SUS PWB ASS’Y Y-SUS PWB ASS’Y The state of a panel simple substance. Manufactured at FHP factory. Manufactured at FHP factory. Manufactured at FHP factory. PANEL X-SUS...
- Page 87 37PD5000 (EU) (PW1) The figure of FHP Panel Module (37V) Rear view Y-SUS PWB ASS’Y LOGIC PWB ASS’Y X-SUS PWB ASS’Y The state of a panel simple substance. Manufactured at FHP factory. Manufactured at FHP factory. Manufactured at FHP factory. Attachment for packing Attachment for packing * Apply it before packing...
- Page 88 37PD5200 (EU) (PW1) Panel Module (37V) [The assembled form in a product (before servicing)] Handle Handle PANEL X-SUS PANEL Y-SUS PANEL LOGIC PANEL ABUS-L PANEL ABUS-R Panel Holder x2 * Remove these holders and apply the handles / attachments for packing.
- Page 89 55PMA550...
- Page 91 THE UPDATED PARTS LIST FOR THIS MODEL IS AVAILABLE ON ESTA...
- Page 92 HITACHI SM005 Power Supply Block Diagram...
- Page 93 HITACHI SM005 Panel Connectors...
- Page 94 HITACHI SM005 Power Supply Circuit Board...
- Page 95 HITACHI SM005 Power Supply Circuit - 1 of 5...
- Page 96 HITACHI SM005 Power Supply Circuit - 2 of 5...
- Page 97 HITACHI SM005 Power Supply Circuit - 3 of 5...
- Page 98 HITACHI SM005 Power Supply Circuit - 4 of 5...
- Page 99 HITACHI SM005 Power Supply Circuit - 5 of 5...
- Page 100 NO P OW E R NO•P OW E R NO V s ,V a,V cc,S T B F U S E impedance check D001 D001 Impedance check Q003/Q004 Q003/Q004, S T B impedance check Q201 over 130V Q201,IC201 check voltage D210,Q202,etc D011(k)-J13 under 130V...
- Page 101 Fax: +46 (0) 8 562 711 13 Tel: +39 02 38073415 Servizio Clienti Email: csgswe@hitachi-eu.com Fax: +39 02 48786381/2 Email: customerservice.italy@hitachi-eu.com HITACHI EUROPE S.A.S HITACHI EUROPE LTD (Norway) AB Lyon Office STRANDVEIEN 18 B.P. 45, 69671 BRON CEDEX 1366 Lysaker FRANCE...