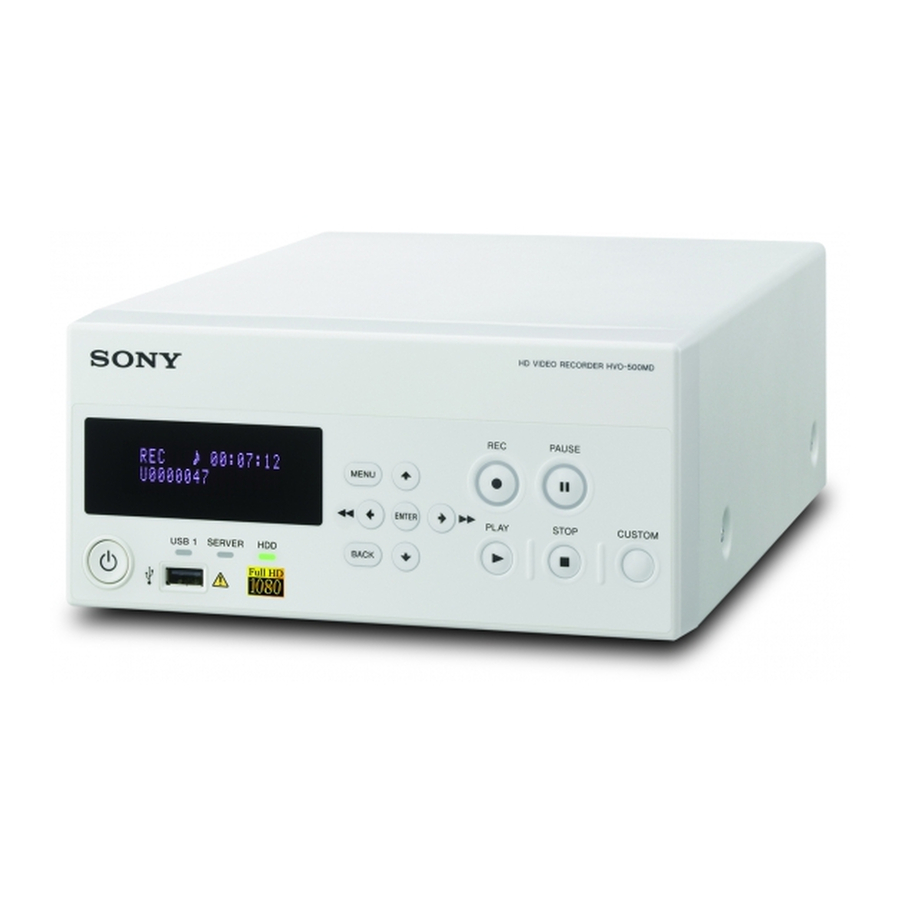
Sony HVO-500MD Instructions For Use Manual
Hd video recorder
Hide thumbs
Also See for HVO-500MD:
- Instruction manual (90 pages) ,
- Service manual (88 pages) ,
- Protocol manual (48 pages)

Related Manuals for Sony HVO-500MD


Summary of Contents for Sony HVO-500MD
- Page 1 4-564-082-11 (1) HD Video Recorder Instructions for Use Before operating the unit, please read this manual thoroughly and retain it for future reference. HVO-500MD/550MD © 2014 Sony Corporation...
- Page 2 The model and serial numbers are located at the rear. Symbol: Black Record these numbers in the space provided below. Refer to these numbers whenever you call upon your Sony Consult the Instructions for Use dealer regarding this product. Follow the directions in the Instructions for Use for parts of the unit on which this mark Model No.
- Page 3 (which can be determined by unplugging If you have any questions about this product, you may call; the power cord from the unit), try these measures: Sony Customer Information Service Center 1-800-222- Relocate the unit with respect to the susceptible 7669 or http://www.sony.com/ equipment.
- Page 4 IEC 61000-3-2 Voltage fluctuations/ flicker emissions Not applicable IEC 61000-3-3 WARNING If the HVO-500MD/550MD should be used adjacent to or stacked with other equipment, it should be observed to verify normal operation in the configuration in which it will be used.
- Page 5 Guidance and manufacturer’s declaration - electromagnetic immunity The HVO-500MD/550MD is intended for use in the electromagnetic environment specified below. The customer or the user of the HVO-500MD/550MD should assure that it is used in such as environment. IEC 60601 test...
- Page 6 To assess the electromagnetic environment due to fixed RF transmitters, an electromagnetic site survey should be considered. If the measured field strength in the location in which the HVO-500MD/550MD is used exceeds the applicable RF compliance level above, the HVO-500MD/550MD should be observed to verify normal operation. If abnormal performance is observed, additional measures may be necessary, such as reorienting or relocating the HVO-500MD/ 550MD.
- Page 7 For the customers in Europe This product has been manufactured by or on behalf of Sony Corporation, 1-7-1 Konan Minato-ku Tokyo, 108-0075 Japan. Inquiries related to product compliance based on European Union legislation shall be addressed to the authorized representative, Sony Deutschland GmbH, Hedelfinger Strasse 61, 70327 Stuttgart, Germany.
-
Page 8: Table Of Contents
Table of Contents Please Read First................12 Usage Notes ................... 13 Chapter 1 Overview Features..................14 System Configuration Example............ 15 Names and Functions of Parts ............. 16 Front ....................16 Rear ..................... 18 Chapter 2 Preparation Connections ................... 21 Turning the Unit On and Off ............21 Configuring System Settings ............ - Page 9 Chapter 3 Basic Recorder Operations Operation Flow................34 Step 1 Record................. 34 Step 2 Quick Playback ..............35 Step 3 Capture Still Images ............36 Step 4 Stop Recording ..............37 Chapter 4 Recording and Playback Recording ..................38 Manual Recording ................38 Capturing Still Images..............
- Page 10 Chapter 5 System Administrator Settings Overview..................63 Displaying the [System Admin Settings] Screen......63 Language Settings................. 64 Date and Time Settings ..............65 Function Settings ................68 [General 1] Tab ................... 68 [General 2] Tab ................... 69 [Video 1] Tab ..................73 [Video 2] Tab ..................
- Page 11 • Sony assumes no responsibility for damages, loss of income, or any claims from a third party arising out of use of the recorder or supplied software.
-
Page 12: Please Read First
Disclaimer of Liability for Recorded Data occur. When installing and using the unit, closely observe Sony Corporation does not accept any liability whatsoever the following precautions. for any problems arising from a failure to record, or from... -
Page 13: Usage Notes
Use isopropyl alcohol with a concentration of 50% to 70% (v/v) or ethanol with a concentration of 76.9% to 81.4 % (v/v) to clean the surface of the unit. In the event of operating problems If you should experience problems with the unit, contact your Sony dealer. Usage Notes... -
Page 14: Chapter 1 Overview
Features Using this unit for medical purposes The connectors on this unit are not isolated. The Sony HVO-500MD/550MD HD Video Recorder is Always use USB-compatible external hard drives and intended to record HD video and still images from USB memory devices that operate solely on the power endoscopic, laparoscopic, and other compatible diagnostic supplied by the unit. -
Page 15: System Configuration Example
Operating room Doctor’s office Hospital network IP cameras in operating room File server Endoscopic device HVO-500MD/550MD FS-24 Foot switch Simultaneously record data to one of two Printer external storage media and the server. (Recording to DVD is only available on the HVO-550MD.) -
Page 16: Names And Functions Of Parts
Names and Functions of Parts Front HVO-500MD HVO-550MD Names and Functions of Parts... -
Page 17: Hdd Indicator
B / m button Note Use this to move the cursor left or select an item that is (HVO-550MD only) to the left of the current item. Do not touch the laser pickup inside the DVD You can also use this button to rewind during playback drive of recorded data. -
Page 18: Rear
You cannot remove the disc when this indicator is If the disc tray does not open when you press the Z blinking green. EJECT button, insert a long, thin object such as a Rear HVO-500MD/550MD Names and Functions of Parts... - Page 19 Do not touch the patient while touching the pins the Supported USB devices DC connector. The 24 V voltage applied to the pins of • Use Sony USB media formatted in the FAT32 file the DC connector may adversely the patient. system.
- Page 20 “READY” appears in the front panel display) before turning on the video input device. HDMI output connector (Type A) Outputs HDMI signals. Note We recommend using a Sony HDMI cable (not supplied). DVI-D output connector (19-pin DVI) Outputs DVI-D signals. S VIDEO output connector (4-pin mini DIN) Outputs analog S-Video signals.
-
Page 21: Chapter 2 Preparation
Preparation Chapter Connections Turning the Unit On and Connect the DC power cable of the supplied AC adapter to the DC IN connector on the rear of the unit. To turn on the unit Connect the output signal of the medical equipment to Press the 1 (on/standby) switch on the front panel of the a video input connector on the rear of the unit. -
Page 22: Configuring System Settings
Configuring System To completely shut off the power supply, disconnect the Settings power cord of the AC adapter. Be sure to configure the system settings before you begin operating the unit. The system settings should be configured by the system administrator. For details on system settings, see “System Administrator Settings”... -
Page 23: Configuring Recording Settings (User Settings)
Use the B and b buttons to select a tab, and press the Configuring Recording ENTER button. Settings (User Settings) Select image inputs and configure image quality settings in the [User Settings] screen. You can navigate menus using the navigation buttons on the front panel of the unit. -
Page 24: Configuring Image Quality Settings
Configure image quality settings for videos. Use the B and b buttons to select the [Quality] tab. For details on the resolutions that are supported for each input signal type, contact your local Sony representative. [Audio] When the input signal is set to [HDMI], select the... - Page 25 The [Quality] screen closes, and the [Quality] tab The [Quality] screen appears. appears again. 4 Use the V and v buttons to select the image quality, and press the ENTER button. The setting configured here will be used as the initial value for the [Video Quality] setting in the [Recording Preparation] screen.
-
Page 26: Configuring Save Settings
Configuring Save Settings Configure settings related to external media used to store recorded data, and specify whether to output metadata. Use the B and b buttons to select the [Save] tab. [Metadata Output] Select whether to include metadata when copying recorded data to external media in the setting screen that appears, and press the ENTER button. -
Page 27: Configuring Print Settings
[Add. Info.] Configure print settings for still images. Select whether to print the following additional The HVO-500MD/550MD supports connection and use of information (recording date, patient information, etc.). the Sony UP-DR80MD printer. You can also individually select whether to print each additional information item in the [Detail of Add. - Page 28 The default setting is [Not Printed] for all settings except [Rec Timestamp]. To print watermarks or logos, you must import the watermarks files and logo files onto the unit beforehand. The items that can be configured in the [Detail of Add. Info.] screen are as follows.
-
Page 29: Using The On-Screen Keyboard (Text Entry)
Using the On-Screen Keyboard (Text Entry) When text entry is necessary, an on-screen keyboard appears. Names and Functions of Parts (On-Screen Keyboard) You can display an alphanumeric, symbol, or umlaut character set on the on- screen keyboard. The name and function of each part on the keyboard is as follows. Example: On-screen keyboard during alphanumeric character display A Title bar F [Delete]... -
Page 30: Handling Discs
K [Caps] Handling Discs Select this and press the ENTER button to switch the keyboard to upper case display. L [Alphanum] Compatible discs Select this and press the ENTER button to switch the This unit supports the following DVD disc. keyboard to alphanumeric character display. -
Page 31: Inserting And Removing Discs
Cleaning Insert the disc. • Clean the disc with a soft cloth, wiping it from the center out. If the dust is heavy, wipe it with a soft cloth moistened with water, then wipe off the water with a dry cloth. -
Page 32: Function Keys
Use the B and b buttons to select [System Admin Function Keys Settings], and press the ENTER button. When using the HVO-500MD/550MD, you can assign certain functions (recording, playback, etc.) to the function keys (F1 to F12) at the top of a keyboard and perform these functions. -
Page 33: Factory Assigned Functions
Use the v button to select the [Keyboard Mode] box, • Stop: Stop recording or playback. and press the ENTER button. • Pause: Pause recording or playback. • Record: Record video. • Capture: Capture still images. • Input signal switch: Switch between DVI-D, HDMI, VIDEO, and S VIDEO for the input signal with each press. -
Page 34: Chapter 3 Basic Recorder Operations
Basic Recorder Operations Chapter Operation Flow Step 1 Record This chapter describes how to record and play back videos Press the z REC button. and capture still images while viewing the display on the zREC button front panel of the unit and using only the buttons on the front panel. -
Page 35: Step 2 Quick Playback
Press the x STOP button to stop recording. Step 2 Quick Playback Play back data recorded in Step 1. What is quick playback? “Quick playback” is a function that allows you to play back the most recent data recorded to the internal hard disk with a simple press of the B PLAY button. -
Page 36: Step 3 Capture Still Images
Stop playback Step 3 Capture Still Press the x STOP button. Images When playback stops, the following appears. Capture still images from live image transmissions. READY Tips To capture still images manually, the capture function • If you press the MENU button during playback, must be assigned to the CUSTOM button. -
Page 37: Step 4 Stop Recording
Step 4 Stop Recording Press the x STOP button. xSTOP button Recording stops, and the following appears. 1234567890123456 Recording will take longer to stop if data is being saved to external media, in addition to the internal hard disk. Wait a moment for the writing process to complete. -
Page 38: Chapter 4 Recording And Playback
For details on configuring patient information and storage destinations for recorded data beforehand, see “Recording Preparation” (page 43). For details on how to record via contact switch, contact your local Sony representative. Note on the auto delete function for Recording starts. recorded data... - Page 39 To stop recording, press the x STOP button. When the data transfer is complete, select [Close], and press the ENTER button. If the [MENU] screen is displayed, you can also press the ENTER button to stop recording. In such cases, continue with the following steps.
-
Page 40: Capturing Still Images
CUSTOM button. (The default setting for the CUSTOM button is [Capture].) • For details on contact switch controls, contact your local Sony representative. For details on assigning functions, see “[CUSTOM Button Control]” under “[General 2] Tab” (page 69). -
Page 41: Stopping Recording Operations
A recorded data separator is created when recording Stopping Recording stops. If simultaneous saving to external media is enabled in Operations addition to saving to the unit’s internal hard disk, the following screen appears. Wait a moment for the data transfer to complete. -
Page 42: Playback
Recorded data directory Playback Video data is stored in one of the following directories, depending on the system administrator settings. Video data directory You can play back the most recent recorded data stored on <uppermost folder of the external media>/<recording start the unit’s internal hard disk via simple controls. -
Page 43: Recording Preparation
• When NTSC is selected as the video format under the Recording Preparation system administrator settings, PAL-format recorded data cannot be played back properly. Conversely, when PAL is selected, NTSC-format recorded data cannot be played back properly. Before starting to record, enter information regarding the •... - Page 44 for that item. [Date of Birth] [Patient Info] entry can be skipped. Select the year, month, and day in the setting screens that appear, and press the ENTER button. Configure storage settings for recorded data. [Patient ID] Enter an identification number for the patient using the Select an item using the V and v buttons, and press the on-screen keyboard.
-
Page 45: Using A Hard Keyboard For Patient Information And Data Storage
Tips The procedures must be registered beforehand. • If the external media is currently inserted and recognized, the remaining recording times are also For details on this setting, see “Registering Cases” displayed. (page 96). • Servers will not be detected automatically. •... -
Page 46: Registering Multiple Patients In Advance
In the [Recording Preparation] screen, use the V , v , B , Function and b buttons to select [Call List], and press the Move within entered text. ENTER button. (arrows) Enter Apply the setting, and close the [Recording Preparation] screen. Cancel the setting, and close the [Recording Preparation] screen. - Page 47 In the [Recording Preparation] screen, use the V , v , B , Deleting Registered Patients from the List and b buttons to select [Call List], and press the Delete patients that were registered in advance from the ENTER button. list.
-
Page 48: Test Recording
Use the V , v , B , and b buttons to select [Done], and Test Recording press the ENTER button. Confirm whether images record properly. When you perform a test recording, images record for five seconds and then play back automatically. In the [Recording Preparation] screen, use the V , v , B , and b buttons to select [Test Record], and press the ENTER button. -
Page 49: Image Search
Specify the search conditions. Image Search Select an item using the V , v , B , and b buttons, and press the ENTER button to display the text entry screen for that item. You can search for recorded data stored on the unit’s internal hard disk. -
Page 50: Viewing Thumbnails Of Recorded Data
[Status] Viewing Thumbnails of Recorded Select whether the recorded data has been saved to Data external media in the setting screen that appears, and press the ENTER button. You can view thumbnail images of recorded data in an image list. Select [Image List] for the operation box in the [Recording List] screen. -
Page 51: Playback From The Search Results List
Use the V and v buttons to select [Video], [Still], or [All], and press the ENTER button. The display changes. BPLAY button To play back by chapter, select the recorded data you want to play back, and press the ENTER button. Tips The [Image List] screen appears, and thumbnail •... -
Page 52: Sorting The Recorded Data List
Use the V and v buttons to select the [Order] box, and Sorting the Recorded Data List press the ENTER button. You can sort the recorded data list by recording date, patient ID, patient name, size, or save status. In the [Recording List] screen, use the V , v , B , and b buttons to select [Sort], and press the ENTER button. -
Page 53: Processing Recorded Data
Use the V , v , B , and b buttons to select [Execute], and Processing Recorded press the ENTER button. Data You can process recorded data stored on the unit’s internal hard disk in the following ways. • Printing (page 53) •... - Page 54 Use the V and v buttons to select [Execute], and press Select the check boxes for the recorded data you want to print. the ENTER button. Select a thumbnail using the V , v , B , and b buttons, and press the ENTER button to select or clear the check box.
-
Page 55: Copying To External Media
Display the [Recording List] screen, use the V , v , B , and b buttons to select the operation box, and press the To cancel printing, select [Abort] and press the ENTER button. ENTER button. For details on displaying the [Recording List] Screen, see “Image Search”... - Page 56 Use the V , v , B , and b buttons to select [Execute], and Use the V and v buttons to select [Execute], and press press the ENTER button. the ENTER button. Copying of recorded data starts. The [Save to] screen appears. Configure save settings for the recorded data.
- Page 57 In the [Recording List] screen, use the V and v buttons Use the V , v , B , and b buttons to select the to select the recorded data, and press the ENTER [Operation] box, and press the ENTER button. button.
-
Page 58: Editing Patient Information
Copying of recorded data starts. [External Media] Select the storage destination, and press the ENTER button. To cancel copying, select [Abort] and press the ENTER button. Use the v button to select [Close], and press the ENTER button. [File Server] If [SERVER] is selected as the external storage destination, select a file server (the server configured for each doctor), and press the ENTER button. -
Page 59: Protecting Recorded Data
The [Operation] screen appears. The [Change] screen appears. Use the V and v buttons to select [Change], and press Edit each item as necessary. the ENTER button. Select an item using the V , v , B , and b buttons, and press the ENTER button to display the setting screen for that item. -
Page 60: Deleting Recorded Data
To select data for protection from the [Recording List] screen This section describes how to select recorded data for protection in the [Recording List] screen. Both videos and still images will be protected with this procedure. Display the [Recording List] screen, use the V , v , B , and b buttons to select the operation box, and press the ENTER button. -
Page 61: Viewing Information On Recorded Data
Note Recorded data that is deleted cannot be restored. To select data for deletion from the [Recording List] screen This section describes how to select recorded data for deletion in the [Recording List] screen. Display the [Recording List] screen, use the V , v , B , and b buttons to select the operation box, and press the ENTER button. - Page 62 For details on displaying the [Recording List] Screen, see “Image Search” (page 49). The [Image List] screen appears. Use the V , v , B , and b buttons to select [Rec Info], and press the ENTER button. The information on recorded data is displayed. Processing Recorded Data...
-
Page 63: Chapter 5 System Administrator Settings
System Administrator Settings Chapter Overview Displaying the [System Admin Settings] Screen You can set the initial configurations for various settings in the [System Admin Settings] screen. Press the MENU button. Configurations in the [System Admin Settings] screen must be performed by the system administrator. The [MENU] screen appears. -
Page 64: Language Settings
Language Settings If password protection is enabled, a password entry screen will appear. Configure the display language and date display format. A confirmation message appears. In the [System Admin Settings] screen, use the V , v , Press the ENTER button. B , and b buttons to select [Language], and press the ENTER button. -
Page 65: Date And Time Settings
Use the V and v buttons to select the [Date Format] Date and Time Settings box, and press the ENTER button. Configure the current date and time. In the [System Admin Settings] screen, use the V , v , B , and b buttons to select [Date and Time], and press the ENTER button. - Page 66 Configure the time in the same way. List of time zones Configure the time zone and daylight saving time Time zone settings. GMT-12:00 International Date Line West Select an item using the V and v buttons, and press the GMT-11:00 Midway Island ENTER button to display the setting screen for that GMT-10:00 Hawaii item.
- Page 67 Time zone Time zone GMT+02:00 Athens, Bucharest, Istanbul GMT+10:00 Canberra, Melbourne, Sydney GMT+02:00 Amman GMT+10:00 Guam, Port Moresby GMT+02:00 Windhoek GMT+10:00 Brisbane GMT+02:00 Jerusalem GMT+10:00 Hobart GMT+02:00 Cairo GMT+11:00 Magadan, Solomon Islands, New Caledonia GMT+02:00 Harare, Pretoria GMT+12:00 Auckland, Wellington GMT+02:00 Beirut GMT+12:00 Fiji Islands, Kamchatka, Marshall GMT+02:00 Helsinki, Kiev, Riga, Skopje, Sofia,...
-
Page 68: Function Settings
[General 1] Tab Function Settings Configure initial system settings. Configure initial settings related to recording and external Use the B and b buttons to select the [General 1] tab. devices. Configure each setting. In the [System Admin Settings] screen, use the V , v , Select an item using the V and v buttons, and press the B , and b buttons to select [Function Settings], and ENTER button to display the setting screen for that... -
Page 69: [General 2] Tab
[Add 0 to Patient ID] [General 2] Tab Select whether to add zeros to patient IDs with lengths shorter than the specified number of digits in the Configure initial system settings. setting screen that appears, and press the ENTER button. Use the B and b buttons to select the [General 2] tab. - Page 70 The functions that can be assigned are as follows. If you want to select [Use], be sure to import the logo. For details on importing, see “To import a logo” Assignable Description (page 72). function Not Used A function is not assigned. [Image List Display] Select whether thumbnail images of videos in the Capture...
- Page 71 [Show Rec Status] Select whether to display recording status information in the setting screen that appears, and press the ENTER button. If you select [Use], the recording status, the status of data transfer to media, and other status information will appear on the recording screens that are output. Data is being written if the media status is green, and an error has occurred if it is orange.
- Page 72 Copy the logo file onto a USB memory device. Create a folder with the following name in the uppermost directory of the USB memory device, and copy the logo file. Folder name: DisplayLogo To configure advanced image list settings Specify the selection state of recorded data when you perform copy or print operations in the [Image List] screen.
-
Page 73: [Video 1] Tab
[Save to] Select the selection state of recorded data when you specify [Save to] for the [Operation] box. The default setting is [Deselect All]. [I/O Timing] Select the input and output timing in the setting screen that appears, and press the ENTER button. Select [Normal] as signal processing is usually performed under normal circumstances. - Page 74 [Auto Live] Select whether to use the auto live function in the setting screen that appears, and press the ENTER button. When the auto live function is enabled and you capture a still image, the captured image is displayed for the duration specified with the [Auto Live Duration] setting.
-
Page 75: [Video 2] Tab
[Input Detect Duration] [Duration] Select the duration for which captured still images are Select from 0 to 3 seconds for the duration for which displayed. input signals are detected. The default setting is [3 sec]. The default setting is [3 sec]. [Position] Select the position in which captured still images are displayed. -
Page 76: Device Settings
Settings] screen appears again. For details on this setting, see “To configure printer settings” (page 77). The unit can recognize the Sony UP-DR80MD printer automatically. To have the unit recognize UP- DR80MD printers automatically, set the peripheral device setting for the USB connector to which the... - Page 77 [USB 4] [No Device] appears for this setting on the When a UP-DR80MD is selected, configure the color HVO-500MD/550MD, and the setting cannot be balance, brightness, and other settings. changed. Use the B and b buttons to select [Advanced], and [RS-232C] press the ENTER button.
- Page 78 [Color Balance] Adjust the color balance for cyan, magenta, and yellow and red, green, and blue. Select a correction value in the setting screens that appear, and press the ENTER button. When import of the watermark file is complete, a notification message will appear.
-
Page 79: [Contact Switch] Tab
• For A4 size paper The procedure for configuring the [Contact Switch 1] File format: 24-bit bitmap and [Contact Switch 2] settings is the same. File name: watermark_A4.bmp The default setting is [Not Used]. Size: 2392 × 3400 pixel 1 Use the V and v buttons to select the box for the Color: Background: RGB (255, 255, 255) white contact switch setting you want to configure, and... - Page 80 3 Use the B and b buttons to select [Advanced], and 6 Use the V and v buttons to select [Apply], and press the ENTER button. press the ENTER button. The [Contact Switch] tab appears again. If you want to use the tally lamp control and video input switching functions for the monitor, configure The [Advanced] screen appears.
- Page 81 3 Use the B and b buttons to select [Advanced], and 5 Use the V and v buttons to select a pin number, and press the ENTER button. press the ENTER button. From the eight pins on the monitor connector, assign one pin each for camera signal inputs (endoscopic image inputs), recorder signal inputs (image inputs from this unit), and the recording...
-
Page 82: Password Settings
Use the V and v buttons to select [Use], and press the Password Settings ENTER button. The default setting is [Not Used]. Configure password settings to prevent unauthorized changes to the [System Admin Settings]. When password protection is enabled, a password entry screen appears when [System Admin Settings] is selected in the [Settings] screen. -
Page 83: Network Settings
For details on using the on-screen keyboard, see Network Settings “Using the On-Screen Keyboard” (page 29). Configure initial settings related to the network and server. The password is not configured under default conditions. When configuring the password for the In the [System Admin Settings] screen, use the V , v , first time, configure the new password in the [Change B , and b buttons to select [Network Settings], and Password] screen without entering an old password. - Page 84 Use the V and v buttons to select the [Network] box, [Preferred DNS server], and [Alternate DNS server] and press the ENTER button. settings. [IP Address] Enter the IP address using the on-screen keyboard. The [Network] screen appears. For details on using the on-screen keyboard, see “Using the On-Screen Keyboard”...
-
Page 85: [File Server] Tab
For details on using the on-screen keyboard, see Configure each setting. “Using the On-Screen Keyboard” (page 29). Select an item using the V and v buttons, and press the [Alternate DNS server] ENTER button to display the setting screen for that Enter the IP address for the alternate DNS server using item. - Page 86 To configure settings in other tabs, use the V , v , B , and b buttons to select a tab. If you are finished configuring [Network Settings], use the V , v , B , and b buttons to select [Apply], and press the ENTER button to save the configurations.
-
Page 87: Initial User Settings
[Rec Time] displays the following information. For details on each tab, see the following. • For the HVO-500MD: Estimated recording time “[Quality] Tab” (page 87) available for USB media (500 GB). • For the HVO-550MD: Estimated recording time “[Save] Tab”... -
Page 88: [Save] Tab
ENTER button. item. [Rec Quantity] displays the following information. [Format] • For the HVO-500MD: Estimated recording time Select a format for still image files in the setting screen available for USB media (500 GB). that appears, and press the ENTER button. - Page 89 [External Media] Select the external concurrent storage destinations in the setting screens that appear, and press the ENTER button. The default setting is [Not Specified]. When recorded data with the same patient ID is created, a new recording date folder is created under the patient ID folder, and the recorded data is saved to the new folder.
-
Page 90: Editing The Doctor List
Configure each setting. Editing the Doctor List Select an item using the V and v buttons, and press the ENTER button to display the setting screen for that item. Register and edit information regarding the doctors performing the surgical procedures and examinations. The doctor information registered here will be used as the initial settings that appear in the other setting screens. -
Page 91: [General] Tab
Use the B and b buttons to select a tab, and configure For details on using the on-screen keyboard, see settings as necessary. “Using the On-Screen Keyboard” (page 29). [Video Quality] Select the video image quality in the setting screen that appears, and press the ENTER button. -
Page 92: [Print] Tab
For details on using the on-screen keyboard, see “Using the On-Screen Keyboard” (page 29). [Password] Enter the password using the on-screen keyboard. For details on using the on-screen keyboard, see “Using the On-Screen Keyboard” (page 29). When you finish configuration, use the V , v , B , and b buttons to select [Add], and press the ENTER button. -
Page 93: Sorting The Doctor List
After editing the settings, select [Apply] and press the Sorting the Doctor List ENTER button. Use the V , v , B , and b buttons to select a doctor entry to reposition, select [Up] or [Down], and then press the ENTER button. -
Page 94: Editing The Case List
The configurations are saved, and the [System Admin Editing the Case List Settings] screen appears again. Register or edit categories and entries for surgical cases and examinations. The case information that is registered here will be used in the case lists that appear in other screens. Registering Categories Register categories for exams. -
Page 95: Sorting The Category List
Use the B and b buttons to select [Add], and press the The category moves up or down one position at a time. ENTER button. Use the v button to select [Apply], and press the ENTER button. The configurations are saved, and the [Edit Case List] screen appears again. -
Page 96: Registering Cases
A confirmation message appears. The [Category] screen appears. Use the B and b buttons to select [Yes], and press the Select the appropriate category, and press the ENTER ENTER button. button. The category is deleted. Use the v button to select [Apply], and press the ENTER button. -
Page 97: Sorting The Case List
For details on using the on-screen keyboard, see “Using the On-Screen Keyboard” (page 29). Use the V , v , B , and b buttons to select [Apply], and press the ENTER button. The case is added. Use the v button to select [Apply], and press the ENTER button. -
Page 98: Auto Delete Settings
Auto Delete Settings Configure the threshold value that will be used for the function. In the [System Admin Settings] screen, use the V , v , B , and b buttons to select [Auto Delete], and press the ENTER button. The [Auto Delete Setting] screen appears. -
Page 99: Chapter 6 Miscellaneous
0000 Startup error Restart the unit. If the error persists, contact your local Sony representative. If the power supply is inadvertently shut off while the unit is in operation or if you turn off the unit improperly, the internal HDD may be damaged and the same error may occur at the next startup. - Page 100 An internal temperature error has occurred. Check your operating environment. WARN. HDD Internal HDD warning or error An internal HDD error has occurred. Contact your local Sony representative. ERR.BATTERY Battery dead The battery is dead. Contact your local Sony representative. Error Messages...
-
Page 101: Troubleshooting
Be sure to check the following if a problem occurs. If the • The remaining storage capacity on problem persists, contact your local Sony representative. the media is insufficient. tReplace the media. • You are using an unsupported DVD... -
Page 102: Licenses
Permission to use, copy, modify, distribute, and sell this Licenses software and its documentation for any purpose is hereby granted without fee. DCMTK zlib This product uses the OFFIS DICOM Toolkit DCMTK (C) 1995-2004 Jean-loup Gailly and Mark Adler (C) 1993-2008, OFFIS e.V. gSOAP “Part of the software embedded in this product is gSOAP software. -
Page 103: Specifications
TMDS (single link) AC-80MD AC adaptor) S VIDEO (Mini DIN 4-pin type) (1) Input current HVO-500MD: 3.2 A to 1.6 A Y: 1.0 Vp-p (75 Ω) Sync negative HVO-550MD: 3.5 A to 1.8 A C (BURST): 0.286 Vp-p (75 Ω) (NTSC) Operating temperature C (BURST): 0.3 Vp-p (75 Ω) (PAL) - Page 104 WARRANTY PERIOD OR AFTER EXPIRATION OF THE WARRANTY, OR FOR ANY OTHER REASON WHATSOEVER. • SONY WILL NOT BE LIABLE FOR CLAIMS OF ANY KIND MADE BY USERS OF THIS UNIT OR MADE BY THIRD PARTIES. • SONY WILL NOT BE LIABLE FOR THE LOSS, REPAIR,...
-
Page 105: Index
Index Language settings 64 Test recording 48 Logos 28 Thumbnail display 50 Troubleshooting 101 Auto delete function 98 Monitor controls 80 Multi auto live 74 USB indicator 17 User settings 23 Capture 40 Compatible discs 30 Network 83 Contact switches 79 Network settings 83 Video 1 73 Copying data 55...