
Related Manuals for Brother S-7220C


Summary of Contents for Brother S-7220C
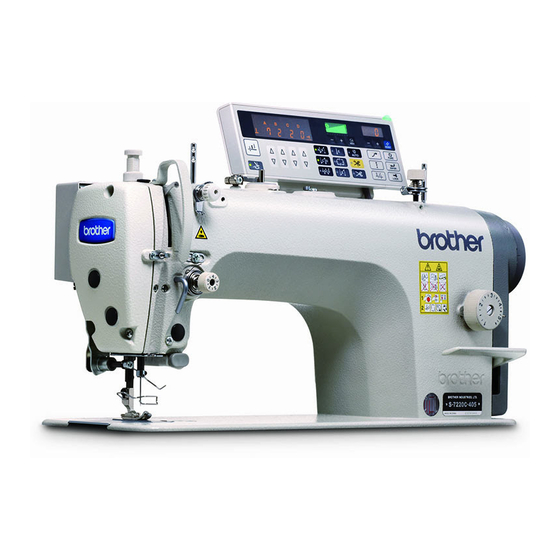
- Page 1 S-7220C INSTRUCTION MANUAL Please read this manual before using the machine. Please keep this manual within easy reach for quick reference. SINGLE NEEDLE DIRECT DRIVE NEEDLE FEED LOCK STITCHER WITH THREAD TRIMMER...
- Page 2 Thank you very much for buying a BROTHER sewing machine. Before using your new machine, please read the safety instructions and the explanations given in the instruction manual. With industrial sewing machines, it is normal to carry out work while positioned directly in front of moving parts such as the needle and thread take-up, and consequently there is always a danger of injury that can be caused by these parts.
-
Page 3: Safety Instructions
) indicates something that you must do. The picture inside the circle indicates the · · · · · nature of the thing that must be done. (For example, the symbol at left means “you must make the ground connection”.) S-7220C... - Page 4 Contact your Brother dealer or a qualified electrician for any electrical work that may need to Secure the table so that it will not move when tilting be done.
-
Page 5: Maintenance And Inspection
If only one hand is used, the weight of the machine Ask your Brother dealer or a qualified electrician to head may cause your hand to slip, and your hand carry out any maintenance and inspection of the may get caught. - Page 6 The following warning labels appear on the sewing machine. Please follow the instructions on the labels at all times when using the machine. If the labels have been removed or are difficult to read, please contact your nearest Brother dealer. Touching areas where high voltages are present can Be careful not to get your hands result in severe injury.
- Page 7 Oil pan Transformer box (100 V/400 V system only) Oil tank Control box 0545D S-7220C...
-
Page 8: Table Of Contents
8-4. Adjusting of the feed dog height..... 37 8-5. Adjusting the feed dog angle......38 8-6. Adjusting the needle and feed mechanism timing .............. 39 8-7. Adjusting arm thread guide R......40 8-8. Adjusting the presser foot height....40 S-7220C... - Page 9 S-7220C...
-
Page 10: Machine Specifications
…When sewing at speeds of 3,000 sti/min or higher, set the stitch length to 4.5 mm or less. Rotary hook -403, -433 -405 Lubricated / Lubricated / for medium materials for heavy materials Lubricating oil -403, -405 -433 Rotary hook High-speed spindle High-speed spindle Needle bar Special Brother grease S-7220C... - Page 11 If the table moves, it may crush your feet or cause other injuries. Contact your Brother dealer or a qualified electrician for any electrical work that may need to be done. Use both hands to hold the machine head when tilting it back or returning it to its original position.
-
Page 12: Installation 2-1. Table Processing Diagram
Control box mounting hole 4126M . Installation 1. Control box (1) Control box (2) Bolts [3 pcs] (3) Nuts [3 pcs] (4) Spring washers [3 pcs] (5) Washers [3 pcs] 2. Connecting rod (6) Connecting rod (7) Nut 4127M S-7220C... -
Page 13: Oil Pan
Tap the head rest (3) securely into the table hole. If the head rest (3) is not pushed in as far as it will go, the machine head will not be sufficiently stable when it is tilted back. 0549D S-7220C... -
Page 14: Operation Panel
Sticker 0551D 9. Cotton stand (1) Cotton stand NOTE: Securely tighten the nut (4) so that the two rubber cushions (2) and the washer (3) are securely clamped and so that the cotton stand (1) does not move. 3636M S-7220C... - Page 15 (6) is at the desired position within a distance of 16 mm of the needle plate when the knee liter plate (1) is fully pressed. 9. After adjustment is completed, securely tighten the nut (10). Within 16 mm 0553D S-7220C...
-
Page 16: Lubrication
If the oil gauge (7) drops below the lower reference line (or if the oil level drops below the lower reference line (8) on the oil tank (4)), be sure to replenish the oil. Upper reference line Lower reference line 0554D S-7220C... -
Page 17: Connecting The Cords
Touching areas where high voltages are present can result in severe injury. CAUTION Contact your Brother dealer or a qualified electrician When securing the cords, do not bend the cords for any electrical work that may need to be done. - Page 18 (2) using the repeat cable tie (1), otherwise vibration from the sewing machine may cause the cords become disconnected, <Securing> which can cause problems with the operation of the control box. Cords <Closing the cover> 4141M S-7220C...
-
Page 19: Other Cords
Take care when tapping in the staples (3) to make sure that they do not pierce the cords. extension cords, otherwise machine operation <Seen from underneath table> problems may result. Control box Green and yellow wire (ground wire) 2129B S-7220C... - Page 20 NOTE: Take care when tapping in the staples (5) to make sure that they do not pierce the cords. extension cords, otherwise machine operation problems may result. Green and yellow wire (ground wire) 4147M S-7220C...
- Page 21 NOTE: Take care when tapping in the staples (7) to make sure that they do not pierce the cords. extension cords, otherwise machine operation problems may result. Green and yellow wire (ground wire) 4150M S-7220C...
-
Page 22: Using The Operation Panel (Basic Operations)
A, B, C and D, the thread is trimmed automatically. 4163M Fixed stitch key When this key is pressed so that the indicator illuminates, the number of stitches (1-1999) in the E stitch number display is sewn, and then the sewing machine stops automatically. 4164M S-7220C... - Page 23 (18) is disabled. ・ If you press the thread trimming lock key (13) so that its indicator illuminates while the indicator of the thread wiper key (18) is illuminated, the indicator of the thread wiper key (18) will switch off. 4174M S-7220C...
-
Page 24: Sewing Start And End Backtack Stitches
・ If the indicator of the thread trimming lock key is illuminated, the sewing machine will stop in the needle up position without thread trimming being carried out. 2160M S-7220C... -
Page 25: Sewing Continuous Backtack Stitches
When the AUTO key is pressed to turn on the automatic sewing function, operation will be carried out automatically from continuous backtack sewing through to thread trimming just by depressing the treadle once, without needing to keep it depressed continuously. S-7220C... -
Page 26: Sewing Fixed Stitches
・ If changing the number of end backtack stitches in C and D, press the fixed stitch key to temporarily turn off the fixed stitch function before making the change. (The CD display will show the number of stitches and the setting can then be changed.) S-7220C... -
Page 27: Sewing Name Labels
・ If changing the number of start and end backtack stitches in A, B, C and D, press the name label stitch key to turn off the name label function before making the change. (The ABCD display will show the number of stitches and the settings can then be changed.) S-7220C... -
Page 28: Sewing Pleat Presser Stitches
・ If changing the number of end backtack stitches indicated in C and D, press the pleat presser sewing key to turn off the pleat presser sewing function before making the change. (The CD display will show the number of stitches and the setting can then be changed.) S-7220C... -
Page 29: Using The Lower Thread Counter
When the RESET key (2) is pressed, the warning icon (1) will switch off and the display will return to showing the initial values. Sewing using the treadle will then be possible. S-7220C... -
Page 30: Using The Operation Panel (Advanced Operations)
・ When the needle up icon (24) is illuminated, the needle bar stops in the up position. ・ When the needle down icon (25) is illuminated, the needle bar stops in the down position. 4188M 2207M 2208M S-7220C... -
Page 31: Adjusting The Needle Up Stop Position
10° for the upper shaft. Becomes higher Becomes lower 0557D 2138M 2139M The setting values will be memorized. 4192M Normal sewing machine operation will then be possible. 4193M * For details on other adjustment items, refer to the Service Manual. S-7220C... -
Page 32: Lock Key
This key is used to make settings for various functions. ENTER key (4) This key is used to accept function settings. MAX key (5) This key is used to change the maximum sewing speed. * Refer to the Service Manual for details on using these keys. 4194M S-7220C... -
Page 33: Resetting All Settings To Their Defaults
“ init SEW ” Initializes programs 4196M 2138M 2139M Once initialization is complete, the main display will return to green. 4192M (Press for 2 seconds or more) Initialization mode will be exited and normal sewing machine operation will then be possible. 4193M S-7220C... -
Page 34: Sewing
Turn the adjusting screw (5) clockwise. ・ To lower the presser foot (1) ... Turn the adjusting screw (5) counterclockwise. 5. Tighten the nut (4). * After making the adjustment, sew a piece of material to check the floating amount. Raise Lower 0566D S-7220C... -
Page 35: Sewing Condensed Stitches
(2). (Condensed stitches are sewn while the actuator (1) or reverse lever (2) is being pressed.) * To stop sewing condensed stitches, tighten the bolt (6) so that its head is not touching the solenoid lever (7). 0568D S-7220C... -
Page 36: Cleaning
1. Lubrication A. Oil tank oil quantity Check the oil gauge window (1), and add more oil if the oil gauge (2) is below the lower reference line. (Refer to page 7.) Upper reference line Lower reference line 0558D S-7220C... -
Page 37: Lubrication
4. Return the machine head to its original position. NOTE: The rubber cap (3) has a hole in it for adjusting the air pressure. When replacing the rubber cap (3) use only the replacement part specified by Brother. Approx. 2 mm 2188M S-7220C... - Page 38 6. CLEANING 2. Checking 1. Replace the needle if it is bent or if the tip is broken. 2. Check that the upper threads have been threaded correctly. 3. Carry out a test sewing. 0559D S-7220C...
-
Page 39: Applying Grease (When "Greaseup" Appears
If this happens, apply grease and carry out the reset procedure. * If you continue to use the sewing machine after carrying out the reset procedure but without applying grease, problems with the sewing machine may result. <Applying grease> Use Brother-specified “Grease unit (SA8837-001)”. Using the tube 4087M S-7220C... - Page 40 4. The main display (1) will change to “GuCt 0”. 5. Press the ENTER key (5). The main display (1) will change to stitch number display mode and treadle operation will be possible. (This completes the reset procedure.) 0584D 2138M 2139M S-7220C...
-
Page 41: Replacing The Fixed Knife And Movable Knife
Secure the table so that it will not move when tilting parts. back the machine head. If the table moves, it may Brother will not be held responsible for any accidents crush your feet or cause other injuries. or problems resulting from the use of non-genuine parts. -
Page 42: Standard Adjustments
Ask your Brother dealer or a qualified electrician to depressed by mistake, which could result in injury. carry out any maintenance and inspection of the ・... -
Page 43: Adjusting The Safety Switch Position
If the spring stroke is to small, the safety switch will not operate. 3.5 mm or more Sewing machine Table Clearance is too large. By changing the position of the safety switch, the required spring stroke can be maintained. Reduce the clearance. 3692M 3690M S-7220C... -
Page 44: Adjusting The Needle Bar Height
B on the <1> side of the accessory timing gauge (2). 6. Securely tighten the screw (7). 7. Install the rubber cap (6). 8. Install the feed dog (5), the needle plate (4) and the presser foot (3). <Presser foot including finger guard> 0572D S-7220C... -
Page 45: Adjusting The Needle And Rotary Hook Timing
(8) and the hook stopper (10). The clearance is 0.4 to 0.7 mm for -4[]3 specifications, and 0.8 to 1.2 mm for -405 specifications. <-4[]3> 0.4 - 0.7 mm <-405> 0.8 - 1.2 mm 0575D S-7220C... -
Page 46: Adjusting Of The Feed Dog Height
(6) while carrying out the above adjustment. (Fig. [B]) Becomes (Refer to “8-5. Adjusting the feed dog angle” on the next lower page for details of this operation.) 0576D Becomes higher Needle plate Becomes lower 3766M Becomes higher Becomes higher Becomes lower Becomes lower 3767M S-7220C... -
Page 47: Adjusting The Feed Dog Angle
* The height of the feed dog (1) will change after the angle Parallel Needle has been adjusted, so it will be necessary to re-adjust the plate height of the feed dog (1). Lower the front 3769M Back is lowered Raise the front Back is raised Lower the front 3770M S-7220C... -
Page 48: Adjusting The Needle And Feed Mechanism Timing
3. Loosen the two set screws (5), and then turn the vertical cam (3) sligtly to adjust the timing. NOTE: Use the standard needle and feed mechanism timing. If the timing is changed, broken needles may occur. 4. After adjustment is completed, securely tighten the two screws (5). 0578D S-7220C... -
Page 49: Adjusting Arm Thread Guide R
6. Replace the oil cap (5). 7. Adjust the presser foot pressure using the adjustment screw (4), and then tighten the nut (3). NOTE: After adjusting, check that the needle moves down into the center of the groove in the presser foot. Needle 0580D S-7220C... -
Page 50: Adjusting The Rotary Hook Lubrication Amount
<Checking the lubrication amount> above. * Turn the adjusting screw (3) and check the lubrication 0581D amount repeatedly until the lubrication amount is correct. 4. Check the lubrication amount again after the sewing machine has been used for approximately two hours. S-7220C... -
Page 51: Sewing
Is the thread take-up spring too weak? Adjust the tension of the thread take-up spring. Is the needle and rotary hook timing correct? Adjust the height of the needle bar. Adjust the clearance between the needle and the tip of the rotary hook. 0470M S-7220C... - Page 52 Adjust the presser foot pressure. Is the sewing speed too fast? Use the sewing speed control keys to gradually reduce the sewing speed. Is the angle of the feed dog correct? Tilt the front of the feed dog down slightly. 0978M S-7220C...
- Page 53 Attach the anti-spin spring. Is the bobbin turning smoothly? If the bobbin is not turning smoothly, replace the bobbin. Is a bobbin other that the light-alloy bobbins specified by Brother being used? Use only bobbins which are specified by Brother.
- Page 54 (If the power cord is too long or too many appliances are being run from a single outlet, this may cause voltage drops which will in turn cause the reset function to activate and stop the machine, even if the power supply itself is normal.) S-7220C...
- Page 55 Insert connector securely. 4264M “GrEASEUP” flashes This display is to notify you that it is time to apply grease. the panel display when the Apply grease. power switch is turned on. S-7220C...
-
Page 56: Error Code Displays
・ Was the actuator switch being pressed when the power ON switch was pressed? Press the power OFF switch and check that the actuator switch is not being pressed ・ There is a problem with the actuator switch. Replace the actuator switch. S-7220C... - Page 57 Replace the motor or the control box. E132 ・ Problem with motor. Replace the motor. Problem with ・ Problem with drive PCB. motor operation. Replace the control box. E140 ・ Motor reverse operation was detected. Replace the motor. Motor reverse operation. S-7220C...
- Page 58 ・ Is the 6-pin head detector unit connector inside the control box disconnected? Press the power OFF switch, and then check that the 6-pin head detector unit Head detector unit connector is connected to connector P8 on the main PCB. connection error. S-7220C...
- Page 59 Press the power OFF switch and set DIP switch No. 4 to OFF. If an error code that is not listed above appears or if carrying out the specified remedy does not solve the problem, contact the place of purchase. S-7220C...
-
Page 60: Segment Display
10. 7-SEGMENT DISPLAY 10. 7-SEGMENT DISPLAY 4268M S-7220C... - Page 61 MEMO S-7220C...
- Page 62 INSTRUCTION MANUAL * Please note that the contents of this manual may differ slightly from the actual product purchased as a result of product improvements. © 2013 Brother Industries, Ltd. All Rights Reserved. S-7220C SB4251-001 E This is the original instructions.