TP-Link TL-WA855RE User Manual
Hide thumbs
Also See for TL-WA855RE:
- User manual ,
- Quick installation manual (4 pages) ,
- Installation manual (2 pages)
Table of Contents
Advertisement
Advertisement
Table of Contents

Related Manuals for TP-Link TL-WA855RE


Summary of Contents for TP-Link TL-WA855RE
- Page 1 1910011642 REV 1.1.0...
- Page 2 Specifications are subject to change without notice. a registered trademark of TP-LINK TECHNOLOGIES CO., LTD. Other brands and product names are trademarks or registered trademarks of their respective holders. No part of the specifications may be reproduced in any form or by any means or used to make any derivative such as translation, transformation, or adaptation without permission from TP-LINK TECHNOLOGIES CO., LTD.
-
Page 3: Table Of Contents
Change Wi-Fi Coverage ............20 Appearance ............... 1 Change the Extender’s IP Address ........21 LED Explanation ..............1 DHCP Server ................22 Button and Port Explanation ............ 2 Set the DHCP Server ............22 Position the Extender ............... 2 DHCP Client List .............. -
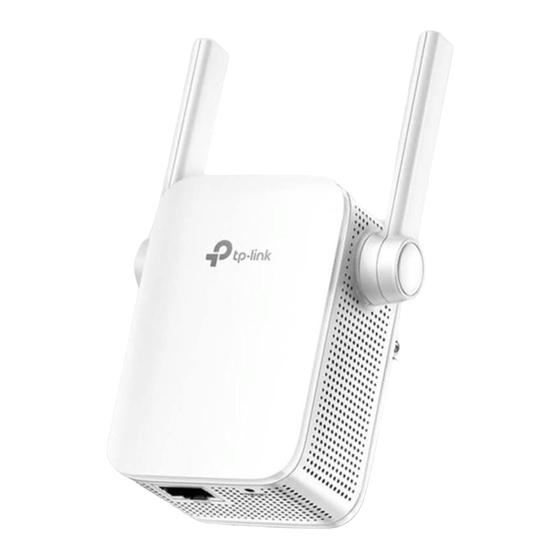
Page 4: Appearance
RE Button This chapter covers the following topics: LED Explanation Button and Port Explanation Position the Extender RESET Ethernet Port Statue Color Indication The extender is connected to the router, and is in a Green good location. The extender is connected to the router, but is too far Orange away from the router. - Page 5 For safety, we suggest you plug the extender right way up as the picture shows (Range Extender/WPS) Button: If your Wireless router supports WPS below. function, you can press the WPS button and then press the RE button of the extender to establish a secure connection between the wireless router and the extender.
-
Page 6: Connect The Extender To The Internet
Please read this chapter carefully before using the device. The operating distance range of your wireless connection can vary significantly depending on the physical position of the wireless devices. Factors that can weaken signals by getting in the way of your network’s radio waves are metal appliances or obstructions and walls. - Page 7 Place your extender in a well-ventilated place far from direct sunlight, any heater or heating vent. Leave at least 2 inches (5cm) space around the device for heat dissipation. Unplug your extender in a lighting storm to avoid damage. ...
- Page 8 Enjoy! The extender adds _EXT to the end of the host network’s SSID and has the same Wi-Fi password. If the LED does not orange), please turn solid green (or Option Two: Using Web Browser. Some ISP gateways disable the WPS function by ...
-
Page 9: Connect To The Extender
Connect to the Extender Via Wireless ● For Windows Users Disconnect the Ethernet (wired) connection to your computer. Click the Wi-Fi icon on the taskbar and connect to the extender's network TP-LINK_WA855RE. Via Ethernet Cable ● Disable the Wi-Fi on your computer. Connect your computer to the extender via an Ethernet cable. - Page 10 Select your router’s 2.4GHz Network and enter its wireless password (NOT the account password you just created for management), then click Next. Create an account for secure management purpose, then click Confirm. Connect the Extender to the Internet...
- Page 11 Either keep the default SSID or customize it for the extended 2.4GHz network, then click Next. Enjoy! Unless you customized the extended network name during the configuration, the extender adds _EXT to the end of the host network’s SSID and has the same Wi-Fi password.
-
Page 12: Set The Extender As An Ap
Set the extender to AP mode Connect your computer to your extender’s wireless network. Launch a web browser and log into http://tplinkrepeater.net, click Mode in the top right corner, select Access Point and click Save. The extender can be used as a wireless adapter to connect any Ethernet- The extender will switch to AP mode and reboot automatically. - Page 13 extender operates in 802.11n mode, because TKIP is not supported by 802.11n specification and the WPS function. Enter a new password in the Password field. If WEP is selected, Select the security type. The defult is auto, which automatically chooses Open System or Shared Key based on the capability Network Name (SSID): Set a SSID for your AP’s wireless network.
-
Page 14: Connect Your Devices To The Ap By Wps
Channel: Select the operating channel for the wireless network. It is recommended to leave the channel to Auto, if you are not experiencing the intermittent wireless connection issue. Enjoy the Internet Now you can connect to the AP’s wireless network to enjoy the Internet. Within 2 minutes push the WPS button on your client device. - Page 15 “Connect successfully” will appear on this page, which means that your client device has connected to the AP by WPS. Method THREE: Enter the AP’s PIN code on your client device Use this method if your client device requires the AP’s PIN code. Launch a web browser, log into http://tplinkrepeater.net, and then go to Settings >...
-
Page 16: View The Information Of The Extender
Launch a web browser, log into http://tplinkrepeater.net, and then go to Settings > Status page. You can view the network connection status in this page. The normal status. ● The extender is failed to connect to the wireless network of your router. ●... - Page 17 The extender is failed to connect to the NTP server, or failed to obtain ● the DNS server address. Please check your host network. Launch a web browser, log into http://tplinkrepeater.net, and then go to Settings > Status page. Instructions Click the icon of your router, the extender and clients.
-
Page 18: Manage The Extended Network And Security Settings
If you want to extend another network, you can refer to the following steps to finish it quickly. Launch a web browser, log into http://tplinkrepeater.net, and then go to Settings > Wireless > Connect to Network page. Enable Connect to 2.4GHz Network. Then click Wireless Scanner to scan the wireless network you want to extend. - Page 19 Select the network you want to extend from the list. Once a network is selected, the SSID and security settings of that network will automatically be filled in. If the host network is encrypted, enter the password and click Save. When Host 2.4GHz Security is WEP, please select the index same as the host network.
-
Page 20: Secure The Extended Network
Secure the Extended Network On the Extended Network page, you can change and hide the wireless network Change your Admin Account name (SSID) of the extender, as well as enable or disable the wireless network of the extender. Launch a web browser, log into http://tplinkrepeater.net, and then go to Launch a web browser, log into http://tplinkrepeater.net, and then go to Settings >... -
Page 21: Block / Allow Network Access For Specific Clients
select them and click Block to add them at the same time. Block / Allow Network Access for Specific Clients For increased security, you can restrict access to the extended network by allowing only specific wireless devices in the pre-set white list, or preventing the devices in the pre-set black list from connecting to the extended network. - Page 22 Whitelist Mode Only the devices in the Whitelist are allowed to connect to the extender. Launch a web browser, log into http://tplinkrepeater.net, and then go to Settings > Advanced Settings > Access Control page. Click the button to enable the Access Control function. Select Whitelist as default access mode, then click Save.
-
Page 23: Change Wi-Fi Coverage
Modify or Remove a Device in the Blacklist/Whitelist Launch a web browser, log into http://tplinkrepeater.net, and then go to Settings > Advanced Settings > Access Control page. In the Devices in Blacklist / Whitelist part: Click the icon , and then you can modify the device name and mac ●... -
Page 24: Change The Extender's Ip Address
Settings > Network page. Select Use the following IP address, then enter the IP address and gateway manually. IP Address: Enter the IP address in dotted-decimal notation (192.168.0.254 by default). Change the Extender’s IP Subnet: Enter the subnet mask in dotted-decimal notation that ... -
Page 25: Dhcp Server
IP Address Pool: start address and end address must be DHCP Server on the same subnet with LAN IP. Your extender will assign addresses within this specified range to its clients. The extender can be configured as a DHCP (Dynamic Host Configuration Protocol) server to assign IP addresses automatically to the clients on the LAN. - Page 26 MAC Address: The MAC address of the DHCP client. Assigned IP Address: The IP address that is assigned to the client by the DHCP server. Lease Time: The time duration that the IP address is leased to the ...
-
Page 27: Manage The Extender
For power-saving purpose, you can power off the extender according to the pre- set time schedule by enabling this power schedule function. Launch a web browser, log into http://tplinkrepeater.net, and then go to Settings > Advanced Settings > Power Schedule page. Set the power-off schedule of your extender by following the below steps: This chapter covers the following topics: ... - Page 28 The extender obtain the current time from the Internet automatically. You can set the time zone of your location via the Time Settings page. Launch a web browser, log into http://tplinkrepeater.net, and then go to Settings > System Tools > Time Settings page. Select the Time Zone of your location, then click Save.
-
Page 29: Backup And Restore
Please DO NOT power off the extender during the upgrade process. On your computer, download the latest firmware file from our support page at http://tp-link.com. Launch a web browser, log into http://tplinkrepeater.net, and then go to Settings > System Tools > Firmware Upgrade page. -
Page 30: Troubleshooting
Launch a web browser and log into http://tplinkrepeater.net, then go to Settings > System Tools > Backup & Restore page. Click Factory Restore to reset your extender to its factory default settings. Please DO NOT power off the extender during the backup process. - Page 31 level. Launch a web browser and log into http://tplinkrepeater.net. Click Reboot on the top right corner to reboot the extender. If you have logged into the web management page http://tplinkrepeater.net, click Logout in the top right corner to log out safely. Click Save Log to save all the logs in a txt file to your computer.
-
Page 32: Glossary
Name Status Username admin Password admin IP Address 192.168.0.254 Subnet Mask 255.255.255.0 This chapter covers the following topics: Domain http://tplinkrepeater.net Factory Default Settings SSID TP-LINK_WA855RE Troubleshooting Wireless Security Disabled Specifications Glossary Access Control Disabled T1. How do I restore my extender to its factory default settings? There are two ways to reset the extender: Option One: With the extender powered on, use a pin to press the ●... - Page 33 ● An easy way is to compare the signal strength of your target wireless network (symbolized by its SSID), with TL-WA855RE in operation vs. out T4. I enabled a wireless MAC filter, wireless access control, or access of operation. Before comparison, you’d better make sure your computer control list (ACL) on my router.
- Page 34 Wireless router (or AP) and the terminal clients; so the transmission 11n:up to 300Mbps time will be double-increased, while the speed will be decreased. TP-LINK recommends that you connect to the extender when your home network Radio Data Rate 11g:54/48/36/24/18/12/9/6Mbps...
- Page 35 devices in a network to communicate with each other, all devices must be configured with the same SSID. This is typically the configuration parameter for a wireless PC card. It corresponds to the ESSID in the wireless Access 802.11b - The 802.11b standard specifies a wireless networking at 11 Mbps ●...
- Page 36 Any changes or modifications not expressly approved by the party responsible for compliance could void the user’s authority to operate the equipment. Note: The manufacturer is not responsible for any radio or tv interference caused by unauthorized modifications to this equipment. Such modifications This equipment has been tested and found to comply with the limits for a could void the user’s authority to operate the equipment.
- Page 37 This device complies with Industry Canada license-exempt RSSs. Complies with the Canadian ICES-003 Class B specifications. Operation is subject to the following two conditions: Cet appareil numérique de la classe B est conforme à la norme NMB-003 du Canada. This device may not cause interference, and CAN ICES-3 (B)/NMB-3(B) This device must accept any interference, including interference that may cause undesired operation of the device.
- Page 38 安全諮詢及注意事項 請使用原裝電源供應器或只能按照本產品注明的電源類型使用本產品。 ● 清潔本產品之前請先拔掉電源線。 請勿使用液體、 噴霧清潔劑或濕布進行 ● 清潔。 When product has power button, the power button is one of the way to ● shut off the product; when there is no power button, the only way to 注意防潮,請勿將水或其他液體潑灑到本產品上。 ● completely shut off power is to disconnect the product or the power 插槽與開口供通風使用,...
- Page 39 Symbol Explanation Class II equipment AC voltage RECYCLING This product bears the selective sorting symbol for Waste electrical and electronic equipment (WEEE). This means that this product must be handled pursuant to European directive 2012/19/EU in order to be recycled or dismantled to minimize its impact on the environment. User has the choice to give his product to a competent recycling organization or to the retailer when he buys a new electrical or electronic equipment.
- Page 40 TP-LINK TECHNOLOGIES CO., LTD The product carries the CE Mark: For the following equipment: Product Description: 300Mbps Wi-Fi Range Extender Model No.: TL-WA855RE Person responsible for marking this declaration: Trademark: TP-LINK We declare under our own responsibility that the above products satisfy all the...