Table of Contents
Advertisement
Quick Links
Advertisement
Table of Contents

Related Manuals for Rollei Prego da3


Summary of Contents for Rollei Prego da3
- Page 1 Gebrauchsanleitung Instruction Manual Rollei Prego da3...
- Page 2 This manual is designed to assist you in using this 3 Mega Pixels Digital Camera. Information in this document has been carefully checked for accuracy; however, no guarantee is given to the correctness of the contents. The information in this document is subject to change without notice Edition First Edition, January 2004...
- Page 3 Declaration of Conformity This device complies with part 15 of the FCC rules. Operation is subject to the following conditions: • This device may not cause harmful interference. • This device must accept any interference received, including interference that may cause undesired operation.
-
Page 4: Table Of Contents
Contents Unpack Your Camera....................... 1 Getting Acquainted with Your Camera .................. 2 Top & Front View....................... 2 Rear & Bottom View......................3 LCD Monitor Display ......................4 Mode Dial Selector......................5 LED Status ........................5 Nagivation Switch ......................6 Shutter Button ........................ - Page 5 Setting the Single-loop/Endless-loop Slideshow ............16 Playback on TV ........................17 Display Image Properties...................... 18 Rotating a Still Image ......................19 Deleting Images ........................20 Deleting Single in QuickView ..................20 Deleting Single Image in Playback ................. 20 Deleting All Images ......................
-
Page 6: Unpack Your Camera
Unpack Your Camera Package Contents Digital Camera Wrist Strap USB Cable AV Cable 2 AA Batteries Software CD containing -Camera Driver for Windows 98 -Ulead Photo Explorer -Ulead Video Studio -Adobe Acrobat Reader -Owner’s Manual (PDF) Quick Start Guide Optional Accessories •... -
Page 7: Getting Acquainted With Your Camera
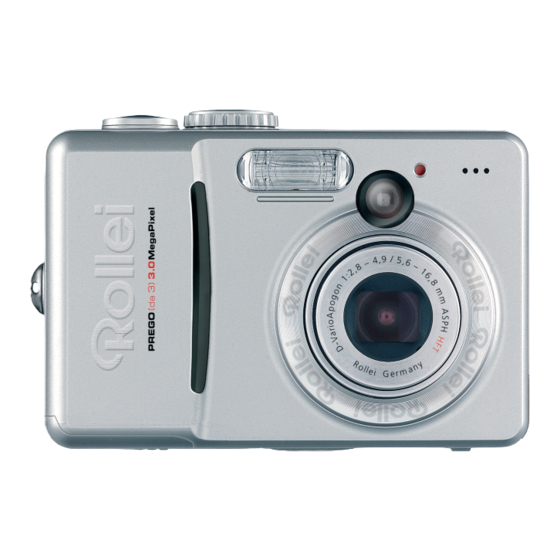
Getting Acquainted with Your Camera Congratulations on your purchase of this digital camera. Your digital camera has been designed with a 3 Mega Pixels CCD image sensor and 3X optical zoom lens which allow you to quickly and easily take high quality digital pictures. Top &... -
Page 8: Rear & Bottom View
Rear & Bottom View 1. Viewfinder 2. AF LED (green) 3. Flash LED (red) 4. Flash/Delete button ( 5. Zoom-out button ( 6. Zoom-in button ( 7. Playback button ( 8. Strap eyelet 9. Up-arrow/Self-timer button 10. Right-arrow button ( ) 11. -
Page 9: Lcd Monitor Display
LCD Monitor Display Scene Mode Auto-Exposure (AE) Metering Full Auto Average Portrait Landscape Center-weighted Close-up Spot Sport (P.26) Night Landscape Saturation Night Portrait ISO Speed High Museum Auto (no icon) Medium Backlight (P.9-11) (P.27) White Balance (P.27) Auto Sharpness Daylight High Cloudy (no icon) Medium... -
Page 10: Mode Dial Selector
Mode Dial Selector Icon Mode Function Camera power off. Full Auto Capture- Full Auto Mode Movie Capture- Movie mode. Portrait Capture -Portrait mode. Landscape Capture -Landscape mode. Close-up Capture –Macro mode. Scene More Scene modes available for Capture. SCENE (Refer to P. 9 to 11 for details.) LED Status LED Type LED Status... -
Page 11: Nagivation Switch
Navigation Switch Up-arrow ( ) for menu selection Self-timer On/Off switch Left-arrow ( ) for review playback Right-arrow ( ) for images in backward review playback direction. images in forward LCD Monitor On/Off direction. control switch ( Down-arrow ( ) for <Menu/OK>... -
Page 12: Getting The Camera Ready
Getting the Camera Ready Installing Memory SD/MMC Card and Battery Open the battery/memory card cover and slide the Batteries memory SD/MMC card (optional) and two new AA Ni-MH batteries or one CRV3 Lithium battery into – compartments. Close cover securely until it clicks shut. SD Card Battery level is shown in 3 stages, Full Battery, Low Battery, and Insufficient Battery. -
Page 13: Setting The Language And Date & Time
Setting the Language and Date & Time The Language selection will display the first time you power on the camera. After selecting the language, the Date & Time Menu will bring up automatically. Setting Language Left-arrow Button Press Up or Down arrow ( / ) button to select the Up-arrow Button desired language. -
Page 14: Capturing Still Images
Capturing Still Images Full Auto Mode < > Recommend to use Full Auto Mode for beginners. While in Full Auto mode, you just shoot on your subject. Portrait Mode < > Use this mode to take a distinctive portrait with a blurred background. Landscape Mode <... -
Page 15: Night Portrait Mode
recommended to use. Night Portrait Mode < > Use this mode to take portrait pictures at night, twilight or indoor with a blurred background. Note: This mode sets the camera with Red-eye reduction and at a slower shutter speed. Tripod is recommended to use. Museum Mode <... - Page 16 Press <Menu/OK> button to return. Press Up-arrow ( ) button to select “EXIT MENU” and press <Menu/OK> button to return to LiveView mode. The selected Scene mode icon is displayed at the center-top of the LCD Monitor.
-
Page 17: Recording Videos
Recording Videos Video mode allows you to shoot movie scenario. Video mode Switch the Mode Dial to Video Mode < > The Video icon < > is displayed on the LCD Monitor. Note : Flash, digital Zoom-in and Zoom-out Shutter Button cease to function during video mode. -
Page 18: Adding Audio To Images
Adding Audio to Images You may add voice to the captured still images. Turn On Camera. Press Playback ( ) button. The last captured will be displayed. Press Left-arrow ( ) button or Right-arrow ( ) button to select the image you want to add audio. -
Page 19: Setting Self-Timer
Setting Self-Timer This camera provides 10 seconds for the self-timer. n Capture mode, press Up-arow/Self-timer button ( ). The Self-timer screen will display on the LCD monitor for 3 seconds. The Self-timer icon < > will display on the LCD monitor. Self-Timer Icon Press the Shutter button. -
Page 20: Playback Still Images
Playback Still Images Playback a Still Image Turn on camera and press Playback ( ) button. Zoom-out Button Press Left-arrow ( )or Right-arrow ( ) button to Playback Button navigate images. FLASH FLASH Press Playback ( ) button again to return Capture mode. -
Page 21: Playback Video Images
Playback Video Images When you browse video images, the video will playback automatically. Follow Step 1-2 of “Playback a Still Image”. Press Left-arrow ( ) or Right-arrow ( ) to select a video image. The video will start to playback. Press Playback ( ) button to return Capture mode. -
Page 22: Playback On Tv
Playback on TV Turn On camera. Press <Menu/OK> to enter “SETUP MENU”. Press the Up-arrow (▲) or Down-arrow (▼) button to select “VIDEO OUT”. Press <Menu/OK>. Set your video system format (NTSC or PAL). Connect the provided AV cable to the camera and the TV Video IN terminal. Turn the TV on and set the TV input switch to Video In. -
Page 23: Display Image Properties
Display Image Properties This camera provides image property information, which includes filename, image quality, aperture value, shutter speed and ISO speed. Turn On camera. Press Playback ( ) button. Press <Menu/OK> button to enter “PICTURE INFO” . Press <Menu/OK> button to display. Press Left-arrow ( ) or Right-arrow ( ) to navigate images. -
Page 24: Rotating A Still Image
Rotating a Still Image Turn On the camera. Press Playback ( ) button. Press <Menu/OK>button. Press the Up-arrow (▲) or Down-arrow (▼) button to select “ROTATE”. Press Right-arrow ( ), Left-arrow ( ), Down-arrow (▼) or Up-arrow (▲) button to rotate the image in 90∘, 270∘, 180∘and 360∘. -
Page 25: Deleting Images
Deleting Images Deleting Single Image in QuickView After a picture is taken, the image will have a Menu/OK Button QuickView. While the image is on display, press the Playback Button Delete ( button and a confirmation screen will pop Delete Button out. -
Page 26: Format Memory Card Or Internal Memory
Format Memory Card or Internal Memory Follow Step 1-2 of “Deleting All Images”. Select “Format Internal” or “Format Memory” (if a memory card is installed). Press <Menu/OK> button. Press Down-arrow ( ) or Up-arrow ( ) to select “Yes” and press <Menu/OK> button to format internal memory or SC/MMC card. -
Page 27: Settings Capture Mode
Settings Capture Mode Switching LCD Off between Shots In Capture mode, press the Left-arrow/LCD on/ff button ( / ) to switch OFF the LCD monitor. To switch On the LCD, press the Left-arrow/LCD on/off button ( / ) again. Setting LCD Always Off Press <Menu/OK>... -
Page 28: Setting Flash
Setting Flash Mode The camera offers four Flash modes - Auto (no icon), Flash Off < >, Flash On < > and Red-eye Reduction < >. To select the Flash mode, repeatedly press the Flash button under Capture mode. The following diagram shows the Flash mode cycle: Flash Always Flash Always... -
Page 29: Setting Image Resolution
Setting Image Resolution This camera provides Best (2048 x 1536 pixels), Better (1024 x 768 pixels) and Good (640 x 480 pixels ) image quality for selection. Press <Menu/OK> button. Press Down-arrow ( ) or Up-arrow ( ) to select “IMAGE QUALITY”. -
Page 30: Setting White Balance
Setting White Balance This camera provides Auto, Daylight, Shade, Tungsten and Fluorescent for White Balance settings. Press <Menu/OK> button. Press Up-arrow ( ) or Down-arrow ( ) button to select “WHITE BALANCE”. Press <Menu/OK> button. Press Up-arrow ( ) or Down-arrow ( ) button to select the “EXIT MEMU”. Press <Menu/OK>... -
Page 31: Setting Auto-Exposure (Ae) Metering
Setting Auto-Exposure (AE) Metering This camera provides three modes of AE metering- Average, Center-weighted and Sport metering. Press <Menu/OK> button. Press Up-arrow ( ) or Down-arrow ( ) button to select the “AE METERING” Press <Menu/OK> button. Press Up-arrow ( ) or Down-arrow ( ) button to select the Metering Mode. Press <Menu/OK>... -
Page 32: Setting Sharpness
Setting Sharpness This camera provides 3 levels of image sharpness- High, Medium and Low. Press <Menu/OK> button. Press Up-arrow ( ) or Down-arrow ( ) button to select “SHARPNESS”. Press <Menu/OK> button. Select Sharpness level. Press <Menu/OK> button to apply the setting. Setting Saturation This camera provides 3 levels of image saturation- High, Medium and Low. -
Page 33: Setting Dpof Print
Setting DPOF Print The DPOF (Digital Printer Order Format) settings allow you to select photo stores on a SD card. It is very convenient when you make a direct-print from a printer that supports DPOF. Set DPOF for Printing a Single Image Press Playback ( ) button. -
Page 34: Camera Setup
Camera Setup Factory default settings: Function Factory Default Setting Digital Zoom Enable Camera Sound LCD Monitor Flash Mode Auto Drive Mode Single Pre-set Scene Sports Image Quality Best EV Compensation White Balance Auto ISO Speed Auto AE Metering Center Weighted Saturation Medium Sharpness... -
Page 35: Setting Digital Zoom
Setting Digital Zoom Press <Menu/OK> button. Press to select “SETUP MENU”. Press <Menu/OK> button. Select “DIGITAL ZOOM” Press <Menu/OK> button. Press “Off” to disable Digital Zoom and press <Menu/OK> button to apply the settings. To enable this function, repeat procedure and select “On.”... -
Page 36: Setting Camera Sound Volume
Setting Camera Sound Volume The volume level of this camera can be set to High, Low and Off. Press <Menu/OK> button. Select “SETUP MENU”. Press <Menu/OK> button Select “CAMERA SOUND”. Press <Menu/OK> button. Select the desired sound level and press <Menu/OK> button to setup. -
Page 37: Move Images From Internal Memory To Card
Move Images from Internal Memory to Card The camera has a built-in 16MB internal memory. When a memory card is inserted into the camera, you may move the images from the internal memory into the card. Note : This feature is only function when the memory card is inserted. Press <Menu/OK>... -
Page 38: Software Installation
Software Installation Installation Software/Hardware Driver Insert the software CD into the CD-ROM drive. The CD should auto run and the installer menu will appear (see below). If the CD does not auto run; go to: Start → Run, and type in "D:\setup.exe" where D:\ is the CD-ROM drive Two installation options: Automatic Installation and Custom Installation. -
Page 39: Custom Installation
Custom Installation The custom installation allows individual selection of the software provided on the CD. From the previous Installer Menu select “Custom Installation” and click “Next”. The following screen will appear: Check the desired application(s) and click “Next” to continue the software installation. Follow the on-screen instructions to complete installing each software. -
Page 40: How To Dowload Pictures Via Ulead Photo Explorer
To download the files to your computer, highlight the files that you want to save, and choose one of the following way to move your files a. Copy & Paste Right-click on the highlighted files with and select “Copy” from the resulting menu. Go to the target location on your computer and right-click on it again, and select “Paste”... -
Page 41: Troubleshooting
Troubleshooting Condition Corrective Action Camera cannot power on The batteries may be exhausted Replace new batteries. The batteries are installed incorrectly. Reinstall the batteries with correct polarities. Camera turns off automatically Press any button to restore power to the camera. LCD turns off automatically Press any button to turn on the LCD. -
Page 42: Specification
Specifications DESCRIPTION SPECIFICATION. Image sensor 1/2.7” CCD with 3 million square pixels Still image output resolution 2048x1536(Best), 1024x768(Better), 640x480(Good) Still image file formats JPEG (Exif 2.2) Movie mode resolution 320X240 @ 18fps with audio Movie file format Image ratio Internal memory 16MB Memory card slot SD/MMC...