D-Link DSR-150 User Manual
Wireless n services router
Hide thumbs
Also See for DSR-150:
- User manual ,
- Reference manual (129 pages) ,
- Quick installation manual (57 pages)

Related Manuals for D-Link DSR-150


Summary of Contents for D-Link DSR-150
-
Page 1: User Manual
Wireless N Services Router User Manual DSR-150/150N/250/250N/500/500N/1000/1000N Version 2.02 | January 28, 2015... -
Page 2: Preface
ANY OTHER COMMERCIAL DAMAGES OR LOSSES) RESULTING FROM THE APPLICATION OR IMPROPER USE OF THE D-LINK PRODUCT OR FAILURE OF THE PRODUCT, EVEN IF D-LINK IS INFORMED OF THE POSSIBILITY OF SUCH DAMAGES. FURTHERMORE, DLINK WILL NOT BE LIABLE FOR THIRD-PARTY CLAIMS AGAINST CUSTOMER FOR LOSSES OR DAMAGES. -
Page 3: Safety Instructions
The voltage and current rating of the cable should be greater than the ratings marked on the product. • To help prevent electric shock, plug the system and peripheral power cables into properly grounded electrical outlets. D-Link DSR-Series User Manual... - Page 4 • If the system has multiple sources of power, disconnect power from the system by unplugging all power cables from the power supplies. • Move products with care; ensure that all casters and/or stabilizers are firmly connected to the system. Avoid sudden stops and uneven surfaces. D-Link DSR-Series User Manual...
-
Page 5: Protecting Against Electrostatic Discharge
2. When transporting a sensitive component, first place it in an antistatic container or package. 3. Handle all sensitive components in a static-safe area. If possible, use antistatic floor pads, workbench pads and an antistatic grounding strap. D-Link DSR-Series User Manual... -
Page 6: Power Usage
Switched Off: 0.1301 watts DSR-250 Network Standby: 7.8588 watts Switched Off: 0.1290 watts DSR-150N Network Standby: 8.2317 watts Switched Off: 0.1283 watts DSR-150 Network Standby: 6.9133 watts Switched Off: 0.12661 watts DSR-1000N Network Standby: 10.969 watts Switched Off: 0.0 watts DSR-1000 Network Standby: 10.912 watts... -
Page 7: Table Of Contents
DHCP Relay ..................................20 DHCP Reserved IPs ...............................21 IGMP Setup ....................................22 UPnP Setup ....................................23 Jumbo Frames ..................................24 VLAN ......................................25 VLAN Settings .................................25 Captive Portal ................................27 Port/Wireless VLAN ...............................28 Connect to the Internet ..........................30 Dynamic IP ..................................30 D-Link DSR-Series User Manual... - Page 8 Routing ......................................57 Static Routes ...................................57 RIP .......................................59 OSPF ....................................60 Protocol Binding ................................62 IPv6 ......................................63 IP Mode .....................................63 WAN Settings ..................................64 Dynamic IP ................................64 Static IP..................................65 PPPoE ..................................66 Static Routing .................................67 OSPFv3 ....................................69 6 to 4 Tunneling ................................71 D-Link DSR-Series User Manual...
- Page 9 Client....................................103 PPTP Active Users List ............................104 L2TP VPN ....................................105 Server ....................................105 Client....................................106 L2TP Active Users List ............................107 SSL VPN ....................................108 Server Policies ................................108 Portal Layouts ................................110 Resources ..................................112 Add New Resource...............................112 Port Forwarding ..............................114 Client....................................115 D-Link DSR-Series User Manual viii...
- Page 10 Dynamic Filtering ................................145 Firewall .....................................146 Firewall Rules ................................146 Schedules ..................................148 Custom Services ................................149 ALGs ....................................150 SMTP ALGs ................................151 Approved Mail IDs ..............................152 Blocked Mail IDs ..............................153 Mail Filtering ................................154 VPN Passthrough .................................155 Dynamic Port Forwarding ............................156 D-Link DSR-Series User Manual...
- Page 11 Check Update ................................183 Using PC ..................................184 Using USB ..................................185 Configuration Files..............................186 Backup ..................................186 Restore ..................................187 Configuration Settings ............................188 Soft Reboot ...................................189 Reset to Factory Default Settings ..........................190 Log Settings ...................................191 Defining What to Log ..............................191 Routing Logs .................................193 D-Link DSR-Series User Manual...
- Page 12 Testing the LAN path from your PC to a remote device ................225 Restoring factory-default configuration settings .....................226 Appendix A - Glossary ..........................227 Appendix B - Factory Default Settings ....................229 Appendix C - Standard Services for Port Forwarding & Firewall Configuration ........ 230 D-Link DSR-Series User Manual...
- Page 13 Appendix D - Log Output Reference ...................... 231 Appendix E - RJ-45 Pin-outs ........................294 Appendix F - New Wi Fi Frequency table ( New appendix section ) ............ 295 Appendix G - Product Statement ......................298 D-Link DSR-Series User Manual...
-
Page 14: Introduction
DMZ port allowing you to isolate servers from your LAN. Note: The DSR-150/150N/250/250N products have a single WAN interface, and thus do not support Auto Failover or Load Balancing scenarios. • Superior Wireless Performance Designed to deliver superior wireless performance, the DSR-500N and DSR-1000N include 802.11 a/b/g/n support, allowing for operation on either the 2.4 GHz or 5 GHz radio bands. - Page 15 Section 1 - Introduction • Efficient D-Link Green Technology As a concerned member of the global community, D-Link is devoted to providing eco-friendly products. D-Link Green Wi-Fi and D-Link Green Ethernet save power and prevent waste. The D-Link Green WLAN scheduler reduces wireless power automatically during off-peak hours.
-
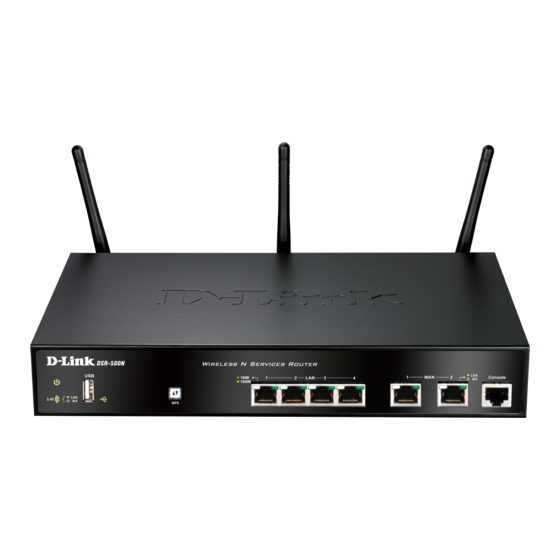
Page 16: Installation
3. Connect an RJ45-to-DB9 cable from the console port for CLI (Command Line Interface) management access (optional). Note: Refer to the Quick Installation Guide included with your router for more information on network connectivity, port, and LED information. D-Link DSR-Series User Manual... -
Page 17: Basic Configuration
• “#5 Internet Connection Setup” on page 9 • “#6 Wireless Network Setup” on page 12 • “#7 Create Users” on page 13 • “#8 Security/VPN Wizard” on page 14 • “#9 Dynamic DNS Wizard” on page 16 D-Link DSR-Series User Manual... -
Page 18: Log In To The Web Ui
4. Enter your username (default = admin) and your password (default = admin), then click Login. 5. The web management interface opens with the Status > Dashboard page. This page displays general, LAN, and WLAN status information. You can return to this page at any time by clicking Status > Dashboard. D-Link DSR-Series User Manual... -
Page 19: Change Lan Ip Address
Be sure the LAN host (the machine used to manage the router) has obtained an IP address from newly assigned pool (or has a static IP address in the router’s LAN subnet) before accessing the router via changed IP address. D-Link DSR-Series User Manual... -
Page 20: Configure Dhcp Server
Lease Time Enter the time, in hours, for which IP addresses are leased to clients. Configure DNS/WINS Toggle to On and enter DNS and/or WINS server IP address(es). 5. Click Save at the bottom of the page. D-Link DSR-Series User Manual... -
Page 21: Set Time And Date
6. If you selected ON, select either Default or Custom from the drop-down menu. If you selected Custom, enter a primary and secondary NTP server address. 7. Enter the time to synchronize with the NTP server and click Save. 8. A summary page will appear. Verify your settings and then click Finish. D-Link DSR-Series User Manual... -
Page 22: Internet Connection Setup
3. Click Run in the Internet Connection Wizard box. 4. Toggle On next to either DHCP or Static IP Address and click Next. If your connection type is not listed, refer to “Connect to the Internet” on page 30. D-Link DSR-Series User Manual... - Page 23 Get Dynamically from ISP - Select to use the DNS servers assigned by your ISP. DNS Server Source • Use these DNS Servers - Select to manually enter a primary and secondary DNS server address(es). Skip to Step 5 on the bottom of the next page. D-Link DSR-Series User Manual...
- Page 24 Secondary DNS Server Enter the secondary DNS server IP address assigned by your ISP. 5. Click Save. The router will reboot and attempt to connect to your ISP. Please allow one to two minutes to connect. D-Link DSR-Series User Manual...
-
Page 25: Wireless Network Setup
7. Enter a password for the wireless network. Wireless devices connecting to this network must enter this password to connect. The password is case-sensitive. 8. Click Save. 9. A window will appear with a summary of your settings. Click Finish. D-Link DSR-Series User Manual... -
Page 26: Create Users
6. Select the group type from the drop-down menu. For more information on groups, refer to “Groups” on page 125. 7. Enter a password for the user. 8. Enter the password again for confirmation. 9. Click Save. D-Link DSR-Series User Manual... -
Page 27: Security/Vpn Wizard
3. Click Run in the Security Wizard box. 4. The wizard screen will appear. 5. Select the default outbound policy from the drop-down menu. 6. Toggle which type(s) of VPN you want allowed to pass through the router to ON and click Next. D-Link DSR-Series User Manual... - Page 28 17. Enter the local network IP address and subnet mask. 18. Click Save. Note: The IP address range used on the remote LAN must be different from the IP address range used on the local LAN. D-Link DSR-Series User Manual...
-
Page 29: Dynamic Dns Wizard
Dynamic DNS (DDNS) is an Internet service that allows routers with varying public IP addresses to be located using Internet domain names. To use DDNS, you must setup an account with a DDNS provider such as DynDNS. org, D-Link DDNS, or Oray.net. Refer to “Dynamic DNS Settings” on page 53 for more information. Follow the steps below: 1. -
Page 30: Lan Configuration
You can also enable DNS proxy for the LAN. When this is enabled the router then as a proxy for all DNS requests and communicates with the ISP’s DNS servers. When disabled all DHCP clients receive the DNS IP addresses of the ISP. D-Link DSR-Series User Manual... -
Page 31: Lan Settings
• DHCP Server (default) - The router will act as the DHCP server on your network. DHCP Mode • DHCP Relay - DHCP clients on your network will receive IP address leases from a DHCP server on a different subnet. D-Link DSR-Series User Manual... -
Page 32: Dhcp Server
Configure DNS/WINS LAN IP address will be assigned the DNS server to your clients and the router will get the DNS information from your ISP. Save Click Save at the bottom to save and activate your settings. D-Link DSR-Series User Manual... -
Page 33: Dhcp Relay
DHCP Mode Select DHCP Relay from the drop-down menu. Domain Name Enter the domain name of your network. Gateway Enter the relay gateway IP address. Click Save at the bottom to save and activate your settings. Save D-Link DSR-Series User Manual... -
Page 34: Dhcp Reserved Ips
Enter the MAC address of this device (xx:xx:xx:xx:xx:xx format). This is not case-sensitive. Associate with IP/MAC Toggle ON to associate this device’s information with IP/MAC binding. Binding Save Click Save to save and activate your settings. D-Link DSR-Series User Manual... -
Page 35: Igmp Setup
LAN hosts do not need to receive this multicast traffic. To enable IGMP Proxy: 1. Click Network > LAN > IGMP Setup. 2. Toggle IGMP Proxy to On. 3. Click Save. D-Link DSR-Series User Manual... -
Page 36: Upnp Setup
6. Click Save. 7. Your entry will be displayed in the UPnP Port Map List. To edit or delete, right-click an entry and select the action from the menu. Repeat steps 2-6 to add multiple entries. D-Link DSR-Series User Manual... -
Page 37: Jumbo Frames
Jumbo frames are Ethernet frames with more than 1500 bytes of payload. When this option is enabled, the LAN devices can exchange information at Jumbo frames rate. To enable jumbo frames: 1. Click Network > LAN > Jumbo Frames. 2. Toggle Activate Jumbo Frames to On. 3. Click Save. D-Link DSR-Series User Manual... -
Page 38: Vlan
To create a new VLAN: 1. Click Network > LAN > VLAN Settings. 2. Click Add New VLAN at the bottom. 3. Enter the following required information from the table on the next page. D-Link DSR-Series User Manual... - Page 39 Toggle ON to enable the router to act as a proxy for all DNS requests and communicate with the Enable DNS Proxy ISP’s DNS servers. Save Click Save to save and activate your settings. D-Link DSR-Series User Manual...
-
Page 40: Captive Portal
Section 4 - LAN Configuration Captive Portal Note: The DSR-150/150N/250/250N routers do not have support for the Captive Portal feature. Captive Portal is available for LAN users only and not for DMZ hosts. Captive Portals can be enabled on a per-VLAN basis. Hosts of a particular VLAN can be directed to authenticate via the Captive Portal, which may be a customized portal with unique instructions and branding as compared to another VLAN. -
Page 41: Port/Wireless Vlan
• Configured VLAN memberships will be displayed on the VLAN Membership Configuration for the port. By selecting one more VLAN membership options for a General or Trunk port, traffic can be routed between the selected VLAN membership IDs. D-Link DSR-Series User Manual... - Page 42 Data passing through the phone from a connected device will be untagged. Note: The DSR-150/150N do not support General mode due to hardware limitations. In Trunk mode the port is a member of a user selectable set of VLANs.
-
Page 43: Connect To The Internet
Select to use the default MTU value (1500) or select Custom to enter your own value. Custom MTU Enter a MTU value to optimize performance with your ISP. Port Speed Select a value from the drop-down menu. The default value is Auto-Sense. Save Click Save to save and activate your settings. D-Link DSR-Series User Manual... -
Page 44: Static Ip
Select to use the default MTU value (1500) or select Custom to enter your own value. Custom MTU Enter a MTU value to optimize performance with your ISP. Port Speed Select a value from the drop-down menu. The default value is Auto-Sense. Click Save to save and activate your settings. Save D-Link DSR-Series User Manual... -
Page 45: Pppoe
MTU Size Custom MTU Enter a MTU value to optimize performance with your ISP. Port Speed Select a value from the drop-down menu. The default value is Auto-Sense. Save Click Save to save and activate your settings. D-Link DSR-Series User Manual... -
Page 46: Pptp
Select to use the default MTU value (1500) or select Custom to enter your own value. Custom MTU Enter a MTU value to optimize performance with your ISP. Port Speed Select a value from the drop-down menu. The default value is Auto-Sense. Click Save to save and activate your settings. Save D-Link DSR-Series User Manual... -
Page 47: L2Tp
Select to use the default MTU value (1500) or select Custom to enter your own value. Custom MTU Enter a MTU value to optimize performance with your ISP. Select a value from the drop-down menu. The default value is Auto-Sense. Port Speed Save Click Save to save and activate your settings. D-Link DSR-Series User Manual... -
Page 48: Japanese Pppoe
If you selected Use this MAC, enter the MAC address you want to associate with your ISP. Port Speed Select a value from the drop-down menu. The default value is Auto-Sense. Save Click Save to save and activate your settings. D-Link DSR-Series User Manual... -
Page 49: Russian Pppoe
Select either Get Dynamically from ISP or Use These DNS Servers to manually enter DNS servers. Port Speed Select a value from the drop-down menu. The default value is Auto-Sense. Save Click Save to save and activate your settings. D-Link DSR-Series User Manual... -
Page 50: Russian Pptp
Select to use the default MTU value (1500) or select Custom to enter your own value. Custom MTU Enter a MTU value to optimize performance with your ISP. Port Speed Select a value from the drop-down menu. The default value is Auto-Sense. Save Click Save to save and activate your settings. D-Link DSR-Series User Manual... -
Page 51: Russian L2Tp
MTU Size Custom MTU Enter a MTU value to optimize performance with your ISP. Port Speed Select a value from the drop-down menu. The default value is Auto-Sense. Save Click Save to save and activate your settings. D-Link DSR-Series User Manual... -
Page 52: Wan2 Settings
Path: Network > Internet > WAN2 Settings Select WAN and select the Internet connection type. Please refer to the previous pages (41-49) for more information. If you want to set WAN2 port to DMZ, skip to the next page. D-Link DSR-Series User Manual... -
Page 53: Dmz
Note: For DSR-150N and DSR-250N, enabling DMZ will result in port 8 of the LAN switch being used for a dedicated DMZ port. The other 7 LAN ports remain unchanged. 1. Click Network > Internet > WAN2 / DMZ Settings. 2. Select DMZ and click Save. D-Link DSR-Series User Manual... -
Page 54: Wan3 (3G Internet)
If you selected “Use These DNS Servers”, enter the secondary DNS server IP address. Select to use the default MTU value (1500) or select Custom to enter your own value. MTU Size Custom MTU Enter a MTU value to optimize performance with your ISP. D-Link DSR-Series User Manual... -
Page 55: Wan Mode
Single WAN Port If you do not want to use Auto Failover or Load Balancing, select Single WAN Port from the WAN Mode drop-down menu and select the WAN port you want to set. Click Save. D-Link DSR-Series User Manual... -
Page 56: Auto-Rollover Using Wan Ip
Failover After Enter the number of failures before the router will enable the failover process. Note: The DSR-1000, DSR-1000N, DSR-500, DSR-500N, DSR-250, DSR-250N, DSR-150, and DSR-150N routers support 3G USB Modem as a failover link when the internet access is lost. -
Page 57: Load Balancing
Load balancing is particularly useful when the connection speed of one WAN port greatly differs from another. In this case you can define protocol bindings to route low-latency services (such as VOIP) over the higher-speed link and let low-volume background traffic (such as SMTP) go over the lower speed link. D-Link DSR-Series User Manual... -
Page 58: Round Robin
• Retry Interval is: The number tells the router how often it should run the above configured failure detection method. • Failover after: This sets the number of retries after which failover is initiated. Save Click to save and activate your settings. D-Link DSR-Series User Manual... -
Page 59: Spillover
Enter the percentage of bandwidth after which the router switches to the secondary WAN. Max Bandwidth This sets the maximum bandwidth tolerable by the primary WAN for outbound traffic. Save Click to save and activate your settings. D-Link DSR-Series User Manual... -
Page 60: Routing Mode
NAT with WAN1 Toggle to ON to use NAT with WAN1 or OFF for classical. NAT with WAN2 Toggle to ON to use NAT with WAN2 or OFF for classical. Save Click to save and activate your settings. D-Link DSR-Series User Manual... -
Page 61: Transparent
“NAT loopback” since LAN generated traffic is redirected through the firewall to reach LAN servers by their external name. 1. Click Network > Internet > Routing. 2. Complete the fields from the table below and click Save. Field Description Routing Settings Select Transparent. Save Click to save and activate your settings. D-Link DSR-Series User Manual... -
Page 62: Bridge
DMZ Interface IP Address Enter the DMZ interface IP address. Subnet Mask Enter the subnet mask. NAT with WAN1 Toggle ON to turn NAT on WAN1 or OFF for classical. Save Click to save and activate your settings. D-Link DSR-Series User Manual... -
Page 63: Ip Aliasing
Select either WAN1 or WAN2. IP Address Enter an alias IP address for the WAN interface you selected. Subnet Mask Enter a subnet mask for the WAN interface you selected. Save Click to save and activate your settings. D-Link DSR-Series User Manual... -
Page 64: Dmz Settings
If DNS Proxy is set to ON, enter the secondary DNS server IP address. WINS Server If DNS Proxy is set to ON, enter the WINS server IP address. Save Click to save and activate your settings. D-Link DSR-Series User Manual... -
Page 65: Dmz Lan Dhcp Reserved Ips
Enter the IP address you want to assign to this device. Note that this IP address must be in the IP Address same range as the starting/ending IP address under DHCP Settings. MAC Address Enter the MAC address of this device (xx:xx:xx:xx:xx:xx format). Save Click Save to save your reservation. D-Link DSR-Series User Manual... -
Page 66: Dynamic Dns Settings
Internet domain names. To use DDNS, you must setup an account with a DDNS provider such as DynDNS. org, D-Link DDNS, or Oray.net. Each configured WAN can have a different DDNS service if required. Once configured, the router will update DDNS services changes in the WAN IP address so that features that are dependent on accessing the router’s WAN... -
Page 67: Traffic Management
To edit, delete, or create a new bandwidth profile: 1. Click Network > Internet > Traffic Management > Bandwidth Profiles. 2. Toggle Enable Bandwidth Profiles to ON and click Save. 3. Click Add New Bandwidth Profile. D-Link DSR-Series User Manual... - Page 68 If you selected Priority, select Low, Medium, or High. Priority Minimum Bandwidth Rate If you selected Rate, enter the minimum bandwidth rate. Maximum Bandwidth Rate If you selected Rate, enter the maximum bandwidth rate. Save Click Save to save your reservation. D-Link DSR-Series User Manual...
-
Page 69: Traffic Shaping
If you selected IP, enter the IP address of the source associated with this profile. Subnet Mask If you selected IP, enter a subnet mask. MAC Address If you selected MAC, enter the MAC address of the source associated with this profile. Save Click to save and activate your settings. D-Link DSR-Series User Manual... -
Page 70: Routing
To create a new static route: 1. Click Network > Routing > Static Routes. 2. Click Add New Static Route. 3. Complete the fields in the table on the next page and click Save. D-Link DSR-Series User Manual... - Page 71 IP address of the gateway through which the destination host or network can be reached. Determines the priority of the route. If multiple routes to the same destination exist, the route with Metric the lowest metric is chosen. Save Click Save to save your route. D-Link DSR-Series User Manual...
-
Page 72: Rip
LAN and allow for dynamic adjustment of routing tables in order to adapt to modifications in the LAN without interrupting traffic flow. Note: The DSR-150/150N/250/250N routers do not support RIP. To configure RIP: 1. Click Network > Routing > RIP. -
Page 73: Ospf
OSPF version 2 is a routing protocol which described in RFC2328 - OSPF Version 2. OSPF is IGP (Interior Gateway Protocols). OSPF is widely used in large networks such as ISP backbone and enterprise networks. Note: The DSR-150/150N/250/250N routers do not support OSPFv2. To configure OSPF: 1. - Page 74 • MD5: The interface authenticates OSPF packets with MD5 authentication. Md5 Key ID If MD5 authentication is selected, enter the MD5 key ID. Md5 Authentication Key If MD5 authentication is selected, enter the MD5 authentication key. Save Click Save to save your settings. D-Link DSR-Series User Manual...
-
Page 75: Protocol Binding
Range is selected, enter the IP address or IP range. Select the destination network: Any, Single Address, or Address Range. If Single Address or Address Destination Network Range is selected, enter the IP address or IP range. Save Click Save to save your settings. D-Link DSR-Series User Manual... -
Page 76: Ipv6
(LAN), you must set the router to be in IPv4 / IPv6 mode. This mode will allow IPv4 nodes to communicate with IPv6 devices through this router. To enable IPv6 on the router: 1. Click Network > IPv6 > IP Mode. 2. Select IPv4 & IPv6. 3. Click Save. D-Link DSR-Series User Manual... -
Page 77: Wan Settings
DHCPv6 servers available on the ISP, the obtained prefix is updated to the advertised prefixes on Prefix Delegation the LAN side. This option can be selected only in Stateless Address Auto Configuration mode of DHCPv6 Client. Save Click Save to save your settings. D-Link DSR-Series User Manual... -
Page 78: Static Ip
Default IPv6 Gateway Enter the IPv6 gateway address supplied by your ISP. Primary DNS Server Enter the primary DNS server IP address. Secondary DNS Server Enter the secondary DNS server IP address. Save Click Save to save and activate your settings. D-Link DSR-Series User Manual... -
Page 79: Pppoe
DHCPv6 Options dhcpv6/Stateless dhcpv6 with prefix delegation. Primary DNS Server Enter the primary DNS server IP address. Secondary DNS Server Enter the secondary DNS server IP address. Save Click Save to save and activate your settings. D-Link DSR-Series User Manual... -
Page 80: Static Routing
To create a new static route: 1. Click Network > IPv6 > Static Routing. 2. Click Add New IPv6 Static Route. 3. Complete the fields in the table on the next page and click Save. D-Link DSR-Series User Manual... - Page 81 IPv6 address of the gateway through which the destination host or network can be reached. Determines the priority of the route. If multiple routes to the same destination exist, the route with Metric the lowest metric is chosen. Click Save to save your route. Save D-Link DSR-Series User Manual...
-
Page 82: Ospfv3
Open Shortest Path First version 3 (OSPFv3) supports IPv6. To enable an OSPFv3 process on a router, you need to enable the OSPFv3 process globally, assign the OSPFv3 process a router ID, and enable the OSPFv3 process on related interfaces. Note: The DSR-150/150N/250/250N routers do not support OSPFv3. To configure OSPF: 1. Click Network > IPv6 > OSPFv3. - Page 83 If any of these intervals are different, these routers will not become neighbors on a particular segment. Cost Enter the cost of sending a packet on an OSPFv3 interface. Save Click Save to save your settings. D-Link DSR-Series User Manual...
-
Page 84: To 4 Tunneling
IPv6 LAN to be sent over an IPv4 Option to reach a remote IPv6 network. To enable 6 to 4 tunneling: 1. Click Network > IPv6 > 6 to 4 Tunneling. 2. Toggle Activate Auto Tunneling to ON. 3. Click Save. D-Link DSR-Series User Manual... -
Page 85: Isatap
This is the endpoint address for the tunnel that starts with this router. The endpoint can be the LAN End Point Address interface (assuming the LAN is an IPv4 network), or a specific LAN IPv4 address. IPv4 Address The end point address if not the entire LAN. Save Click Save to save your settings. D-Link DSR-Series User Manual... -
Page 86: Lan Settings
To configure IPv6 LAN settings on the router: 1. Click Network > IPv6 > LAN Settings > IPv6 LAN Settings. 2. Complete the fields in the table on the next page and click Save. D-Link DSR-Series User Manual... - Page 87 Toggle to ON to enable prefix delegation in DHCPv6 server. This option can be selected only in Stateless Prefix Delegation Address Auto Configuration mode of DHCPv6 server. Save Click Save at the bottom to save and activate your settings. D-Link DSR-Series User Manual...
-
Page 88: Ipv6 Address Pools
Start IPv6 Address Enter the starting IPv6 LAN address. End IPv6 Address Enter the ending IPv6 LAN address. Prefix Length Enter the prefix length. Save Click Save at the bottom to save and activate your settings. D-Link DSR-Series User Manual... -
Page 89: Ipv6 Prefix Length
3. Complete the fields in the table below and click Save. Field Description Profile Enter a name for this profile. Prefix Length Enter the prefix length. Click Save at the bottom to save and activate your settings. Save D-Link DSR-Series User Manual... -
Page 90: Router Advertisement
Router Lifetime The default is 3600 seconds. Upon expiration of this value, a new RADVD exchange must take place between the host and this router. Save Click Save at the bottom to save and activate your settings. D-Link DSR-Series User Manual... -
Page 91: Advertisement Prefixes
This defines the duration (in seconds) that the requesting node is allowed to use the advertised prefix. It Prefix Lifetime is analogous to DHCP lease time in an IPv4 network. Save Click Save at the bottom to save and activate your settings. D-Link DSR-Series User Manual... -
Page 92: Ipv6 Tunnels Status
Section 5 - Connect to the Internet IPv6 Tunnels Status Path: Network > IPv6 > IPv6 Tunnels Status This page displays the current status of IPv6 Tunnels. D-Link DSR-Series User Manual... -
Page 93: Wireless Settings
To add, edit, or delete an access point entry: 1. Click Wireless > General > Access Points. 2. Right-click a current entry and select Edit or Delete. To add a new entry, click Add New Access Point. D-Link DSR-Series User Manual... - Page 94 Toggle to ON if you want to specify a time to have this access point turned on. Start/Stop Time Enter a start and stop time. Toggle to ON to prevent associated wireless clients from communicating with each other. WLAN Partition Save Click Save at the bottom to save and activate your settings. D-Link DSR-Series User Manual...
-
Page 95: Profiles
1. Click Wireless > General > Profiles. 2. Right-click a current entry and select Edit or Delete. To add a new entry, click Add New Access Point. 3. Complete the fields in the table on the next page and click Save. D-Link DSR-Series User Manual... - Page 96 To create a VAP, refer to “Access Points” on page 80. After setting the AP name, the profile drop-down menu is used to select one of the configured profiles. D-Link DSR-Series User Manual...
-
Page 97: Radio Settings
Select a transmission rate from the drop-down menu. This will lock the transmission rate of your wireless Transmission Rate connection. It is strongly recommended to use Best (Automatic). Save Click Save at the bottom to save and activate your settings. D-Link DSR-Series User Manual... -
Page 98: Wmm Settings
Select an available access category (voice, video, best effort, or background) to assign as “default”. IP DSCP / TOS Under Class of Service, select a service and map it to the IP DSCP / TOS value. Save Click Save at the bottom to save and activate your settings. D-Link DSR-Series User Manual... -
Page 99: Wds
Once you enabled WDS (and clicked Save), click Add New WDS and enter the MAC address of a WDS peer. Add New WDS You can add up to four WDS peers. Click Save at the bottom to save and activate your settings. Save D-Link DSR-Series User Manual... -
Page 100: Advanced Settings
Toggle to ON to enable the Unscheduled Automatic Power Save Delivery (also referred to as WMM Power Power Save Enable Save) feature that allows the radio to conserve power. Save Click Save at the bottom to save and activate your settings. D-Link DSR-Series User Manual... -
Page 101: Wps
To enable and connect clients using WPS: 1. Click Wireless > Advanced > WPS. 2. Select which VAP you want to perform the WPS process from the drop-down menu. 3. Toggle WPS Status to ON and click Save. D-Link DSR-Series User Manual... - Page 102 WPS button (or initiate through an interface) on your client within one minute. 8. Allow up to two minutes to connect. Check the Session Status to see if it successfully connected. D-Link DSR-Series User Manual...
-
Page 103: Vpn
Router. The remote PC client at the NAT router initiates a VPN tunnel as the IP address of the remote NAT router is not known in advance. The gateway WAN port acts as responder. • PPTP server for LAN / WAN PPTP client connections. • L2TP server for LAN / WAN L2TP client connections. D-Link DSR-Series User Manual... -
Page 104: Ipsec Vpn
To configure the radio settings: 1. Click VPN > IPSec VPN > Policies. 2. Click Add new IPSec Policy. Fill out the General section which you will name the VPN, select policy type, define the tunnel type, and define endpoints. D-Link DSR-Series User Manual... - Page 105 • Subnet: Allows an entire subnet to connect to the VPN. Enter the network address and subnet mask in the provided fields. Toggle to ON to periodically send ping packets to the host on the peer side of the network to keep the Enable Keepalive tunnel alive. D-Link DSR-Series User Manual...
- Page 106 The VPN policy is one half of the IKE/VPN policy pair required to establish an Auto IPsec VPN tunnel. The IP addresses of the machine or machines on the two VPN endpoints are configured here, along with the policy parameters required to secure the tunnel. D-Link DSR-Series User Manual...
- Page 107 Note: Once you have created an IPSec policy, you may right-click the policy and select Export to save as a file. You can then upload this to another DSR router or keep as a backup. To upload a saved policy, refer to “Easy VPN Setup” on page 101. D-Link DSR-Series User Manual...
-
Page 108: Tunnel Mode
Enter the starting and ending IP addresses. Primary/Secondary DNS Enter the primary and secondary DNS server addresses. Primary/Secondary WINS Enter the primary and secondary WINS server addresses. Save Click Save to save and activate your settings. D-Link DSR-Series User Manual... -
Page 109: Split Dns Names
1. Click VPN > IPSec VPN > Tunnel Mode > Split DNS Names tab. 2. Click Add New Split DNS name. You can right-click any created entries to edit or delete. 3. Enter a domain name and click Save. D-Link DSR-Series User Manual... -
Page 110: Dhcp Range
Enter the starting IP address to issue your clients connecting using DHCP over IPSec. Ending IP Address Enter the ending IP address. Subnet Mask Enter the subnet mask. Click Save to save and activate your settings. Save D-Link DSR-Series User Manual... -
Page 111: Certificates
Expiry Time: The date after which this Trusted certificate becomes invalid To upload a certificate: 1. Click VPN > IPSec VPN > Certificate > Trusted Certificates tab. 2. Click the Browse button. Locate your certificate and click Open. 3. Click Upload. D-Link DSR-Series User Manual... -
Page 112: Active Self Certificates
Expiry Time: The date after which this signed certificate becomes invalid. You should renew the certificate before it expires. To upload a certificate: 1. Click VPN > IPSec VPN > Certificate > Active Self Certificates tab. 2. Click the Browse button. Locate your certificate and click Open. 3. Click Upload. D-Link DSR-Series User Manual... -
Page 113: Self Certificate Requests
Select the application type from the drop-down menu. Select either HTTPS or IPSec. IP Address Enter an IP address (optional). Domain Name Enter a domain name (optional). Email Address Enter your email address. Save Click Save to save and activate your settings. D-Link DSR-Series User Manual... -
Page 114: Easy Vpn Setup
2. Click Browse and navigate to the policy file you want to upload. Select it and click Open. 3. Click Upload. 4. Once uploaded, go to VPN > IPSec VPN > Policies and the loaded VPN will be listed. Right-click it to edit or delete. D-Link DSR-Series User Manual... -
Page 115: Pptp Vpn
Idle TimeOut Enter the amount of time in seconds that the connection will disconnect when idle. NetBIOS Toggle to ON to allow NetBIOS broadcasts to travel over the VPN tunnel. Save Click to save your settings. D-Link DSR-Series User Manual... -
Page 116: Client
Toggle to ON to enable Microsoft Point-to-Point Encryption (MPPE). Idle Time Out Enter the amount of time (in seconds) that you will disconnect from the PPTP server when idle. Save Click Save to save and activate your settings. D-Link DSR-Series User Manual... -
Page 117: Pptp Active Users List
Section 7 - VPN PPTP Active Users List A list of PPTP connections will be displayed on this page. Right-click the connection to connect and disconnect. D-Link DSR-Series User Manual... -
Page 118: L2Tp Vpn
Idle TimeOut Enter the amount of time in seconds that the connection will disconnect when idle. NetBIOS Toggle to ON to allow NetBIOS broadcasts to travel over the VPN tunnel. Save Click to save your settings. D-Link DSR-Series User Manual... -
Page 119: Client
Enter your L2TP user name. Password Enter your L2TP password. Reconnect Mode Select Always On or On Demand. MPPE Encryption Toggle to ON to enable Microsoft Point-to-Point Encryption (MPPE). Click Save to save and activate your settings. Save D-Link DSR-Series User Manual... -
Page 120: L2Tp Active Users List
Section 7 - VPN L2TP Active Users List A list of L2TP connections will be displayed on this page. Right-click the connection to connect and disconnect. D-Link DSR-Series User Manual... -
Page 121: Ssl Vpn
1. Make sure you have enabled remote management and have created user(s) and group(s) to assign to this policy. 2. Click VPN > SSL VPN > SSL VPN Server Policy. 3. Click Add New SSL VPN Server Policy. D-Link DSR-Series User Manual... - Page 122 If you have not created a resource, refer to “Resources” on page 112 to create a defined resource. Select either VPN Tunnel, Port Forwarding, or All. This field is not available when Service selecting Network Resource. Permission Select either Permit or Deny. Save Click to save your settings. D-Link DSR-Series User Manual...
-
Page 123: Portal Layouts
2. Click Add New SSL VPN Portal Layout. Note: You may right-click a layout from the list and edit or delete a layout. 3. Complete the fields from the table on the next page and click Save. D-Link DSR-Series User Manual... - Page 124 Select what group to include from the drop-down menu. VPN Tunnel Page Toggle to ON to allow remote users to view this page. Toggle to ON to allow remote users to view this page. Port Forwarding Save Click to save your settings. D-Link DSR-Series User Manual...
-
Page 125: Resources
Length, and Port Range/Port Number can all be defined for this resource as required. Add New Resource To add a new resource: 1. Click VPN > SSL VPN > Resources. 2. Click Add New Resource. 3. Complete the fields from the table on the next page and click Save. D-Link DSR-Series User Manual... - Page 126 Select Single IP Address or IP Network. Object Address Enter the IP address. Mask Length If you selected IP Network, enter the mask length (0-32). Begin/End Enter a port range for the object. Save Click to save your settings. D-Link DSR-Series User Manual...
-
Page 127: Port Forwarding
2. Click Add New Rule under either Port Forwarding List for Configured Applications (TCP Port) or under Port Forwarding List for Configured Host Names (FQDN). 3. Enter the IP address of the local server. 4. Next enter either the TCP port number or the domain name (FQDN). 5. Click Save. D-Link DSR-Series User Manual... -
Page 128: Client
3. Enter a primary and secondary DNS server addresses (optional). 4. Enter the range of IP addresses clients will be assigned (DHCP). 5. Next to LCP Timeout, set the value for LCP echo interval (in seconds). 6. Click Save. D-Link DSR-Series User Manual... -
Page 129: Client Routes
• Subnet mask: The subnet information of the destination network is set here. To configure a client route: 1. Click VPN > SSL VPN > Client Routes. 2. Click Add New Client Route. 3. Enter the destination network and subnet mask. 4. Click Save. D-Link DSR-Series User Manual... -
Page 130: Open Vpn
VPN tunnel to the router. Split Tunnel mode only sends traffic to the private LAN based on pre-specified client routes. If you select Split Tunnel, refer to “Local Networks” on page 120 to create local networks. Save Click Save to save and activate your settings. D-Link DSR-Series User Manual... -
Page 131: Client
Tunnel Protocol Select either TCP or UDP. Encryption Algorithm Select the encryption algorithm from the drop-down menu. Hash Algorithm Select the hash algorithm from the drop-down menu. Save Click Save to save and activate your settings. D-Link DSR-Series User Manual... -
Page 132: Access Server Client
Enter what port to use. The default port is 1194. Upload Status Displays if a configuration file has been uploaded. File Click Browse and locate the configuration file. Click Open and then click Upload. Save Click Save to save and activate your settings. D-Link DSR-Series User Manual... -
Page 133: Local Networks
If you selected Split Tunnel (from OpenVPN Server), you can create a local network by following the steps below: 1. Click VPN > OpenVPN > Local Networks. 2. Click Add New OpenVPN Local Network. 3. Enter a local IP network. 4. Enter the subnet mask. 5. Click Save. D-Link DSR-Series User Manual... -
Page 134: Remote Networks
1. Click VPN > OpenVPN > Remote Networks. 2. Click Add New OpenVPN Remote Network. 3. Enter a name of the remote network. 4. Enter a local IP network. 5. Enter the subnet mask. 6. Click Save. D-Link DSR-Series User Manual... -
Page 135: Authentication
Section 7 - VPN Authentication This page will allow you to upload certificates and keys. Click Browse and select the file you want to upload. Click Open and then click Upload. D-Link DSR-Series User Manual... -
Page 136: Gre
GRE tunnels allow for broadcast traffic on the LAN of the router to be passed over the internet and received by remote LAN hosts. This is primarily useful in the D-Link Discovery Protocol (DDP) application where broadcast traffic from one LAN host is to be received by all LAN hosts in the local subnets of the GRE endpoints. - Page 137 Enter the destination IP address of the static route from the remote LAN subnet. Subnet Mask Enter the subnet mask. Gateway IP Address Enter the IP address of the termination router. Save Click Save to save and activate your settings. D-Link DSR-Series User Manual...
-
Page 138: Security
Enter the number of minutes of inactivity that must occur before the users in this user group are logged out Idle Timeout of their web management session automatically. Entering an Idle Timeout value of 0 (zero) means never log out. Save Click Save at the bottom to save and activate your settings. D-Link DSR-Series User Manual... -
Page 139: Login Policies
Toggle ON to deny login access to the web management interface from the WAN2/DMZ Port for all users in Interface this user group. Toggle OFF will allow users. Save Click Save at the bottom to save and activate your settings. D-Link DSR-Series User Manual... -
Page 140: Browser Policies
Click Save at the bottom to save and activate your settings. 4. Your policy will now be in the browser policies list. By default the status will be set to deny. If you want to set the status to allow, right-click the policy and select Allow. D-Link DSR-Series User Manual... -
Page 141: Ip Policies
Select either Network to specify a IP network or IP Address to specify a specific IP address. Network Address/IP Enter the network address or IP address. Address Mask Length If you selected Network, enter the mask length. Save Click Save at the bottom to save and activate your settings. D-Link DSR-Series User Manual... -
Page 142: Users
Enter a case-sensitive login password that the user must specify at the login prompt to access the web Password management interface. For security, each typed password character is masked with a dot (•). Confirm Password Enter the password to confirm. Click Save at the bottom to save and activate your settings. Save D-Link DSR-Series User Manual... -
Page 143: Import User Database
4. Once completed, go to Security > Authentication > User Database > Users and your imported users will be displayed in the Users List. 5. From the list you can right-click the user to edit or delete. D-Link DSR-Series User Manual... -
Page 144: Create A User Database (Csv File)
• The Group for a corresponding user (“GroupName” in the CSV) must be created via the GUI in advance of the User Database CSV upload action. • None of the above fields can be left empty or NULL in the User Database CSV. D-Link DSR-Series User Manual... -
Page 145: External Authentication Servers
This determines the number of tries the controller will make to the RADIUS server before giving Retries Save Click Save at the bottom to save and activate your settings. Server Check Click to test the connection(s) to your RADIUS Server(s). D-Link DSR-Series User Manual... -
Page 146: Pop3 Server
This determines the number of tries the controller will make to the POP3 server before giving up. Save Click Save at the bottom to save and activate your settings. Server Check Click to test the connection(s) to your POP3 Server(s). D-Link DSR-Series User Manual... -
Page 147: Pop3 Trusted Server
CA used for authentication. To configure: 1. Click Security > Authentication > External Auth Server > POP3 Trusted CA tab. 2. Click Add CA File. 3. Click Browse and select a CA file. Click Open and then click Upload. D-Link DSR-Series User Manual... -
Page 148: Ldap Server
Click Save at the bottom to save and activate your settings. Enter the admin account information that will be used when LDAP authentication is required for PPTP/ Administrator Account L2TP connection. Server Check Click to test the connection(s) to your LDAP Server(s). D-Link DSR-Series User Manual... -
Page 149: Ad Server
1. Click Security > Authentication > External Auth Server > AD Server tab. 2. Complete the AD server information from the table on the next page and click Save. You can configure up to three servers. D-Link DSR-Series User Manual... - Page 150 Enter the admin account information that will be used when authentication is required for PPTP/L2TP Administrator Account connection. Save Click Save at the bottom to save and activate your settings. Server Check Click to test the connection(s) to your AD Server(s). D-Link DSR-Series User Manual...
-
Page 151: Nt Domain Server
Enter the admin account information that will be used when authentication is required for PPTP/L2TP Administrator Account connection. Save Click Save at the bottom to save and activate your settings. Server Check Click to test the connection(s) to your AD Server(s). D-Link DSR-Series User Manual... -
Page 152: Login Profiles
1. Click Security > Authentication > Login Profiles tab. 2. Right-click an entry and select either Edit or Delete. To add a new group, click Add New Login Profile. 3. Complete the fields from the table on the next page and click Save. D-Link DSR-Series User Manual... - Page 153 Footer Content If Change Footer Content is checked, enter the text that appears in the footer. Footer Font Color If Change Footer Content is checked, select the color of the text that appears in the footer. D-Link DSR-Series User Manual...
- Page 154 Unit Price. Enable the billing profile by switch ON on STATUS. Service Disclaimer Text Enter the service disclaimer text which is shown before user select and purchase wireless service. Payment Server Select the payment received account and its payment agent. D-Link DSR-Series User Manual...
-
Page 155: Web Content Filtering
To block or allow a service: 1. Click Security > Web Content Filter > Static Filtering tab. 2. Toggle Content Filtering to ON. 3. Toggle the service to ON to block. Toggle to OFF to allow. 4. Click Save. D-Link DSR-Series User Manual... -
Page 156: Approved Urls
2. To import a list from a text/CSV file, click Upload URLs List from File. If you want to export the current list, click Export URLs List to File. To add a new URL, click Add New Approved URL. 3. Enter a URL and click Save. D-Link DSR-Series User Manual... -
Page 157: Blocked Keywords
2. To import a list from a text/CSV file, click Upload Keywords List from File. If you want to export the current list, click Export Keywords List to File. To add a new URL, click Add New Keyword. 3. Enter a keyword and click Save. D-Link DSR-Series User Manual... -
Page 158: Dynamic Filtering
1. Click Security > Web Content Filter > Dynamic Filtering. 2. Toggle Global Filtering to ON to enable dynamic filtering. 3. Toggle any of the listed categories to ON to block. Toggle to OFF to allow. 4. Click Save. D-Link DSR-Series User Manual... -
Page 159: Firewall
1. Click Security > Firewall > IPv4 Firewall Rules tab or IPv6 Firewall Rules tab. 2. Right-click an entry and select either Edit or Delete. To add a new group, click Add New IPv4/IPv6 Firewall Rule. D-Link DSR-Series User Manual... - Page 160 Outbound rules (where To Zone = insecure WAN only) can have the traffic marked with a QoS priority tag. Select a priority level: • Normal-Service: ToS=0 (lowest QoS) QoS Priority (IPv4 only) • Minimize-Cost: ToS=1 • Maximize-Reliability: ToS=2 • Maximize-Throughput: ToS=4 • Minimize-Delay: ToS=16 D-Link DSR-Series User Manual...
-
Page 161: Schedules
If you selected Specific Times, use the mouse on the blue boxes representing the hour, minutes, and am/ Start Time/End Time pm to select the start time and end time. Click, hold, and move up to decrease the value or move down to increase the value. Save Click to save your settings. D-Link DSR-Series User Manual... -
Page 162: Custom Services
If you selected Multiple Ports, enter the port or ports separated by a comma. ICMP Type The ICMP type is a numeric value that can range between 0 and 40. Save Click to save your settings. D-Link DSR-Series User Manual... -
Page 163: Algs
1. Click Security > Firewall > ALGs tab. 2. Toggle the protocol(s) to ON that you want to allow through the router. D-Link DSR-Series User Manual... -
Page 164: Smtp Algs
SMTP traffic originating from both clients and servers. 1. Click Security > Firewall > ALGs > SMTP ALGs tab. 2. Toggle Status to ON. 3. Enter the port at which the SMTP packets are inspected. 4. Click Save. D-Link DSR-Series User Manual... -
Page 165: Approved Mail Ids
1. Click Security > Firewall > ALGs > Approved Mail IDs tab. 2. Right-click an entry and select either Edit or Delete. To add a new mail ID, click Add New Approved Mail ID. 3. Enter a mail ID and click Save. D-Link DSR-Series User Manual... -
Page 166: Blocked Mail Ids
1. Click Security > Firewall > ALGs > Blocked Mail IDs tab. 2. Right-click an entry and select either Edit or Delete. To add a new mail ID, click Add New Blocked Mail 3. Enter a mail ID and click Save. D-Link DSR-Series User Manual... -
Page 167: Mail Filtering
2. Right-click an entry and select either Edit or Delete. To add a new mail ID, click Add New Mail Filter. 3. Enter a subject and a mail ID. 4. Select to allow or block. 5. Click Save. D-Link DSR-Series User Manual... -
Page 168: Vpn Passthrough
VPN Passthrough page must be toggled to ON. 1. Click Security > Firewall > VPN Passthrough. 2. Toggle the VPN protocol you want to allow to ON and click Save. D-Link DSR-Series User Manual... -
Page 169: Dynamic Port Forwarding
(TCP or UDP) and the range of incoming and outgoing ports to open when enabled. 1. Click Security > Firewall > Dynamic Port Forwarding > Application Rules tab. 2. Right-click an entry and select either Edit or Delete. To add a new schedule, click Add New Application Rule. D-Link DSR-Series User Manual... - Page 170 Outgoing (Trigger) Port Range Enter the start and end trigger port range. Incoming Port Range Enter the port range to open. Save Click to save your settings. 4. Click on the Application Rules Status tab to see a list of rules and their status. D-Link DSR-Series User Manual...
-
Page 171: Attack Checks
The number of ICMP packets per second at which the router detects an ICMP flood attack from the WAN and ICMP Flood prevents further ICMP traffic from that external address. D-Link DSR-Series User Manual... -
Page 172: Intel® Amt
Toggle to ON to use the selected port. Enter the listening port on which the server will listen for incoming Redirect to Port 16992-16995 connections. Toggle to ON to use the selected port. Enter the listening port on which the server will listen for incoming Redirect to Port 9971 connections. D-Link DSR-Series User Manual... -
Page 173: Ips
The checks can be enabled between the WAN and DMZ or LAN, and a running counter will allow the administrator to see how many malicious intrusion attempts from the WAN have been detected and prevented. Note: The DSR-150/150N routers do not support Intrusion Prevention System. 1. Click Security > Firewall > IPS. -
Page 174: Maintenance
2. Complete the fields from the table below and click Save. Field Description Current System Name Displays the current name for the router. New Name for System Enter a new name for the router. Save Click to save and activate your settings. D-Link DSR-Series User Manual... -
Page 175: Date And Time
Secondary NTP Server If you selected Custom, enter the secondary NTP server address. Time to re-synchronize Enter the time in minutes for the router to re-synch with the NTP server(s). Save Click to save and activate your settings. D-Link DSR-Series User Manual... -
Page 176: Session Settings
2. Complete the fields from the table below and click Save. Field Description Administrator Enter the timeout value in minutes for the Administrator account. Guest Enter the timeout value in minutes for the Guest account. Save Click to save and activate your settings. D-Link DSR-Series User Manual... -
Page 177: License Updates
The license model as it relates to the feature being added. Activation Code The activation code corresponding to this license. Expiration Licenses can either have a fixed duration, or are perpetual for the life of this router. D-Link DSR-Series User Manual... -
Page 178: Usb Share Ports
USB Port 2 Printer Interface Name Displays the name of the printer interface. Enable Printer Displays if the printer is enabled or not. Toggle to ON to enable. Save Click to save and activate your settings. D-Link DSR-Series User Manual... -
Page 179: Sms Service
Path: Maintenance > Administration > SMS Service > Inbox The D-Link Services Router has a USB interface to connect 3G modem support to send and receive Short Messaging Service (SMS). The received messages can be seen in the Inbox and allows the user to create a new SMS. -
Page 180: Create Sms
2. Complete the fields from the table below and click Send Message. Field Description Receiver Enter the phone number of the intended receiver. Text Message Enter the message you want to send. Send Message Click to send your message. Cancel Click to reset the fields. D-Link DSR-Series User Manual... -
Page 181: Package Manager
Note: This feature is only supported on the DSR-1000, DSR-1000N, DSR-500, and DSR-500N routers. A package is a set of files which are installed by the router from D-Link’s repositories. This feature allows users to download new drivers for supported USB devices and language packs to enable multi-lingual support for the router’s management interface. - Page 182 If you have downloaded a packed, click Browse and select the package. Click Open and then click Install. Manual Install Install History Displays a list of package installations. D-Link DSR-Series User Manual...
-
Page 183: Set Language
You can download language packs (refer to “Package Manager” on page 168) and install them on the router. Once you have downloaded a pack, follow the steps below to install: 1. Click Maintenance > Administration > Set Language. 2. Select a loaded language pack from the drop-down menu and click Save. D-Link DSR-Series User Manual... -
Page 184: Web Gui Management
4. Enter a name for this configuration. 5. Select either Single IP Address and enter the IP address of the computer/device or VLAN Network and enter the VLAN ID that you want to allow access to the web GUI. 6. Click Save. D-Link DSR-Series User Manual... -
Page 185: Remote Management
Select either All IP Addresses, IP Address Range (enter an IP range), or Only Selected PC (enter an IP Access Type address). Respond to Ping Toggle to ON to allow the router to respond to ping requests from the WAN. Save Click to save and activate your settings. D-Link DSR-Series User Manual... -
Page 186: Snmp
• Auth No-Priv: Provides authentication based on the MD5 or SHA algorithms. • Auth Priv: Provides authentication based on the MD5 or SHA algorithms as well as encryption privacy with the DES 256-bit standard. 4. Click Save. D-Link DSR-Series User Manual... -
Page 187: Snmp Trap List
The community string to which the agent belongs. Most agents are configured to listen for traps in the Community Public community. Authentication Type The SNMP version used by the trap agent. The choices are v1, v2c, or v3. Save Click to save and activate your settings. D-Link DSR-Series User Manual... -
Page 188: Access Control
The community string to which the agent belongs. Most agents are configured to listen for traps in the Community Public community. Access Type Access will be either read only (ROcommunity) or read-write (RWcommunity). Save Click to save and activate your settings. D-Link DSR-Series User Manual... -
Page 189: Snmp System Info
The name of the contact person for this router. Examples: admin, John Doe. SysLocation The physical location of the router: Example: Rack #2, 4th Floor. SysName A name given for easy identification of the router. Save Click to save and activate your settings. D-Link DSR-Series User Manual... -
Page 190: Diagnostics
1. Click Maintenance > Diagnostics > Network Tools tab. 2. Under Command Output for Ping and Traceroute, in the IP Address/Domain Name field, enter an IP address or domain name. 3. Click Ping. The results will appear in the Command Output display below. D-Link DSR-Series User Manual... -
Page 191: Using Traceroute
1. Click Maintenance > Diagnostics > Network Tools tab. 2. Under Command Output for Ping and Traceroute, in the IP Address/Domain Name field, enter an IP address or domain name. 3. Click Traceroute. The results will appear in the Command Output display below. D-Link DSR-Series User Manual... -
Page 192: Performing Dns Lookups
3. Click Lookup. The results will appear in the Command Output display. If the host or domain entry exists, a response will appear with the IP address. If the message Host Unknown appears, the Internet name does not exist. D-Link DSR-Series User Manual... -
Page 193: Capture Packets
2. Select an interface from the drop-down menu. 3. Click Start Trace. The trace can be downloaded by clicking the Download button, which will immediately begin the download to the browser’s default download location. To stop the trace click Stop Trace. D-Link DSR-Series User Manual... -
Page 194: System Check
As part of the diagnostics functions on the router, you can view the static and dynamic routes for both IPv4 and IPv6. 1. Click Maintenance > Diagnostics > System Check tab. 2. Click Display IPv4 Table or Display IPv6 Table. The results will appear in the Command Output display. D-Link DSR-Series User Manual... -
Page 195: Power Saving
With “Length Detection State” option toggled to ON, the overall current supplied to a LAN port is reduced By Cable Length Detection when a smaller cable length is connected on a LAN port. Save Click to save and activate your settings. D-Link DSR-Series User Manual... -
Page 196: Firmware Upgrade
This router supports an automated notification to determine if a newer firmware version is available for this router. By clicking the Check Now button in the notification section, the router will check a D-Link server to see if a newer firmware version for this router is available for download. -
Page 197: Using Pc
Using PC To upgrade the firmware from a PC: 1. Download the latest firmware version from the D-Link support website. 2. Once downloaded, log in to the router and click Maintenance > Firmware > Firmware Upgrade > Using System (PC) tab. -
Page 198: Using Usb
Using USB To upgrade the firmware using a USB thumb drive: 1. Download the latest firmware version from the D-Link support website and copy the file to a USB thumb drive. 2. Plug the USB thumb drive into a USB port on the router. -
Page 199: Configuration Files
1. Click Maintenance > Firmware > Backup / Restore tab. 2. To save the file to your computer, click Save to System (PC). If you have a USB thumb drive connected to the router, you can click Save to USB Port 1 (or Port 2). D-Link DSR-Series User Manual... -
Page 200: Restore
2. To restore the file from your computer, click Browse and select the file. Click Open and then click Restore. To restore the file from a USB thumb drive, select the file in the list under the corresponding USB port and click Restore. D-Link DSR-Series User Manual... -
Page 201: Configuration Settings
3. Toggle Encrypt Configuration File to ON to encrypt the configuration file. This will ensure confidential information like system username/passwords are not available for view by unauthorized sources. Enabling this option will apply to configuration files backed up on the host as well as a USB drive. D-Link DSR-Series User Manual... -
Page 202: Soft Reboot
Section 9 - Maintenance Soft Reboot Performing a soft reboot simply performs a power cycle. 1. Click Maintenance > Firmware > Soft Reboot. 2. Click Soft Reboot. The router will power cycle. D-Link DSR-Series User Manual... -
Page 203: Reset To Factory Default Settings
2. Click Default. The router will power cycle and reset all settings to the default values. Note: After restoring to the factory default settings, the router’s default LAN IP address is 192.168.10.1, the default login user name is ‘admin’ , and the default login password is ‘admin’ . D-Link DSR-Series User Manual... -
Page 204: Log Settings
• Local0-Wireless: This facility corresponds to the 802.11 driver used for providing AP functionality to your network. 1. Click Maintenance > Log Settings > Log Facilities. 2. Select the facility and then toggle ON which events you want to log and click Save. D-Link DSR-Series User Manual... - Page 205 (the Event Log viewer is in the Status > System Information > All Logs > Current Logs) or a remote Syslog server for later review. E-mail logs, discussed in a subsequent section, follow the same configuration as logs configured for a Syslog server. D-Link DSR-Series User Manual...
-
Page 206: Routing Logs
This option is useful when the Default Outbound Policy is “Allow Always”. 1. Click Maintenance > Log Settings > Routing Logs. 2. Toggle which events you want to log to ON and click Save. D-Link DSR-Series User Manual... -
Page 207: System Logs
This data will indicate to the admin whether the bandwidth profile has to be modified to account for the desired internet traffic of LAN users. 1. Click Maintenance > Log Settings > System Logs. 2. Toggle which events you want to log to ON and click Save. D-Link DSR-Series User Manual... -
Page 208: Remote Logs
Hourly, Daily, or Weekly. Selecting Never will disable log e-mails but will preserve the e-mail server settings. 1. Click Maintenance > Log Settings > Remote Logs. 2. Complete the fields from the table on the next page and click Save. D-Link DSR-Series User Manual... - Page 209 If Unit is set to Weekly, select the day of the week when logs will be sent. Time If Unit is set to Daily or Weekly, select the time when logs will be sent. Save Click to save and activate your settings. D-Link DSR-Series User Manual...
-
Page 210: Syslog Server
Select the severity level you want to log. Refer to “Defining What to Log” on page 191 for definitions. Syslog Server 2-8 Toggle to ON to setup another Syslog server. Repeat the fields above for each server you want to setup. Save Click to save and activate your settings. D-Link DSR-Series User Manual... -
Page 211: Event Logs
Facility Logs page or Routing Logs page, the corresponding log message will appear in this window with a timestamp. 1. Click Maintenance > Log Settings > Event Logs. 2. Toggle to ON and click Save. D-Link DSR-Series User Manual... -
Page 212: Ipv6 Logs
Toggle to ON to log accepted packets. Toggle to ON to log dropped packets. Dropped Packets Accepted Packets Toggle to ON to log accepted packets. Toggle to ON to log dropped packets. Dropped Packets Save Click to save and activate your settings. D-Link DSR-Series User Manual... -
Page 213: Status And Statistics
Displays bandwidth usage by network segment such as WAN or LAN. The data is broken into by applications Bandwidth Usage service such as HTTP, HTTPS, DNS, SNMP, and others. VPNs Displays a chart of VPN traffic by bandwidth and number of tunnels. Traffic Information Displays a grid of traffic statistics for each interface. D-Link DSR-Series User Manual... -
Page 214: Manage Dashboard
1. Click on the Manage Dashboard button. 2. The following window will pop out and allow you to enable or disable the overview panels shown on the dashboard. Toggle the panel to ON or OFF and click Save. D-Link DSR-Series User Manual... -
Page 215: System
Section 10 - Status and Statistics System Path: Status > System Information > Device > System The System Info page displays the current system name, firmware version, hardware version, and serial number. D-Link DSR-Series User Manual... -
Page 216: Lan Info
Section 10 - Status and Statistics LAN Info Path: Status > System Information > Device > LAN The LAN Information page summarizes the LAN settings including MAC address, IP address, and link state. D-Link DSR-Series User Manual... -
Page 217: Wan1
Section 10 - Status and Statistics WAN1 Path: Status > System Information > Device > WAN1 The WAN1 Information page summarizes the WAN1 port settings. D-Link DSR-Series User Manual... -
Page 218: Wan2
Section 10 - Status and Statistics WAN2 Path: Status > System Information > Device > WAN2 The WAN2 Information page summarizes the WAN2 port settings. D-Link DSR-Series User Manual... -
Page 219: Wan3
Section 10 - Status and Statistics WAN3 Path: Status > System Information > Device > WAN3 The WAN3 Information page summarizes the WAN3 settings. D-Link DSR-Series User Manual... -
Page 220: Wireless
Path: Status > System Information > Device > Wireless The Wireless Information page displays traffic statistics for each enabled access point. This page will give a snapshot of how much traffic is being transmitted over each wireless link. D-Link DSR-Series User Manual... -
Page 221: All Logs
Click Clear All to remove all entries in the Display Logs screen or click Send Logs to send all logs in the Current Logs screen to preconfigured e-mail recipients. D-Link DSR-Series User Manual... -
Page 222: Firewall Logs
Click Clear All to remove all entries in the Display Logs screen or click Send Logs to send all logs in the Current Logs screen to preconfigured e-mail recipients. D-Link DSR-Series User Manual... -
Page 223: Ipsec Vpn Logs
Click Clear All to remove all entries in the Display Logs screen or click Send Logs to send all logs in the Current Logs screen to preconfigured e-mail recipients. D-Link DSR-Series User Manual... -
Page 224: Ssl Vpn Logs
Click Clear All to remove all entries in the Display Logs screen or click Send Logs to send all logs in the Current Logs screen to preconfigured e-mail recipients. D-Link DSR-Series User Manual... -
Page 225: Usb Status
Section 10 - Status and Statistics USB Status Path: Status > System Information > USB Status The USB Status page summarizes the USB devices connected to the router. You may connect USB printer and USB storage device directly to the router. D-Link DSR-Series User Manual... -
Page 226: Network Information
Path: Status > Network Information > DHCP Clients Three separated tabs display a list of clients whom get IP leased from the router: LAN leased clients, IPv6 leased clients, and DMZ leased clients. LAN Leased Clients IPv6 Leased Clients DMZ Leased Clients D-Link DSR-Series User Manual... -
Page 227: Active Sessions
Section 10 - Status and Statistics Active Sessions Path: Status > Network Information > Active Sessions This table lists the active internet sessions through the router’s firewall. The session’s protocol, state, local, and remote IP addresses are shown. D-Link DSR-Series User Manual... -
Page 228: Active Vpns
VPN associations/connections are listed along with the traffic details and tunnel state. The traffic is a cumulative measure of transmitted/received packets since the tunnel was established. SSL VPN Connections IPSec SAs OpenVPN Connections PPTP VPN Connections L2TP VPN Connections D-Link DSR-Series User Manual... -
Page 229: Interface Statistics
Section 10 - Status and Statistics Interface Statistics Path: Status > Network Information > Interfaces Statistics This page displays packet information on the LAN, VLAN, and WLAN interfaces. D-Link DSR-Series User Manual... -
Page 230: View Wireless Clients
AP. The statistics table has auto-refresh control which allows display of the most current port level data at each page refresh. The default auto-refresh for this page is 10 seconds. D-Link DSR-Series User Manual... -
Page 231: Device Stats
The statistics table has auto-refresh control which allows display of the most current port level data at each page refresh. The default auto-refresh for this page is 10 seconds. D-Link DSR-Series User Manual... -
Page 232: Wireless Statistics
If you suspect that a radio or VAP may be down, the details on this page would confirm if traffic is being sent and received through the VAP. D-Link DSR-Series User Manual... -
Page 233: View Lan Clients
Path: Status > Network Information > LAN Clients The LAN clients to the router are identified by an ARP scan through the LAN switch. The NetBIOS name (if available), IP address, and MAC address of discovered LAN hosts are displayed. D-Link DSR-Series User Manual... -
Page 234: Troubleshooting
3. Select Monitoring > Router Status. 4. Ensure that an IP address is shown for the WAN port. If 0.0.0.0 is shown, your firewall has not obtained an IP address from your ISP. See the next symptom. D-Link DSR-Series User Manual... - Page 235 1. Ask your ISP for the addresses of its designated Domain Name System (DNS) servers. Configure your PC to recognize those addresses. For details, see your operating system documentation. 2. On your PC, configure the router to be its TCP/IP gateway. D-Link DSR-Series User Manual...
-
Page 236: Date And Time
Possible cause: The router does not automatically adjust for Daylight Savings Time. Recommended action: 1. Select Administration > Time Zone and view the current date and time settings. 2. Click to check or uncheck “Automatically adjust for Daylight Savings Time”, then click Apply. D-Link DSR-Series User Manual... -
Page 237: Pinging To Test Lan Connectivity
• Verify that the Ethernet card driver software and TCP/IP software are installed and configured on the PC. • Verify that the IP address for the router and PC are correct and on the same subnet. D-Link DSR-Series User Manual... -
Page 238: Testing The Lan Path From Your Pc To A Remote Device
ISPs additionally restrict access to the MAC address of just a single PC connected to that modem. If this is the case, configure your firewall to clone or spoof the MAC address from the authorized PC. D-Link DSR-Series User Manual... -
Page 239: Restoring Factory-Default Configuration Settings
3. After a restore to factory defaults —whether initiated from the configuration interface or the Reset button — the following settings apply: • LAN IP address: 192.168.10.1 • Username: admin • Password: admin • DHCP server on LAN: enabled • WAN port configuration: Get configuration via DHCP D-Link DSR-Series User Manual... -
Page 240: Appendix A - Glossary
Network Time Protocol. Protocol for synchronizing a router to a single clock on the network, known as the clock master. Password Authentication Protocol. Protocol for authenticating users to a remote access server or ISP. D-Link DSR-Series User Manual... - Page 241 IKE Extended Authentication. Method, based on the IKE protocol, for authenticating not just XAUTH devices (which IKE authenticates) but also users. User authentication is performed after device authentication and before IPsec negotiation. D-Link DSR-Series User Manual...
-
Page 242: Appendix B - Factory Default Settings
DHCP Ending IP Address 192.168.10.100 Time Zone Daylight Saving Time Disabled SNMP Disabled Remote Management Disabled Inbound Communication from Internet Disabled (except Port 80 HTTP) Outbound Communication to Internet Enabled (all) Firewall Source MAC Filtering Disabled Stealth Mode Enabled D-Link DSR-Series User Manual... -
Page 243: Appendix C - Standard Services For Port Forwarding & Firewall Configuration
• ICMP-TYPE-8 • SNMP-TRAPS:UDP • ICMP-TYPE-9 • SQL-NET • ICMP-TYPE-10 • SSH:TCP • ICMP-TYPE-11 • SSH:UDP • ICMP-TYPE-13 • STRMWORKS • ICQ • TACACS • IMAP2 • TELNET • IMAP3 • TFTP • IRC • VDOLIVE D-Link DSR-Series User Manual... -
Page 244: Appendix D - Log Output Reference
Failed to call ddns enable ERROR status: %d nimfAdvOptSetWrap: current Mac Option: DEBUG ddns: SQL error: %s ERROR nimfAdvOptSetWrap: current Port Speed DEBUG sqlite3QueryResGet failed.Query:%s ERROR Option: %d nimfAdvOptSetWrap: current Mtu Option: DEBUG Failed to call ddns enable ERROR D-Link DSR-Series User Manual... - Page 245 MacAddress: %s DEBUG failed to open %s ERROR nimfMacGet: MacAddress: %s DEBUG failed to query networkInterface table ERROR nimfMacGet:Mac option Not changed \ DEBUG failed to query networkInterface table ERROR nimfMacGet: MacAddress: %s DEBUG sqlite3QueryResGet failed.Query:%s ERROR D-Link DSR-Series User Manual...
- Page 246 Failed to open %s: %s DEBUG ERROR LedPinId Failed to start sipalg DEBUG %s: unable to kill dhclient ERROR nimfAdvOptSetWrap: unable to get Failed to stop sipalg DEBUG ERROR current Mac Option D-Link DSR-Series User Manual...
- Page 247 Re-Starting sshd daemon..DEBUG sqlite3QueryResGet failed.Query:%s ERROR sshd re-started successfully. DEBUG error executing the command %s ERROR sshd stopped . DEBUG error executing the command %s ERROR failed query %s DEBUG error executing the command %s ERROR D-Link DSR-Series User Manual...
- Page 248 [switchConfig] executing %s ... %s DEBUG file not found ERROR restarting bridge... DEBUG sqlite3QueryResGet failed.Query:%s ERROR UserName: %s DEBUG sqlite3QueryResGet failed.Query:%s ERROR Password: %s DEBUG sqlite3QueryResGet failed.Query:%s ERROR IspName: %s DEBUG No memory to allocate ERROR D-Link DSR-Series User Manual...
- Page 249 Failed to remove vlan Interface for vlanId \ DEBUG sqlite3QueryResGet failed ERROR Failed to execute vlanConfig binary for sqlite3QueryResGet failed DEBUG ERROR port number %d Failed to execute vlanConfig binary for Invalid oidp passed DEBUG ERROR vlanId %d D-Link DSR-Series User Manual...
- Page 250 ERROR threegDisable: unable to kill ppp Chap Secrets file not found DEBUG ERROR daemon %s:DBUpdate event: Table: %s opCode:%d DEBUG threegMgmtHandler: Query: %s ERROR rowId:%d threegMgmtHandler: error in chap-secrets File found DEBUG ERROR executing database update D-Link DSR-Series User Manual...
- Page 251 %s pptpMgmtTblHandler: MtuFlag: %d DEBUG sqlite3QueryResGet failed.Query:%s ERROR writing Chap-secrets/Pap-Secrets pptpMgmtTblHandler: Mtu: %d DEBUG ERROR failed pptpMgmtTblHandler: IdleTimeOutFlag: DEBUG xl2tpdStop failed ERROR pptpMgmtTblHandler: IdleTimeOutValue: DEBUG xl2tpdStart failed ERROR pptpMgmtTblHandler: GetDnsFromIsp: DEBUG sqlite3QueryResGet failed.Query:%s ERROR D-Link DSR-Series User Manual...
- Page 252 DHCPv6 Client stopped successfully. DEBUG ERROR pppoeMgmtInit: unable to open the DHCPv6 Client Restart successful DEBUG ERROR database file %s pppoeDisable: unable to kill ppp l2tpMgmtTblHandler: MtuFlag: %d DEBUG ERROR daemon D-Link DSR-Series User Manual...
- Page 253 %s dhcpLibInit: unable to open the RADVD started successfully DEBUG ERROR database file %s RADVD stopped successfully DEBUG sqlite3QueryResGet failed.Query:%s ERROR dhcpcMgmtInit: unable to open the empty update. nRows=%d nCols=%d WARN ERROR database file %s D-Link DSR-Series User Manual...
- Page 254 Illegal invocation of tcpdumpConfig (%s) ERROR Restoring old configuration.. ERROR DHCPv6 Server configuration update Failed to start tcpdump ERROR ERROR failed Failed to stop tcpdump ERROR DHCPv6 Server Restart failed ERROR Invalid tcpdumpEnable value ERROR sqlite3QueryResGet failed.Query:%s ERROR D-Link DSR-Series User Manual...
- Page 255 P1: Total TLS message size = (%d) DEBUG ERROR else: ERROR P1: sending unfragmented message. DEBUG Protocol version mismatch: ERROR ERROR peapFragFirstProcess: TLS record size to Processing PEAP message (from frag): DEBUG ERROR receive = (%d) ERROR D-Link DSR-Series User Manual...
- Page 256 Generating NT response: Error ERROR ignoring. no data to send while fragment ack DEBUG NULL in/out buffer: Error ERROR received. TLS handshake successful. DEBUG Incorrect vendor id. ERROR Created EAP/TTLS context: OK DEBUG Allocating memory for outBuff: ERROR ERROR D-Link DSR-Series User Manual...
- Page 257 EAPAUTH_MALLOC failed. ERROR pFB is NULL DEBUG tlsGlueCtxCreate failed. ERROR TLS_FB* is NULL. DEBUG Context NULL: ERROR ERROR pFB->msgBuff is NULL. DEBUG Setting profile to glue layer: ERROR. ERROR Error calculating binary. DEBUG _eapCtxCreate failed. ERROR D-Link DSR-Series User Manual...
- Page 258 AVP code not EAP: Error ERROR \tmsLen = %d DEBUG Encapsulating AVP: ERROR ERROR \tvalSize = %d DEBUG profile %s doesnt exist. ERROR Frag Buffer bytes left = (%d) DEBUG profile %s is in use. ERROR D-Link DSR-Series User Manual...
- Page 259 ERROR rowId:%d umiRegister failed ERROR Re-assembling fragments incorrect size ERROR eapAuthHandler: Invalid data received ERROR Error creating cipher context. ERROR EAPAUTH_MALLOC failed. ERROR Error initializing cipher context. ERROR malloc failed. ERROR Error creating digest context. ERROR D-Link DSR-Series User Manual...
- Page 260 ERROR currently. state machine is in invalid state. ERROR Couldn’t get the x509 cert hash ERROR BuildReq operation failed ERROR Memory allocation failed ERROR No method ops defined for current ERROR FileName too lengthy ERROR method D-Link DSR-Series User Manual...
- Page 261 Context NULL: ERROR ERROR Memory Allocation Failed ERROR Initializing inner EAP auth: ERROR ERROR File Open Failed ERROR pCtx is NULL: ERROR ERROR File is Empty ERROR Memory Allocation Failed ERROR Error in executing DB update handler ERROR D-Link DSR-Series User Manual...
- Page 262 Sending Packet to %x:%d ..DEBUG ERROR ID received:%d radVendorAttrGet: Invalid Length in Receiving Reply Packet..DEBUG ERROR Vendor Message radVendorAttrGet: Unknown Vendor Verified Reply Packet Integrity DEBUG ERROR ID:%d radVendorMessagePack: Unknown Generated Reply Attribute-Value pairs DEBUG ERROR Vendor ID:%d D-Link DSR-Series User Manual...
- Page 263 No State Attribute in Access-Challenge DEBUG ERROR rowId:%d message Host IP address: %s DEBUG radEapRecvTask: “ ERROR Adding Packet for existing cookie:%p DEBUG failed to initialize UMI ERROR Adding Packet and cookie:%p DEBUG umiRegister failed. errno=%d ERROR D-Link DSR-Series User Manual...
- Page 264 Request Timed out from %s DEBUG ERROR timeZoneChangeScript. ” Looking Up %s DEBUG unexpected reply from %d cmd=%d ! ERROR Timezone difference :%d DEBUG cmd %d not supported. caller %d ERROR Could not open file: %s DEBUG default reached ERROR D-Link DSR-Series User Manual...
- Page 265 ERROR Some error occurred while removing Calling unmount for USB ... DEBUG ERROR device Some error occurred while removing Calling mount for USB ... DEBUG ERROR device usbdevice is %d %s:%d DEBUG Sqlite update failed ERROR D-Link DSR-Series User Manual...
- Page 266 Trap Configuration Failed ERROR Error Reading from the Database. ERROR sqlite3QueryResGet failed query:%s ERROR short DB update event request! ERROR sqlite3QueryResGet failed.Query:%s ERROR Error in executing DB update handler ERROR Failed to Open Snmp Configuration File ERROR D-Link DSR-Series User Manual...
- Page 267 Exiting. sqlite3QueryResGet failed ERROR short DB update event request! ERROR Could not execute the smtpClient. ERROR short ifDev event request! ERROR Error while cleaning the database.Exiting. ERROR sqlite3_mprintf failed ERROR %s failed. status=%d ERROR D-Link DSR-Series User Manual...
- Page 268 WAN interface. Protocol Disabling attack check for Stealth mode Enabling Firewall Rule for DHCP Relay DEBUG DEBUG for tcp Protocol Disabling attack check for Stealth mode prerouting Firewall Rule add for Relay DEBUG DEBUG for udp failed D-Link DSR-Series User Manual...
- Page 269 DEBUG Enabling DOS Attacks DEBUG notification. Disabling ICSA Notification Item for DEBUG Restarting Firewall [%d]:[%d] For %s DEBUG Fragmented Packets. Disabling ICSA Notification Item for Multi restartStatus = %d for LogicalIfName = DEBUG DEBUG cast Packets. D-Link DSR-Series User Manual...
- Page 270 PERMIT REST. = %s MAC Filtering %sabled for PERMIT and DEBUG Enabling DROP for INPUT DEBUG BLOCK REST. Enabling Content Filtering. DEBUG Enabling DROP for FORWARD DEBUG Disabling Content Filtering. DEBUG Enabling NAT based Firewall Rules DEBUG D-Link DSR-Series User Manual...
- Page 271 DNS proxy firewall rule add failed for %s ERROR deleting interface %s from ifgroup %d Adding new IP address %s. DEBUG ERROR failed Updating old IP address %s to new IP DEBUG adding interface %s to ifgroup %d failed ERROR address %s. D-Link DSR-Series User Manual...
- Page 272 Added firewall rule %s for service %s with DEBUG Invalid Second KeyId ERROR action %s Enabling Inter VLAN routing. DEBUG Invalid Authentication Type ERROR Updating inter VLAN routing status. DEBUG ripDisable failed ERROR Deleting inter VLAN routing. DEBUG ripEnable failed ERROR D-Link DSR-Series User Manual...
- Page 273 DEBUG sqlite3QueryResGet failed.Query:%s ERROR Recvied DOT11_EAPOL_KEYMSG DEBUG sqlite3QueryResGet failed.Query:%s ERROR shutting down AP:%s DEBUG profile %s not found ERROR APCtx Found DEBUG sqlite3QueryResGet failed.Query:%s ERROR Interface name and policy must be APCtx Not-Found DEBUG ERROR specified D-Link DSR-Series User Manual...
- Page 274 DEBUG IAPP: socket (SOCK_STREAM) failed. ERROR Add PMKSA to the list DEBUG IAPP: TCP connect failed to %s. ERROR eapolRecvAuthKeyMsg: received key DEBUG cmd %d not supported.sender=%d ERROR message umiIoctl(UMI_COMP_KDOT11,%d,%d) node not found DEBUG ERROR failed D-Link DSR-Series User Manual...
- Page 275 NULL ERROR unable to allocate memory for DOT11_ could not find access point context for %s DEBUG ERROR join event for existing node %s DEBUG unable to install wme mapping on %s ERROR D-Link DSR-Series User Manual...
- Page 276 ERROR pae found sending unicast key DEBUG Invalid IE. ERROR umiIoctl(UMI_COMP_KDOT11_VAP,%d sending broadcast key DEBUG ERROR ) failed from pnacAuthPAEDisconnected: calling umiIoctl(UMI_COMP_KDOT11,%d ,%d) DEBUG ERROR pnacTxCannedFail failed from pnacAuthPAEForceUnauth: calling KDOT11_SET_PARAM:IEEE80211_IOC_ DEBUG ERROR pnacTxCannedFail WME_CWMIN failed D-Link DSR-Series User Manual...
- Page 277 = %d, eapolRecvKeyMsg: invalid descriptor DEBUG ERROR pktType = %d version from pnacPDUProcess: received PNAC_ eapolRecvKeyMsg: incorrect descriptor DEBUG ERROR EAP_PACKET version from pnacPDUProcess: currentId = %d DEBUG eapolRecvKeyMsg: Ack must not be set ERROR D-Link DSR-Series User Manual...
- Page 278 DEBUG aesWrap failed ERROR Auth PAE state = %s DEBUG unknown key descriptor version %d ERROR Auth Reauth state = %s DEBUG dot11Malloc failed ERROR Back auth state = %s DEBUG could not initialize AES128ECB ERROR D-Link DSR-Series User Manual...
- Page 279 Failed to set dot11 port status WARN ERROR malloc failed Error from pnacEapDemoAuthRecv: PTK state machine in NO_STATE. WARN ERROR received null EAP pkt Error from pnacEapDemoAuthRecv: PTK state machine in NO_STATE!! WARN ERROR send “ D-Link DSR-Series User Manual...
- Page 280 AP list. Recd IE data for non-existent AP %s ERROR could not start PNAC task ERROR Recd IE data for wrong AP %s ERROR invalid aruments ERROR Received Invalid IE data from WSC ERROR pnacIfNameToIndex failed ERROR D-Link DSR-Series User Manual...
- Page 281 Profile %s does not exist ERROR ERROR cannot be NULL Error from pnacAuthConfig: receive SSID should not be longer than %d ERROR ERROR routine hook “ Profile %s does not exist ERROR pnacAuthConfig: pnacAuthInit failed ERROR D-Link DSR-Series User Manual...
- Page 282 Profile %s does not exist ERROR ERROR failed Error from pnacEAPPktCreate: basic pkt Auth method %s not found in the list. ERROR ERROR create failed Error from pnacTxCannedFail: eap pkt Profile %s does not exist ERROR ERROR create failed D-Link DSR-Series User Manual...
- Page 283 ERROR unable to create new EAP context. ERROR dot11RogueAP. unable to apply %s profile on the EAP sqlite3QueryResGet failed ERROR ERROR context. pnacUmiAuthConfig: could not unhandled database operation %d ERROR ERROR configure PNAC PAE “ D-Link DSR-Series User Manual...
- Page 284 Returning to chan %d, ieeeChan DEBUG %s%d: cannot decode offset value, DEBUG DEBUG %s%d: wrong length code: 0x%X, DEBUG DEBUG %s%d: short packet (len=%d), __FUNCTION__, DEBUG AES_CCM DEBUG %s%d: bad sequence number: %d, expected: %d, DEBUG CKIP DEBUG D-Link DSR-Series User Manual...
- Page 285 %s: no memory for sysctl table!, PPPOL2TP: <-- %s, __FUNCTION__) DEBUG DEBUG __func__ %s: no memory for VAP name!, %s: recv: , tunnel->name DEBUG DEBUG __func__ %s: failed to register sysctls!, vap- %s: xmit:, session->name DEBUG DEBUG >iv_dev->name D-Link DSR-Series User Manual...
- Page 286 FAIL: ieee80211_crypto_setkey failed DEBUG >name, addr[0], addr[1], addr[2], addr[3], addr[4], addr[5] %s: mac_undefined %02X:%02X:%02X:%02X:%02X:%02X, dev- DEBUG FAIL: unable to allocate skbuff DEBUG >name, addr[0], addr[1], addr[2], addr[3], addr[4], addr[5] %s: set_float %d;%d, DEBUG FAIL: ccmp encap failed DEBUG D-Link DSR-Series User Manual...
- Page 287 DEBUG 802.11i TKIP test vectors passed DEBUG ip_rt_bug: %u.%u.%u.%u -> %u.%u.%u.%u, %s, DEBUG %s, buf DEBUG UDP: short packet: From %u.%u.%u.%u:%u Atheros HAL assertion failure: %s: line DEBUG DEBUG %d/%d to %u.%u.%u.%u:%u, %u: %s, D-Link DSR-Series User Manual...
- Page 288 %u %d %d %d, expire, DEBUG %02x, hk->kv_val[i] DEBUG rt_cache @%02x: %u.%u.%u.%u, hash, DEBUG mac %s, ether_sprintf(mac) DEBUG rt_bind_peer(0) @%p, NET_CALLER(iph) DEBUG %s , sc->sc_splitmic ? mic : rxmic DEBUG ip_rt_advice: redirect to DEBUG %02x, hk->kv_mic[i] DEBUG D-Link DSR-Series User Manual...
- Page 289 DEBUG %s: %s: unable to restart recv logic, DEBUG %s: unable to allocate channel table, ip_conntrack: can’t register to sysctl. DEBUG DEBUG dev->name ip_conntrack_rtsp v IP_NF_RTSP_VERSION %s: unable to allocate channel table, DEBUG DEBUG loading dev->name D-Link DSR-Series User Manual...
- Page 290 () .., status xlr8NatSoftCtxEnqueue: ip_conntrack version %s (%u buckets, %d max) DEBUG xlr8NatIpFinishOutput () returned DEBUG [%d], status ERROR registering port %d, DEBUG icmpExceptionHandler: Exception! DEBUG netfilter PSD loaded - (c) astaro AG DEBUG fragExceptionHandler: Exception! DEBUG D-Link DSR-Series User Manual...
- Page 291 TYPE=%u CODE=%u , ich->type, ich->code DEBUG unRegistering IPsecMib ..DEBUG ERROR: Failed to add entry to IPsec sa INCOMPLETE [%u bytes] , DEBUG DEBUG table ERROR: Failed to add entry to IPsec sa ID=%u SEQ=%u , DEBUG DEBUG table D-Link DSR-Series User Manual...
- Page 292 IPT_ACCOUNT_NAME : checkentry() ip_ct_q931: decoding error: %s, DEBUG INFO failed to register match. ip_ct_q931: packet dropped DEBUG failed to create procfs entry . INFO MPPE/MPPC encryption/compression ip_ct_ras: decoding error: %s, DEBUG INFO module registered D-Link DSR-Series User Manual...
- Page 293 %s: %s (, dev_info, ath_hal_version INFO kmalloc failed DEBUG %s: driver unloaded, dev_info INFO %s: %s: mem=0x%lx, irq=%d hw_ kmalloc failed DEBUG INFO base=0x%p, kmalloc failed DEBUG %s: %s, dev_info, version INFO kmalloc Failed DEBUG %s: driver unloaded, dev_info INFO D-Link DSR-Series User Manual...
- Page 294 4. hop :%d dev:%s usableBwLimit = %d currBwShare = %d lastHopSelected = %d DEBUG %s: %s: mem=0x%lx, irq=%d, INFO weightedHopPrefer = %d , 2. selecting hop: %d lastHopSelected = %d , DEBUG %s: %s, dev_info, version INFO selHop, lastHopSelected D-Link DSR-Series User Manual...
- Page 295 Failed to set AES encrypt key DEBUG INFO about IP: routing cache hash table of %u Failed to set AES encrypt key DEBUG INFO buckets, %ldKbytes, source route option %u.%u.%u.%u -> Failed to set AES encrypt key DEBUG INFO %u.%u.%u.%u, D-Link DSR-Series User Manual...
- Page 296 DES Software Test: %d iterations, iter DEBUG %s: key size %d is too large, WARNING DES Software Test Duration: %d:%d, DEBUG try_module_get failed WARNING DES Hardware Test: %d iterations, iter DEBUG %s: request_irq failed, dev->name WARNING D-Link DSR-Series User Manual...
- Page 297 Cannot Set Rate: %x, value DEBUG ll header: WARNING Getting Rate Series: %x,vap->iv_fixed_rate.series DEBUG %u.%u.%u.%u sent an invalid ICMP WARNING Getting Retry Series: %x,vap->iv_fixed_rate. DEBUG dst cache overflow WARNING retries IC Name: %s,ic->ic_dev->name DEBUG Neighbour table overflow. WARNING D-Link DSR-Series User Manual...
- Page 298 %s: cannot load SHA1 module, fname ERROR %s: [%s] %s, vap->iv_dev->name, ether_ %s: CryptoAPI SHA1 digest size too DEBUG ERROR sprintf(mac), buf small, fname [%s:%s] discard %s frame, %s, vap->iv_dev- %s: cannot allocate space for SHA1 DEBUG ERROR >name, digest, fname D-Link DSR-Series User Manual...
- Page 299 %s: cannot load ARC4 module, fname ERROR %s%s, seen_option++ ? , : , DEBUG %s: cannot load SHA1 module, fname ERROR %s: CryptoAPI SHA1 digest size too %s, seen_option ? > : DEBUG ERROR small, fname D-Link DSR-Series User Manual...
- Page 300 PKTLOG_TAG %s: page fault out of range, __ DEBUG JBD: bad block at offset %u, ERROR FUNCTION__ PKTLOG_TAG %s: Log buffer unavailable, __ DEBUG JBD: corrupted journal superblock ERROR FUNCTION__ PKTLOG_TAG DEBUG JBD: bad block at offset %u, ERROR D-Link DSR-Series User Manual...
- Page 301 %s: unable to start recv logic, __func__ DEBUG %s: %s:%d: BAD SESSION MAGIC \ ERROR %s: unable to reset hardware; hal status %u, DEBUG %s: %s:%d: BAD TUNNEL MAGIC \ ERROR msg->msg_namelen wrong, %d, msg- hardware error; reseting DEBUG ERROR >msg_namelen D-Link DSR-Series User Manual...
- Page 302 %02x, ((unsigned char *)p)[i] ERROR %s: unable to allocate channel table, __func__ DEBUG mic check failed ERROR %s: Tx Antenna Switch. Do internal reset., __ %s: 0x%p len %u, tag, p, (unsigned DEBUG ERROR func__ int)len D-Link DSR-Series User Manual...
- Page 303 Error entering wow mode DEBUG ERROR >ifName Wakingup due to wow signal DEBUG unable to register KIFDEV to UMI ERROR ERROR: %s: Timeout at page %#0x %s, wowStatus = 0x%x, __func__, wowStatus DEBUG ERROR addr %#0x D-Link DSR-Series User Manual...
- Page 304 ; %d: %p , j, tid->tx_buf[j] DEBUG ath_pci: no memory for device state ERROR %s: unable to attach hardware: ‘%s’ %p , buf DEBUG ERROR (HAL status %u), axq_q: DEBUG %s: HAL ABI mismatch; ERROR D-Link DSR-Series User Manual...
- Page 305 FAST PATH Breaks on BUF CHECK CRITICAL %02x, hk->kv_val[i] DEBUG FAST PATH Breaks on DST CHECK CRITICAL FAST PATH Breaks on MTU %d %d mac %02x-%02x-%02x-%02x-%02x-%02x, DEBUG %d,bufMgrLen(pBufMgr),mtu,dst_ CRITICAL mac[0], mac[1], mac[2], mac[3], mac[4], mac[5] mtu(pDst->path) D-Link DSR-Series User Manual...
- Page 306 ESP: Assigning the secure flags for sav KERN_EMERG Initialzing Wps module DEBUG :%p skb:%p src:%x dst:%x,sav,skb,ip- CRITICAL >ip_src.s_addr,ip->ip_dst.s_addr %s Buffer %d mtu %d path mtu %d header %d trailer %d,__func__,bufM %s:%d %s, __FILE__, __LINE__, __func__ DEBUG grLen(pBufMgr),mtu,dst_mtu(pDst- CRITICAL >path),pDst->header_len,pDst- >trailer_len D-Link DSR-Series User Manual...
-
Page 307: Appendix E - Rj-45 Pin-Outs
Appendix E - RJ-45 Pin-outs Appendix E - RJ-45 Pin-outs Signal RJ-45 Cable Adapter Signal RJ-45 PIN DB-9 PIN D-Link DSR-Series User Manual... -
Page 308: Appendix F - New Wi Fi Frequency Table ( New Appendix Section )
5, 6, 7, 8, 9, 10, United states 2.4Ghz 1, 2, 3, 4, 5, 6, 7 10, 11 36, 40, 44, 48, 149, 153, 5 Ghz 40, 48, 153, 161 36, 44, 149, 157 157, 161, 165 D-Link DSR-Series User Manual... - Page 309 40, 48, 56, 64 36, 44, 52, 60 60, 64 1, 2, 3, 4, 5, 6, 7, 8, 9, 10, 5, 6, 7, 8, 9, 10, 1, 2, 3, 4, 5, 6, Brazil 2.4Ghz 11,12,13 11,12,13 7,8,9 D-Link DSR-Series User Manual...
- Page 310 5, 6, 7, 8, 9, 10, 1, 2, 3, 4, 5, 6, China 2.4Ghz 11, 12, 13 11, 12, 13 7, 8, 9 36, 40, 44, 48, 149, 153, 40, 48, 153, 5 Ghz 36, 44, 149, 157 157, 161, 165 D-Link DSR-Series User Manual...
-
Page 311: Appendix G - Product Statement
TI Navigator access point and violate FCC regulations. Any changes or modifications not expressly approved by the party responsible for compliance could void the user’s authority to operate this equipment. D-Link DSR-Series User Manual... - Page 312 - EN 301 489-17 V1.3.2 (2008-04) and EN 301 489-1 V1.8.1 (2008-04) Electromagnetic compatibility and Radio spectrum Matters (ERM); Electro Magnetic Compatibility (EMC) standard for radio equipment and services; Part 17: Specific conditions for 2,4 GHz wideband transmission systems and 5 GHz high performance RLAN equipment D-Link DSR-Series User Manual...
- Page 313 5350 MHz. In Luxermbourg it is not allowed to make use of the frequency band 5470 – 5725 MHz. End-users are encouraged to contact the national spectrum authorities in France and Luxembourg in order to obtain the latest information about any restrictions in the 5 GHz frequency band(s). D-Link DSR-Series User Manual...
- Page 314 Hereby, [D-Link Corporation], declares that this [DSR-1000N] is in compliance with the essential English requirements and other relevant provisions of Directive 1999/5/EC. Por medio de la presente [D-Link Corporation] declara que el [DSR-1000N] cumple con los Español requisitos esenciales y cualesquiera otras disposiciones aplicables o exigibles de la Directiva [Spanish] 1999/5/CE.
- Page 315 [D-Link Corporation] declara que este [DSR-1000N]está conforme com os requisitos essenciais e Português outras disposições da Directiva 1999/5/CE. [Portuguese] [D-Link Corporation] izjavlja, da je ta [DSR-1000N] v skladu z bistvenimi zahtevami in ostalimi Slovensko relevantnimi določili direktive 1999/5/ES. [Slovenian] [D-Link Corporation] týmto vyhlasuje, že [DSR-1000N] spĺňa základné požiadavky a všetky Slovensky príslušné...
- Page 316 Canadian Department of Communications Industry Canada (IC) Notice This Class B digital apparatus complies with Canadian ICES-003 and RSS-210. Cet appareil numérique de la classe B est conforme à la norme NMB-003 et CNR-210 du Canada. D-Link DSR-Series User Manual...
- Page 317 - This device may not be used for setting up outdoor radio links in France and in some areas the RF output power may be limited to 10 mW EIRP in the frequency range of 2454 – 2483.5 MHz. For detailed information the enduser should contact the national spectrum authority in France. D-Link DSR-Series User Manual...
- Page 318 Hereby, [D-Link Corporation], declares that this [DSR-500N] is in compliance with the English essential requirements and other relevant provisions of Directive 1999/5/EC. Por medio de la presente [D-Link Corporation] declara que el [DSR-500N] cumple con Español los requisitos esenciales y cualesquiera otras disposiciones aplicables o exigibles de la [Spanish] Directiva 1999/5/CE.
- Page 319 [D-Link Corporation] declara que este [DSR-500N]está conforme com os requisitos essenciais e outras disposições da Directiva 1999/5/CE. Português [Portuguese] [D-Link Corporation] izjavlja, da je ta [DSR-500N] v skladu z bistvenimi zahtevami in ostalimi relevantnimi določili direktive 1999/5/ES. Slovensko [Slovenian] [D-Link Corporation] týmto vyhlasuje, že [DSR-500N] spĺňa základné požiadavky a všetky príslušné...
- Page 320 Is herewith confirmed to comply with the requirements set out in the Council Directive on the Approximation of the Laws of the Member States relating to Electromagnetic Compatibility (2004/108/ D-Link DSR-Series User Manual...
- Page 321 L’exploitation est autorisée aux deux conditions suivantes : (1) l’appareil ne doit pas produire de brouillage, et (2) l’utilisateur de l’appareil doit accepter tout brouillage radioélectrique subi, même si le brouillage est susceptible d’en compromettre le fonctionnement. D-Link DSR-Series User Manual...
- Page 322 20 cm from all persons and must not be co-located or operating in conjunction with any other antenna or transmitter. End-users and installers must be provided with antenna installation instructions and consider removing the no-collocation statement. D-Link DSR-Series User Manual...
- Page 323 Europe – EU Declaration of Conformity This device complies with the essential requirements of the R&TTE Directive 1999/5/EC. The following test methods have been applied in order to prove presumption of conformity with the essential requirements of the R&TTE Directive 1999/5/EC: D-Link DSR-Series User Manual...
- Page 324 This device may not be used for setting up outdoor radio links in France and in some areas the RF output power may be limited to 10 mW EIRP in the frequency range of 2454 – 2483.5 MHz. For detailed information the end-user should contact the national spectrum authority in France. D-Link DSR-Series User Manual...
- Page 325 1999/5/EY oleellisten vaatimusten ja sitä koskevien direktiivin [Finnish] muiden ehtojen mukainen. Härmed intygar [företag] att denna [utrustningstyp] står I överensstämmelse med de väsentliga Svenska egenskapskrav och övriga relevanta bestämmelser som framgår av direktiv 1999/5/EG. [Swedish] D-Link DSR-Series User Manual...
- Page 326 4. Maneuver the Router so the wall-mount slots line up with the two screws. 5. Place the wall-mount slots over the screws and slide the Router down until the screws fit snugly into the wall-mount slots. D-Link DSR-Series User Manual...