Table of Contents
Advertisement
Advertisement
Table of Contents

Related Manuals for Breville vdf108


Summary of Contents for Breville vdf108
- Page 1 ® ® easy clean digital fryer...
-
Page 2: Product Safety
product safety READ CAREFULLY AND KEEP FOR FUTURE REFERENCE This appliance can be used by children aged from 8 years and above and persons with reduced physical, sensory or mental capabilities or lack of experience and knowledge if they have been given supervision or instruction concerning use of the appliance in a safe way and understand the hazards involved. - Page 3 product safety ! Never use this appliance for anything other than its intended use. This appliance is for household use only. Do not use this appliance outdoors. ! Always ensure that hands are dry before handling the plug or switching on the appliance.
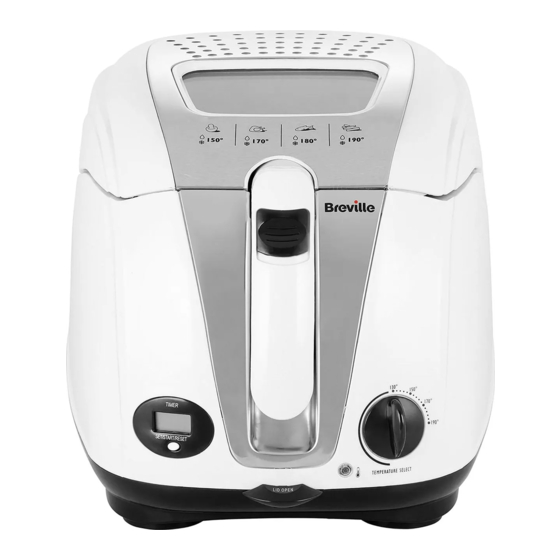
- Page 4 features Lid release button Timer button Timer display Basket handle lock button Basket Removable lid Viewing window Non-stick removable bowl Body 10 Temperature control Due to our policy of continuous improvement, the actual product may differ slightly from the one illustrated in these instructions.
-
Page 5: Before First Use
before first use Unpacking • Carefully remove your fryer from its packaging. Keep the packaging until you are happy that the fryer is working properly. Retain this instruction booklet for reference in the future. • Check that there is no packaging under the lid. Clean your fryer Make sure that your fryer is switched off and unplugged from the mains supply socket before cleaning it. - Page 6 preparing your fryer Filling your fryer with oil Make sure that your fryer is switched off and unplugged from the mains supply socket before filling it with oil. Never fill your fryer above the MAX indicator mark on the fryer bowl, or below the MIN indicator mark. Over or under filling your fryer could cause damage or injury.
-
Page 7: Using Your Fryer
using your fryer Always use your fryer on a stable, secure, dry and level surface. Allow adequate space above and on all sides for air circulation. Do not allow the appliance to touch any flammable material during use (such as curtains or wall coverings). -
Page 8: Switching On And Preheating
using your fryer Switching on and preheating 1. Plug in and switch on the fryer from the mains supply. 2. To set the temperature, rotate the temperature dial until the pointer aligns with the required temperature. The temperature indicator will illuminate red. The maximum temperature is 190°C.The fryer will automatically control the oil temperature to prevent overheating. - Page 9 how to remove oil from your fryer Before removing oil from your fryer ALWAYS turn the temperature control fully anticlockwise , unplug your fryer from the mains supply socket and allow the oil to cool completely. 1. You will need a slotted spoon, a suitable tray or large plate, kitchen paper, a funnel or jug with a pouring lip, muslin (if reusing the oil), and the original oil bottle you saved earlier.
- Page 10 frying guidelines Oils recommended for use in the fryer include: • Sunflower • Vegetable • Groundnut • Rape seed • Corn Oils and fats not recommended: • Hard fats • Olive oil (any type) Oil quantity: Always use the recommended (MAX) quantity of oil when deep frying. Never exceed this amount, and never use the fryer without any oil in it.
-
Page 11: Cooking Guidelines
frying guidelines Cooking guidelines The following table is a guide to the temperature and cooking times for various foods. Experiment to find the cooking temperature and times that produce the results most suited to your taste. Always make sure that meat and fish are thouroughly cooked before eating. Food Type Temperature (ºC) Time (minutes) - Page 12 frying guidelines 1. For even frying, cut food items such as chips to the same size and choose similar sized pieces of fish and chicken. 2. Always make sure that the food you are frying is as dry as possible (battered foods are the exception) to avoid spitting and overflowing.
-
Page 13: Care And Cleaning
care and cleaning Always make sure that the fryer has completely cooled down before cleaning it. This can take 2-3 hours. Make sure that your fryer is switched off and unplugged from the mains supply socket. Never immerse your fryer or its mains plug in water or any other liquid. Never use harsh abrasives, chemicals or oven cleaners Cleaning the cooking basket 1. - Page 14 When replacing oil, never mix different oil types. Turn on your Creativity ™ Let the Breville team help you turn on your creativity with a gateway to a world of food ® and drinks without limits. You don’t have to travel far—just to your computer, tablet or mobile—where you will discover our FREE website with top tips and recipes to inspire...
-
Page 15: Connection To The Mains Supply
connection to the mains supply This appliance must be earthed. This appliance is fitted with either a moulded or rewirable BS1363, 13 amp plug. The fuse should be rated at 13 amps and be ASTA approved to BS1362. If the fuse in a moulded plug needs to be changed, the fuse cover must be refitted. The appliance must not be used without the fuse cover fitted. -
Page 16: After Sales Service
after sales service These appliances are built to the very highest of standards. There are no user serviceable parts. Follow these steps if the unit fails to operate: 1. Check the instructions have been followed correctly. 2. Check that the fuse has not blown. 3. - Page 17 guarantee Please keep your receipt as this will be required for any claims under this guarantee. This appliance is guaranteed for 1 year after your purchase as described in this document. During this guaranteed period, if in the unlikely event the appliance no longer functions due to a design or manufacturing fault, please take it back to the place of purchase, with your till receipt and a copy of this guarantee.
- Page 20 Telephone: 0161 621 6900 For Customer Service details, please see the website. www.breville.co.uk © 2015 Jarden Consumer Solutions (Europe) Limited All rights reserved. Imported and distributed by Jarden Consumer Solutions (Europe) Limited, Cheadle Royal Business Park, Cheadle, SK8 3GQ, United Kingdom.