NEC VT490 User Manual
Portable
Hide thumbs
Also See for VT490:
- Installation manual (7 pages) ,
- Quick setup manual (2 pages) ,
- User manual (79 pages)
Table of Contents
Advertisement
Quick Links
Advertisement
Chapters
Table of Contents
Troubleshooting

Related Manuals for NEC VT490


Summary of Contents for NEC VT490
- Page 1 Portable Projector VT695/VT595/VT590/VT490/VT59/VT49 User’s Manual...
- Page 2 (3) Great care has been taken in the preparation of this user’s manual; however, should you notice any questionable points, errors or omissions, please contact us. (4) Notwithstanding article (3), NEC will not be responsible for any claims on loss of profit or other matters deemed to result from using the Projector.
- Page 3 Important Information Safety Cautions Precautions Please read this manual carefully before using your NEC VT695/VT595/VT590/VT490/VT59/VT49 projector and keep the manual handy for future reference. Your serial number is located on the bottom of your projector. Record it here: CAUTION To turn off main power, be sure to remove the plug from power outlet.
- Page 4 The Federal Communications Commission does not allow any modifications or changes to the unit EXCEPT those specified by NEC Corporation of America in this manual. Failure to comply with this government regulation could void your right to operate this equipment. This equipment has been tested and found to comply with the limits for a Class B digital device, pursuant to Part 15 of the FCC Rules.
- Page 5 - Do not heat the power cable. - Do not handle the power plug with wet hands. • Turn off the projector, unplug the power cable and have the object removed by a qualified NEC service personnel under the following conditions: - When the power cable or plug is damaged or frayed.
- Page 6 Important Information CAUTION • Do not use the tilt-foot for purposes other than originally intended. Misuses such as gripping the tilt-foot or hanging on the wall can cause damage to the projector. • Do not send the projector in the soft case by parcel delivery service or cargo shipment. The projector inside the soft case could be damaged.
-
Page 7: Table Of Contents
Introduction to the Projector --------------------------------------------------------------------- 2 Part Names of the Projector --------------------------------------------------------------------- 3 Attaching the supplied carrying handle (VT695, VT595, VT590 and VT490 only) ------------------------------------------------- 4 Top Features -------------------------------------------------------------------------------------- 5 Terminal Panel Features ----------------------------------------------------------------------- 6 Part Names of the Remote Control ------------------------------------------------------------ 7... - Page 8 Table of Contents 4. Convenient Features ------------------------------------------------------ 30 Turning off the Image and Sound ------------------------------------------------------------ 30 Freezing a Picture -------------------------------------------------------------------------------- 30 Enlarging a Picture ------------------------------------------------------------------------------- 30 Changing Lamp Mode --------------------------------------------------------------------------- 31 Preventing the Unauthorized Use of the Projector --------------------------------------- 31 Using the Optional Remote Mouse Receiver (NP01MR) ------------------------------ 34 5.
-
Page 9: Important Information
Registration card Limited warranty For Europe only Guarantee policy Quick Setup Guide CD-ROM Important Information User’s manual For VT695, VT595, VT590 For VT695 and VT595 only and VT490 only Carrying handle (24FT9651) DVI to VGA adapter (7N960231) Screw (M4 2: 24V00411) -
Page 10: Introduction To The Projector
Display popular wide screen and full screen aspect ratios – 16:9 and 4:3 • Built-in speaker for an integrated audio solution • High resolution display - up to UXGA compatible, XGA native resolution (SVGA: VT490 and VT49). • Multiple video mode selections (depending on your source) •... -
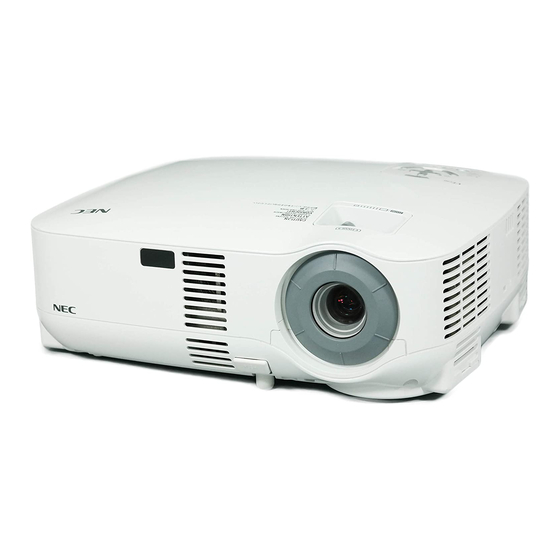
Page 11: Part Names Of The Projector
1. Introduction Part Names of the Projector Front/Top Zoom Lever (VT695/VT595/VT590/VT490/VT59) Controls ( → page 5) Digital Zoom Button (VT49) ( → page 24) Ventilation (inlet) / Filter Cover Remote sensor ( → page 50) ( → page 8) Two filters on VT695, VT595, VT590... -
Page 12: Attaching The Supplied Carrying Handle (Vt695, Vt595, Vt590 And Vt490 Only)
( → page 23) ( → page 52) Attaching the supplied carrying handle (VT695, VT595, VT590 and VT490 only) You can carry the projector by attaching the supplied carrying handle securely to the projector. To attach the supplied carrying handle, use a Phillips-head screwdriver and the supplied two screws. -
Page 13: Top Features
1. Introduction Top Features MENU SELECT LAMP STATUS POWER ON/STAND BY SOURCE AUTO ADJ. 1. LAMP Indicator (→page 52,55) 2. STATUS Indicator (→page 55) 3. POWER Indicator (→page 20,28,55) 4. POWER Button (ON / STAND BY) ( ) (→page 20,28) 5. -
Page 14: Terminal Panel Features
1. COMPUTER 1 IN/ Component Input Connector (Mini D-Sub 15 Pin) (VT695/VT595) (→page 13,15) COMPUTER IN/ Component Input Connector (Mini D-Sub 15 Pin) (VT590/VT490/VT59/VT49) (→page 13,17) 2. AUDIO IN Mini Jack (Stereo Mini) (→page 13,14,17) (VT695/VT595) 3. AUDIO OUT Mini Jack (Stereo Mini) (→page 16) (VT695/VT595) 4. -
Page 15: Part Names Of The Remote Control
2. POWER ON Button 15. COMPUTER 1/2 Button (→ page 20) (The COMPUTER 2 button is not available on 3. POWER OFF Button VT590, VT490, VT59 and VT49) (→ page 28) (→ page 22) 4. MAGNIFY (+)(–) Button 16. AUTO ADJ. Button (→... -
Page 16: Battery Installation
30° 30° 30° *NOTE: The VT590, VT490, VT59 and VT49 do not 7m/22feet have the remote sensor on the rear panel. • The infrared signal operates by line-of-sight up to a distance of about 22 feet/7 m and within a 60-degree angle of the remote sensor on the projector cabinet. -
Page 17: Installation And Connections
2. Installation and Connections This section describes how to set up your projector and how to connect video and audio sources. Your projector is simple to set up and use. But before you get started, you must first: 1 Set up a screen and the projector. 2 Connect your computer or video equipment to the projector. -
Page 18: Selecting A Location (Vt595/Vt590/Vt490/Vt59)
2. Installation and Connections Selecting a Location (VT595/VT590/VT490/VT59) The further your projector is from the screen or wall, the larger the image. The minimum size the image can be is approximately 21" (0.53 m) measured diagonally when the projector is roughly 30 inches (0.8 m) from the wall or screen. -
Page 19: Throw Distance And Screen Size
3658 1260 7170 8610 -570 6858 5486 4115 1410 8070 9690 -640 7620 6096 4572 1570 8970 10770 -710 VT595/VT590/VT490/VT59 α Screen Size Diagonal Width Height wide tele wide tele inch inch inch inch inch inch inch degree degree 10.3 1090 10.2... - Page 20 Contact your NEC dealer if you need a mirror * Do not attempt to install the projector yourself. system. If you're using a mirror system and your image •...
-
Page 21: Making Connections
Usually, the combination of the ‘Fn” key along with one of the 12 function keys gets the external display to come on or off. For example, NEC laptops use Fn + F3, while Dell laptops use Fn + F8 key combinations to toggle through external display selections. -
Page 22: When Viewing A Dvi Digital Signal (Vt695/Vt595)
2. Installation and Connections When Viewing a DVI Digital Signal (VT695/VT595) To project a DVI digital signal, be sure to connect the PC and the projector using a DVI cable (not supplied) before turning on your PC or projector. Turn on the projector first and select Computer 2 (Digital) from the source menu before turning on your PC. -
Page 23: Using Two Analog Computer Inputs Simultaneously (Vt695/Vt595)
2. Installation and Connections Using Two Analog COMPUTER Inputs Simultaneously (VT695/VT595) If you need to use two analog COMPUTER inputs simultaneously, connect a VGA signal cable as shown below. COMPUTER 1 IN COMPUTER 2 (DVI-I) IN S-VIDEO PC CTRL COMPUTER 2 (DVI-I) IN AUDIO IN COMPUTER 1 IN MONITOR OUT (COMP 1) -
Page 24: Connecting An External Monitor
• The signal from the COMPUTER 2 IN connector cannot be output from the MONITOR OUT connector on VT695 and VT595. • When the DVI Digital signal is selected, no signals will be output from the MONITOR OUT connector on VT695 and VT595. • The VT590/VT490/VT59/VT49 do not have the AUDIO OUT connector. -
Page 25: Connecting Your Dvd Player With Component Output
Component A component signal will be automatically displayed. If not, from the menu, select [Setup] → [Options] → [Signal Select] → [Computer 1 ([Computer] on VT590/VT490/VT59/VT49)], and then place a check mark in the Component radio button. NOTE: Refer to your DVD player's owner's manual for more information about your DVD player's video output requirements. -
Page 26: Connecting Your Vcr Or Laser Disc Player
2. Installation and Connections Connecting Your VCR or Laser Disc Player AUDIO IN S-VIDEO IN S-VIDEO PC CTRL COMPUTER 2 (DVI-I) IN AUDIO IN COMPUTER 1 IN MONITOR OUT (COMP 1) AUDIO OUT VIDEO IN AUDIO IN VIDEO IN S-Video cable (not supplied) Video cable (not supplied) Audio equipment VCR/ Laser disc player... -
Page 27: Connecting The Supplied Power Cable
2. Installation and Connections Connecting the Supplied Power Cable Connect the supplied power cable to the projector. First connect the supplied power cable's two-pin plug to the AC IN of the projector, and then connect the other plug of the supplied power cable in the wall outlet. To wall outlet ←... -
Page 28: Projecting An Image (Basic Operation)
3. Projecting an Image (Basic Operation) This section describes how to turn on the projector and to project a picture onto the screen. Turning on the Projector NOTE: • The projector has two power switches: a main power switch and a POWER (ON/STAND BY) button (POWER ON and OFF on the remote control). -
Page 29: Note On Startup Screen (Menu Language Select Screen)
3. Projecting an Image (Basic Operation) Note on Startup screen (Menu Language Select screen) When you first turn on the projector, you will get the Startup menu. This menu gives you the opportunity to select one of the 8 menu languages. To select a menu language, follow these steps: 1. -
Page 30: Selecting A Source
LAMP MODE VOLUME ASPECT HELP NOTE: the COMPUTER 2 button is not available on the VT590, VT490, VT59 and VT49. PICTURE FREEZE TIP: The COMPUTER 2 button on the remote control toggles the Computer 2 source between [Computer 2 (Digital)] and [Computer 2 (Analog)]. -
Page 31: Adjusting The Picture Size And Position
3. Projecting an Image (Basic Operation) Adjusting the Picture Size and Position Place your projector on a flat level surface and ensure that the projector is square to the screen. Lift the front edge of the projector to center the image vertically. If the projected image does not appear square to the screen then use the Keystone feature for proper adjustment. - Page 32 3. Projecting an Image (Basic Operation) Zoom VT695/VT595/VT590/VT490/VT59 VT695/VT595/VT590/VT490/VT59 Use the ZOOM lever to adjust the image size on the screen. VT49 VT49 Use the Digital ZOOM button on the projector cabinet to electronically enlarge or reduce the image size.
-
Page 33: Correcting Keystone Distortion
3. Projecting an Image (Basic Operation) Correcting Keystone Distortion Correcting Keystone Distortion If the screen is tilted vertically, keystone distortion becomes large. Proceed with the following steps to correct keystone distortion NOTE: The Keystone correction can cause an image to be slightly blurred because the correction is made electronically. NOTE: The Keystone correction range can be made narrower, depending on a signal or its aspect ratio selection. - Page 34 3. Projecting an Image (Basic Operation) Adjusting with the Auto Keystone Function (VT695 and VT595 only) The Auto Keystone correction feature will correct the vertical distortion of a projected image on the screen. No special operation required. Just put the projector on a flat surface. TIP: Even when the menu setting for [Auto Keystone] is turned on, [Keystone] can be adjusted manually.
-
Page 35: Optimizing Rgb Picture Automatically
• VT695/VT595: The Auto Adjust function does not work for component, video, and DVI digital signals. • VT590/VT490/VT59/VT49: The Auto Adjust function does not work for component and video signals. • If the Auto Adjust operation cannot optimize the RGB signal, try to adjust Horizontal/Vertical Position, Clock and Phase manually. -
Page 36: Turning Off The Projector
3. Projecting an Image (Basic Operation) Turning off the Projector To turn off the projector: MENU 1. First, press the POWER (ON/STAND BY) button on POWER the projector cabinet or the POWER OFF button on MAGNIFY PIC-MUTE PAGE SELECT the remote control. The [Power Off / Are you sure?] DOWN LAMP message will appear. -
Page 37: After Use
3. Projecting an Image (Basic Operation) After Use Preparation: Make sure that the projector is turned off. 1. Unplug the power cable. 2. Disconnect any other cables. 3. Retract adjustable tilt feet if extended. 4. Cover the lens with the lens cap. 5. -
Page 38: Convenient Features
4. Convenient Features ³ Turning off the Image and Sound Press the PIC-MUTE button to turn off the image and sound for a short POWER period of time. Press again to restore the image and sound. MAGNIFY PIC-MUTE PAGE DOWN MENU NOTE: Sound from the AUDIO OUT jack (Stereo mini) on the VT695/VT595 can be... -
Page 39: Changing Lamp Mode
4. Convenient Features Changing Lamp Mode This feature enables you to select two brightness modes of the lamp: Normal and Eco modes. The lamp life can be extended by using the Eco mode. Lamp Mode Description Status of LAMP indicator LAMP Normal Mode This is the default setting (100%... - Page 40 NOTE: Do not forget your keyword. However, if you forget your keyword, NEC or your dealer will provide you with your Release Code upon proof of ownership. See more information at the end of this section. ( → page 33) 7.
- Page 41 4. Convenient Features To turn on the projector when Security is enabled: 1. Press the Main Power Switch to the On position (I). 2. Press and hold the POWER ON or the ON/STAND BY button for a minimum of 1 second. The projector will be turned on and display a message to the effect that the projector is security-protected.
-
Page 42: Using The Optional Remote Mouse Receiver (Np01Mr)
4. Convenient Features Using the Optional Remote Mouse Receiver (NP01MR) The optional remote mouse receiver enables you to operate your computer’s mouse functions from the remote control. It is a great convenience for clicking through your computer-generated presentations. Connecting the remote mouse receiver to your computer If you wish to use the remote mouse function, connect the mouse receiver and computer. - Page 43 4. Convenient Features Operating your computer’s mouse from the remote control You can operate your computer's mouse from the remote control. PAGE UP/DOWN Button: scrolls the viewing area of the window or to move to the previous or next slide in PowerPoint on your computer.
-
Page 44: Using On-Screen Menu
5. Using On-Screen Menu Using the Menus NOTE: The on-screen menu may not be displayed correctly while interlaced motion video image is projected. 1. Press the MENU button on the remote control or projector cabinet to display the Menu. POWER MAGNIFY PIC-MUTE PAGE... - Page 45 5. Using On-Screen Menu 4. Use the SELECT button on the remote control or the projector cabinet to select the item you want to adjust or set. 5. Adjusting the level of a selected item or selecting an item. Slide bar Solid triangle POWER MAGNIFY...
-
Page 46: Menu Elements
5. Using On-Screen Menu · Menu Elements Title Slide bar Highlight Source Off Timer remaining time Radio button Solid triangle Check mark Thermometer symbol Key Lock symbol Menu windows or dialog boxes typically have the following elements: Title .......... Indicates the menu title. Highlight ........ -
Page 47: List Of Menu Items
Last Last, Auto, Computer, Computer 1, Computer 2(Digital), Computer 2 (Analog), Video, S-Video • Computer: VT590/VT490/VT59/VT49 only • Computer 1, Computer 2 (Digital), Computer 2 (Analog): VT695/VT595 only The asterisk (*) indicates that the default setting varies depending on the signal. - Page 48 5. Using On-Screen Menu Signal Select Computer 1(VT695/VT595) RGB/Component RGB/Component, RGB, Component Computer 2 (Analog) (VT695/VT595) RGB/Component RGB/Component, RGB, Component Computer(VT590/VT490/VT59/VT49) RGB/Component RGB/Component, RGB, Component Video Auto Auto, NTSC3.58, NTSC4.43, PAL, PAL-M, PAL-N, PAL60, SECAM S-Video Auto Auto, NTSC3.58, NTSC4.43, PAL, PAL-M,...
-
Page 49: Menu Descriptions & Functions [Picture]
5. Using On-Screen Menu ¿ Menu Descriptions & Functions [Picture] Preset When selecting user adjustable [Preset], the submenu will be displayed. You can customize each gamma or color. To do so, first select [Preset] and press the ENTER button, then proceed using the following steps. -
Page 50: Menu Descriptions & Functions [Image Options]
5. Using On-Screen Menu Adjusting White Balance [White Balance] This allows you to adjust the white balance. Contrast for each color (RGB) to adjust the white level of the screen; Brightness for each color (RGB) is used to adjust the black level of the screen. Adjusting Contrast, Brightness, Sharpness, Color and Hue You can adjust contrast, brightness, sharpness, color and hue. - Page 51 5. Using On-Screen Menu NOTE: • When you are displaying an RGB image with a higher resolution than the projector’s native resolution, the image will be displayed in the projector’s native resolution. In this case [Native] is not available from the menu. Only when displaying an RGB image with a lower resolution than the projector's native resolution, will the image be able to be displayed in its true resolution [Native].
-
Page 52: Menu Descriptions & Functions [Setup]
5. Using On-Screen Menu ² Menu Descriptions & Functions [Setup] [General] VT695/VT595 VT590/VT490/VT59/VT49 Enabling Auto Keystone [Auto Keystone] (VT695/VT595 only) This feature allows the projector to detect its tilt and correct vertical distortion automatically. To turn on the Auto Keystone feature, select [On]. - Page 53 5. Using On-Screen Menu [Installation] Selecting Projector Orientation [Orientation] This sets your image for your type of projection application. The options are: desktop front projection, ceiling rear projection, desktop rear projection, and ceiling front projection. Desktop front Ceiling rear Desktop rear Ceiling front Selecting Communication Speed [Communication Speed] This feature sets the baud rate of the PC Control port (Mini DIN 8 Pin).
- Page 54 5. Using On-Screen Menu Enabling Security [Security] This feature turns on or off the Security function. Unless the correct keyword is entered, the projector cannot project an image. (→page 31) Selecting Menu Color [Menu Color Select] You can choose between two color modes for menu color: color and monochrome. Selecting Menu Display Time [Menu Display Time] This option allows you to select how long the projector waits after the last touch of a button to turn off the menu.
- Page 55 Video → S-Video → Computer 1 and displays the first found source. NOTE The VT590, VT490, VT59 and VT49 will search for an active source in order of Computer → Video → S-Video → Computer and displays the first found source.
-
Page 56: Menu Descriptions & Functions [Information]
If the remaining lamp time reaches 0 hours, the projector will not turn on regardless of whether the lamp mode is set to Normal or Eco. Lamp life(H) Model Replacement lamp Normal VT695/VT595/ 2000 3000 VT85LP VT590/VT490 3000 4000 VT80LP VT59/VT49 [Source] [Source Index] [Horizontal Frequency] [Vertical Frequency] [Signal Type]... -
Page 57: Menu Descriptions & Functions [Reset]
5. Using On-Screen Menu [Version] [Product] [Firmware] Version [Serial Number] [Data] Version Menu Descriptions & Functions [Reset] Returning to Factory Default [Reset] The Factory Default feature allows you to change adjustments and settings to the factory preset for a (all) source (s) except the following: [Current Signal] Resets the adjustments for the current signal to the factory preset levels. -
Page 58: Maintenance
To replace the filter (sponge): 1. Remove the filter cover by pushing down on the catch of the cover until you feel it detach. NOTE: The VT695/VT595/VT590/VT490 have two filters; the VT59 and VT49 have one filter only. Catch 2. Gently peel off the filter (sponge) and replace it with the new one. -
Page 59: Cleaning The Cabinet And The Lens
6. Maintenance 3. Reinstall the new filter cover. 4. Clear the filter hours used. To reset the filter usage time, from the menu, select [Reset] → [Clear Filter Hours]. (→page for resetting the filter usage time.) NOTE: Do not wash the filter with soap and water. Soap and water will damage the filter membrane. Before replacing the filter, remove dust and dirt from the projector cabinet. -
Page 60: Replacing The Lamp
Eco mode) of use, the lamp bulb may shatter, and pieces of glass may be scattered in the lamp case. Do not touch them as the pieces of glass may cause injury. If this happens, contact your NEC dealer for lamp replacement. - Page 61 6. Maintenance 2. Remove the lamp cover. (1)Press firmly and slide the lamp cover by 1 cm (0.4”) • Do not force to pull the lamp cover (2)Push to release two catches on both sides and slide the lamp cover off. 3.
- Page 62 (1)Insert a new lamp housing until the lamp housing is plugged into the socket. CAUTION Do not use a lamp other than the NEC replacement lamp VT85LP (VT695/VT595/VT590/VT490) or VT80LP (VT59/VT49). Order this from your NEC dealer. (2)Secure it in place with the two screws.
-
Page 63: Appendix
7. Appendix Troubleshooting This section helps you resolve problems you may encounter while setting up or using the projector. Indicator Messages Power Indicator Indicator Condition Projector Condition Note The main power is off – Blinking light Green 0.5 sec On, The projector is getting ready to turn on. - Page 64 • Ensure that the distance between the projector and screen is within the adjustment range of the lens. (→ page for VT695, page for VT595/VT590/VT490/VT59 and for VT49) • Condensation may form on the lens if the projector is cold, brought into a warm place and is then turned on.
- Page 65 Usually, the combination of the ‘Fn” key along with one of the 12 function keys gets the external display to come on or off. For example, NEC laptops use Fn + F3, while Dell laptops use Fn + F8 key combinations to toggle through external display selections.
-
Page 66: Specifications
7. Appendix Specifications This section provides technical information about the VT695/VT595/VT590/VT490/VT59/VT49 projector's performance. Model Number VT695/VT595/VT590/VT490/VT59/VT49 Optical LCD Panel VT695: 0.63" p-Si TFT active-matrix with Micro Lens Array VT595/VT590/VT490/VT59/VT49:0.6" p-Si TFT active-matrix with Micro Lens Array Resolution VT695/VT595/VT590/VT59: 1024 768 pixels* native, up to UXGA with... - Page 67 (not including protrusions) Weight VT695/VT595: approx. 6.6 lbs / 3.0 kg VT590/VT490: approx. 6.4 lbs / 2.9 kg VT59/VT49: approx. 6.2 lbs / 2.8 kg Environmental Considerations Operational Temperatures : 41° to 104°F (5° to 40°C), (Eco mode selected automatically at 95°F to 104°F/35°C to 40°C) 20% to 80% humidity (non-condensing) Storage Temperatures : 14°...
- Page 68 7. Appendix Regulations VT695/VT595/VT590/VT490/VT49: For United States: UL Approved (UL 60950 - 1) Meets FCC Class B requirements For Canada: UL Approved (CSA 60950 - 1) Meets DOC Canada Class B requirements For Australia/New Zealand: Meets AS/NZS CISPR.22 Class B...
-
Page 69: Cabinet Dimensions
7. Appendix Cabinet Dimensions Although the appearance is slightly different, the VT695, VT595, VT590, VT490, VT59 and VT49 are the same in dimensions. Lens center 308.7 (12.2") 83 (3.3") 71.35 (2.8") Lens center PUSH Unit: mm (inch) -
Page 70: Pin Assignments Of D-Sub Computer Input Connector
7. Appendix Pin Assignments of D-Sub COMPUTER Input Connector Mini D-Sub 15 Pin Connector Pin No. RGB Signal (Analog) YCbCr Signal 11 12 13 14 15 Green or Sync on Green Blue Ground Signal Level Ground Video signal : 0.7Vp-p (Analog) Red Ground Cr Ground Sync signal : TTL level... -
Page 71: Compatible Input Signal List
D : Images in above flagged with “D” are supported by the DVI digital signals on VT695/VT595. @ : Images in above flagged with @ are compressed with Advanced AccuBlend on VT490/VT49. NOTE: Some composite sync signals may not be displayed correctly. -
Page 72: Pc Control Codes And Cable Connection
INPUT SELECT COMPUTER 2 (Analog) 02H INPUT SELECT VIDEO INPUT SELECT S-VIDEO PICTURE MUTE ON PICTURE MUTE OFF SOUND MUTE ON SOUND MUTE OFF PC Control Codes (VT590/VT490/VT59/VT49) Function Code Data POWER ON POWER OFF INPUT SELECT COMPUTER INPUT SELECT VIDEO... - Page 73 7. Appendix PC Control Connector (DIN-8P) To TxD of PC To GND of PC To RxD of PC NOTE: Pins 2, 3, 5, 6 and 8 are used inside the projector.
-
Page 74: Troubleshooting Check List
7. Appendix Troubleshooting Check List Before contacting your dealer or service personnel, check the following list to be sure repairs are needed also by referring to the “Troubleshooting” section in your user’s manual. This checklist below will help us solve your problem more efficiently. - Page 75 Native resolution: Refresh rate: Video adapter: Other: Projector DVD player Video equipment Signal cable VCR, DVD player, Video camera, Video game or other NEC standard or other manufacturer’s cable? Model number: Length: inch/m Manufacturer: Distribution amplifier Model number: Model number: Switcher...
-
Page 76: Travelcare Guide
6) Problems or damage caused by expendable supplies or devices TravelCare - a service for international travelers connected to the product other than those designated by NEC. This product is eligible for "TravelCare", NEC's unique international war- 7) Problems caused by natural consumption, wear or deterioration ranty. - Page 77 (Regions Covered) Riyadh Taiwan Address: P.O.Box 5519, Riyadh 11432, Saudi Arabia Telephone: +966 1 4645064 NEC Solutions Asia Pacific Pte. Ltd Fax Line: +966 1 4657912 Address: 401 Commonwealth Drive, #07-02, Haw Par Email Address: bhimji@samir-photo.com Technocentre, Singapore 149598...
- Page 78 7. Appendix P-1/ Date: TO: NEC or NEC's Authorized Service Station: (Company & Name with signature) Dear Sir (s), I would like to apply your TravelCare Service Program based on attached registration and qualification sheet and agree with your following conditions, and also the Service fee will be charged to my credit card account, if I don't return the Loan units within the specified period.
- Page 79 3) Any fault in the attachments or associated products or components (whether or not supplied by NEC or its agents which do not form part of the Product covered by this warranty); 4) Any act of God, fire, flood, war, act of violence or any similar occur- rence;...
- Page 80 Portable Projector VT695/VT595/VT590/VT491/VT59/VT49 User’s Manual...
- Page 81 (3) Great care has been taken in the preparation of this user’s manual; however, should you notice any questionable points, errors or omissions, please contact us. (4) Notwithstanding article (3), NEC will not be responsible for any claims on loss of profit or other matters deemed to result from using the Projector.
- Page 82 Important Information Safety Cautions Precautions Please read this manual carefully before using your NEC VT695/VT595/VT590/VT491/VT59/VT49 projector and keep the manual handy for future reference. Your serial number is located on the bottom of your projector. Record it here: CAUTION To turn off main power, be sure to remove the plug from power outlet.
- Page 83 The Federal Communications Commission does not allow any modifications or changes to the unit EXCEPT those specified by NEC Corporation of America in this manual. Failure to comply with this government regulation could void your right to operate this equipment. This equipment has been tested and found to comply with the limits for a Class B digital device, pursuant to Part 15 of the FCC Rules.
- Page 84 Important Information Place the projector in a horizontal position The tilt angle of the projector should not exceed 10 degrees, nor should the projector be installed in any way other than the desktop and ceiling mount, otherwise lamp life could decrease dramatically. 10°...
- Page 85 Important Information CAUTION • Do not use the tilt-foot for purposes other than originally intended. Misuses such as gripping the tilt-foot or hanging on the wall can cause damage to the projector. • Do not send the projector in the soft case by parcel delivery service or cargo shipment. The projector inside the soft case could be damaged.
- Page 86 Table of Contents Important Information ----------------------------------------------------------- i 1. Introduction ---------------------------------------------------------------------- 1 What's in the Box? --------------------------------------------------------------------------------- 1 Introduction to the Projector --------------------------------------------------------------------- 2 Part Names of the Projector --------------------------------------------------------------------- 3 Attaching the supplied carrying handle (VT695, VT595, VT590 and VT491 only) ------------------------------------------------- 4 Top Features -------------------------------------------------------------------------------------- 5 Terminal Panel Features ----------------------------------------------------------------------- 6 Part Names of the Remote Control ------------------------------------------------------------ 7...
- Page 87 Table of Contents 4. Convenient Features ------------------------------------------------------ 30 Turning off the Image and Sound ------------------------------------------------------------ 30 Freezing a Picture -------------------------------------------------------------------------------- 30 Enlarging a Picture ------------------------------------------------------------------------------- 30 Changing Lamp Mode --------------------------------------------------------------------------- 31 Preventing the Unauthorized Use of the Projector --------------------------------------- 31 Using the Optional Remote Mouse Receiver (NP01MR) ------------------------------ 34 5.
-
Page 88: Important Information
1. Introduction What's in the Box? Make sure your box contains everything listed. If any pieces are missing, contact your dealer. Please save the original box and packing materials if you ever need to ship your projector. Projector Lens cap (24FT9641) Soft case (24BS7582) -
Page 89: Introduction To The Projector
1. Introduction Introduction to the Projector This section introduces you to your new projector and describes the features and controls. Congratulations on Your Purchase of the Projector This projector is one of the very best projectors available today. The projector enables you to project precise images up to 300 inches across (measured diagonally) from your PC or Macintosh computer (desktop or notebook), VCR, DVD player, document camera, or a laser disc player. -
Page 90: Part Names Of The Projector
1. Introduction Part Names of the Projector Front/Top Zoom Lever (VT695/VT595/VT590/VT491/VT59) Controls ( → page 5) Digital Zoom Button (VT49) ( → page 24) Ventilation (inlet) / Filter Cover Remote sensor ( → page 50) ( → page 8) Two filters on VT695, VT595, VT590 and VT491 Focus Ring One filter on VT59 and VT49... -
Page 91: Attaching The Supplied Carrying Handle (Vt695, Vt595, Vt590 And Vt491 Only)
1. Introduction Bottom Rear Foot (Left / Right) ( → page 23) Adjustable Tilt Foot ( → page 23) Adjustable Tilt Foot Button Lamp Cover ( → page 23) ( → page 52) Attaching the supplied carrying handle (VT695, VT595, VT590 and VT491 only) You can carry the projector by attaching the supplied carrying handle securely to the projector. -
Page 92: Top Features
1. Introduction Top Features MENU SELECT LAMP STATUS POWER ON/STAND BY SOURCE AUTO ADJ. 1. LAMP Indicator (→page 52,55) 2. STATUS Indicator (→page 55) 3. POWER Indicator (→page 20,28,55) 4. POWER Button (ON / STAND BY) ( ) (→page 20,28) 5. -
Page 93: Terminal Panel Features
1. Introduction Terminal Panel Features VT695/VT595 S-VIDEO PC CTRL COMPUTER 2 (DVI-I) IN AUDIO IN COMPUTER 1 IN MONITOR OUT (COMP 1) AUDIO OUT VIDEO IN AUDIO IN PC CONTROL MONITOR OUT(COMP 1) S-VIDEO VT491 COMPUTER 1 IN AUDIO IN COMPUTER 2 IN AUDIO OUT VIDEO IN... -
Page 94: Part Names Of The Remote Control
1. Introduction Part Names of the Remote Control POWER MAGNIFY PIC-MUTE PAGE DOWN MENU ENTER EXIT L-CLICK R-CLICK MOUSE VIDEO COMPUTER COMPUTER AUTO ADJ. S-VIDEO LAMP MODE VOLUME ASPECT HELP PICTURE FREEZE 12. MOUSE R-CLICK Button* (→ page 34,35) 13. VIDEO Button (→... -
Page 95: Battery Installation
1. Introduction Battery Installation Slip the cover back over the bat- Press firmly and slide the Install new batteries (AAA). teries until it snaps into place. Do battery cover off. Ensure that you have the not mix different types of batter- batteries' polarity (+/–) aligned ies or new and old batteries. -
Page 96: Installation And Connections
2. Installation and Connections This section describes how to set up your projector and how to connect video and audio sources. Your projector is simple to set up and use. But before you get started, you must first: 1 Set up a screen and the projector. 2 Connect your computer or video equipment to the projector. -
Page 97: Selecting A Location (Vt595/Vt590/Vt491/Vt59)
2. Installation and Connections Selecting a Location (VT595/VT590/VT491/VT59) The further your projector is from the screen or wall, the larger the image. The minimum size the image can be is approximately 21" (0.53 m) measured diagonally when the projector is roughly 30 inches (0.8 m) from the wall or screen. The largest the image can be is 300"... -
Page 98: Throw Distance And Screen Size
2. Installation and Connections Throw Distance and Screen Size The following shows the proper relative positions of the projector and screen. Refer to the table to determine the position of installation. Distance Chart B = Vertical distance between lens center and screen center C = Throw distance D = Vertical distance between lens center and... - Page 99 Contact your NEC dealer if you need a mirror * Do not attempt to install the projector yourself. system. If you're using a mirror system and your image •...
-
Page 100: Making Connections
Usually, the combination of the ‘Fn” key along with one of the 12 function keys gets the external display to come on or off. For example, NEC laptops use Fn + F3, while Dell laptops use Fn + F8 key combinations to toggle through external display selections. -
Page 101: When Viewing A Dvi Digital Signal (Vt695/Vt595)
2. Installation and Connections When Viewing a DVI Digital Signal (VT695/VT595) To project a DVI digital signal, be sure to connect the PC and the projector using a DVI cable (not supplied) before turning on your PC or projector. Turn on the projector first and select Computer 2 (Digital) from the source menu before turning on your PC. -
Page 102: Using Two Analog Computer Inputs Simultaneously (Vt695/Vt595)
2. Installation and Connections Using Two Analog COMPUTER Inputs Simultaneously (VT695/VT595) If you need to use two analog COMPUTER inputs simultaneously, connect a VGA signal cable as shown below. COMPUTER 1 IN COMPUTER 2 (DVI-I) IN S-VIDEO PC CTRL COMPUTER 2 (DVI-I) IN AUDIO IN COMPUTER 1 IN MONITOR OUT (COMP 1) -
Page 103: Connecting An External Monitor
2. Installation and Connections Connecting an External Monitor VT695/VT595 VT491 AUDIO OUT MONITOR OUT MONITOR OUT PC CONTROL MONITOR OUT(COMP 1) S-VIDEO COMPUTER 1 IN AUDIO IN S-VIDEO PC CTRL COMPUTER 2 (DVI-I) IN AUDIO IN COMPUTER 1 IN COMPUTER 2 IN AUDIO OUT VIDEO IN AUDIO IN... -
Page 104: Connecting Your Dvd Player With Component Output
2. Installation and Connections Connecting Your DVD Player with Component Output VT695/VT595 VT491 COMPUTER 1 IN AUDIO IN COMPUTER 1 IN PC CONTROL MONITOR OUT(COMP 1) S-VIDEO COMPUTER 1 IN AUDIO IN S-VIDEO PC CTRL COMPUTER 2 (DVI-I) IN AUDIO IN COMPUTER 1 IN COMPUTER 2 IN AUDIO OUT... -
Page 105: Connecting Your Vcr Or Laser Disc Player
2. Installation and Connections Connecting Your VCR or Laser Disc Player AUDIO IN S-VIDEO IN S-VIDEO PC CTRL COMPUTER 2 (DVI-I) IN AUDIO IN COMPUTER 1 IN MONITOR OUT (COMP 1) AUDIO OUT VIDEO IN AUDIO IN VIDEO IN The above drawing is for VT695/VT595. The layout except VIDEO, S-VIDEO and AUDIO connectors S-Video cable (not supplied) may differ slightly from that shown in this drawing... -
Page 106: Connecting The Supplied Power Cable
2. Installation and Connections Connecting the Supplied Power Cable Connect the supplied power cable to the projector. First connect the supplied power cable's two-pin plug to the AC IN of the projector, and then connect the other plug of the supplied power cable in the wall outlet. To wall outlet ←... -
Page 107: Projecting An Image (Basic Operation)
3. Projecting an Image (Basic Operation) This section describes how to turn on the projector and to project a picture onto the screen. Turning on the Projector NOTE: • The projector has two power switches: a main power switch and a POWER (ON/STAND BY) button (POWER ON and OFF on the remote control). -
Page 108: Note On Startup Screen (Menu Language Select Screen)
3. Projecting an Image (Basic Operation) Note on Startup screen (Menu Language Select screen) When you first turn on the projector, you will get the Startup menu. This menu gives you the opportunity to select one of the 8 menu languages. To select a menu language, follow these steps: 1. -
Page 109: Selecting A Source
3. Projecting an Image (Basic Operation) Selecting a Source Selecting the computer or video source NOTE: Turn on the computer or video source equipment connected to the projector. Selecting from Source List MENU Press and quickly release the SOURCE button on the projector cabinet to display the Source list. -
Page 110: Adjusting The Picture Size And Position
3. Projecting an Image (Basic Operation) Adjusting the Picture Size and Position Place your projector on a flat level surface and ensure that the projector is square to the screen. Lift the front edge of the projector to center the image vertically. If the projected image does not appear square to the screen then use the Keystone feature for proper adjustment. - Page 111 3. Projecting an Image (Basic Operation) Zoom VT695/VT595/VT590/VT491/VT59 VT695/VT595/VT590/VT491/VT59 Use the ZOOM lever to adjust the image size on the screen. VT49 VT49 Use the Digital ZOOM button on the projector cabinet to electronically enlarge or reduce the image size. NOTE: Digital Zoom can result in a blurry image due to the electronic zoom.
-
Page 112: Correcting Keystone Distortion
3. Projecting an Image (Basic Operation) Correcting Keystone Distortion Correcting Keystone Distortion If the screen is tilted vertically, keystone distortion becomes large. Proceed with the following steps to correct keystone distortion NOTE: The Keystone correction can cause an image to be slightly blurred because the correction is made electronically. NOTE: The Keystone correction range can be made narrower, depending on a signal or its aspect ratio selection. - Page 113 3. Projecting an Image (Basic Operation) Adjusting with the Auto Keystone Function (VT695 and VT595 only) The Auto Keystone correction feature will correct the vertical distortion of a projected image on the screen. No special operation required. Just put the projector on a flat surface. TIP: Even when the menu setting for [Auto Keystone] is turned on, [Keystone] can be adjusted manually.
-
Page 114: Optimizing Rgb Picture Automatically
3. Projecting an Image (Basic Operation) Optimizing RGB Picture Automatically Adjusting the Image Using Auto Adjust Optimizing an RGB image automatically. Press the AUTO ADJ. button to optimize an RGB image automatically. This adjustment may be necessary when you connect your computer for the first time. [Poor picture] MENU L-CLICK... -
Page 115: Turning Off The Projector
3. Projecting an Image (Basic Operation) Turning off the Projector To turn off the projector: MENU 1. First, press the POWER (ON/STAND BY) button on POWER the projector cabinet or the POWER OFF button on MAGNIFY PIC-MUTE PAGE SELECT the remote control. The [Power Off / Are you sure?] DOWN LAMP message will appear. -
Page 116: After Use
3. Projecting an Image (Basic Operation) After Use Preparation: Make sure that the projector is turned off. 1. Unplug the power cable. 2. Disconnect any other cables. 3. Retract adjustable tilt feet if extended. 4. Cover the lens with the lens cap. 5. -
Page 117: Convenient Features
4. Convenient Features ³ Turning off the Image and Sound Press the PIC-MUTE button to turn off the image and sound for a short POWER period of time. Press again to restore the image and sound. MAGNIFY PIC-MUTE PAGE DOWN MENU NOTE: Sound from the AUDIO OUT jack (Stereo mini) on the VT695/VT595/VT491 can... -
Page 118: Changing Lamp Mode
4. Convenient Features Changing Lamp Mode This feature enables you to select two brightness modes of the lamp: Normal and Eco modes. The lamp life can be extended by using the Eco mode. Lamp Mode Description Status of LAMP indicator LAMP Normal Mode This is the default setting (100%... - Page 119 NOTE: Do not forget your keyword. However, if you forget your keyword, NEC or your dealer will provide you with your Release Code upon proof of ownership. See more information at the end of this section. ( → page 33) 7.
- Page 120 4. Convenient Features To turn on the projector when Security is enabled: 1. Press the Main Power Switch to the On position (I). 2. Press and hold the POWER ON or the ON/STAND BY button for a minimum of 1 second. The projector will be turned on and display a message to the effect that the projector is security-protected.
-
Page 121: Using The Optional Remote Mouse Receiver (Np01Mr)
4. Convenient Features Using the Optional Remote Mouse Receiver (NP01MR) The optional remote mouse receiver enables you to operate your computer’s mouse functions from the remote control. It is a great convenience for clicking through your computer-generated presentations. Connecting the remote mouse receiver to your computer If you wish to use the remote mouse function, connect the mouse receiver and computer. - Page 122 4. Convenient Features Operating your computer’s mouse from the remote control You can operate your computer's mouse from the remote control. PAGE UP/DOWN Button: scrolls the viewing area of the window or to move to the previous or next slide in PowerPoint on your computer.
-
Page 123: Using On-Screen Menu
5. Using On-Screen Menu Using the Menus NOTE: The on-screen menu may not be displayed correctly while interlaced motion video image is projected. 1. Press the MENU button on the remote control or projector cabinet to display the Menu. POWER MAGNIFY PIC-MUTE PAGE... - Page 124 5. Using On-Screen Menu 4. Use the SELECT button on the remote control or the projector cabinet to select the item you want to adjust or set. 5. Adjusting the level of a selected item or selecting an item. Slide bar Solid triangle POWER MAGNIFY...
-
Page 125: Menu Elements
5. Using On-Screen Menu · Menu Elements Title Slide bar Highlight Source Off Timer remaining time Radio button Solid triangle Check mark Thermometer symbol Key Lock symbol Menu windows or dialog boxes typically have the following elements: Title .......... Indicates the menu title. Highlight ........ -
Page 126: List Of Menu Items
5. Using On-Screen Menu » List of Menu Items Some menu items are not available depending on the input source. Resettable Picture Default Item Preset 1 to 6 Detail Settings General Reference High-Bright, Presentation, Video, Movie, Graphic, sRGB Gamma Correction Dynamic, Natural, Black Detail Color Temperature 6500, 7800, 8500, 9300... - Page 127 5. Using On-Screen Menu Signal Select Computer 1 RGB/ RGB/Component, RGB, Component (VT695/VT595/VT491) Component Computer 2 (Analog) RGB/ RGB/Component, RGB, Component (VT695/VT595) Component Computer 2 (VT491) RGB/ RGB/Component, RGB, Component Component Computer RGB/ RGB/Component, RGB, Component (VT590/VT59/VT49) Component Video Auto Auto, NTSC3.58, NTSC4.43, PAL, PAL-M, PAL-N, PAL60, SECAM S-Video...
-
Page 128: Menu Descriptions & Functions [Picture]
5. Using On-Screen Menu ¿ Menu Descriptions & Functions [Picture] Preset When selecting user adjustable [Preset], the submenu will be displayed. You can customize each gamma or color. To do so, first select [Preset] and press the ENTER button, then proceed using the following steps. -
Page 129: Menu Descriptions & Functions [Image Options]
5. Using On-Screen Menu Adjusting White Balance [White Balance] This allows you to adjust the white balance. Contrast for each color (RGB) to adjust the white level of the screen; Brightness for each color (RGB) is used to adjust the black level of the screen. Adjusting Contrast, Brightness, Sharpness, Color and Hue You can adjust contrast, brightness, sharpness, color and hue. - Page 130 5. Using On-Screen Menu NOTE: • When you are displaying an RGB image with a higher resolution than the projector’s native resolution, the image will be displayed in the projector’s native resolution. In this case [Native] is not available from the menu. Only when displaying an RGB image with a lower resolution than the projector's native resolution, will the image be able to be displayed in its true resolution [Native].
- Page 131 5. Using On-Screen Menu ² Menu Descriptions & Functions [Setup] [General] VT695/VT595 VT590/VT491/VT59/VT49 Computer: VT590/VT59/VT49 Computer 1: VT491 Enabling Auto Keystone [Auto Keystone] (VT695/VT595 only) This feature allows the projector to detect its tilt and correct vertical distortion automatically. To turn on the Auto Keystone feature, select [On]. Correcting Vertical Keystone Distortion Manually [Keystone] You can correct vertical distortion manually.
- Page 132 5. Using On-Screen Menu [Installation] Selecting Projector Orientation [Orientation] This sets your image for your type of projection application. The options are: desktop front projection, ceiling rear projection, desktop rear projection, and ceiling front projection. Desktop front Ceiling rear Desktop rear Ceiling front Selecting Communication Speed [Communication Speed] This feature sets the baud rate of the PC Control port (Mini DIN 8 Pin).
- Page 133 5. Using On-Screen Menu Enabling Security [Security] This feature turns on or off the Security function. Unless the correct keyword is entered, the projector cannot project an image. (→page 31) Selecting Menu Color [Menu Color Select] You can choose between two color modes for menu color: color and monochrome. Selecting Menu Display Time [Menu Display Time] This option allows you to select how long the projector waits after the last touch of a button to turn off the menu.
- Page 134 5. Using On-Screen Menu Enabling Fan Speed Mode [Fan Mode] This option allows you to select two modes for fan speed: Auto mode and High speed mode. Auto ...... The built-in fans automatically run at a variable speed according to the internal temperature. High ......
-
Page 135: Menu Descriptions & Functions [Information]
5. Using On-Screen Menu ¶ Menu Descriptions & Functions [Information] Displays the status of the current signal and lamp usage. This item has three pages. The information included is as follows: [Usage Time] [Lamp Life Remaining] (%)* [Lamp Hours Used] (H) [Filter Hours Used] (H) The progress indicator shows the percentage of remaining bulb life. -
Page 136: Menu Descriptions & Functions [Reset]
5. Using On-Screen Menu [Version] [Product] [Firmware] Version [Serial Number] [Data] Version Menu Descriptions & Functions [Reset] Returning to Factory Default [Reset] The Factory Default feature allows you to change adjustments and settings to the factory preset for a (all) source (s) except the following: [Current Signal] Resets the adjustments for the current signal to the factory preset levels. -
Page 137: Maintenance
6. Maintenance This section describes the simple maintenance procedures you should follow to clean the filters and replace the lamp. Cleaning or Replacing the Filters The air-filter sponge keeps dust and dirt from getting inside the projector and should be cleaned after every 100 hours of operation (more often in dusty conditions). -
Page 138: Cleaning The Cabinet And The Lens
6. Maintenance 3. Reinstall the new filter cover. 4. Clear the filter hours used. To reset the filter usage time, from the menu, select [Reset] → [Clear Filter Hours]. (→page for resetting the filter usage time.) NOTE: Do not wash the filter with soap and water. Soap and water will damage the filter membrane. Before replacing the filter, remove dust and dirt from the projector cabinet. -
Page 139: Replacing The Lamp
Eco mode) of use, the lamp bulb may shatter, and pieces of glass may be scattered in the lamp case. Do not touch them as the pieces of glass may cause injury. If this happens, contact your NEC dealer for lamp replacement. - Page 140 6. Maintenance 2. Remove the lamp cover. (1)Press firmly and slide the lamp cover by 1 cm (0.4”) • Do not force to pull the lamp cover (2)Push to release two catches on both sides and slide the lamp cover off. 3.
- Page 141 (1)Insert a new lamp housing until the lamp housing is plugged into the socket. CAUTION Do not use a lamp other than the NEC replacement lamp VT85LP (VT695/VT595/VT590/VT491) or VT80LP (VT59/VT49). Order this from your NEC dealer. (2)Secure it in place with the two screws.
-
Page 142: Appendix
7. Appendix Troubleshooting This section helps you resolve problems you may encounter while setting up or using the projector. Indicator Messages Power Indicator Indicator Condition Projector Condition Note The main power is off – Blinking light Green 0.5 sec On, The projector is getting ready to turn on. - Page 143 7. Appendix Common Problems & Solutions (→ "Power/Status/Lamp Indicator" on page 55.) Problem Check These Items Does not turn on • Check that the power cable is plugged in and that the power button on the projector cabinet or the remote control is on.
- Page 144 Usually, the combination of the ‘Fn” key along with one of the 12 function keys gets the external display to come on or off. For example, NEC laptops use Fn + F3, while Dell laptops use Fn + F8 key combinations to toggle through external display selections.
-
Page 145: Specifications
7. Appendix Specifications This section provides technical information about the VT695/VT595/VT590/VT491/VT59/VT49 projector's performance. Model Number VT695/VT595/VT590/VT491/VT59/VT49 Optical LCD Panel VT695: 0.63" p-Si TFT active-matrix with Micro Lens Array VT595/VT590/VT491/VT59/VT49:0.6" p-Si TFT active-matrix with Micro Lens Array Resolution VT695/VT595/VT590/VT59: 1024 768 pixels* native, up to UXGA with Advanced AccuBlend VT491/VT49: 800 600 pixels* native, up to UXGA with Advanced... - Page 146 7. Appendix Horizontal Resolution NTSC / NTSC4.43/PAL/PAL-M/PAL-N/PAL60: 540 TV lines SECAM: 300 TV lines RGB: VT695/VT595/VT590/VT59: 1024 dots (H) 768 dots (V), VT491/VT49: 800 dots (H) 600 dots (V) External Control RS232, IR Sync Compatibility Separate Sync / Composite Sync / Sync on Green / Sync on Video Built-in Speaker VT695/VT595: 5W (monaural) VT590/VT491/VT59/VT49: 1W (monaural)
- Page 147 Meets Low Voltage Directive (EN60950-1, TÜV GS Approved) For additional information visit: US : http://www.necvisualsystems.com Europe : http://www.neceurope.com/ Global : http://www.nec-pj.com/ For information on our optional accessories, visit our website or see our brochure. The specifications are subject to change without notice.
-
Page 148: Cabinet Dimensions
7. Appendix Cabinet Dimensions Although the appearance is slightly different, the VT695, VT595, VT590, VT491, VT59 and VT49 are the same in dimensions. Lens center 308.7 (12.2") 83 (3.3") 71.35 (2.8") Lens center PUSH Unit: mm (inch) -
Page 149: Pin Assignments Of D-Sub Computer Input Connector
7. Appendix Pin Assignments of D-Sub COMPUTER Input Connector Mini D-Sub 15 Pin Connector Pin No. RGB Signal (Analog) YCbCr Signal 11 12 13 14 15 Green or Sync on Green Blue Ground Signal Level Ground Video signal : 0.7Vp-p (Analog) Red Ground Cr Ground Sync signal : TTL level... -
Page 150: Compatible Input Signal List
7. Appendix Compatible Input Signal List Horizontal: 15KHz to 100KHz (RGB: 24KHz or over) Vertical: 50Hz to 120Hz Signal Resolution Frequency H. Refresh Rate ( Dots ) ( kHz ) ( Hz ) NTSC – 15.73 59.94 – 15.63 50.00 PAL60 –... -
Page 151: Pc Control Codes And Cable Connection
7. Appendix PC Control Codes and Cable Connection PC Control Codes (VT695/VT595) Function Code Data POWER ON POWER OFF INPUT SELECT COMPUTER 1 INPUT SELECT COMPUTER 2 (Digital) 02H INPUT SELECT COMPUTER 2 (Analog) 02H INPUT SELECT VIDEO INPUT SELECT S-VIDEO PICTURE MUTE ON PICTURE MUTE OFF SOUND MUTE ON... - Page 152 7. Appendix PC Control Connector (DIN-8P) To TxD of PC To GND of PC To RxD of PC NOTE: Pins 2, 3, 5, 6 and 8 are used inside the projector.
-
Page 153: Troubleshooting Check List
7. Appendix Troubleshooting Check List Before contacting your dealer or service personnel, check the following list to be sure repairs are needed also by referring to the “Troubleshooting” section in your user’s manual. This checklist below will help us solve your problem more efficiently. - Page 154 Native resolution: Refresh rate: Video adapter: Other: Projector DVD player Video equipment Signal cable VCR, DVD player, Video camera, Video game or other NEC standard or other manufacturer’s cable? Model number: Length: inch/m Manufacturer: Distribution amplifier Model number: Model number: Switcher...
-
Page 155: Travelcare Guide
6) Problems or damage caused by expendable supplies or devices TravelCare - a service for international travelers connected to the product other than those designated by NEC. This product is eligible for "TravelCare", NEC's unique international war- 7) Problems caused by natural consumption, wear or deterioration ranty. - Page 156 (Regions Covered) Riyadh Taiwan Address: P.O.Box 5519, Riyadh 11432, Saudi Arabia Telephone: +966 1 4645064 NEC Solutions Asia Pacific Pte. Ltd Fax Line: +966 1 4657912 Address: 401 Commonwealth Drive, #07-02, Haw Par Email Address: bhimji@samir-photo.com Technocentre, Singapore 149598...
- Page 157 7. Appendix P-1/ Date: TO: NEC or NEC's Authorized Service Station: (Company & Name with signature) Dear Sir (s), I would like to apply your TravelCare Service Program based on attached registration and qualification sheet and agree with your following conditions, and also the Service fee will be charged to my credit card account, if I don't return the Loan units within the specified period.
- Page 158 3) Any fault in the attachments or associated products or components (whether or not supplied by NEC or its agents which do not form part of the Product covered by this warranty); 4) Any act of God, fire, flood, war, act of violence or any similar occur- rence;...
- Page 159 VT695/VT595/VT590/VT490/VT59/VT49 VT695/VT595/VT590/VT490/VT59/VT49 Quick Setup Guide Quick Setup Guide 7N8P7261 Printed in China ©NEC Viewtechnology, Ltd. 2006 Ver. 1 09/06 (T) VT695/VT595 VT590/VT490/VT59/VT49 MENU COMPUTER 1 IN Connect your computer to the projector. COMPUTER IN Turn on the projector. POWER MAGNIFY...
- Page 160 La función de corrección automática de la distorsión trapezoidal también está disponible en el VT695/VT595. VT695/VT595 har också automatisk keystonekorrigering. (→ page 26 of the User’s Manual) ZOOM VT695/VT595/VT590/VT490/VT59 VT49 Turn off the projector. MENU Schalten Sie den Projektor aus.
- Page 161 VT695/VT595/VT590/VT491/VT59/VT49 VT695/VT595/VT590/VT491/VT59/VT49 Quick Setup Guide Quick Setup Guide 7N8P7262 Printed in China ©NEC Viewtechnology, Ltd. 2006-2007 Ver. 2 01/07 (S) VT695/VT595 VT491 COMPUTER 1 IN Connect your computer to the projector. Remove the lens cap. COMPUTER 1 IN S-VIDEO PC CTRL...
- Page 162 Correcting Keystone Distortion [Keystone] Korrigieren der Trapezverzerrung [Trapez] Adjust the picture size and position. Correction de la déformation trapézoïdale [Keystone] Correzione della deformazione trapezoidale [Trapezio] Einstellung der Bildgröße und Bildposition. Corrección de la distorsión trapezoidal [Keystone] Ajuster la taille et de la position de l’image. Corrigir a Distorção do Trapezóide [Trapezóide] Regolate delle dimensioni e della posizione Korrigera den keystonedistorsionen [Keystone]...
- Page 163 Portable Projector English VT695/VT595/VT590/VT490/VT59/VT49 Deutsch Français Important Information Italiano Español Svenska Troubleshooting Check List...
- Page 164 Registration card Limited warranty For Europe only Guarantee policy Quick Setup Guide CD-ROM Important Information User’s manual For VT695, VT595, VT590 For VT695 and VT595 only and VT490 only Carrying handle (24FT9651) DVI to VGA adapter (7N960231) Screw (M4 2: 24V00411)
- Page 165 The complete user's manual is supplied on the CD-ROM in PDF (Portable Document Format) and provides detailed product and usage information for your NEC projector. The manual is available in seven languages (English, German, French, Italian, Spanish, Swedish and Japa- nese).
- Page 166 Safety Cautions Precautions Please read this manual carefully before using your NEC VT695/VT595/VT590/VT490/VT59/VT49 projector and keep the manual handy for future reference. Your serial number is located on the bottom of your projector. Record it here: CAUTION To turn off main power, be sure to remove the plug from power outlet.
- Page 167 The Federal Communications Commission does not allow any modifications or changes to the unit EXCEPT those specified by NEC Corporation of America. in this manual. Failure to comply with this government regulation could void your right to operate this equipment. This equipment has been tested and found to comply with the limits for a Class B digital device, pursuant to Part 15 of the FCC Rules.
- Page 168 - Do not heat the power cable. - Do not handle the power plug with wet hands. • Turn off the projector, unplug the power cable and have the object removed by a qualified NEC service personnel under the following conditions: - When the power cable or plug is damaged or frayed.
- Page 169 CAUTION • Do not use the tilt-foot for purposes other than originally intended. Misuses such as gripping the tilt-foot or hanging on the wall can cause damage to the projector. • Do not send the projector in the soft case by parcel delivery service or cargo shipment. The projector inside the soft case could be damaged.
- Page 170 To replace the filter (sponge): 1. Remove the filter cover by pushing down on the catch of the cover until you feel it detach. NOTE: The VT695/VT595/VT590/VT490 have two filters; the VT59 and VT49 have one filter only. Catch 2. Gently peel off the filter (sponge) and replace it with the new one.
- Page 171 3. Reinstall the new filter cover. 4. Clear the filter hours used. To reset the filter usage time, from the menu, select [Reset] → [Clear Filter Hours]. (→page 49 (User’s Manual) for resetting the filter usage time.) NOTE: Do not wash the filter with soap and water. Soap and water will damage the filter membrane. Before replacing the filter, remove dust and dirt from the projector cabinet.
- Page 172 Eco mode) of use, the lamp bulb may shatter, and pieces of glass may be scattered in the lamp case. Do not touch them as the pieces of glass may cause injury. If this happens, contact your NEC dealer for lamp replacement.
- Page 173 (1)Insert a new lamp housing until the lamp housing is plugged into the socket. CAUTION Do not use a lamp other than the NEC replacement lamp VT85LP (VT695/VT595/VT590/VT490) or VT80LP (VT59/VT49). Order this from your NEC dealer. (2)Secure it in place with the two screws.
- Page 174 Troubleshooting This section helps you resolve problems you may encounter while setting up or using the projector. Indicator Messages Power Indicator Indicator Condition Projector Condition Note The main power is off – Blinking light Green 0.5 sec On, The projector is getting ready to turn on. Wait for a moment.
- Page 175 • Ensure that the distance between the projector and screen is within the adjustment range of the lens. (→ page 11 for VT695, page 11 for VT595/VT590/VT490/VT59 and 12 for VT49) • Condensation may form on the lens if the projector is cold, brought into a warm place and is then turned on.
- Page 176 Usually, the combination of the ‘Fn” key along with one of the 12 function keys gets the external display to come on or off. For example, NEC laptops use Fn + F3, while Dell laptops use Fn + F8 key combinations to toggle through external display selections.
- Page 177 • The complete user's manual is supplied on the CD-ROM in PDF (Portable Document Format) and provides detailed product and usage information for your NEC projector. The manual is available in eight languages (English, German, French, Italian, Spanish, Portuguese, Swedish and Japanese).
- Page 178 Safety Cautions Precautions Please read this manual carefully before using your NEC VT695/VT595/VT590/VT491/VT59/VT49 projector and keep the manual handy for future reference. Your serial number is located on the bottom of your projector. Record it here: CAUTION To turn off main power, be sure to remove the plug from power outlet.
- Page 179 The Federal Communications Commission does not allow any modifications or changes to the unit EXCEPT those specified by NEC Corporation of America. in this manual. Failure to comply with this government regulation could void your right to operate this equipment. This equipment has been tested and found to comply with the limits for a Class B digital device, pursuant to Part 15 of the FCC Rules.
- Page 180 Place the projector in a horizontal position The tilt angle of the projector should not exceed 10 degrees, nor should the projector be installed in any way other than the desktop and ceiling mount, otherwise lamp life could decrease dramatically. 10°...
- Page 181 CAUTION • Do not use the tilt-foot for purposes other than originally intended. Misuses such as gripping the tilt-foot or hanging on the wall can cause damage to the projector. • Do not send the projector in the soft case by parcel delivery service or cargo shipment. The projector inside the soft case could be damaged.
- Page 182 Cleaning or Replacing the Filters The air-filter sponge keeps dust and dirt from getting inside the projector and should be cleaned after every 100 hours of operation (more often in dusty conditions). If the filter is dirty or clogged, your projector may overheat. CAUTION •...
- Page 183 3. Reinstall the new filter cover. 4. Clear the filter hours used. To reset the filter usage time, from the menu, select [Reset] → [Clear Filter Hours]. (→page 49 (User’s Manual) for resetting the filter usage time.) NOTE: Do not wash the filter with soap and water. Soap and water will damage the filter membrane. Before replacing the filter, remove dust and dirt from the projector cabinet.
- Page 184 Do not touch them as the pieces of glass may cause injury. If this happens, contact your NEC dealer for lamp replacement.
- Page 185 (1)Insert a new lamp housing until the lamp housing is plugged into the socket. CAUTION Do not use a lamp other than the NEC replacement lamp VT85LP (VT695/VT595/VT590/VT491) or VT80LP (VT59/VT49). Order this from your NEC dealer. (2)Secure it in place with the two screws.
- Page 186 Troubleshooting This section helps you resolve problems you may encounter while setting up or using the projector. Indicator Messages Power Indicator Indicator Condition Projector Condition Note The main power is off – Blinking light Green 0.5 sec On, The projector is getting ready to turn on. Wait for a moment.
- Page 187 Common Problems & Solutions (→ "Power/Status/Lamp Indicator" on page E-10) (The numbers in the table reger to pages in the User’s Manual) Problem Check These Items Does not turn on • Check that the power cable is plugged in and that the power button on the projector cabinet or the remote control is on.
- Page 188 Usually, the combination of the ‘Fn” key along with one of the 12 function keys gets the external display to come on or off. For example, NEC laptops use Fn + F3, while Dell laptops use Fn + F8 key combinations to toggle through external display selections.
- Page 189 • Das vollständige Bedienungshandbuch befindet sich in Form einer PDF-Datei (Portable Document Format) auf CD-ROM und liefert Ihnen detaillierte Produkt- und Verwendungsinformationen für Ihren NEC-Projektor. Das Handbuch ist in acht Sprachen verfügbar (Englisch, Deutsch, Französisch, Italienisch, Spanisch, Portugiesisch, Schwedisch und Japanisch).
- Page 190 Sicherheitshinweise Vorsichtsmaßnahmen Lesen Sie sich dieses Handbuch bitte sorgfältig durch, bevor Sie den NEC VT695/VT595/VT590/VT491/VT59/VT49 Projektor benutzen, und bewahren Sie das Bedienungshandbuch in greifbarer Nähe als spätere Referenz auf. Die Seriennummer Ihres Projektors befindet sich auf der Unterseite des Gerätes. Tragen Sie diese hier ein: VORSICHT Zum Ausschalten der Hauptspannung müssen Sie unbedingt den Netzstecker von der Netzsteckdose...
- Page 191 Wichtige Sicherheitshinweise Diese Sicherheitshinweise sollen eine lange Lebensdauer Ihres Projektors sicherstellen und vor Feuer und elektrischen Schlägen schützen. Lesen Sie diese Hinweise sorgfältig durch und beachten Sie alle Warnungen. Installation • Den Projektor unter folgenden Bedingungen nicht aufstellen: - auf einem instabilen Handwagen, Gestell oder Tisch. - in der Nähe von Wasser, in Badezimmern oder feuchten Räumen.
- Page 192 Vorsichtsmaßnahmen in Bezug auf Feuer und Elektroschläge • Um einen Hitzestau im Projektor zu vermeiden, sollten Sie darauf achten, dass eine ausreichende Ventilation gewähr- leistet ist und die Lüftungsschlitze nicht blockiert sind. Halten Sie einen Mindestabstand von 10 cm zwischen Wänden und Projektor ein.
- Page 193 VORSICHT • Verwenden Sie den Kippfuß ausschließlich für den angegebenen Zweck. Ein Missbrauch wie z.B. die Benutzung des Kippfußes als Griff oder Aufhänger für die Wandmontage kann zu einer Beschädigung des Projektors führen. • Versenden Sie die Softtasche nicht durch einen Paketdienst und verschiffen Sie sie nicht. Der Projektor im Inneren der Softtasche könnte dadurch beschädigt werden.
-
Page 194: Reinigung Oder Austausch Des Filters
Reinigung oder Austausch des Filters Der Luftfilter-Schwamm schützt den Innenraum des Projektors vor Staub und Schmutz und sollte alle 100 Betriebsstunden (unter staubigen Bedingungen öfter) gereinigt werden. Wenn der Filter verschmutzt oder verstopft ist, kann dies zu einer Überhitzung Ihres Projektor führen. VORSICHT •... - Page 195 3. Setzen Sie die neue Filterabdeckung auf. 4. Löschen Sie die Filterbetriebsstunden. Wählen Sie zur Rückstellung der Filterbetriebszeit im Menü [Reset] → [Filterbetr. -Std. Löschen] aus. (→ Seite 49 (Bedienungshandbuch) für die Rückstellung der Filterbetriebszeit.) HINWEIS: Waschen Sie die Filterabdeckung nicht mit Seife und Wasser. Seife und Wasser führen zu einer Beschädigung der Filtermembran.
-
Page 196: Austausch Der Projektionslampe
Lampengehäuse verstreut. Fassen Sie die Splitter nicht an, da Sie sich daran verletzen könnten. Beauftragen Sie im Falle einer zerplatzten Lampe Ihren NEC-Fachhändler mit dem Lampenaustausch. HINWEIS: Die Lampenlebensdauer der VT59/VT49 liegt im Normal-Modus bei 3000 Betriebsstunden und im Eco-Modus bei 4000 Betriebsstunden. - Page 197 4. Installation eines neuen Lampengehäuses. (1)Setzen Sie das neue Lampengehäuse ein, bis es in der Fassung einrastet. VORSICHT Verwenden Sie ausschließlich die NEC-Austauschlampe VT85LP (VT695/VT595/VT590/VT491) oder VT80LP (VT59/VT49). Bestellen Sie die Lampe bei Ihrem NEC-Fachhändler. (2)Befestigen Sie das Lampengehäuse mit den beiden Befestigungsschrauben.
- Page 198 Fehlersuche Dieses Kapitel hilft Ihnen bei der Beseitigung von Störungen, die bei der Einrichtung oder während des Betriebes Ihres Projektors auftreten können. Anzeige-Meldungen Netzanzeige (POWER) Anzeige-Zustand Projektor-Zustand Hinweis Die Hauptstromversorgung ist ausgeschaltet – Anzeige blinkt Grün 0,5 Sek. Ein, Der Projektor macht sich einschaltbereit. Warten Sie einen Moment.
- Page 199 Herkömmliche Störungen & Lösungen (→ “Netz / Status / Lampen-Anzeige” auf Seite G-10) (Die in der Tabelle aufgeführten Zahlenangaben beziehen sich auf die jeweiligen Seiten im Bedienunghandbuch.) Störung Überprüfen Sie diese Punkte Der Projektor schaltet • Stellen Sie sicher, dass das Netzkabel eingesteckt und die Netztaste am Projektorgehäuse oder auf der sich nicht ein.
- Page 200 Laptops wird das externe Display durch eine Funktionstasten-Kombination aktiviert / entaktiviert. Normalerweise wird das externe Display mit der Tastenkombination der ‘Fn”-Taste und einer der 12 Funktionstasten ein- oder ausgeschaltet. NEC-Laptops verwenden z.B. die Tastenkombination Fn + F3, während Dell-Laptops die Tastenkombination Fn + F8 verwenden, um durch die Auswahlmöglichkeiten des externen Displays zu schalten.
- Page 201 Le mode d’emploi complet est fourni avec le CD-ROM en format PDF (Portable Document Format) et donne des informations détaillées sur le produit et l’utilisation pour votre projecteur NEC. Le manuel est disponible en huit langues (anglais, allemand, français, italien, espagnol, portugais, suédois et japonais).
- Page 202 Consignes de sécurité Précautions Veuillez lire ce manuel avec attention avant d’utiliser votre projecteur NEC VT695/VT595/VT590/VT491/VT59/VT49 et gardez ce manuel à portée de main afin de pouvoir y recourir facilement. Le numéro de série se trouve en dessous du projecteur. L’inscrire ici : ATTENTION Pour couper complètement l’alimentation, retirez la prise du secteur.
- Page 203 Mesures de sécurité importantes Ces instructions de sécurité garantissent la longévité de votre projecteur et préviennent les risques d’incendie et de décharge électrique. Lisez-les et respectez les conseils. Installation • Ne placez pas le projecteur dans les endroits suivants : - sur un chariot, un support ou une table instable.
- Page 204 Précautions contre l’incendie et l’électrocution • Veiller à ce que la ventilation soit suffisante et à ce que les bouches ne soient pas obstruées afin d’éviter toute accumulation de chaleur à l’intérieur du projecteur. Laisser un espace d’au moins 4 pouces (10 cm) entre le projec- teur et le mur.
- Page 205 ATTENTION • Ne pas utiliser le pied à inclinaison réglable pour effectuer des réglages autres que ceux initialement prévus. Des utilisations non appropriées, telles que le fait de saisir le pied à inclinaison réglable ou de suspendre l’appareil au mur peuvent endommager le projecteur. •...
- Page 206 Nettoyge ou remplacement du filtre L’éponge du filtre à air protège l’intérieur du projecteur de la poussière et de la saleté et doit être nettoyé après 100 heures d’utilisation (plus souvent si l’environnement est poussiéreux). Si le filtre est sale ou obstrué, le projecteur risque de surchauffer.
- Page 207 3. Remettre en place le nouveau couvercle du filtre. 4. Effacer les heures d’utilisation du filtre Pour réinitialiser la durée d’utilisation du filtre en utilisant le menu, sélectionner [Reset] → [Effacer heures filtre]. (→ page 49 (Mode d’emploi) pour réinitialiser le temps d’utilisation du filtre.) REMARQUE : Ne pas laver le couvercle du filtre avec de l'eau et du savon.
-
Page 208: Remplacement De La Lampe
Ne les touchez pas car ils peuvent vous blesser. Dans ce cas, contactez votre revendeur NEC afin de procéder au remplacement de la lampe. REMARQUE : La durée de vie de la lampe du VT59/VT49 est de 3000 heures en mode Normal et de 4000 heures en mode Eco. - Page 209 4. Installer un nouveau logement de lampe. (1)Insérer un boîtier de lampe neuve dans la prise. ATTENTION N’utilisez pas d’autre lampe que la lampe de remplacement NEC VT85LP (VT695/VT595/VT590/VT491) ou VT80LP (VT59/VT49). Commandez-la chez votre revendeur NEC. (2)Fixez-le à l’aide des deux vis.
- Page 210 Depistage des pannes Cette section facilite la résolution des problèmes pouvant être rencontrés pendant l’installation ou l’utilisation du projecteur. Messages des voyants Voyant d’alimentation (POWER) Condition du voyant Condition du projecteur Remarque Arrêt L’alimentation principale est coupée. – Voyant Vert 0,5 s Marche, Le projecteur se prépare à...
- Page 211 Problèmes courants & Solutions (→ “Alimentation/Etat/Voyant de lampe” page F-10) (Les chiffres figurant dans le tableau font référence aux pages du mode d’emploi.) Problème Vérifier ces éléments Ne s’allume pas • Vérifier que le câble d’alimentation est branché et que la touche d’alimentation du projecteur ou de la télécommande est activée.
- Page 212 En général, la combinaison de la touche “Fn” avec l’une des 12 touches de fonction permet l’allumage ou l’extinction de l’affichage externe. Par exemple, les ordinateurs portables NEC utilisent Fn + F3, tandis que les ordinateurs portables Dell utilisent la combinaison de touches Fn + F8 pour alterner entre les sélections d’affichage externe.
- Page 213 Il manuale completo dell’utente è fornito su CD-ROM in formato PDF (Portable Document Format) e fornisce informazioni dettagliate sul prodotto e sul suo utilizzo per il vostro proiettore NEC. Il manuale è disponibile in otto lingue (inglese, tedesco, francese, italiano, spagnolo, portoghese, svedese e giapponese).
-
Page 214: Precauzioni Di Sicurezza
Precauzioni di sicurezza Precauzioni Leggete attentamente il presente manuale prima di utilizzare il nuovo proiettore NEC VT695/VT595/VT590/VT491/ VT59/VT49 e tenerlo a portata di mano per riferimenti futuri. Il numero di serie è posto nella parte inferiore del proiettore. Annotatelo qui: ATTENZIONE Per spegnere l’alimentazione, accertatevi di scollegare la spina dalla presa di alimentazione. - Page 215 Misure speciali importanti Le istruzioni di sicurezza servono per garantire la lunga durata del proiettore e per evitare incendi e scosse elettriche. Leggetele attentamente e prestate attenzione a tutte le avvertenze. Installazione • Non posizionate il proiettore: - su un carrello, un sostegno o un tavolo instabili. - in prossimità...
- Page 216 Precauzioni per evitare incendi e scosse elettriche • Assicuratevi che la ventilazione sia sufficiente e che i fori di ventilazione non siano bloccati per prevenire l’accumulo di calore all’interno del proiettore. Lasciate uno spazio di almeno 10 cm tra il proiettore e la parete. •...
- Page 217 ATTENZIONE • Non usate il piedino di inclinazione per scopi diversi da quelli originali. Utilizzi non appropriati, come ad esempio, afferrare il proiettore per il piedino regolabile o appendendolo alla parete, possono danneggiare il proiettore. • Non inviate il proiettore nella custodia morbida mediante corriere. Il proiettore all’interno della custodia morbida potrebbe danneggiarsi.
-
Page 218: Pulizia O Sostituzione Del Filtro
Pulizia o sostituzione del filtro La spugna del filtro dell’aria evita che la polvere e la sporcizia penetrino all’interno del proiettore e deve essere pulita dopo 100 ore di funzionamento (più spesso quando è presente molta polvere). Se il filtro è sporco o otturato, il proiettore si può... - Page 219 3. Reinstallate il nuovo coprifiltro. 4. Azzerate le ore di utilizzo del filtro. Per azzerare il tempo di utilizzo del filtro, selezionate sul menu [Azzera] → [Azzera ore filtro]. (→ pagina 49 (Manuale dell’utente) per informazioni su come azzerare il tempo di utilizzo del filtro.) NOTA: non lavate il coprifiltro con acqua e sapone.
-
Page 220: Sostituzione Della Lampada
Non toccate questi pezzi di vetro, altrimenti vi potete fare male. Se la lampada si rompe, rivolgersi al rivenditore NEC per la sostituzione della stessa. NOTA: La durata di servizio della lampada per VT59/VT49 è di 3000 ore in modo Normale e 4000 ore in modo Eco. - Page 221 4. Installate un nuovo alloggiamento della lampada. (1)Inserite l’alloggiamento della nuova lampada finché non è inserito nella presa. ATTENZIONE Non utilizzate lampade diverse dalla lampada di sostituzione NEC VT85LP (VT695/VT595/VT590/VT491) o VT80LP (VT59/VT49). Ordinate la lampada dal più vicino rivenditore NEC.
-
Page 222: Risoluzione Dei Problemi
Risoluzione dei problemi Questa sezione vi aiuta a risolvere eventuali problemi che sorgono durante l’impostazione o l’utilizzo del proiettore. Messaggi dell’indicatore Indicatore di alimentazione (POWER) Condizione dell’indicatore Condizione del proiettore Nota Spento La corrente principale è spenta – Spia Verde 0,5 sec Acceso, Il proiettore è... - Page 223 Problemi comuni e soluzioni (→ “Indicatore alimentazione/stato/lampada” a pagina I-10) (I numeri nella tabella si riferiscono alle pagine del manuale dell’utente.) Problema Controllate queste voci Non si accende la • Controllate che il cavo di alimentazione sia collegato e che il tasto d’accensione sull’involucro del proiettore corrente o sul telecomando sia acceso.
- Page 224 ‘Fn” insieme a uno dei 12 tasti funzione consente di attivare/disattivare il display esterno. Ad esempio, i computer portatili NEC utilizzano la combinazione di tasti Fn + F3, mentre i portatili Dell utilizzano Fn + F8 per attivare/disattivare le selezioni del display esterno.
- Page 225 El manual del usuario completo se suministra en el CD-ROM en formato PDF (Portable Document Format) y proporciona información detallada sobre el producto y su utilización para el proyector NEC. El manual está disponible en ocho idiomas (inglés, alemán, francés, italiano, español, portugués, sueco y japonés).
- Page 226 Precauciones Precaución Lea con cuidado este manual antes de utilizar el proyector NEC VT695/VT595/VT590/VT491/VT59/VT49 y tenga el manual a mano para poder consultarlo más adelante. El número de serie está situado en la parte inferior del proyector. Anótelo aquí: PRECAUCIÓN Para desactivar la alimentación asegúrese de extraer el enchufe de la toma de red eléctrica.
- Page 227 Importante para su seguridad Estas instrucciones de seguridad son para garantizar una larga vida de su proyector y para evitar incendios y descargas eléctricas. Léalas detenidamente y respete todas las advertencias. Instalación • No coloque el proyector en las siguientes condiciones: - en una mesa con ruedas, soporte o mesa inestables.
- Page 228 Precauciones ante fuegos y descargas eléctricas • Asegúrese de que existe una ventilación suficiente que los ventiladores no presentan obstrucciones para evitar la acumulación de calor en el interior del proyector. Deje un mínimo de 4 pulgadas (10 cm) de espacio entre su proyector y las paredes que lo rodean.
- Page 229 PRECAUCIÓN • No utilice la pata de inclinación con otro propósito que no sea el originalmente establecido. El uso incorrecto, como la sujeción de la pata de inclinación o colgar en una pared pueden dañar el proyector. • No envíe el estuche blando por servicios de entrega de paquetes o envíos de carga. Es posible que el proyector en el interior del estuche blando se dañe.
-
Page 230: Limpieza O Reemplazo Del Filtro
Limpieza o reemplazo del filtro La esponja del filtro de aire mantiene el interior del proyector libre de polvo y suciedad y debe limpiarse cada 100 horas de funcionamiento (más a menudo en condiciones de mucho polvo). Si el filtro está sucio u obstruido, puede que el proyector se caliente en exceso. - Page 231 3. Vuelva a instalar la cubierta del filtro nuevo. 4. Borrar las horas de filtro utilizadas. Para borrar el tiempo de uso del filtro, en el menú seleccione [Reajuste] → [Borrar horas filtro]. (→ página 49 (Manual del usuario) sobre como borrar el tiempo de uso del filtro). NOTA: No lave la cubierta del filtro con jabón y agua.
- Page 232 No toque los trozos de vidrio, pues podría cortarse. Si esto sucediera, contacte con su distribuidor NEC para el reemplazo de la lámpara. NOTA: La vida útil de la lámpara para VT59/VT49 es de 3000 horas en el modo Normal y 4000 horas en el modo Eco.
- Page 233 (1)Introduzca un nuevo bastidor de lámpara hasta que el bastidor de lámpara esté introducido en la toma. PRECAUCIÓN Utilice solamente la lámpara de repuesto NEC VT85LP (VT695/VT595/VT590/VT491) o VT80LP (VT59/VT49). Haga su pedido a su distribuidor NEC. (2)Fíjelo en su sitio con dos tornillos.
- Page 234 Detección de fallos Esta sección le ayuda a resolver eventuales problemas que puede tener al ajustar o utilizar el proyector. Mensajes de los indicadores Indicador de alimentación (POWER) Condición del indicador Condición del proyector Nota Apagado La alimentación principal está desconectada. –...
- Page 235 Problemas comunes y sus soluciones (→ “Indicador de alimentación/estado/lámpara” en la página S-10) (Los números en la tabla se refieren a los números de las páginas en el manual del usuario.) Problema Compruebe los siguientes puntos • Compruebe que el cable de alimentación está conectado y que el botón de alimentación del proyector o del El proyector no se enciende mando a distancia está...
- Page 236 Generalmente, la pulsación de la tecla “Fn” junto con una de las 12 teclas de función permite activar o desactivar el modo de visualización externa. Por ejemplo, en los ordenadores portátiles NEC se utiliza la combinación de teclas Fn + F3 (en los ordenadores portátiles Dell se utiliza Fn + F8) para alternar entre las opciones de visualización externa.
- Page 237 O manual do utilizador completo vem no CD-ROM em PDF (formato portátil do documento) e contém informações detalhadas do produto e de utilização do seu projector NEC. O manual encontra-se disponível em oito línguas (inglês, alemão, francês, italiano, espanhol, português, sueco e japonês).
- Page 238 Precauções de Segurança Precauções Por favor, leia este manual com atenção antes de utilizar o seu projector NEC VT695/VT595/VT590/VT491/VT59/ VT49 e mantenha este manual à mão para futuras referências. O seu número de série encontra-se na parte inferior do seu projector. Registe-o aqui: CUIDADO Para desligar a alimentação, certifique-se que retira a ficha da tomada.
- Page 239 Notas Importantes de Segurança Estas instruções de segurança servem para assegurar uma longa duração de vida do seu projector e para prevenir fogo e choques eléctricos. Por favor, leia-as com atenção e preste atenção aos avisos. Instalação • Não coloque o projector nas seguintes condições: - num carrinho, suporte ou mesa instável.
- Page 240 Precauções contra fogo e choques • Certifique-se que existe ventilação suficiente e que as entradas de ar não se encontram obstruídas, para prevenir que o interior do seu projector fique quente. Permita que exista pelo menos 10 cm de espaço entre o seu projector e uma parede.
- Page 241 CUIDADO • Não utilize o pé de inclinação para outros intuitos diferentes dos indicados. A má utilização, como segurar o pé de inclinação ou pendurar na parede pode dar origem a danos no projector. • Não envie o projector numa caixa pouco resistente por correio ou por despacho. O projector no interior de uma caixa pouco resistente pode ficar danificado.
- Page 242 Limpeza e Substituição dos Filtros A esponja do filtro do ar mantém o pó e sujidade afastados do interior do projector e verá ser limpo a cada 100 horas de utilização (mais frequentemente em locais poeirentos). Se o filtro estiver sujo ou entupido, o seu projector pode aquecer em demasia.
- Page 243 3. Volte a colocar a tampa do novo filtro. 4. Apagar as horas do filtro usadas. Para reiniciar o tempo de uso do filtro, no menu escolha a opção [Reiniciar] → [Apagar Horas do Filtro]. (→página para reiniciar o tempo de uso do filtro.) NOTA: Não lave o filtro com sabão e água.
- Page 244 Não toque neles, pois pode lesionar-se. Se isto acontecer, contacte o seu revendedor NEC para proceder à substituição da lâmpada. NOTA: O tempo de vida da lâmpada para o VT59/VT49 é de 3.000 horas no modo Normal e 4.000 horas no modo Eco.
- Page 245 4. Instale um novo compartimento da lâmpada. (1)Insira um novo compartimento da lâmpada até que este fique ligado na ficha. CUIDADO Não utilize outra lâmpada para além da lâmpada de substituição da NEC VT85LP (VT695/VT595/VT590/VT491) ou VT80LP (VT59/VT49). Peça-a no seu revendedor NEC.
- Page 246 Resolução de Problemas Esta secção ajuda-o a resolver problemas que pode encontrar enquanto estiver a configurar ou a utilizar o projector. Mensagens do Indicador Indicador da Alimentação Condição do Indicador Condição do Projector Nota Desligado A alimentação está desligada – Luz a piscar Verde 0,5 seg Ligado,...
- Page 247 Problemas Comuns e Soluções (→ "Indicador da Alimentação/Estado/Lâmpada" na página P-10.) Problema Verifique estes itens Não liga • Verifique se o cabo da alimentação está colocado e se o botão na estrutura do projector ou no comando à distância está ligado. (→ páginas e 20) •...
- Page 248 Habitualmente, a combinação da tecla "Fn" com uma das 12 teclas de funções liga ou desliga a apresentação externa. Por exemplo, os portáteis da NEC usam as teclas Fn + F3, enquanto os portáteis da Dell usam a combinação de teclas Fn + F8 para alternar entre as escolhas da apresentação externa.
- Page 249 Den fullständiga bruksanvisningen finns i PDF-format (Portable Document Format) på den medföljande CD- ROM-skivan. I den hittar du detaljerad information om din NEC-projektor och hur du använder den. Bruksanvisningen är tillgänglig på åtta språken (engelska, tyska, franska, italienska, spanska, portugisiska, svenska och japansk).
- Page 250 Säkerhetsföreskrifter Försiktighetsmått Läs denna bruksanvisning noggrant innan du börjar använda din NEC-projektor VT695/VT595/VT590/VT491/VT59/VT49, och förvara den nära till hands för framtida bruk. Serienumret finns på undersidan av din projektor. Anteckna det här: FÖRSIKTIGT För att helt bryta strömförsörjningen till apparaten, skall stickproppen dras ur vägguttaget.
- Page 251 Viktiga säkerhetsinstruktioner Säkerhetsinstruktionerna är till för att projektorn ska få en lång livslängd och för att förhindra brand och elskador. Läs dem noga och följ varningstexterna. Installation • Placera inte projektorn på följande platser: - på instabila vagnar, ställ eller bord. - nära vatten, badkar eller i fuktiga rum.
- Page 252 Försiktighetsmått mot brand och elstötar • Se till att ventilationen är tillräcklig och att ventilationshålen inte är blockerade för att förhindra att värme genereras i projektorn. Lämna minst 10 cm mellanrum mellan projektorn och omgivande väggar. • Vidrör inte ventilationsutloppet framtill till vänster (sett framifrån) eftersom detta kan vara mycket varmt när projektorn är igång och omedelbart efter att projektorn stängts av.
- Page 253 Försiktighetsmátt när du använder fjärrkontrollen • Handskas försiktigt med fjärrkontrollen. • Torka genast av fjärrkontrollen om den blir våt. • Undvik överdriven värme eller fukt. • Du får aldrig värma upp, demontera eller kasta batterierna i öppen eld. • Ta ur batterierna om du inte räknar med att använda fjärrkontrollen under en längre tid. •...
- Page 254 Rengöra eller byta filtret Skumgummit i luftfiltret skyddar projektorns insida mot damm och smuts och bör rengöras med driftintervall på 100 timmar (oftare i dammiga miljöer). Om filtret är smutsigt eller igensatt kan projektorn överhettas. FÖRSIKTIGT • Stäng av strömmen till projektorn, slå av huvudströmbrytaren och dra ut nätkabeln innan du byter filtret. •...
- Page 255 3. Sätt tillbaka filterkåpan. 4. Nollställa filterbrukstimmar. För att nollställa filterbrukstiden, väljer du [Återställ] → [Nollställ filtrets timmar] i menyn. (→ sid 49 (Bruksanvisning) för nollställning av filterbrukstiden.) OBSERVERA: Tvätta inte filtret med tvål och vatten. Tvål och vatten skadar filtermembranet. Torka av damm och smuts från projektorkåpan innan du byter filtret.
-
Page 256: Byta Lampa
(upp till 3000 timmar i Eko-läge) bruk, kan lampan explodera, och lamphuset fyllas med glassplitter. Rör i så fall inte splittret. Kontakta din NEC-återförsäljare för lampbyte. OBSERVERA: Lampans livslängd för VT59/VT49 är 3000 timmar i Normal-läget och 4000 timmar i Eko-läget. - Page 257 4. Installera ett nytt lamphus. (1)Sätt i ett nytt lamphus och se till att det sticks helt in i kontakten. FÖRSIKTIGT Använd inga andra lampor än NEC-lamporna VT85LP (VT695/VT595/VT590/VT491) eller VT80LP (VT59/VT49). Beställ lamporna från din NEC-återförsäljare. (2)Fäst huset med de två skruvarna.
- Page 258 Felsökning I det här avsnittet beskrivs hur du åtgärdar problem som kan uppkomma under installation och användning av projektorn. Indikatormeddelanden Driftindikator (POWER) Indikatorläge Projektorläge Anmärkning Huvudströmmen är frånslagen. – Blinkar Grön 0,5 sek På, Projektorn håller på att sättas igång. Vänta en stund.
- Page 259 Vanliga problem & lösningar (→ “Drift-/status-/lampindikator” på sid W-10) (Siffrorna i tabellen hänvisar till sidor i bruksanvisningen.) Problem Kontrollera följande punkter Projektorn går inte • Kontrollera att nätsladden är ansluten och att strömbrytaren på projektorn eller fjärrkontrollen är igång tillslagen. (→ sid 19 och 20) •...
- Page 260 Vanligtvis sätter du på eller stänger av externdisplayen med en kombination av ‘Fn” och en av de 12 funktionstangenterna . På t.ex. NEC-datorer använder man Fn + F3, medan man på Dell-datorer använder Fn + F8 för att växla mellan externdisplayvalen.
- Page 262 Troubleshooting Check List Before contacting your dealer or service personnel, check the following list to be sure repairs are needed also by referring to the “Troubleshooting” section in your user’s manual. This checklist below will help us solve your problem more efficiently.
- Page 263 Native resolution: Refresh rate: Video adapter: Other: Projector DVD player Video equipment Signal cable VCR, DVD player, Video camera, Video game or other NEC standard or other manufacturer’s cable? Model number: Length: inch/m Manufacturer: Distribution amplifier Model number: Model number: Switcher...
-
Page 265: Background Logo
Supplement Sheet to the User’s Manual for VT695M Read This Document First Except for the following information, the contents of the user's manual for the VT695M are the same as in the one for the VT695. See also the user's manual (PDF) contained on the supplied CD-ROM. •... - Page 266 - A keyword must be 4 to 10 digits in length. Please make a note of your keyword. - Do not forget your keyword. However, if you forget your keyword, NEC or your dealer will provide you with your Release Code upon proof of ownership.
- Page 267 - A keyword must be 4 to 10 digits in length. Please make a note of your keyword. When no signal is available, the logo will be displayed by default. - Do not forget your keyword. However, if you forget your keyword, NEC or your dealer will provide you with your Release Code upon proof of ownership.
- Page 268 Schlüsselwortes “Ändern Ihres aktuellen Passwortes” Zusatzbogens. - Ein Passwort muss zwischen 4 und 10 Zeichen lang sein. Bitte notieren Sie sich Ihr Passwort. - Vergessen Sie Ihr Passwort nicht. Falls Sie es doch vergessen sollten, wird NEC oder Ihr Händler Ihren • Hintergrund-Logo Freigabecode besorgen, mit dem Sie Ihre Eigentumsrechte nachweisen können.