Table of Contents
Advertisement
Advertisement
Table of Contents

Related Manuals for Gree GWH30LB-D3DNA3F


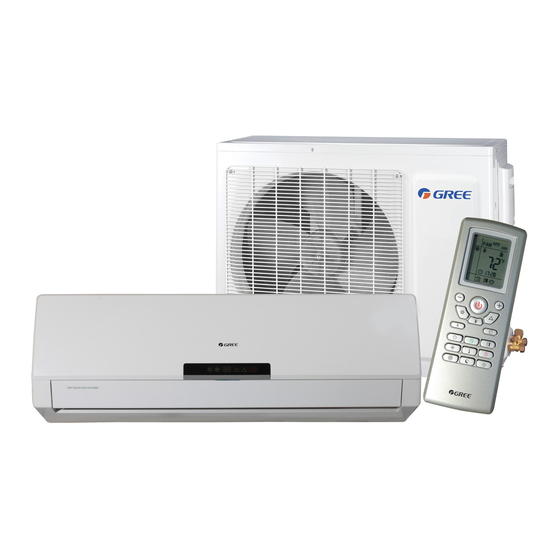
Summary of Contents for Gree GWH30LB-D3DNA3F
- Page 1 Change for Life Service Manual GREE ELECTRIC APPLIANCES,INC.OF ZHUHAI...
- Page 9 Cooling Heating Condition Condition Indoor:DB 70°F Indoor:DB 80.6°F WB66.2°F Indoor air flow: Super High Indoor air flow: Super High Pipe length:24.6ft Pipe length:24.6ft Compressor Frequency(Hz) Compressor Frequency(Hz) Cooling Heating Conditions Condition Indoor: DB 80.6°F WB66.2°F Indoor:DB 70°F Indoor air flow: Super High Indoor air flow: Super High Pipe length : 24.6ft...
- Page 10 Indoor side noise Outdoor side noise...
- Page 11 53 1/7 13 6/7 29 2/7 Φ2 3/4 Φ2 3/4 11 3/5 3 1/2...
-
Page 12: Indoor Unit
Outdoor unit Indoor unit Gas pipe side Valve 4-Way valve Di s charge Heat Accumlator Suction exchanger Compressor (evaporator) Heat exchanger Liquid pipe (condenser) side Valve Strainer Electron Capillary Strainer expansion valve COOLING HEATING... - Page 14 K101 K101...
- Page 15 2 2 2...
-
Page 17: Introduction For Icons On Display Screen
Buttons on Remote Controller ON/OFF Button MODE Button +/- Button FAN Button Button CLOCK Button TIMER ON/TIMER-OFF Button X-FAN Button TEMP Button TURBO Button LIGHT Button SLEEP Button Introduction for Icons on Display Screen Operation mode Operation mode Set fan speed Send signal Auto mode Cool mode... -
Page 18: Clock Button
● When selecting auto mode, Air conditioner will start auto operation according to indoor ambient temperature.Set temperature can’t be adjusted and will not be displayed as well. Press "FAN" button can adjust fan speed. Press " " button can adjust fan blowing angle. ●... -
Page 19: Turbo Button
controller blinks. Press "+" or "-"button to adjust TIMER ON setting. After each pressing "+" or "-"button, TIMER ON setting will increase or decrease 1min. Hold "+" or "-"button, 2s later, the time will change quickly until reaching your required time. Press “ TIMER ON”to confi rm it. The word “ON" will stop blinking. " "... -
Page 20: Replacement Of Batteries In Remote Controller
Operation Guide 1. After putting through the power, press “ON/OFF” button on remote controller to turn on the air conditioner. 2. Press "MODE" button to select your required mode:AUTO,COOL,DRY,FAN,HEAT. 3. Press “+” or “-“ button to set your required temperature. (Temperature can’t be adjusted under auto mode). - Page 21 Tamb. Start cooling Tpreset Original working state Tpreset +3˚F Stop cooling ≥ 6 min. ≥ 3 min. ≥ 6 min. Compressor Outdoor fan Set fan speed Indoor fan Stop...
- Page 26 Space to the wall Space to the wall At least 5 8/9 inch At least 5 8/9 inch Drainage pipe...
- Page 27 Start installation Preparation before installation Read the requirements select installation Prepare tools for electric connection location Select indoor unit Select outdoor unit installation location installation location Install the support of outdoor unit Install wall-mounting (select it according to the actual situation) frame, drill wall holes Connect pipes of indoor Fix outdoor unit...
-
Page 29: Outlet Pipe
Wall Wall Mark on the middle of it Gradienter Space Space to the to the wall 6 wall 6 Open-end inch inch wrench above above Union nut Pipe Pipe joint Union nut Pipe Torque wrench Right Left Ф2 3/4inch Ф2 3/4inch (Rear piping hole) (Rear piping hole) Indoor pipe... - Page 30 Screw Panel Wiring cover Indoor and outdoor power cord Indoor unit pipe Liquid pipe Band Drain hose Drain hose Connection pipe Band connection wire sleeve Indoor power cord outdoor unit connection Note: The wiring connect is for reference only, please refer to the actual one. Outdoor Indoor Wall pipe...
- Page 31 Handle Indoor unit connection Drain vent Chassis Outdoor drain join t Drain hose Foot holes Foot holes The drain hos can't raise upwards Wall Liquid pipe Pipe joint U-shaped curve Liquid gas pipe valve Union nut gas valve...
- Page 32 The drain hose can't be fluctuant The water outlet can't be placed The drain hose in water can't be fluctuant The water outlet can't be fluctuant Liquid valve Piezometer Gas valve Valve cap Refrigerant charging vent Nut of refrigerant Charging vent Vacuum pump Inner hexagon spanner...
- Page 33 Display Method of Outdoor Display Method of Indoor Unit Unit Indicator has 3 kinds of Indicator Display (during display status and during Malfunction blinking, ON 0.5s and OFF Dual-8 A/C status Possible Causes blinking, ON 0.5s and OFF Name 0.5s) Code 0.5s Display...
- Page 34 Display Method of Outdoor Display Method of Indoor Unit Unit Indicator has 3 kinds of Indicator Display (during display status and during Malfunction blinking, ON 0.5s and OFF Dual-8 A/C status Possible Causes blinking, ON 0.5s and OFF Name 0.5s) Code 0.5s Display...
- Page 35 Display Method of Outdoor Display Method of Indoor Unit Unit Indicator has 3 kinds of Indicator Display (during display status and during Malfunction blinking, ON 0.5s and OFF Dual-8 A/C status Possible Causes blinking, ON 0.5s and OFF Name 0.5s) Code 0.5s Display...
- Page 36 Display Method of Outdoor Display Method of Indoor Unit Unit Indicator has 3 kinds of Indicator Display (during display status and during Malfunction blinking, ON 0.5s and OFF Dual-8 A/C status Possible Causes blinking, ON 0.5s and OFF Name 0.5s) Code 0.5s Display...
- Page 37 Display Method of Outdoor Display Method of Indoor Unit Unit Indicator has 3 kinds of Indicator Display (during display status and during Malfunction blinking, ON 0.5s and OFF Dual-8 A/C status Possible Causes blinking, ON 0.5s and OFF Name 0.5s) Code 0.5s Display...
- Page 38 Display Method of Outdoor Display Method of Indoor Unit Unit Indicator has 3 kinds of Indicator Display (during display status and during Malfunction blinking, ON 0.5s and OFF Dual-8 A/C status Possible Causes blinking, ON 0.5s and OFF Name 0.5s) Code 0.5s Display...
- Page 39 Display Method of Indoor Unit Display Method of Outdoor Unit Indicator Display (during Indicator has 3 kinds of display blinking, ON 0.5s and OFF status and during blinking, ON Dual-8 Malfunction A/C status Possible Causes 0.5s) 0.5s and OFF 0.5s Code Name Operation...
- Page 42 Troubleshooting for F1,F2 malfunction the wiring terminal between the temperature sensor and the controller loosened or poorly contacted? Insert the temperature sensor tightly Is malfunction eliminated Is there short circuit due to trip - over of the parts? Make the parts upright Is malfunction eliminated Is the...
- Page 43 Troubleshooting for H6 malfunction Stir the blade with a tool to see whether the blade rotates smoothly Tighten the screw; reassemble the blade, motor and shaft bearing rubber base sub-assy to make sure there is no foreign object between them Is malfunction eliminated Is the...
- Page 44 Troubleshooting for C5 malfunction Appearance of Is there jumper cap on the the jumper cap mainboard ? Assemble the jumper cap with the same model Is malfunction eliminated the jumper cap inserted correctly and tightly ? Insert the jumper cap tightly Is malfunction eliminated...
- Page 45 Troubleshooting for U8 malfunction Re-energize1 minute after de-erergization The unit returns to normal. Conclusion:U8 is displayed due U8 is still to instant energization afte de- displayed energization while the capacitor discharges slowly. The zero-cross detection circuit of the mainboard is defined abnormal.Replace the mainboard with the same model...
- Page 46 (1) Capacitor charge fault (Fault with outdoor unit) (AP1 below refers to the outdoor control panel) Main Check Points: Use AC voltmeter to check if the voltage between terminal L and N on the wiring board is within 210VAC~240VAC. If the reactor (L) is correctly connected? If the connection is loose or fallen? If the reactor (L) is damaged? Fault diagnosis process: Turn on the unit and wait 1 minute...
- Page 47 (2) IPM Protection, Out-of-step Fault, Compressor Phase Overcurrent (AP1 below refers to the outdoor control panel) Main check points: If the connection between control panel AP1 and compressor COMP is secure? If loose? If the connection is in correct order? If the voltage input of the machine is within normal range? (Use AC voltmeter to measure the voltage between terminal L and N on the wiring board XT) If the compressor coil resistance is normal? If the insulation of compressor coil against the copper tube is in good condition?
- Page 48 (3)High temperature and overload protection diagnosis (AP1 hereinafter refers to the control board of the outdoor unit) Mainly detect: Is outdoor ambient temperature in normal range? Are the outdoor and indoor fans operating normally? Is the heat dissipation environment inside and outside the unit is good? Fault diagnosis process: Overheat and high temperature protection...
- Page 49 (4) Start-up failure (following AP1 for outdoor unit control board) Mainly detect: Whether the compressor wiring is connected correct? Is compressor broken? Is time for compressor stopping enough? Fault diagnosis process: Power on the unit Restart it up after Is stop time of the compressor 3 minutes longer than 3 minutes? Does startup fail?
- Page 50 (5) Out of step diagnosis for the compressor (AP1 hereinafter refers to the control board of the outdoor unit) Mainly detect: Whether the system pressure is too high? Whether the input voltage is too low? Fault diagnosis process: Out of step occurs in Out of step occurs once the operation unit is powered on.
- Page 51 (6)Overload and air exhaust malfunction diagnosis (following AP1 for outdoor unit control board) Mainly detect: Wether the PMV is connected well or not? Is PMV damaged? Is refrigerant leaked? Fault diagnosis process: 20 minutes after the complete unit is powered off Is the terminal FA for the Connect the electronic expansion valve...
- Page 52 (7)Power factor correct or (PFC) fault (a fault of outdoor unit) (AP1 hereinafter refers to the control board of the outdoor unit) Mainly detect: Check if the reactor (L) of the outdoor unit and the PFC capacitor are broken Fault diagnosis process: Start Check wiring of the reactor (L) of the...
- Page 53 (8) Communication malfunction: (following AP1 for outdoor unit control board) Mainly detect: Is there any damage for the indoor unit mainboard communication circuit? Is communication circuit damaged? Detect the indoor and outdoor units connection wire and indoor and outdoor units inside wiring is connect well or not, if is there any damage? Fault diagnosis process: Start...
- Page 54 (9) Communication malfunction:(following AP1 for outdoor unit control board) Mainly detect: Detect the indoor and outdoor units connection wire and indoor and outdoor units inside wiring is connect well or not, If is there any damage? Is there any damage for the indoor unit mainboard communication circuit? Is communication circuit damaged? The flow chart fir malfunction detect: Start Did the equipment operate...
- Page 55 High-pressure protection Use pressure gauge to Measure if the pressure switch Replace the mainboard of measure if the pressure is is normal outdoor unit really high? Check if the operation mode of Set the correct operation Replace the pressure switch indoor unit is set properly? mode Check if the gas valve and...
- Page 56 Troubleshooting for E5 malfunction Is the supply voltage unstable Normal fluctuation is within 10 % of the rated Malfunction is with big fluctuation? voltage on the nameplate eliminated Is the supply voltage too low Malfunction is Adjust the supply voltage to maintain it within Malfunction is with overload? normal range...
- Page 59 X K 11...
- Page 62 11 12 13 14 15...
- Page 64 Steps Procedure 1.Before disassembly of the unit Axonometric drawing for the complete unit. 2.Remove filter panel Open the panel. Loosen the clasps on the filter. clasps Draw out two pieces of filter. filter...
- Page 65 Steps Procedure 3.Remove display display Remove 2 screws fixing display, and then remove the filter. 4.Remove panel clasp Pull the clasps at both sides slightly, and then remove the panel. panel 5.Remove horizontal louver Remove the axial bush on the horizontal louver, and then remove the horizontal louver.
- Page 66 Steps Procedure 6.Remove top cover of electric box Remove screws fixing the top cover of electric box. screw Remove the top cover of electric box. top cover of electric box screw cap 7.Remove front case Remove the screw caps on front case. screw Remove screws connecting the front case.
- Page 67 Steps Procedure 8.Remove earthing wire screw Remove earthing screws, and then remove the earthing wire. 9.Remove electric box cover clasp Loosen clasps at the left side of electric box. Loosen clasps on the right side of electric box. clasp electric box cover Remove electric box cover.
- Page 68 Steps Procedure 10.Remove temperature sensor Pull out the indoor temperature sensor. temperature sensor 11.Remove electric box Pull out 6 sockets on PCB board. Pull out two screws on electric box. screw electric box Remove the electric box.
- Page 69 Steps Procedure 12.Remove water tray water tray Pull the water tray upwards, and then remove the water tray. 13.Remove connection pipe between indoor and outdoor units Separate the connection pipe between indoor and outdoor units. connection position for indoor and outdoor units' connection pipe 14.Remove pipe-stopping plate Remove two screws on pipe-stopping plate for indoor unit, and then remove the pipe-stopping...
- Page 70 Steps Procedure 16.Remove evaporator screw Remove screws between evaporator and bottom case. Turn over the indoor unit and adjust the pipe line to the position as shown by the broken line. Lift up the evaporator, and then remove the evaporator. evaporator 17.Remove the fixing plate of motor Remove 2 screws on fixing plate of motor, and then...
- Page 71 Steps Procedure 18.Remove cross flow blade and motor blade motor Remove screws fixing cross flow blade and motor. Remove the motor sub-assy. Separate two cross flow blade.
- Page 72 Steps Procedure 19.Remove cushion rubber Remove the cushion rubber on cross flow blade. cushion rubber Remove the cushion rubber from the base.
- Page 73 Steps Procedure 1. Remove big handle,valve cover and top cover Remove the screw connecting the big handle and right side plate, and then remove the big handle. Remove the screw connecting the valve cover and right side plate, and then remove the valve cover. handle valve cover 2.Remove top panel...
- Page 74 Steps Procedure 4.Remove grille and panel Twist off the screws connecting the grille and panel, and then remove the grille. Twist off the screws connecting the panel, chassis and motor support with screwd-river, and then remove the panel. grille panel 5.Remove right side plate right side plate Twist off the screws connecting the right side...
- Page 75 Steps Procedure 7.Remove electric box electric box Twist off the screws on electric box, cut off the tieline with scissors or pliers, pull out the wiring terminal, pull it upwards to remove the electric box. Twist off the screws on electric box (fireproofing) electric box with screwdriver, and then remove the electric (fireproofing)
- Page 76 Steps Procedure 9.Remove motor support Twist off the tapping screws fixingthe motor support, pull it upwardsand then remove the motor support. motor support 10.Remove isolation sheet Twist off the screws connecting isolation sheet and end plate of condenser and chassis, and then remove the isolation sheet.
- Page 77 Steps Procedure 12.Remove gas valve and liquid valve Twist off the 2 bolts fixing the valve sub-assy. Unsolder the soldering joint between gas valve and air-return pipe and then remove the gas valve.(note: when unsoldering the soldering joint, wrap the gas valve with wet cloth completely to gas valve avoid the damage to valve, and release all refrigerant completely at first).
- Page 78 Steps Procedure 15.Remove left side plate Twist off the screws connecting the left side plate and chassis with screwdriver, and then remove the left side plate. left side plate 16.Remove chassis and condenser Pull it upwards to separate the chassis and condenser.
- Page 80 Pipe Pipe cutter Leaning Uneven Burr Pipe Shaper Downwards Union pipe Pipe Hard mold Expander Pipe Smooth surface Improper expanding damaged leaning crack uneven surface thickness The length is equal...