Table of Contents
Advertisement
Available languages
Available languages
Quick Links
Advertisement
Table of Contents

Related Manuals for Atlantis Land A02-PL100


Summary of Contents for Atlantis Land A02-PL100
- Page 1 PowerLine Ethernet Adapter A02-PL100 MULTILANGUAGE Manual A02-PL100_MX01...
-
Page 2: Table Of Contents
MULTILANGUAGE QUICK START GUIDE ITALIANO 1.1 Introduzione ... 2 1.2 Indicazioni per l’Utilizzo ... 3 1.3 Contenuto della confezione... 5 1.4 Configurazione Minima ... 5 1.5 I LED frontali... 6 ... 6 ... 6 PORTE 1.6 Installazione e Rimozione dell’Utility di Configurazione... -
Page 3: Multilanguage Quick Start Guide
MULTILANGUAGE QUICK START GUIDE 1.10 Technical Features ... 36 FRANCAIS 1.11 Support ... 37 1.1 Introduction... 40 1.2 Précautions d’usage... 41 1.3 Contenu de la boîte ... 43 1.4 Configuration requise... 43 1.5 Connection et Indicateur LED ... 44 ... 44 ... - Page 4 Atlantis Land spa che non si assume responsabilità per qualsiasi errore o inesattezza che possa apparire in questo manuale. Nessuna parte di questa pubblicazione può...
-
Page 5: Introduzione
1.1 Introduzione Uno dei maggiori inconvenienti nel preparare una rete dati in casa è certamente l'assenza del cablaggio richiesto. Negli ultimi anni molte tecnologie hanno tentato di superare questo Certamente la tecnologia in generale più promettente è quella Wireless (802.11X), benché non sempre risulti pienamente utilizzabile. -
Page 6: Indicazioni Per L'utilizzo
1.2 Indicazioni per l’Utilizzo Leggere attentamente le seguenti raccomandazioni: • Scollegare il PowerLine Ethernet Adapter dalla presa elettrica prima di purirlo. Non utilizzare alcun tipo di solvente liquido o in spray. Utilizzare un panno soffice asciutto. • Non utilizzare il PowerLine Ethernet Adapter in prossimità... - Page 7 elevato. Ogni tentativo di apertura del dispositivo, inoltre, invalida la garanzia dello stesso. • Scollegare immediatamente il PowerLine Ethernet Adapter dalla presa elettrica e chiamare immediatamente l’assistenza tecnica nelle seguenti condizioni : • del liquido è caduto sul prodotto • se il prodotto è...
-
Page 8: Contenuto Della Confezione
1.3 Contenuto della confezione La confezione del prodotto contiene: • 2 PowerLine Ethernet Adapter • 2 Cavi CAT-5 UTP (RJ45) • 1 Guida Rapida multilingua • 1 CD-Rom con Utility e Manuali • 1 Certificato di Garanzia Qualora mancasse uno qualsiasi di questi componenti è necessario rivolgersi immediatamente al rivenditore. -
Page 9: I Led Frontali
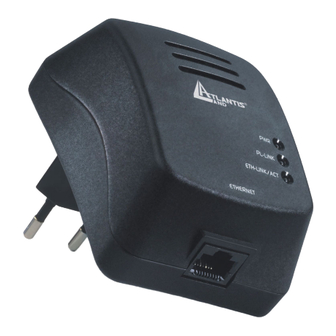
1.5 I LED frontali Il PowerLine Ethernet Adapter dispone di 3 LED ed una porta Ethernet. PL-LINK ETH- LINK/ACT: PORTE ETHERNET: INFORMAZIONI Acceso quando collegato alle rete elettrica. Acceso quando viene rilevato un altro adattatore connesso alla stessa rete elettrica. Acceso quando connesso ad una porta Ethernet di un dispositivo o un PC. -
Page 10: Installazione E Rimozione Dell'utility Di Configurazione
1.6 Installazione e Rimozione dell’Utility di Configurazione Installazione: • Collegare il PowerLine Ethernet Adapter al computer (o lo Switch) tramite il cavo Ethernet fornito. • Collegare il PowerLine Ethernet Adapter direttamente alla Presa Elettrica. • Installare l’Utility di Configurazione. Lanciare il file setup.exe CDRom:\Utility\Setup.exe). -
Page 11: Considerazioni Sulla Rete Lan
1.7 Considerazioni sulla rete LAN Questo paragrafo include informazioni circa la configurazione della rete. Configurazione del Computer Dopo aver installato il PowerLine Ethernet Adapter è necessario, qualora non sia stato già fatto in precedenza, configurare correttamente il livello IP della scheda di rete. Windows 98 e Windows Me •... -
Page 12: Considerazioni Sulla Rete Lan
• Evidenziare il tab Generale e scegliere la voce Protocollo Internet (TCP/IP). Cliccare su Proprietà e spuntare la voce 'Ottieni automaticamente un indirizzo IP e Server DNS'. Cliccare poi OK. • Verificare le impostazioni del browser : Andare in Pannello di Controllo > Connessioni ed abilitare la voce 'Non utilizzare mai connessioni remote' e cliccare poi su OK. - Page 13 Collegamento di Apparati Remoti (quali IP CAM) alla LAN Quanti PowerLine Il numero massimo di adattatori HomePlug in una singola rete elettrica potrebbe, teoricamente, arrivare sino a 253. comunque opportuno, per conservare una buona fruibilità, non superare una decina di adattatori. Sicurezza Normalmente il contatore elettrico disaccoppia il segnale rendendo, di fatto, il segnale non comprensibile ad altri apparati...
-
Page 14: Uso Dell'utility Di Configurazione
• Scegliere la password in maniera casuale. E’ uso comune immettere nomi compiuti che però risultano più facili da trovare. • Cambiare immediatamente non appena questa venga compromessa. • Il cambio regolare della password crea, a fronte di un minimo sforzo, un grande guadagno nella riservatezza dei dati circolanti sulla rete. - Page 15 Device Tab: Verrà mostrato il MAC del dispositivo collegato col PC su cui si è lanciata l’Utility. Cliccando su Refresh verrà aggiornata la pagina. La barra di scorrimento indicherà lo stato dell’operazione. In Link Quality è possibile vedere le performance medie della rete HomePlug.
- Page 16 Network dialog screen: E’ possibile vedere dettagliate informazioni sui dispositivi presenti nella rete powerline. Viene mostrato l’indirizzo MAC ed il Data Rate tra il dispositivo collegato al PC e gli altri dispositivi presenti. Cliccare su Scan PowerLine Network per ottenere il refresh delle informazioni.
- Page 17 Security dialog screen: Tutti i dispositivi utilizzano la password HomePlug come Password di rete. E’ possibile cambiare questa password immettendola e premendo poi su Set Local. In questo caso il dispositivo collegato direttamente al PC cambierà la sua password. Premendo invece Restore Default, il sistema si riporterà alle condizioni di default.
- Page 18 ITALIANO Advanced dialog screen: In questa schermata è possibile cambiare, da remoto, le password di Network degli altri dispositivi PowerLine connessi alla rete. Introdurre in Device Password la password dei vari dispositivi e poi cliccare su Add. Comparirà una voce nella parte sinistra. Per cambiare la Network Password dei dispositivi remoti introdurre il valore in Network Password e premere su Set All, in questo modo tutti i dispositivi remoti utilizzeranno la nuova...
-
Page 19: Caratteristiche Tecniche
1.10 Caratteristiche Tecniche Standards Protocols Transfer rate Transfer procedure Modulation Frequency Band Range Security Platform Support LED Indicators HomePlug connection Computer interface Power consumption Power supply Temperature Environment 10Base-T Ethernet, IEEE 802.3 10 Mbps Auto MDI / MDIx Support 14 Mbps HomePlug 1.0 compatible CSMA/CA MAC control 14 Mbps Asynchronous... -
Page 20: Supporto Offerto
Per qualunque altro problema o dubbio è possibile contattare l’help desk telefonico (02/93907634) gratuito di Atlantis Land che fornirà assistenza da lunedì al giovedì dalle 9:00 alle 13:00 e dalle 14:00 alle 18:00. Il venerdì dalle 9 :00 alle 13 :00. E’ possibile anche utilizzare il fax (02/93906161) o (info@atlantis-land.com... - Page 21 ITALIANO...
-
Page 22: English
ENGLISH Copyright The Atlantis Land logo is a registered trademark of Atlantis Land SpA. All other names mentioned mat be trademarks or registered trademarks of their respective owners. Subject to change without notice. No liability for technical errors and/or omissions. -
Page 23: Introduction
1.1 Introduction One of the major drawbacks in setting up home network is the absence of required wiring inside the house to interconnect networked computers. In recent years several technologies have attempted to address the issue. The most prominent technology so far is the family of WIFI (802.11 X) products. - Page 24 • The PowerLine Ethernet Adapter should never be placed near or over a radiator or heat register, or in a built-in installation unless proper ventilation provided. • The PowerLine Ethernet Adapter should be operated from the type of power indicated on the marking label. If you are not sure of the type of power available, consult your dealer or local power company.
-
Page 25: Package Contents
At least 64MB hard disk space and memory • CD-ROM drive Your computer or the device to which you want to connect the PowerLine Ethernet Adapter must have an Ethernet port, i.e. a network card or a network adapter. ENGLISH... -
Page 26: The Led Indicators
1.5 The LED Indicators The PowerLine Ethernet Adapter has three lights indicator (LEDs) and an Ethernet port: PL-LINK ETH- LINK/ACT: PORT ETHERNET: MEANING Lights up when connected to AC power supply. Lights when connected with another PowerLine Adapter within the network. Lights up when connected to the Ethernet port of the computer or other Ethernet devices. -
Page 27: Installation And Uninstallation Of Configuration Utility
1.6 Installation and Uninstallation of Configuration Utility Simple Installation: • Connect the PowerLine Ethernet Adapter to the computer or the device with the Ethernet cable. • Connect the PowerLine Ethernet Adapter to the Power Outlet. • Install the Configuration Utility. The Configuration Utility Installation CD has auto run feature. -
Page 28: All About The Home Network
1.7 All about the Home Network This chapter contains important and useful information on networks—from the configuration of your computer to examples of applications to general tips. Configuring the Computer Now that you have successfully connected and installed your PowerLine Ethernet Adapter, we show you how to configure your computer correctly and how to check existing settings. - Page 29 Windows 2000 • Open the properties of the LAN connection on the connected computers by selecting Start > Settings Control Panel > Network and Dial-up Connections. Click with the right mouse button on the corresponding LAN connection and select 'Properties'. •...
- Page 30 Windows XP The Windows XP start menu can be configured in different ways. See the Windows XP documentation for more information. Open the properties of the LAN connection on the connected computers. • Select Start > Control Panel > Internet Connections. Click with the right mouse button on the corresponding LAN connection and select 'Properties'.
-
Page 31: Examples Of Applications
ENGLISH 1.8 Examples of Applications This section demonstrates some of the application scenarios. PowerLine in Home Application PowerLine with IPCAM Network Volume The maximum number of HomePlug adaptors in a single-family house is theoretically 253 connections, but in practice no more than 10 devices should be transferring data simultaneously. - Page 32 Network Security Normally the electric meter forms a physical barrier, i.e. only devices connected to this meter can be part of the network and benefit from the phase coupling. We strongly recommend that you use the PowerLine Ethernet Adapter internal device encryption. It is configured with Configuration Utility Configuration Utility User Guide).
-
Page 33: Configuration Utility User Guide
ENGLISH 1.9 Configuration Utility User Guide Running the Utility: To run the utility, double click the PowerPacket Configuration Utility icon on your desktop. Device dialog screen:... - Page 34 In the text list box, it reports back all devices that are found locally connected to the computer where the utility is running. In most cases, one device only is listed. In case you have more, click on one of them and hit Connect. Make sure that the State box indicates that your PC is connected to the same device.
- Page 35 Network dialog screen: The Network dialog screen provides detailed information about your powerline network. The text list box shows all HomePlug devices found on your powerline network identified by their MAC addresses. A second column indicates their data rate measurements in Mbps. Click on the Scan Powerline Network button to refresh the listed information.
- Page 36 Security dialog screen: All HomePlug devices are shipped using “HomePlug” as a Network Password. The Security dialog screen allows you to change this Network Password and set your own private password and apply it to the HomePlug device connected to the computer where the utility is running.
- Page 37 Network Password as it will be needed when adding other devices to the network later. Advanced dialog screen: The Advanced dialog screen allows you to set up a network password remotely on other HomePlug devices through the powerline. Type your private network password into the Network Password text box.
- Page 38 Passwords text list box and set them to the currently defined Network Password. The device must be present on the powerline in order for the password to be confirmed and added to the Remote Passwords list. Status: The Status indicates whether each device is successfully set to the Network Password.
-
Page 39: Technical Features
1.10 Technical Features Standards Protocols Transfer rate Transfer procedure Modulation Frequency Band Range Security Platform Support LED Indicators HomePlug connection Computer interface Power consumption Power supply Temperature Environment System requirements 10Base-T Ethernet, IEEE 802.3 10 Mbps Auto MDI / MDIx Support 14 Mbps HomePlug 1.0 compatible CSMA/CA MAC control... -
Page 40: Support
If you continue to have problems you should contact the dealer where you bought this adapter. If you have any other questions you can contact the Atlantis Land company directly at the following address: Atlantis Land SpA Viale De Gasperi, 122... - Page 41 FRANCAIS Copyright Copyright. 2002 est la propriété de cette société. Tout droits réservés. Sont interdites, la reproduction, la transmission, la transcription, la mémorisation dans un système de sauvegarde ou la traduction dans une autre langue ou en langage informatique quels qu’ils soient, de la présente publication, sous quelque forme que ce soit ou quelque en soit le moyen, électronique, mécanique, magnétique, optique, chimique, manuel ou de tout autre genre, sans avoir obtenu préalablement l’autorisation de notre entreprise.
- Page 42 FRANCAIS Toutes les marques ou noms de produits mentionnés dans le présent manuel sont des marques commerciales et/ou brevetées par leurs propriétaires respectifs. Marquage CE Cet appareil, qui appartient à la Classe B peut causer des interférences radio, dans ce cas nous vous invitons à prendre les contre-mesures appropriées.
-
Page 43: Introduction
1.1 Introduction Le principal problème rencontré pour l’installation d’un réseau domestique est l’absence du câblage nécessaire. Ces derniers temps, de nouvelles technologies sont apparues pour essayer de régler ce problème. La technologie la plus utilisée est le Wi-Fi (802.11X), mais elle n’est pas toujours utilisable. Une autre technologie appelée HomePlug répond à... -
Page 44: Précautions D'usage
1.2 Précautions d’usage Lisez attentivement les indications suivantes: • Déconnectez le PowerLine Ethernet Adapter de la prise électrique avant de le nettoyer. N’utilisez aucun type de solvant liquide ou en spray. Utilisez un chiffon sec et non pelucheux. • N’utilisez pas le PowerLine Ethernet Adapter à proximité d’eau ou dans un environnement très humide. - Page 45 • Si le produit ne fonctionne pas normalement, bien que les instructions de ce manuel aient été suivies scrupuleusement • Si les performances changent brutalement La garantie du produit est invalidée dans les cas suivants: foudres, voltage incorrect, surtensions violentes. On conseille de connecter les dispositifs PowerLine directement à...
-
Page 46: Contenu De La Boîte
1.3 Contenu de la boîte Assurez vous d’y trouver: • 2 x Adaptateur ETHERNET Courant Porteur • 2 x Câble réseau Ethernet CAT-5 UTP (RJ45) • 1 x Guide de démarrage rapide • 1 x CD-ROM avec Utilitaires et documentation •... -
Page 47: Connection Et Indicateur Led
1.5 Connection et Indicateur LED L’adaptateur ETHERNET Courant Porteur dispose de trois indicateurs (LED) et d’un Port Ethernet: PL-LINK ETH- LINK/ACT: PORT ETHERNET: FONCTION Allumée lorsque l’adaptateur secteur Allumée lorsque connecté à un autre adaptateur à travers le réseau Allumée lorsque connecté au réseau Ethernet Clignotante pendant le passage des données... -
Page 48: Installation Et Désinstallation
1.6 Installation et Désinstallation Installation: • Connectez le PowerLine Ethernet Adapter à l’ordinateur (ou le Switch) à travers le câble Ethernet fourni. • Connectez le PowerLine Ethernet Adapter directement à la Prise électrique. • Installez l’Utilitaire de Configuration. Exécutez le fichier setup.exe (présent sur le CDRom dans: \Utility). -
Page 49: Considérations Sur Le Réseau Lan
1.7 Considérations sur le réseau LAN Ce paragraphe contient des informations sur la configuration du réseau. Configuration de l’Ordinateur Après avoir installé le PowerLine Ethernet Adapter, il est nécessaire de configurer correctement la carte réseau. Windows 98 et Windows Me •... -
Page 50: Examples De Réseaux
'Obtenir automatiquement une adresse IP et le serveur DNS'. Cliquez puis OK. • Vérifiez les configurations du browser: allez en Panneau de configuration > Options Internet > Connexion et validez la ligne 'N’utilisez jamais de connexion à distance' puis cliquez OK. Si aucune ligne avec le mot TCP/IP n’est présente, il faut installer ce protocole. - Page 51 Connexion d’Appareils à distance (comme l’IP-CAM) Combien de PowerLine sur le même réseau Le nombre maximal d’adaptateurs HomePlug dans un seul réseau électrique pourrait, théoriquement, être de 253. Pour conserver de bonnes performances, ne pas dépasser une dizaine d’adaptateur. Sécurité Normalement le compteur électrique isole les réseaux internes et externes.
-
Page 52: Utilitaire De Configuration
• Changez le mot de passe régulièrement et immédiatement s’il vous semble compromis. • Le changement régulier du mot de passe engendre, avec un effort minimal, un grand gain dans la sécurisation des données qui circulent dans le réseau. 1.9 Utilitaire de Configuration Exécutez l’Utilitaire: Double cliquez sur l’icône PowerPacket Configuration Utility sur le bureau. - Page 53 Fenêtre principale: Adresse MAC du dispositif connecté à l’ordinateur sur lequel on a lancé l’Utilitaire. En cliquant sur Refresh, la page est mise à jour. En Link Quality, pour voir les performances moyennes du réseau HomePlug. • Vert: performances excellentes •...
- Page 54 Fenêtre réseau: Il est possible d’y voir des informations détaillées sur les appareils présents dans le réseau powerline. L’adresse MAC de tous les adaptateurs. Le Taux de Transfert entre les appareils. Cliquez sur Scan PowerLine Network pour obtenir la mise à jour des informations.
- Page 55 Fenêtre sécurité : Tous les appareils utilisent le mot de passe HomePlug comme mot de passe par défaut. Vous pouvez le changer puis appuyer sur Set Local pour le mémoriser. En appuyant sur Restore Default, le système reviendra aux conditions initiales. Le mot de passe doit être de 4 à...
- Page 56 FRANCAIS Fenêtre Options avancées: De cette fenêtre, vous pouvez modifier à distance, les mots de passe des autres appareils PowerLine connectés au réseau. Introduisez dans Device Password le mot de passe des différents dispositifs puis cliquez sur Add, les postes apparaîtront dans la partie gauche.
-
Page 57: Caractéristiques Principales
1.10 Caractéristiques Principales Standard Protocole Taux de Transfert Méthode de transfert Modulation Bande de Fréquence Portée Sécurite Système d’exploitation Indicateur LED Connection HomePlug Interface ordinateur Consommation Alimentation Temperature Environnement Besoin System pour soft d’Utilitaires Connecteurs Dimension 10 Base-T Ethernet, IEEE 802.3 10 Mbps Auto MDI / MDIx Support 14 Mbps HomePlug 1.0 compatible... -
Page 58: Support
Poids 1.11 Support Pour tout problème ou renseignement, vous pouvez contacter l’help desk téléphonique gratuite d’Atlantis Land qui vous fournira assistance du lundi au vendredi de 9.00 à 18.00. Vous pouvez aussi nous contacter par email : Atlantis Land France 57, Rue d’Amsterdam...