Table of Contents
Advertisement
Available languages
Available languages
Advertisement
Table of Contents

Related Manuals for Whirlpool AKZ 483


Summary of Contents for Whirlpool AKZ 483
- Page 1 AKZ 483 User and maintenance manual Manuel d’utilisation et d’entretien...
-
Page 3: Important Safety Instructions
IMPORTANT SAFETY INSTRUCTIONS YOUR SAFETY AND THAT OF OTHERS IS PARAMOUNT This manual and the appliance itself provide important safety warnings, to be read and observed at all times. This is the danger symbol, pertaining to safety, which alerts users to potential risks to themselves and others. -
Page 4: Installation
Scrapping of household appliances This appliance is manufactured with recyclable or reusable materials. Dispose of it in accordance with local waste disposal regulations. Before scrapping, cut off the power supply cable. For further information on the treatment, recovery and recycling of household electrical appliances, contact your competent local authority, the collection service for household waste or the store where you purchased the appliance. -
Page 5: Declaration Of Conformity
Energy saving Only pre-heat the oven if specified in the cooking table or your recipe. Use dark lacquered or enamelled baking moulds as they absorb heat far better. Switch the oven off 10/15 minutes before the set cooking time. Food requiring prolonged cooking will continue to cook even once the oven is switched off. -
Page 6: Oven Exterior
CLEANING Never use steam cleaning equipment. WARNING Only clean the oven when it is cool to the touch. Disconnect the appliance from the power supply. Oven exterior IMPORTANT: do not use corrosive or abrasive detergents. If any of these products accidentally comes into contact with the appliance, clean immediately with a damp cloth. -
Page 7: Maintenance
MAINTENANCE Use protective gloves. WARNING Ensure the oven is cold before carrying out the following operations. Disconnect the appliance from the power supply. REMOVING THE DOOR To remove the door: Open the door fully. Lift the catches and push them forwards as far as they will go (Fig. 1). Close the door as far as it will go (A), lift it up (B) and turn it (C) until it is released (D) (Fig. -
Page 8: Replacing The Oven Lamp
REPLACING THE OVEN LAMP To replace the rear lamp (if present): Disconnect the oven from the power supply. Unscrew the lamp cover (Fig. 6), replace the lamp (see note for lamp type) and screw the lamp cover back on. Reconnect the oven to the power supply. To replace the side lamp (if present): Disconnect the oven from the power supply. -
Page 9: Instructions For Oven Use
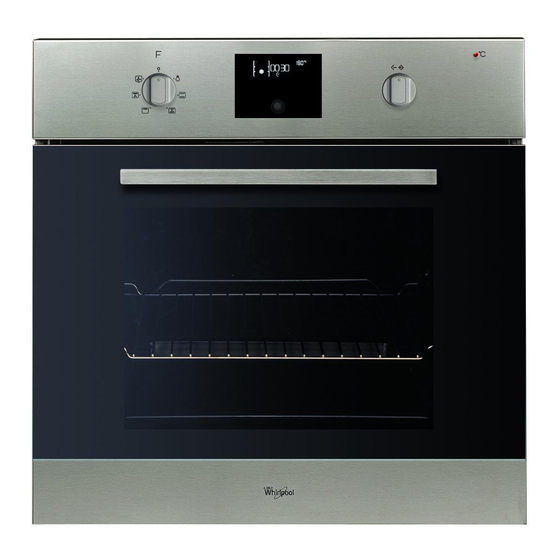
INSTRUCTIONS FOR OVEN USE FOR ELECTRICAL CONNECTION, SEE THE PARAGRAPH ON INSTALLATION Control panel Upper heating element/grill Cooling fan (not visible) Dataplate (not to be removed) Lamp Circular heating element (not visible) Turnspit Lower heating element (not visible) 10. Door 11. -
Page 10: Control Panel Description
INSERTING WIRE SHELVES AND OTHER ACCESSORIES IN THE OVEN Insert the wire shelf horizontally, with the raised part “A” upwards (Fig. 1). The other accessories, like the drip tray and baking tray, are inserted with the raised part on the flat section “B”... -
Page 11: Fast Preheating
STARTING THE OVEN - SETTING THE TIME After connecting the oven to the mains power, the time must be set on the clock. The two hour digits flash on the display. Turn the “Browse” knob to display the correct hour. Press the button to confirm;... -
Page 12: Setting Cooking Time
SETTING COOKING TIME This function can be used to cook food for a set length of time, from a minimum of 1 minute to the maximum time allowed by the selected function, after which the oven switches off automatically. Once the temperature is confirmed, the symbol flashes. -
Page 13: Selecting Special Functions
SELECTING SPECIAL FUNCTIONS Turn the “Functions” knob indicator to the symbol to access a submenu containing five special functions. To browse, select and start one of these functions, proceed as follows: Turn the “Functions” knob to symbol : the display shows “ DEFROST” along with this function’s corresponding symbol. -
Page 14: Automatic Oven Cleaning
SETTINGS Turn the “Functions” knob indicator to the symbol to access a submenu containing four display settings which can be changed. Clock Turn the “Functions” knob to the symbol : the word CLOCK appears on the display. To change the time of day, see the previous paragraph (SETTING THE TIME). - Page 15 OVEN FUNCTION DESCRIPTION TABLE FUNCTIONS KNOB To stop cooking and switch off the oven. LAMP To switch the oven interior light on/off. To speed up defrosting of food. Place food on the middle shelf. Leave food in its packaging in order to prevent it from drying out on the outside. DEFROST For keeping just-cooked food hot and crisp (e.g: meat, fried food or flans).
- Page 16 FUNCTIONS KNOB (Continued) To bake different types and sizes of pizza and bread. This function contains two programmes with predefined settings. Simply indicate the values BREAD/PIZZA required (temperature and time) and the oven will manage the cooking cycle automatically. Place the dough on the 2nd shelf after preheating the oven.
-
Page 17: Cooking Table
COOKING TABLE Recipe Function Pre- Shelf (from Temp. Time Accessories and notes heating bottom) (°C) (min) 160-180 30-90 Cake tin on wire shelf Leavened cakes Shelf 4: cake tin on wire shelf 160-180 30-90 Shelf 1: cake tin on wire shelf GENTLE Drip tray/baking tray or cake 160-200... - Page 18 Recipe Function Pre- Shelf (from Temp. Time Accessories and notes heating bottom) (°C) (min) 190-200 20-30 Drip tray / baking tray Vols-au-vent / Puff pastry crack- Shelf 4: oven tray on wire shelf 180-190 20-40 Shelf 1: drip tray / baking tray GENTLE Lasagne / Baked pasta / Cannel-...
- Page 19 Recipe Function Pre- Shelf (from Temp. Time Accessories and notes heating bottom) (°C) (min) Shelf Oven tray on wire shelf (turn food two thirds of the way through cooking if Lasagna & Meat 50-100 necessary) Shelf 1: drip tray or oven tray on wire shelf Shelf Oven tray on wire shelf (turn food two thirds of the...
- Page 20 TESTED RECIPES (in compliance with IEC 60350:99+A1:05 +A2:08 and DIN 3360-12:07:07) Recipe Function Pre- Shelf (from Temp. Time Accessories and notes heating bottom) (°C) (min) IEC 60350:99+A1:05 +A2:08 § 8.4.1 15-25 Drip tray / baking tray Shelf 3: baking tray (switch Shortbread levels halfway through cooking) 20-30...
-
Page 21: Recommended Use And Tips
RECOMMENDED USE AND TIPS How to read the cooking table The table indicates the best function to use for any given food, to be cooked on one or more shelves at the same time. Cooking times start from the moment food is placed in the oven, excluding pre-heating (where required). - Page 22 INSTRUCTIONS IMPORTANTES SUR LA SÉCURITÉ VOTRE SÉCURITÉ AINSI QUE CELLE D’AUTRUI EST PARTICULIÈREMENT IMPORTANTE Le présent manuel contient d’importants messages relatifs à la sécurité, qui figurent également sur l’appareil. Nous vous invitons à les lire soigneusement et à les respecter en toute circonstance. Ceci est le symbole de danger relatif à...
-
Page 23: Branchement De L'appareil
N’utilisez en aucun cas de récipients en matière synthétique pour cuire des aliments au four. Les graisses et l’huile surchauffées s’enflamment facilement. Surveillez régulièrement la cuisson si vous utilisez une quantité importante de graisse ou d’huile. Ne laissez jamais l’appareil sans surveillance pendant le processus de séchage des aliments. Si vous utilisez des boissons alcoolisées (rhum, cognac, vin, par exemple) pour cuisiner des plats, rappelez-vous que l’alcool s’évapore à... -
Page 24: Conseils Pour La Protection De L'environnement
CONSEILS POUR LA PROTECTION DE L’ENVIRONNEMENT Élimination des emballages Les matériaux d’emballage sont entièrement recyclables comme l’indique le symbole de recyclage ( ). Par conséquent, ne les jetez jamais dans la nature mais conformez-vous aux réglementations locales en vigueur en matière d’élimination des déchets. Mise au rebut de l’appareil Cet appareil est certifié... -
Page 25: Service Après-Vente
• votre numéro de téléphone. Nous vous invitons à enregistrer votre four sur le site : www.whirlpool.fr, rubrique « enregistrez votre produit » afin d’être rapidement reconnu et renseigné par l service consommateur en cas de conseil ou de panne. - Page 26 Accessoires : • Faites tremper les accessoires dans du détergent à vaisselle après leur utilisation et après refroidissement. S’ils sont encore chauds, munissez-vous de gants pour les manipuler. • Utilisez une brosse ou une éponge pour détacher facilement les résidus d’aliments. Nettoyage de la paroi arrière et des panneaux catalytiques latéraux (s’ils sont fournis) : REMARQUE IMPORTANTE : ne nettoyez en aucun cas les panneaux catalytiques et la paroi arrière avec des produits abrasifs, des brosses dures, des éponges pour casseroles ou des bombes pour le...
-
Page 27: Entretien
ENTRETIEN Munissez-vous de gants de protection. AVERTISSEMENT Procédez aux opérations indiquées lorsque l’appareil est froid. Veillez à toujours débrancher l’appareil. DÉMONTAGE DE LA PORTE Pour démonter la porte : Ouvrez complètement la porte du four. Soulevez les deux manettes d’arrêt des charnières en les poussant vers l’avant, jusqu’à la butée (Fig. -
Page 28: Remplacement De L'ampoule
REMPLACEMENT DE L’AMPOULE Pour remplacer l’ampoule arrière (si présente) : Débranchez le four. Dévissez le capot de l’ampoule (Fig. 6), remplacez l’ampoule brûlée par une ampoule neuve (voir Remarque pour connaître le type), puis revissez le capot de l’ampoule. Rebranchez le four. Pour remplacer l’ampoule latérale (si présente) : Débranchez le four. -
Page 29: Instructions Pour L'utilisation Du Four
INSTRUCTIONS POUR L’UTILISATION DU FOUR POUR LE BRANCHEMENT ÉLECTRIQUE, CONSULTEZ LA PARTIE RELATIVE À L’INSTALLATION Bandeau de commandes Résistance supérieure/gril Ventilateur (non visible) Plaque signalétique (à ne pas enlever) Éclairage Résistance circulaire (non visible) Ventilateur Tournebroche Résistance inférieure (non visible) 10. -
Page 30: Liste Des Fonctions
INTRODUCTION DE GRILLES ET AUTRES ACCESSOIRES À L’INTÉRIEUR DU FOUR Insérez la grille horizontalement, avec la partie rehaussée « A » orientée vers le haut (Fig. 1). Pour les autres accessoires, comme le lèchefrite ou la plaque à pâtisserie, l’introduction se fait à l’aide de la saillie se trouvant sur la partie plane «... -
Page 31: Préchauffage Rapide
ACTIVATION DU FOUR - RÉGLAGE DE L’HEURE Après avoir branché le four au réseau électrique, il est nécessaire d’introduire l’heure courante. Les deux chiffres relatifs à l’heure clignoteront sur l’afficheur. Tournez le bouton « Navigation » pour afficher l’heure correcte. Appuyez sur la touche pour confirmer ;... -
Page 32: Réglage De La Durée De Cuisson
RÉGLAGE DE LA DURÉE DE CUISSON Cette fonction permet de cuire pendant un temps défini, d’un minimum de 1 minute jusqu’au temps maximum permis par la fonction sélectionnée. Quand la durée de cuisson est écoulée, le four s’éteint automatiquement. Après avoir confirmé la température, le symbole clignote. - Page 33 SÉLECTION DES FONCTIONS SPÉCIALES En positionnant l’indicateur du bouton « Fonctions » en face du symbole , on accède à un sous-menu contenant trois fonctions spéciales. Pour sélectionner et lancer l’une de ces fonctions, procédez comme suit : Tournez le bouton « Fonctions » sur le symbole : l’afficheur visualise «...
- Page 34 RÉGLAGES En positionnant l’indicateur du bouton « Fonctions » en face du symbole , on accède à un sous-menu contenant quatre réglages de l’afficheur, qu’il est possible de modifier. Horloge Tournez le bouton « Fonctions » à la hauteur du symbole : le message CLOCK (horloge) apparaît sur l’afficheur.
- Page 35 TABLEAU DESCRIPTIF DES FONCTIONS DU FOUR BOUTON FONCTIONS Pour interrompre la cuisson et éteindre le four. LAMPE Pour allumer/éteindre la lumière à l’intérieur du four. Pour accélérer la décongélation des aliments. Placez l’aliment sur le gradin central. Laissez-le dans son emballage pour empêcher que la surface ne se déshydrate.
-
Page 36: Nettoyage Automatique
BOUTON FONCTIONS (Suite) Pour cuire différents types et formats de pizzas et de pain. Deux program- mes sont présents dans cette fonction ; leurs paramétrages sont prédéfinis. PAIN/PIZZA Il suffira d’indiquer les valeurs demandées (température et durée) et le four gèrera automatiquement le cycle de cuisson optimal. -
Page 37: Tableau De Cuisson
TABLEAU DE CUISSON Recette Fonction Pré- Gradin Temp. Durée Accessoires et notes chauffage (du bas) (°C) (min) 160-180 30-90 Moule à gâteau sur grille Grad. 4 : moule à gâteau sur Gâteaux levés grille 160-180 30-90 Grad. 1 : moule à gâteau sur DÉLICATE grille Lèchefrite / plaque à... - Page 38 Recette Fonction Pré- Gradin Temp. Durée Accessoires et notes chauffage (du bas) (°C) (min) 180-190 40-55 Moule à gâteau sur grille Tourtes (Tourtes Grad. 3 : moule à gâteau sur aux légumes, qui- grille (inverser les gradins à ches) 180-190 40-55 mi-cuisson) Grad.
- Page 39 Recette Fonction Pré- Gradin Temp. Durée Accessoires et notes chauffage (du bas) (°C) (min) Grad. 3 : Plaque sur grille (tourner l’aliment après 2/3 de la cuisson si nécessaire) Lasagnes & Viande 50-100 Grad. 1 : lèchefrite ou plaque sur grille Grad.
- Page 40 RECETTES TESTÉES conformément à la norme IEC 60350:99+A1:05 +A2:08 et DIN 3360-12:07:07 Recette Fonction Pré- Gradin Temp. Durée Accessoires et notes chauffage (du bas) (°C) (min) IEC 60350:99+A1:05 +A2:08 § 8.4.1 15-25 Lèchefrite / plaque à pâtisserie Biscuits de pâte bri- Grad.
- Page 41 CONSEILS POUR L’UTILISATION ET SUGGESTIONS Comment lire le tableau de cuisson Le tableau indique la meilleure fonction à utiliser pour un aliment déterminé, à cuire sur un ou plusieurs gradins simultanément. Les temps de cuisson commencent au moment de l’introduction du plat dans le four et ne tiennent pas compte du préchauffage (lorsque demandé).
- Page 42 Pizzas Graissez légèrement les plats pour obtenir une pizza croustillante également sur le fond. Distribuez la mozzarella sur la pizza après 2/3 de la cuisson. Fonction levage de la pâte Il est conseillé de couvrir la pâte avec un torchon humide avant de la mettre au four. Les temps de levage dans cette fonction diminuent d’environ un tiers par rapport aux temps de levage à...
- Page 44 Printed in Italy 12/2011 5019 310 01368...