NetComm NB5 User Manual
Adsl / adsl-2 modem router
Hide thumbs
Also See for NB5:
- Quick start manual (28 pages) ,
- Specifications (2 pages) ,
- Quick start manual (2 pages)
Table of Contents
Advertisement
Quick Links
Advertisement
Table of Contents

Related Manuals for NetComm NB5


Summary of Contents for NetComm NB5
- Page 2 NetComm. Failure to do so may cause damage to this product, fire or result in personal injury. NetComm NB5 Ethernet/USB Modem Router YML717 Rev1...
-
Page 3: Table Of Contents
Do I need a Micro filter? ... 11 Default Settings ... 12 Quick Start Guide ... 13 Connecting your NB5 ADSL Modem via ETHERNET ... 13 Connecting your NB5 ADSL Modem via USB ... 14 Setting up your ADSL Router ... 15 Log into your ADSL Router ... - Page 4 Ping Test ... 70 Modem Test ... 70 Reboot ... 70 Log Out ... 70 Status Menu ... 71 Network Statistics ... 71 Connection Status ... 71 DHCP Clients ... 71 Modem Status ... 71 NetComm NB5 Ethernet/USB Modem Router YML717 Rev1 www.netcomm.com.au...
- Page 5 USB cable ... 80 9 Pin (RS-232 ) Serial Cable ... 80 Appendix E: Registering your NetComm Product ... 81 Contact Information ... 81 Legal & Regulatory Information ... 82 Product Warranty ... 83 YML717 Rev1 www.netcomm.com.au NetComm NB5 Ethernet/USB Modem Router...
-
Page 6: Overview
NB5 delivers the connection versatility needed to cater for today’s ADSL users. You can simply attach the NB5 to a single PC by using the USB port. Alternatively, should you wish to share your internet connection with up to 253 users, the NB5 is equipped with an in-built Router and a 10/100 Ethernet port for connection to a network system. -
Page 7: Nb5 Package Contents Note
NB5 Package Contents Note Your NB5 Package contains the following items: ■ The NB5 ADSL/ADSL-2 Modem Router ■ Telephone cable (RJ-11) ■ RJ11 to 605 Adaptor ■ USB Cable ■ CAT-5 UTP Straight Ethernet Network cable (RJ-45) ■ Power adapter (DC 9V) ■... -
Page 8: Minimum System Requirements
■ Windows® XP (recommended) ■ OS independent for Ethernet ■ Web Browser support: ■ Microsoft Internet Explorer 5.0 (or later versions) ■ Netscape® Navigator 4.0 (or later versions) ■ Most popular browsers NetComm NB5 Ethernet/USB Modem Router YML717 Rev1 www.netcomm.com.au... -
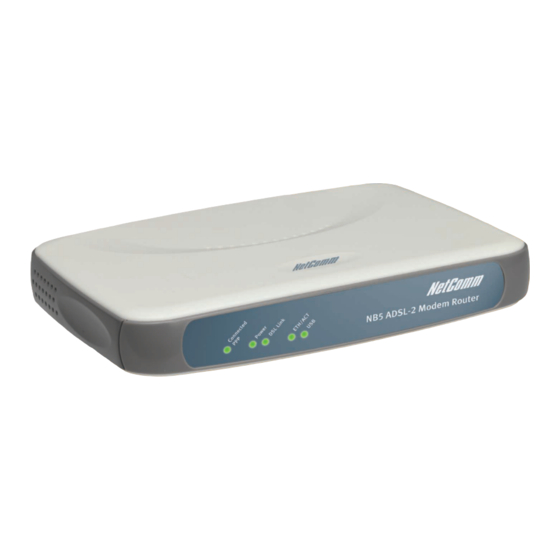
Page 9: Front Indicators
ADSL Service Provider. ETH/ACT Lights up when the Ethernet cable is properly connected from your Router to the Ethernet Card. Lights up when the USB device driver is successfully installed in your Computer/ Notebook. YML717 Rev1 www.netcomm.com.au NetComm NB5 Ethernet/USB Modem Router... -
Page 10: Back Panel
Do not power off the unit at this point. ■ When indicator lights return to steady green, reset is complete. The default settings are now restored. NetComm NB5 Ethernet/USB Modem Router YML717 Rev1 www.netcomm.com.au... -
Page 11: Do I Need A Micro Filter
Telephones and/or facsimiles in other rooms that are using the same extension will also require Microfilters. The following diagram gives an example of connecting your ADSL Modem/ Router using a Microfilter. A suitable Microfilter can be purchased from NetComm or your Service Provider, if required. YML717 Rev1 NetComm NB5 Ethernet/USB Modem Router www.netcomm.com.au... -
Page 12: Default Settings
❖ Default Setting. Although in most cases you will not be required to alter these default settings for your NB5, your ISP may identify specific settings to enable connection to their service. Please refer to your ISP or Network Administrator for further information. -
Page 13: Quick Start Guide
Quick Start Guide The NB5 can be connected via a USB cable or an Ethernet cable or both. The reason for this is that the USB connection is simply an ethernet simulation, as far as your computer is concerned the USB connection is an Ethernet connection, hence DHCP and other protocols will work the same as for Ethernet. -
Page 14: Connecting Your Nb5 Adsl Modem Via Usb
4. Follow the on-screen prompts to load the driver. Refer to the section below for more detailed information. (You may need to restart your computer). 5. Connect one end of the ADSL phone line to the NB5 ADSL Modem and the other end to the wall socket. -
Page 15: Setting Up Your Adsl Router
Setting up your ADSL Router This section will guide you through your ADSL Router's configuration. Before continuing, please ensure that your ADSL line is connected to your NB5 ADSL Router and that your router is connected to your computer. Log into your ADSL Router To access the NB5 ADSL Router configuration screens: 1. -
Page 16: Quick Start Menu
Quick Start Menu The first screen that appears (after the log in screen) is the Quick Start screen. By default the NB5 ADSL Router has been configured to use a PPPoE connection, and you usually only need to enter the username and password (as specified by your ISP) to make a connection to the internet. -
Page 17: Connecting Your Adsl Router
1.1.2(b) Connecting to the USB. Locating the USB Port on your Computer/Notebook The USB Port on your Computer/Notebook can often be identified by the label USB or the icon. YML717 Rev1 www.netcomm.com.au NetComm NB5 Ethernet/USB Modem Router... - Page 18 For details on the connection and types of Ethernet Network cable to use with the Ethernet Switch/Hub, please refer to the documentation that comes with your Ethernet Switch/Hub. Proceed to Step 1.2. NetComm NB5 Ethernet/USB Modem Router YML717 Rev1 www.netcomm.com.au...
- Page 19 For single-user connection, you may now proceed to Step 1.2 1.1.1(b) Connecting to the USB NOTE: Your computer should be powered down before insertion of the USB cable. For a single user connection, you may now proceed to Step 1.2. YML717 Rev1 www.netcomm.com.au NetComm NB5 Ethernet/USB Modem Router...
-
Page 20: Step 1.2 Connecting To The Adsl Line
Connect your ADSL Router to the Power Outlet via the Power adapter (that comes with your ADSL Router package). Step 1.4 Powering On Power on the Power Outlet that is connected to your ADSL Router. Power on your Computer(s)/Notebook(s). Please proceed to Step 2. NetComm NB5 Ethernet/USB Modem Router YML717 Rev1 www.netcomm.com.au... -
Page 21: Step 2: Configuring Your Ethernet Network Card / Installing Your Usb Device
From your Windows desktop, right-click on the Network Neighborhood icon. Select Properties. From the Configuration tab, select TCP/IP-> xxx where xxx refers to the model of your Ethernet Card that is connected to your ADSL Router. Click Properties. YML717 Rev1 www.netcomm.com.au NetComm NB5 Ethernet/USB Modem Router... - Page 22 From your Windows desktop, click Start > All Programs > Accessories > Communica- tions > Network Connections. b) Right-click on the Local Area Connection icon that reflects the model of your Ethernet Card that is connected to your ADSL Router and click Properties. NetComm NB5 Ethernet/USB Modem Router YML717 Rev1 www.netcomm.com.au...
- Page 23 Select Internet Protocol (TCP/IP) and click Properties. Select the option Obtain an IP address automatically and click OK. Click OK again to close. Ensure that your ADSL Router is powered on. Restart your system. Proceed to Step 3. YML717 Rev1 www.netcomm.com.au NetComm NB5 Ethernet/USB Modem Router...
-
Page 24: Installing The Usb Device Driver
Power on your computer to start Windows. Place the Installation CD into your CD-ROM Drive iii At the following promp click Next. iv Select ‘Search for the best driver for your device (Recommended)’ and click Next. NetComm NB5 Ethernet/USB Modem Router YML717 Rev1 www.netcomm.com.au... - Page 25 OK. This is usually x:\win98, where 'x' is the letter of your CD- ROM drive. viii Click Finish to complete the USB driver installation. Restart your system when prompted. Proceed to Step 3. YML717 Rev1 www.netcomm.com.au NetComm NB5 Ethernet/USB Modem Router...
- Page 26 Click the ‘Removable Media’ option and click Next. Click Next again to proceed installation with the indicated driver. Click Finish to complete the USB driver installation. Restart your system when prompted. Now proceed to Step 3. NetComm NB5 Ethernet/USB Modem Router YML717 Rev1 www.netcomm.com.au...
- Page 27 Click CD-ROM drives option and click Next. At the next prompt, click Next to proceed installation with the indicated driver. You may encounter a 'Digital Signature Not Found' dialog box during installation. Click 'Continue Anyway'. YML717 Rev1 www.netcomm.com.au NetComm NB5 Ethernet/USB Modem Router...
- Page 28 Place the Installation CD into your CD-ROM Drive. At the following prompt, select Install from a list or specific location (Advanced) option and click Next. Click ‘Search removable media’ and click Next. Click Finish, then proceed to Step 3. NetComm NB5 Ethernet/USB Modem Router YML717 Rev1 www.netcomm.com.au...
-
Page 29: Step 3: Configuring Your Internet Browser
Select Advanced and click Proxies. Ensure that the option Direct Connection to the Internet is enabled. Click OK for changes to take effect. You may now proceed to Step 4 to establish your Internet connection. YML717 Rev1 www.netcomm.com.au NetComm NB5 Ethernet/USB Modem Router... -
Page 30: Step 4: Connecting To The Internet
From your Internet Browser, type in http://192.168.1.1 and hit <Enter>. NOTE: The NB5 Admin username and password is not the same as the username and password provided by your ISP to connect to the Internet You will be prompted for the username and password to login to the Web Management. -
Page 31: Firewall Configuration
Network Address Translation and Port Mapping The NB5 is a NAT router. NAT stands for Network Address Translation, a process which converts private IP addresses of a computer on the internal private network to one or more public IP ad- dresses for the Internet. - Page 32 The Default Setting of the NB5 does not provided access from the Internet to any services hosted on the LAN. In other words, by default the firewall function is fully enabled and the only incoming packets allowed are those elicited by a request from a LAN client.
-
Page 33: Advanced Configuration Of Your Adsl Router
Advanced Configuration of your ADSL Router This section will guide you through your ADSL Router's configuration. Before continuing, please ensure that your ADSL line is connected to your NB5 ADSL Router and that your router is connected to your computer. -
Page 34: Advanced Configuration Of Your Adsl Router-Login Settings
Advanced Configuration of your ADSL Router-Login Settings The first screen that appears (after the log in screen) is the Quick Start screen. By default the NB5 ADSL Router has been configured to use a PPPoE connection, and you usually only need to enter the username and password (as specified by your ISP) to make a connection to the internet. -
Page 35: Advanced Menus
The Setup and Advanced Menus provide access to further configuration and customisation options for the NB5. While the Quick Start connection is all that is required for many installations, the Setup and Advanced menus enable you to create multiple connection profiles, set up routing options, assign port forwarding, enable Access Control, configure the firewall, and more. -
Page 36: Configuring The Adsl Connection
■ Static ■ Bridged [RFC1483] ■ CLIP [RFC1577] Configuring the NB5 to match these connection types may require entry of some or all of the following values: ■ ISP Account Username and Password ■ VPI/VCI [Defaults are 8/35, recommended] ■... -
Page 37: The Setup Menu
Profiles may be required if you connect to more than one ADSL service provider, or if you vary the connection type you use, or if your NB5 is used in different locations. The NB5 Interface provides a function under the WAN Setup Menu to enable the user to create, save and select Connection Profiles as required. -
Page 38: Pppoe Connection
Firewall [SPI]: Firewall is on by default [recommended]. Allow Incoming Ping: Unchecked by default [recommended]. Check only if this function is required for testing purposes. Select the Quality of Service [QoS] type; if in doubt leave as default NetComm NB5 Ethernet/USB Modem Router YML717 Rev1 www.netcomm.com.au... - Page 39 Maximum Segment Size to PPP MRU. To complete and save the Connection Profile, click the Apply button, and then click on Save Settings at the bottom of the menu list on left. YML717 Rev1 NetComm NB5 Ethernet/USB Modem Router www.netcomm.com.au...
-
Page 40: Pppoa Connection Setup
Firewall [SPI]: Firewall is on by default [recommended]. Allow Incoming Ping: Unchecked by default [recommended]. Check only if this function is required for testing purposes. Select the Quality of Service [QoS] type; if in doubt leave as default. NetComm NB5 Ethernet/USB Modem Router YML717 Rev1 www.netcomm.com.au... - Page 41 Maximum Segment Size to PPP MRU. To complete and save the Connection Profile, click the Apply button, and then click on Save Settings at the bottom of the menu list on left. YML717 Rev1 NetComm NB5 Ethernet/USB Modem Router www.netcomm.com.au...
-
Page 42: Dhcp Connection Setup
Allow Incoming Ping: Unchecked by default [recommended]. Check only if this function is required for testing purposes. Select the Quality of Service [QoS] type; if in doubt leave as default. Select the encapsulation type (LLC or VC) according to information provided by the ISP. NetComm NB5 Ethernet/USB Modem Router YML717 Rev1 www.netcomm.com.au... - Page 43 DHCP address by clicking on the renew button but this is not generally necessary as the process runs automatically. To complete and save the Connection Profile, click the Apply button, and then click on Save Settings at the bottom of the menu list on left. YML717 Rev1 NetComm NB5 Ethernet/USB Modem Router www.netcomm.com.au...
-
Page 44: Static Connection Setup
VoIP or video-conferencing applications where other users must regularly connect to your computer. Static IP numbers are generally made available by ISPs for these purposes for an additional fee. The following instructions will allow you to set up your NB5 to manage a Static IP connection. -
Page 45: Static Settings
ISP for confirmation. To complete and save the Connection Profile, click the Apply button, and then click on Save Settings at the bottom of the menu list on left. YML717 Rev1 NetComm NB5 Ethernet/USB Modem Router www.netcomm.com.au... -
Page 46: Bridged Connection Setup
A Bridged connection basically disables the routing, firewall and NAT features of the NB5. In a Bridged connection, the NB5 acts as a modem or hub, and just transmits packets between the WAN interface and the LAN interface. A Bridged connection assumes that another device is providing the routing functionality that is now disabled in the NB5. - Page 47 Select the Quality of Service [QoS] type; if in doubt leave as default. To complete and save the Connection Profile, click the Apply button, and then click on Save Settings at the bottom of the menu list on left. YML717 Rev1 NetComm NB5 Ethernet/USB Modem Router www.netcomm.com.au...
-
Page 48: Clip [Classical Ip Over Atm] Connection Setup
Allow Incoming Ping: Unchecked by default [recommended]. Check only if this function is required for testing purposes. Select the encapsulation type (LLC or VC); if in doubt leave as default. Select the VPI and VCI settings; 8/35 is Australian default [recommended]. NetComm NB5 Ethernet/USB Modem Router YML717 Rev1 www.netcomm.com.au... - Page 49 Connection Name that you wish to modify or delete. Follow the procedures outlined in the relevant section above to modify the connection, or click 'Delete' to delete a connection. To save changes or to make the deletion permanent, click on Save Settings on the left. YML717 Rev1 NetComm NB5 Ethernet/USB Modem Router www.netcomm.com.au...
-
Page 50: Lan Setup
To access the DHCP Configuration Screen, click Setup>LAN Setup>DHCP Configuration. Server On The Server On radio button enables the NB5 DHCP function. For DHCP functionality to work properly the following rules must be observed. Start IP - End IP Range The Start IP Address indicates the beginning of the range at which the DHCP server starts issuing IP addresses. - Page 51 This will allow LAN DHCP clients to be assigned DHCP information (IP Address, Subnet Mask and Default Gateway) from a DHCP server on the WAN (usually at the ISP). Enable/Disable DHCP YML717 Rev1 www.netcomm.com.au NetComm NB5 Ethernet/USB Modem Router...
-
Page 52: Management Ip
DHCP servers as the presence of two DHCP servers on one LAN will create conflicts and lead to network problems. To disable the DHCP function on the NB5, select the Server and Relay Off radio button. Caution: if this function is disabled careful attention must be paid to the IP address setup of each computer on the LAN as IP addresses will no longer be allocated automatically. -
Page 53: The Advanced Menu
Select the required Connection Profile by clicking on the radio button adjacent to the Connection Profile name; then click on the Enable UPnP Checkbox. To save changes, click on Apply, then click on Save Settings. YML717 Rev1 NetComm NB5 Ethernet/USB Modem Router www.netcomm.com.au... -
Page 54: Snmp
Simple Network Management Protocol is a system which allows management of multiple remote devices from a central location. To access SNMP, click on Advanced>Advanced Features>SNMP. To save changes, click on Apply, then click on Save Settings. NetComm NB5 Ethernet/USB Modem Router YML717 Rev1 www.netcomm.com.au... -
Page 55: Ip Qos
QoS to limit the resources dedicated to the peer-to-peer session in order to ensure web browser connectivity. QoS is often vital to maintain VoIP session quality. To access IP QoS, click on Advanced>Advanced Features>IP QoS To save changes, click on Apply, then click on Save Settings. YML717 Rev1 NetComm NB5 Ethernet/USB Modem Router www.netcomm.com.au... -
Page 56: Lan Clients
QoS rules to individual computers on the LAN. If DHCP is used, all DHCP clients are automatically assigned and are designated as a LAN client. To add a LAN client, click Advanced>Advanced Features>LAN Clients. NetComm NB5 Ethernet/USB Modem Router YML717 Rev1 www.netcomm.com.au... -
Page 57: Mac Filter Control
If the check box is selected, MAC filtering is enabled according to the list of MAC Filter Rules that has been created. If the box is de-selected, MAC Filtering will not be enabled, even if MAC Filter Rules have been created. YML717 Rev1 NetComm NB5 Ethernet/USB Modem Router www.netcomm.com.au... -
Page 58: Create Mac Filter Rules
The third rule allows all IPv4 frames with the source MAC address of the bridge to go through. TIP: To find the MAC address of a Windows-based computer, at the DOS prompt type: ipconfig /all. NetComm NB5 Ethernet/USB Modem Router YML717 Rev1... -
Page 59: Multicasting
[e.g. SMTP]. To access Multicasting, click on Advanced>Advanced Features>Multicast. To enable Multicast, open the multicast screen and select the Enable IGMP Multicast. YML717 Rev1 NetComm NB5 Ethernet/USB Modem Router www.netcomm.com.au... -
Page 60: Static Routing
Gateway: IP address refers to the IP address of the near device that is to connect with the remote network or host. If the NB5 is fulfilling this function then its IP address will be entered in this field. To save changes, click on Apply, then click on Save Settings. -
Page 61: Dynamic Routing
Dynamic Routing makes use of the RIP Protocol to allow the ADSL Router to automatically adjust to physical changes in the network. The NB5, using the RIP protocol, will determine the network packet route based on the fewest number of hops between the Source and the Destination. The RIP protocol regularly broadcasts routing information to other ADSL Routers on the network and is part of the IP Suite. -
Page 62: Port Forwarding
NetMeeting link, it is advisable to consider implementing a Fixed IP address, otherwise the dynamic IP address allocated by DHCP will need to be communicated prior to every user session. To access Port Forwarding, click on Advanced>Firewall>Port Forwarding NetComm NB5 Ethernet/USB Modem Router YML717 Rev1 www.netcomm.com.au... - Page 63 'Delta Force' has been selected from the list of Available Rules and is about to be copied to Applied Rules. In the example, this will configure the NB5 ports to use with 'Delta Force' . To remove a rule from the Applied Rules box, select the Rule and click on the Remove Button.
- Page 64 You can now apply the rule(s) by selecting it and clicking Add. This will add the rule to list of applied rules. Click on Save Settings on the left-hand menu to make changes permanent. NetComm NB5 Ethernet/USB Modem Router YML717 Rev1 www.netcomm.com.au...
-
Page 65: Access Control
Access Control Use Access Control to configure advanced security functions by customising the NB5 Firewall. The default 'Firewall On' setting blocks all anonymous Internet traffic. Access control enables the user to selectively direct such traffic, for example to a Web Host in the DMZ or to specific ports opened for such applications as Web, Telnet or FTP. - Page 66 If Access Control is enabled, and an Enable WAN checkbox is selected, then WAN access to the matching service is enabled. In other words, for example, if your were to enable Telnet access on the WAN you could then manage and configure your NB5 from anywhere on the Internet via Telnet. Caution: Enabling WAN access to the NB5 reduces security…...
-
Page 67: Ip Filters
You must have at least one LAN Client in your LAN clients table before IP filters can be created. To create a LAN Client, see the section above on LAN Clients under the Advanced Menu. YML717 Rev1 www.netcomm.com.au NetComm NB5 Ethernet/USB Modem Router... -
Page 68: Dmz Configuration
NAPT to share your internet connection, LAN computers will still be able to access the Internet when the DMZ host is enabled. Any direct communication to the WAN port of the NB5 that is not a reply to the original NAPT request is forwarded to the DMZ host. -
Page 69: Tools Menu
To access User Management, click on Tools>User Management. This screen enables you to change your User Name and/or Password. It is recommended that you change the User Name and password from the default 'admin' to ensure the security of the NB5. CAUTION: If you forget your user name and password, access to the NB5 interface can only be gained by resetting the unit to factory defaults. -
Page 70: Update Firmware
Update Firmware 'Firmware' is the software that controls the NB5 and also provides the user interface that is the subject of this manual. The Firmware resides in the NB5 internal memory; currently loaded firmware version can be found under Status>Product Information. Firmware upgrades may be offered from time to time by NetComm Ltd. -
Page 71: Status Menu
This displays Upstream (=Us) and Downstream (=Ds) connection speed in Kbps. Product Information To access Product Information, click on Status>Product Information. This displays various parameters of the NB5 including Firmware Version System Log To access the System Log, click on Status>System Log This maintains a dynamic display of System Log information. -
Page 72: Appendix A: Troubleshooting
DOS window and type IPCONFIG; make sure that the network adapter that is connected to the gateway is within the same 192.168.1.x subnet. 3. Also, your PC's Subnet Mask should match the gateways subnet mask. The gateway has a default subnet mask of 255.255.255.0. NetComm NB5 Ethernet/USB Modem Router YML717 Rev1 www.netcomm.com.au... -
Page 73: The Dsl Link Led Continues To Blink But Does Not Go Solid
Router. If the phone line is connected to the phone side of the ADSL Router or you have a splitter installed on the phone line, the DSL light will not come on. YML717 Rev1 www.netcomm.com.au NetComm NB5 Ethernet/USB Modem Router... -
Page 74: Appendix B: Adsl Router Terms
You should use the DMZ when you want to run a server that others will access from the Internet. Internal programs and servers (like print servers, etc) should NOT be connected to the DMZ NetComm NB5 Ethernet/USB Modem Router YML717 Rev1... -
Page 75: What Is A Gateway
If your machine can reach all stations on the same subnet (usually a building or a sector within a building), but cannot communicate outside of this area, it is usually because of an incor- rectly configured default gateway. YML717 Rev1 www.netcomm.com.au NetComm NB5 Ethernet/USB Modem Router... -
Page 76: Appendix C: Features
Network Address Translation (NAT) ■ Port Mapping/Forwarding ■ Easy setup of Port Forwarding rules for popular Games/Application ■ NAT Application Level Gateway for popular applications ■ DHCP Server/Relay/client ■ DNS Relay Agent ■ DMZ support NetComm NB5 Ethernet/USB Modem Router YML717 Rev1 www.netcomm.com.au... -
Page 77: Management Support
1 x RJ-11 Telephone socket for ADSL line ■ 1 x RJ45 for 10/100Base-T Ethernet (MDI-X) ■ 1 x USB 1.1 Type B ■ 1 x DC Jack for Power Input ■ 1 x Factory Default Reset Button YML717 Rev1 www.netcomm.com.au NetComm NB5 Ethernet/USB Modem Router... -
Page 78: Appendix D: Cable Connections
100 metres. Twisted pair cables Figures 1 and 2 illustrate the use of straight-through and crossover twisted pair cables along with the connector. NetComm NB5 Ethernet/USB Modem Router RJ-45 Connector Pin Assignment Normal Assignment Input Receive Data +... -
Page 79: Straight And Crossover Cable Configuration
RJ-11 Connector Pin Assignment YML717 Rev1 www.netcomm.com.au Figure 3 Figure 4 Normal Assignment Signal Ground +5 Volts In Signal Ground Figure 5 NetComm NB5 Ethernet/USB Modem Router... -
Page 80: 605 To Rj-11 Adapter
9 Pin (RS-232 ) Serial Cable A 9 Pin (RS-232) Serial Cable may be used to connect to a serial console terminal or a PC running a terminal emulation program, such as Hyper Terminal. Male Connector NetComm NB5 Ethernet/USB Modem Router Pin No Name SGND “B”... -
Page 81: Appendix E: Registering Your Netcomm Product
NetComm web site at: Contact Information If you have any technical difficulties with your product, please do not hesitate to contact NetComm’s Customer Support Department. Email: support@netcomm.com.au Fax: (+612) 9424-2010 Web: www.netcomm.com.au YML717 Rev1 www.netcomm.com.au www.netcomm.com.au NetComm NB5 Ethernet/USB Modem Router... -
Page 82: Legal & Regulatory Information
NetComm. Failure to do so may cause damage to this product, fire or result in personal injury. NetComm NB5 Ethernet/USB Modem Router YML717 Rev1 www.netcomm.com.au... -
Page 83: Product Warranty
NetComm within 30 days of the original purchase by registering on-line via the NetComm web site at www.netcomm.com.au. NetComm reserves the right to request proof of purchase upon any warranty claim. YML717 Rev1 www.netcomm.com.au NetComm NB5 Ethernet/USB Modem Router...