Table of Contents
Advertisement
Basic Operation Manual
INK JET PRINTER FOR INDUSTRIAL MARKING
HITACHI Printer
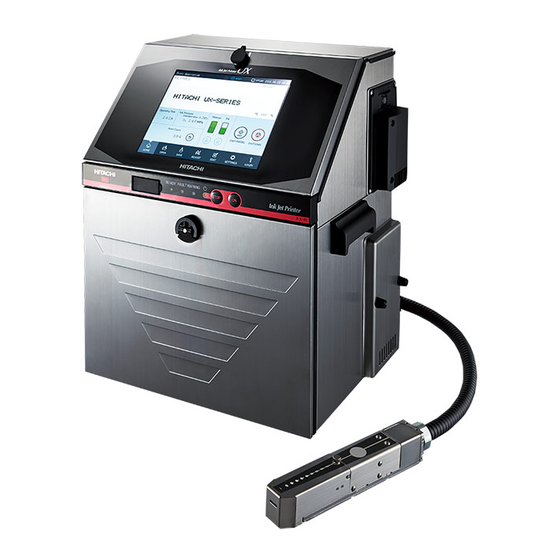
Thank you for purchasing the Hitachi IJ Printer Model UX.
This printer employs a noncontact, ink-jet method to print onto a print target.
This Basic operation manual describes the basic handling procedures of the Hitachi IJ Printer Model UX.
If the printer is improperly handled or maintained, it may not operate smoothly and may become defective or
cause an accident. It is therefore essential that you read the Instruction manual to gain a complete
understanding of the printer and use it correctly.
After thoroughly reading the manual, properly store it for future reference.
IF you changed the language of screen by mistake,see the Instruction Manual chapter 7.8 "Selecting Languages".
Model UX
Advertisement
Table of Contents

Related Manuals for Hitachi UX


Summary of Contents for Hitachi UX
- Page 1 This printer employs a noncontact, ink-jet method to print onto a print target. This Basic operation manual describes the basic handling procedures of the Hitachi IJ Printer Model UX. If the printer is improperly handled or maintained, it may not operate smoothly and may become defective or cause an accident.
- Page 3 Usage Precaution ● Before using the printer, thoroughly read the following safety precautions for optimum printer use. ● All the instructions set forth in this manual are important and must therefore be observed without fail. ● After the manual has been read, it must be stored in such a location that all printer operation personnel can refer to it at all times.
-
Page 4: Safety Precautions
SAFETY PRECAUTIONS ● You should observe the precautions set forth below in order to use the product properly and avoid endangering you or other persons or damaging property. For the purpose of clarifying the severity of injury or damage and likelihood of occurrence, the precautions are classified into two categories, WARNING and CAUTION, which both describe hazardous situations that may arise if you ignore the precautions and perform an incorrect handling or operating procedure. - Page 5 SAFETY PRECAUTIONS (Continued) Installation Environment of Printer WARNING ● Ensure that there is no flame- or arc-generating device around the printer. The ink and makeup are both flammable and may cause fire. Fire can be generated by matches, lighters, cigarettes, heaters, stoves, gas burners, welders, grinders and static electricity.
- Page 6 SAFETY PRECAUTIONS (Continued) Grounding WARNING ● Ensure that all electrical wiring, connections and grounding comply with applicable cords. Properly connect the printer to its dedicated ground. Complete the above procedure to avoid electrical shock hazards. ● When welding, keep enough space between the IJ printer and the welding work area to prevent the arc from starting a fire.
- Page 7 SAFETY PRECAUTIONS (Continued) Ink and Makeup Handling WARNING ● When charging a refill of ink or makeup, exchanging ink, or otherwise handling ink or makeup, take enough care not to spill ink or makeup. If you spill any ink or makeup by mistake, wipe it off neatly and promptly with wiping paper or something similar.
- Page 8 CAUTION ● Only persons who have completed an operator training course for Hitachi IJP can operate and service the printer. If the printer is operated or serviced incorrectly, it may malfunction or break down. ● Do not attempt to make repairs for any purpose other than operation or maintenance.
-
Page 9: Fcc Notice
SAFETY PRECAUTIONS (Continued) Related Regulations WARNING ● Never drain the ink or makeup waste solution into a public sewer system. Waste disposal must comply with all appropriate regulations. Consult the appropriate regulatory agency for further information. ● The printer must be managed in compliance with all appropriate regulations. Read and understand the appropriate Safety Data Sheet (SDS) before using any ink or makeup. - Page 10 SAFETY PRECAUTIONS (Continued) WARNING <Keep all fire away.> ○ Ink and Makeup are flammable. ○ All fire must be kept away from the machine. ○ Spilled Ink and Makeup must be wiped off and dried up immediately. <Caution when handling Ink/Makeup> ○...
-
Page 11: Table Of Contents
CONTENTS 1. DELIVERED GOODS ......1-1 2. USAGE PRECAUTIONS ......2-1 2.1 Ink and makeup . - Page 12 7.2 Shut down operation .........7-13 7.2.1 Automatically stopping by pressing one button (UX-D,E only) ....7-13 7.2.2 Stopping ink ejection by pressing the screen button.
-
Page 13: Delivered Goods
1. DELIVERED GOODS ●Unpack the equipment and check the delivered goods. Part Name Qty Product code. Remarks 1 IJ printer body 2 Basic Operation manual The instruction manual and technical manual are provided. Be sure to read the manuals 3 Manual CD thoroughly and get a good understanding so you can use the printer correctly. - Page 14 Part Name Qty Product code Remarks Seal for power cable and 13 Cable seal external communications cable. Cable clip Nozzle rubber seal 14 Cable clip One page sheet 15 Plastic bag with zipper Use to store the one page sheet and nozzle rubber seal. Used when replacing ink and filter.
-
Page 15: Usage Precautions
2. USAGE PRECAUTIONS 2.1 Ink and makeup (1) Ink and makeup replenishment The printer employs an automatic ink/makeup replenishment system. While the printer is operated, the ink reservoir automatically supplies the ink and the makeup reservoir automatically supplies the makeup to the ink main tank at regular intervals. -
Page 16: Ij Printer Long-Term Shutdown
2.2 IJ printer long-term shutdown When the IJ printer is shut down for a long time due to production or other circumstances, the ink may accrete inside of the printer and cause such problems as inability to be ejected or to be recovered. When this occurs, the following actions must be taken. -
Page 17: Print Head Cleaning
2.3 Print head cleaning Take the following precautions when cleaning ink from around the nozzle. (1) Orient the end of the print head downward and pour makeup onto the dirty part and clean while catching the makeup in a beaker. Do not pour the makeup over this section. -
Page 18: Shutdown (No-Cleaning Stop)
2.4 Shutdown (no-cleaning stop) When you press the SHUTDOWN → OK at HOME screen, the printer stops after completing its automatic nozzle cleaning sequence. If you repeatedly activate the SHUTDOWN → OK to stop an operation, excessive makeup will enter the printer, thereby thinning the ink or producing an unduly high ink main tank solution level. -
Page 19: Cautions On Operating Time When Printer Is In Service
2.5 Cautions on operating time when printer is in service (1) Cautions when printer is repeatedly stopped immediately after the start of operation If you repeatedly stop the printer immediately after the start of operation, automatic nozzle cleaning at shutdown will cause the ink in the IJ printer to gradually become thinner. -
Page 20: Ink Concentration Control
2.7 Ink concentration control (1) The ink is automatically controlled to maintain optimum concentration for printing. (2)If an error occurs in the viscometer which is used to control ink concentration, take care of the following points: There are three types of viscometer errors: “Inside Temperature Sensor Fault”, “Viscometer Reading Instability”, and “Viscometer Reading Out of Range”. -
Page 21: Component Names And Functions
3. COMPONENT NAMES AND FUNCTIONS 3.1 External views (1) External views(UX-D,E) Power lamp Operating status Main power switch indicator lamps Displays "Ready", "Fault" and "Warning" RFID reader Power cable Reads ID of ink and makeup for certification. Maintenance cover Opened/closed for ink... - Page 22 (2) External views (rear side) Air-purge connection port Exhaust duct connection port Attention to the instruction of IJ printer Stainless steel of the main body has the character it not to be easy rust, but it is a possibility that rust is generated when leaving it for a long time. To prevent rust being generated, we will recommend that the surface of the main body be kept clean as much as possible.
-
Page 23: Main Body Internal Parts Arrangement
3.2 Main body internal parts arrangement Inner cover Makeup cartridge bottle (*1) Ink cartridge bottle(*1) Makeup reservoir Ink reservoir Lever handle Lever handle Pressure adjusting screw Appearance with inner cover removed Ink filter Recovery filter Main ink tank (*1) The Ink cartridge bottle and the makeup cartridge bottle are optional parts. ●Main body internal parts arrangement 3-3... -
Page 24: Print Head
3.3 Print head [UX-D,B] Print head cover lock thumbscrew Charge electrode Minus deflection electrode Gutter Nozzle orifice Plus deflection electrode [UX-E] Print head cover lock thumbscrew Air exhaust port Charge electrode Minus deflection electrode Gutter Nozzle orifice Plus deflection electrode... -
Page 25: Screen Display
3.4 Screen display CAUTION ● A touch panel is employed for data entry to operation screen. When manipulating the Touch panel, use only fingers. If the touch panel is operated with metal and/or sharp objects such as ball point pen, it may malfunction or break down. - Page 26 (2) Message For details of message, refer to "9. When Warning or Fault was generated". [New HMI] Close Message name Message type HELP The Description, Fault × Cause and Main Ink Tank Too Full No.002 Solution Message No. The ink level in the main ink tank is too high. Cause ...
-
Page 27: Installing Precautions
4. INSTALLING PRECAUTIONS WARNING ● Ensure that there is no flame- or arc-generating device around the printer. The ink and makeup are both flammable and may cause fire. Fire can be generated by matches, lighters, cigarettes, heaters, stoves, gas burners, welders, grinders and static electricity. - Page 28 (9) When installing the print head and print head cable, comply with the following conditions or it will increase the risk of degraded performance of the ink supply and ink recovery behavior. a) 0 to 45 ℃ When positioning the end of the print head above the printer main body installation surface,ensure that the distance between the end of the print head and the installation surface does not exceed 1.5 m.
- Page 29 (10) When using the printer for upward or lateral printing, ensure that the rising print head cable upper end is positioned not more than 0.5 m above the print head. Print head cable Bend R 0.5m Print head (11) If you fixed the print head, ensure that the minimum bend radius of the print head cable is at least 150 mm. Handle the headcable with care when wiring it.
-
Page 30: Installation Check Items
5. INSTALLATION CHECK ITEMS 5.1 Print head air purge If the makeup remains in the electrode section after cleaning or if you use the IJ printer at a high humidity, moisture condensation may occur within the print head, causing leakage from the deflection electrode section. It is also important to remember that dust or splashed ink accumulation on the deflection electrode section may cause leakage. -
Page 31: Electric Signal Connection
6. ELECTRIC SIGNAL CONNECTION 6.1 Wiring precautions (1)If noise enters the IJ printer from the outside, there is the danger of erroneous operation or trouble. To improve noise resistance, perform wiring work as follows: Separate the power cable to the IJ printer from other power lines for powering use (especially, power line for a speed control inverter, etc.). - Page 32 (3) Precautions related to welding current of welder Signal (weak electric) ground and frame ground are connected because the ink drops of the IJ printer are electrically charged. The ink drops are electrically charged by impressing a volt- Nozzle Ink column Charge electrode age between the charging electrode and ink column as shown at the left.
-
Page 33: Basic Operation
7. BASIC OPERATION 7.1 Start operation 7.1.1 Start operation CAUTION ●The ink and makeup contains organic solvents. When handling the ink and makeup, wear protective gloves and goggles so that the ink will not directly contact your skin. ●An LCD touch panel is used for the screen. Do not press the buttons with unreasonable force. - Page 34 Press the On switch. (Press for about 2 seconds.) (Depending on the model, there may not be a Start switch. When the main power switch of pressed, the following “Print description” screen appears.) In the case of turning on the power again, ensure that status indicator lamp is off when On switch is pressed.
- Page 35 Place a piece of wiping paper, etc., against the ink injection port at the end of the print head and press the STARTUP → Ready . ●Ink is ejected from the nozzle inside the print head. ●Place a piece of wiping paper, etc., against the ink ejection port in preparation for splashing of the ejected ink. Print head Wiping paper, etc.
- Page 36 ● Continuous ejection of ink even though not printing is abnormal. If this occurs, stop ink ejection by pressing the SHUTDOWN → No-cleaning stop . Press SHUTDOWN . TEST START PRINTING SHUTDOWN SETTINGS LOGIN CONFIRMATION × Shutdown Process Confirmation No.051 Shutdown will stop the ink jet.
-
Page 37: When An Error Occurred At The Start Of Operation
7.1.2 When an error occurred at the start of operation Stop ink ejection by pressing the SHUTDOWN → No-cleaning stop . Press SHUTDOWN . TEST START PRINTING SHUTDOWN SETTINGS LOGIN × CONFIRMATION Shutdown Process Confirmation No.051 Shutdown will stop the ink jet. Solution 1. - Page 38 Loosen the screw and remove the print head cover. Around nozzle Loosen the screw. Pull out. Print head cover Clean the inside of the cleaning section with makeup. Clean the nozzle orifice, charge electrode, deflection electrode, gutter, and mounting base with makeup. (Also see “2.3 Print head cleaning”.) Air exhaust port Charge electrode...
- Page 39 With the print head cover removed, press the STARTUP → Ready . ● Ink is ejected from the nozzle. (The status changes from “Stop” to “Starting”. ● Operate the unit with the end of the print head remaining inside the beaker. Press STARTUP .
- Page 40 Confirm that the ink stream is at the center of the gutter. ● Check the position of the ink stream from the sides and top of the print head as shown in the figure and confirm that it is in the center of the gutter. Ink stream Gutter entrance diameter The ink stream...
- Page 41 Ink ejection for maintenance Use this procedure when you want to eject ink from the nozzle for a purpose other than printing. (Use only during maintenance. To print, press the STARTUP → Ready . Press the STARTUP → Eject ink . Press STARTUP .
-
Page 42: Ready And Standby State Switching Operation
7.1.3 Ready and Standby state switching operation (1) “Ready” state → “Standby” state switching ● With the conveyor interlock being activated by “Ready” signal, should this “Ready” signal be turned to “Standby”, the conveyor will stop. Press READY on the upper of the screen, and the message "Print Abort Confirmation"... - Page 43 (2) “Standby” state → “Ready” state switching Press STANDBY on the upper of the screen, and the message "Print Confirmation" appears. Then press OK . Press STANDBY . Print description STANDBY OFFLINE 2015.07.07 12:45 S AMP L E 1 ID:User2 −...
-
Page 44: Specifying The Login User
7.1.4 Specifying the login user (1) Functions ●Specifies the user to be logged in at power-on. ●Selects the user and inputs the password when logging in. ●The administrator defines the user name and password and password protection setting in advance. The password protection setting can be changed beforehand for each user. -
Page 45: Shut Down Operation
7.2 Shut down operation 7.2.1 Automatically stopping by pressing one button (UX-D,E only) Press the Stop switch. (Press for about 2 seconds.) All operations up to IJ printer power OFF are performed automatically. Depending on the model, there may not be a Stop switch. Stop the ink with the button on the screen of par. -
Page 46: Stopping Ink Ejection By Pressing The Screen Button
7.2.2 Stopping ink ejection by pressing the screen button ● Perform ink stop processing using the following procedure. (1) UX-D,E Press the SHUTDOWN → OK . A confirmation screen is displayed. Press SHUTDOWN . TEST START PRINTING SHUTDOWN SETTINGS LOGIN CONFIRMATION ×... - Page 47 (2) UX-B Press the SHUTDOWN → OK . A confirmation screen is displayed. Press SHUTDOWN . TEST START PRINTING SHUTDOWN SETTINGS LOGIN × CONFIRMATION Shutdown Process Confirmation No.051 Shutdown will stop the ink jet. Solution 1. To stop the ink jet, press <OK>.
-
Page 48: Turning Off The Main Power Switch
7.2.3 Turning off the main power switch (1) UX-D,E ●Press Stop switch normally instead of main power switch to turn off the power at the end of operation. ●If the IJ printer will not be used for a long time, turn off the main power switch. -
Page 49: Careful Cleaning
Handling the nozzle rubber seal 1. To prevent drying of the nozzle orifice and dust from sticking to the plate during unit storage, the unit is shipped with a “nozzle rubber seal” installed. Remove this “nozzle rubber seal” at installation and test running and adjustment. Nozzle orifice Nozzle rubber seal Charge electrode... -
Page 50: Basic Operation
7.3 Basic operation 7.3.1 Operating Scheme (New HMI) Power ON Power OFF OPEN SAVE ADJUST HOME (Print description) EDIT Calibration SETTING touch screen coordinates LOGIN : Screen name * The new HMI screens can move directly to other displays without going back to HOME screen. * "Ink eject"... -
Page 51: Operating Scheme(Previous Hmi)
7.3.2 Operating Scheme (Previous HMI) (1) Overall view For print target data Change message Power ON Power OFF Change message Print format Edit message Select message Print description (Menu 1) Print specifications Over Write message Adjust print parameters Adjust print parameters * See next page, Change message Operation... - Page 52 * The display can be switched between screens Edit message, Print format, and Calendar Shift code setup Print specifications. conditions (Op on UX-D,E) Change message Edit message Time count conditions (Op on UX-D,E) Count conditions Print specifications Various print...
- Page 53 Maintenance Environment setup Unit information setup menu menu Date / time Operation setup management Communication Test print environment (Optional on UX-B) setup Excitation Touch screen V update setup (Nozzle test) Login View alarm management history Circulation control View software version...
-
Page 54: Change Procedure Of (New Hmi) (Previous Hmi)
7.3.3 Change procedure of (New HMI) (Previous HMI) ⇔ (1)Change procedure of (New HMI) ⇒ (Previous HMI) The new HMI screen is displayed. Press menu LOGIN . The Select login user screen will be displayed. This icon shows "Administrator". This icon shows "User" Select login user OFFLINE 2015.07.07 12:45... - Page 55 Input the password for the administrator name "admin" and press Enter Enter Logs in again using administrator name "admin" and the touch screen returns to the Print description screen (Previous HMI) is displayed. Print description [Stop ] 2015.07.07 12:45 Com=0 Message name[ ] Current user ID : admin Startup Manual...
- Page 56 (2)Change procedure of (Previous HMI) ⇒ (New HMI) Setup on “Touch screen setup” is necessary to display the New HMI screens. For details, refer to Technical Manual "3.5 Human Machine Interface [HMI] setup". The previous HMI screen is displayed. Press Login management in the environment setup menu. The Login management menu is displayed.
- Page 57 Press user name user2 . A password input window opens. Caution : Administrator user can't change to New HMI screens. Select login user [Stop ] 2015.07.07 12:45 Com=0 Current user ID : user9 admin user2 user3 Enter ← → Cancel Enter User4 User5...
-
Page 58: Ink And Makeup Replenishment
8. INK AND MAKEUP REPLENISHMENT WARNING ● Never pour the ink and makeup waste into a sewer, etc. Have the ink and makeup drainage processed by an industrial waste processor as special control industrial waste and used wiping papers and the empty container as industrial waste. -
Page 59: Replenishing The Ink
8.1 Replenishing the ink (1) Overview ●Ink can be refilled when the remaining ink icon is at the position which indicates that the cartridge bottle can be replaced. ●Replenish the ink in the ink reservoir within 60 minutes after an Ink Low warning is generated. If the ink is not replenished, the printer will stop. - Page 60 [When IC tag reader is supported] Hold the cartridge bottle over the RFID reader of the printer so that the IC tag mark of the label on the bottle can be read. ● If the Ink ID is read by the IJ printer, steps -1 and -2 are not necessary.
- Page 61 [When IC tag reader is not supported] If manually inputting the ID, touch the icon on the home screen of the IJP, call up the ID input screen and input the Ink ID. ● An ink ID is printed on the label of the cartridge bottle. Sc an he re Ink ID...
- Page 62 When the ink ID is read, the lock on the ink side is released. Tilt the lever handle toward yourself, lift and remove the cartridge bottle. Lift the lever handle and remove the empty cartridge bottle. Lever handle CAUTION ● If the lever handle could not be lifted up, do not pull it with excessive force. In such a case, push the lever handle all the way in.
- Page 63 Set a new cartridge bottle in the specified position. Set the boss provided on the cartridge bottle to the boss guide of the ink supply port. Set a new cartridge bottle. Ink side Ink supply port Boss guide Set the boss to the guide. Boss Pipe CAUTION...
- Page 64 When a new cartridge bottle is set, press the lever handle down and it into the printer. Lever handle Lever handle Push CAUTION ● Be careful not to get your hand or fingers pinched when pushing down the lever handle. (See the figure below.) Lever handle Lever handle The cartridge replacement (ink refill) is now completed.
-
Page 65: Replenishing The Makeup
8.2 Replenishing the makeup (1) Overview ● Makeup can be refilled when the remaining makeup icon is at the position which indicates that the cartridge bottle can be replaced. ●Replenish the makeup in the makeup reservoir within 60 minutes after a Makeup Low warning is generated. - Page 66 CAUTION ● When the makeup cap was loosened, set it after tightening firmly. Otherwise the makeup may spill when setting the cartridge bottle. ● After removing the over cap, do not allow your finger, foreign matter or dirt to get into the hole of the makeup cap. Doing so could cause makeup leakage and equipment failure.
- Page 67 [When IC tag reader is not supported] If manually inputting the ID, touch the icon on the home screen of the IJP, call up the ID input screen and input the Makeup ID. ● A makeup ID is printed on the label of the cartridge bottle. Makeup ID Scan here...
- Page 68 When the makeup ID is read, the lock on the makeup side is released. Tilt the lever handle toward yourself, lift and remove the cartridge bottle. Lift the lever handle and remove the empty Lever handle cartridge bottle. CAUTION ● If the lever handle could not be lifted up, do not pull it with excessive force. In such a case, push the lever handle all the way in.
- Page 69 Set a new cartridge bottle in the specified position. Set the boss provided on the cartridge bottle to the boss guide of the makeup supply port. Set a new cartridge bottle. Makeup side Makeup supply port Boss guide Boss CAUTION ●...
- Page 70 When a new cartridge bottle is set, press the lever handle down and it into the printer. Lever handle Lever handle CAUTION ● Be careful not to get your hand or fingers pinched when pushing down the lever handle. (See the figure below.) Lever handle Lever handle The cartridge replacement (makeup refill) is now completed.
-
Page 71: When Warning Or Fault Was Generated
9. WHEN WARNING OR FAULT WAS GENERATED 9.1 Display when warning or fault was generated ●When a warning or fault was generated, a warning or fault lamp lights. Operational status display lamp ●When an operation mistake is made and processing judgment is prompted, a confirmation message is displayed. - Page 72 (2) When warning was generated (a) Previous HMI The description, cause, The name of the warning Message No. and solution are displayed. message is displayed. ◇◇◇◇◇ Ink Low Warning ◇◇◇◇◇ The ink level in the ink reservoir is low. Cause 1. The ink reservoir is almost empty. 2.
- Page 73 (3) When a mistake was generated or when processing judgment is prompted (a) Previous HMI The description, cause, The name of the confirmation Message No. and solution are displayed. message is displayed. ===== Ink Jet Startup Confirmation ===== The ink jet will be turned ON. Solution To turn the ink jet ON, press <Ready>.
- Page 74 (b)New HMI Print description OFFLINE 2015.07.07 12:45 × STOP ID:User2 Displays the guidance. Fault × Main Ink Tank Too Full No.002 − 100% + The ink level in the main ink tank is too high. Cause 1. The valve (MV2) or valve (MV7) is faulty. Operating Time Ink Presure Makeup...
-
Page 75: When Checking The Warning And Fault Generation Status
9.2 When checking the warning and fault generation status (1) Functions ●The warning or fault message generation time and contents can be viewed. ●A maximum of 90 messages can be displayed. ●When 90 messages are exceeded, the messages are closed from the oldest message. (2) Operation Press View alarm history in the Manage messages screen. -
Page 76: Remedial Action To Be Taken In The Event Of A Printing Failure
9.3 Remedial Action to Be Taken in the Event of a Printing Failure ● If a printing failure occurs, perform the associated remedial procedures suggested below. ● If the remedial procedures below do not achieve recovery, it is conceivable that the problem is attributable to a PC board or circulation system failure. - Page 77 Printing failure description Probable cause Solution Reference (phenomenon) There are water, oil, or other ● Make prints with the print deposits on the print target target clear of deposits. surface. ● Adjust the ink pressure for The ink pressure has changed. 6.9 (*2) the standard value.
-
Page 78: Troubleshooting Guide
Hitachi distributor. ■ Report the following to your local source or service company: 1. TYPE-FORM (model number) IJ printer (Model UX- 2. SER. No. (serial number) 3. Failure description In detail 4. -
Page 79: Maintenance Service
“Performance parts for repair” are parts necessary to maintain the functions of the product. Please fill in for later use. Customer memo: Useful when communicating with the service in charge. Your Hitachi sales representative: Tel: Person in charge: Your Hitachi distributor:... -
Page 80: Emergency Procedures
12. EMERGENCY PROCEDURES Press the main power switch to turn OFF the power. Main power switch WARNING ● If an earthquake, fire, or other emergency arises while the printer is operating or when its power is on, turn OFF the power by pressing the main power switch. -
Page 81: Specifications
13. SPECIFICATIONS Model Item UX-E160 W/S UX-D160 W/S UX-B160 W/S Nozzle size 65μm Max. print line number Up to 6 lines Up to 3 lines Up to 240 characters Maximum number of print Up to 1,000 characters (OP: Up to 1000... -
Page 82: Schematic Diagrams
14. SCHEMATIC DIAGRAMS 14.1 Outside Dimensions 14-1 ●Outside Dimensions... - Page 83 ●Outside Dimensions 14-2...
- Page 84 14-3 ●Outside Dimensions...
-
Page 85: Index
15. APPENDIX INDEX Adjust print parameters ............. 7-19 Air purge . - Page 86 On switch............7-1, 7-2, 7-13, 10-1 Password protection .
- Page 88 2S23L6267-8B...