Advertisement
Quick Links
INSTALLATION INSTRUCTIONS FOR PART 99-7009
2004-2007 Mitsubishi Endeavor
99-7009
KIT FEATURES
• DIN Head Unit Provisions
• ISO DIN Head Unit Provisions
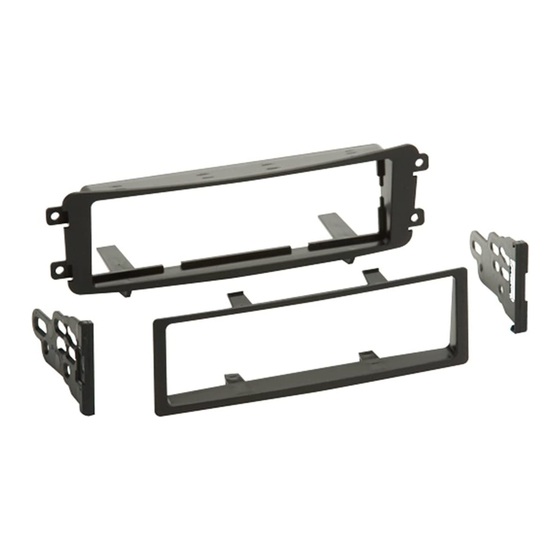
KIT COMPONENTS
A) Radio Housing
I
B) ISO Brackets
A
1-800-221-0932
© COPYRIGHT 2004-2007 METRA ELECTRONICS CORPORATION
APPLICATIONS
I
C) Trim Plate
B
C
TOOLS REQUIRED:
Phillips Screwdriver I Socket Wrench
www.metraonline.com
Advertisement

Related Manuals for Metra Electronics 99-7009


Summary of Contents for Metra Electronics 99-7009
- Page 1 INSTALLATION INSTRUCTIONS FOR PART 99-7009 APPLICATIONS 2004-2007 Mitsubishi Endeavor 99-7009 KIT FEATURES • DIN Head Unit Provisions • ISO DIN Head Unit Provisions KIT COMPONENTS A) Radio Housing B) ISO Brackets C) Trim Plate TOOLS REQUIRED: Phillips Screwdriver I Socket Wrench 1-800-221-0932 www.metraonline.com...
- Page 2 99-7009 Dash Disassembly • - 2004-2007 Mitsubishi Endeavor---------------------------------- 1 Kit Assembly • - ISO Head Unit Provision with Pocket ---------------------------- 2 - DIN Head Unit Provision with Pocket ---------------------------- 3 Final Assembly ------------------------------------------------------ 4 • • Notes ---------------------------------------------------------------- 5...
- Page 3 Remove (3) Phillips screws to remove factory radio chassis (Figure C) Remove (4) Phillips screws from the pock- et at the bottom of the radio and A/C panel and remove the pocket. (This is where the 99-7009 will be mounted.) (Figure D)
-
Page 4: Din Head Unit Provision
99-7009 DIN Head Unit Provision Using the factory hardware, mount the 99-7009 in the location where the factory pocket resided. Slide the DIN cage into the Radio Housing and secure by bending the metal locking tabs down. Slide the after-market head unit into the cage and secure. -
Page 5: Iso Din Head Unit Provision
99-7009 ISO DIN HEAD UNIT PROVISION Mount the ISO Brackets to the head unit with the screws supplied with the unit. Slide the head unit into the radio opening until the side clips engage. Snap the Trim plate into the Radio... - Page 6 99-7009 Strip wire ends back 1/2" Twist ends together Solder Tape Locate the factory wiring harness in the dash. Metra recommends using the proper mating adapter and making the connections as shown. (Isolate and individually tape off the ends of any unused wires to prevent electrical short circuit) See figure A.
- Page 7 99-7009...
- Page 8 INST997009 1-800-221-0932 www.metraonline.com Rev. 06-14-07 © COPYRIGHT 2004-2007 METRA ELECTRONICS CORPORATION INST99-7009...