
Related Manuals for Russound X1-TX8


Summary of Contents for Russound X1-TX8
- Page 1 X1-TX8 X1- RX2 X1-RX220 X1 Products X1-TX8 Multi-channel Wireless Transmitter X1-RX2 Wireless Receiver X1-RX220 Wireless Receiver Amplifi er Installation Manual...
- Page 2 Si de l'eau ou tout autre liquide instructions should be read before the appliance is mal fonctionner. pénètre dans le coff ret de l'appareil, il amène à un operated. Russound X1 Products Installation Manual...
- Page 3 Carts and Stands - The appliance should be used only with a cart or stand that is normalement, ou E. L'appareil est tombé ou son boîtier est endommagé. recommended by the manufacturer. An appliance and cart combination should be Russound X1 Products Installation Manual...
- Page 4 Industrie Canada. Dans le but de réduire les risques de brouillage radioélectrique à l'intention des autres utilisateurs, il faut choisirle type d'antenne et son gain de sorte que la puissance isotrope rayonnée équivalente (p.i.r.e.) ne dépasse pas l'intensité nécessaire à l'établissement d'une communication satisfaisante. Russound X1 Products Installation Manual...
-
Page 5: Table Of Contents
TABLE OF CONTENTS Product Operation ................. 6-7 X1-TX8 Front, Back Panel ..............8 X1-RX2 Front, Back Panel ..............9 X1-RX220 Front, Back Panel ............10 Connection Diagram ...............11 Installation Overview ..............12 Features ....................13 Technical specifi cations ..............13 Warranty ..................14-15 Russound X1 Products Installation Manual... -
Page 6: Product Operation
Channel Hopping or Fixed Channel mode. To select between these modes, press and hold the ID button on the front of the X1-TX8 while applying power, look for 2 LED’s or 3 LED’s illuminated on the front of the unit. 2 LED’s represents Fixed Mode, 3 LED’s represents hopping mode. -
Page 7: Product Operation
Placement should be carefully thought out. Transmitter and receiver antennas should be in vertical and parallel position for maximum performance - see illustration. Russound X1 Products Installation Manual... -
Page 8: X1-Tx8 Front, Back Panel
X1-RX2 or X1-RX220 Link Confi rms connection to receiver X1-RX2 or X1-RX220 Note: Channels are the inputs 1-4 on the back of the X1-TX8 Back panel Power Plug Inlet Audio In Audio inputs: 1–3 Line level 4 Line in or optical Power Supply 5VDC 1.2A... -
Page 9: X1-Rx2 Front, Back Panel
Sets Channel (inputs on the back of X1-TX8 (see page 8) Channel# ID Number Displays inputs on Displays specifi c band back of X1-TX8 (see page 8) used/desired (see page 8) Back panel Audio Out Power Plug Inlet Audio output RCA and... -
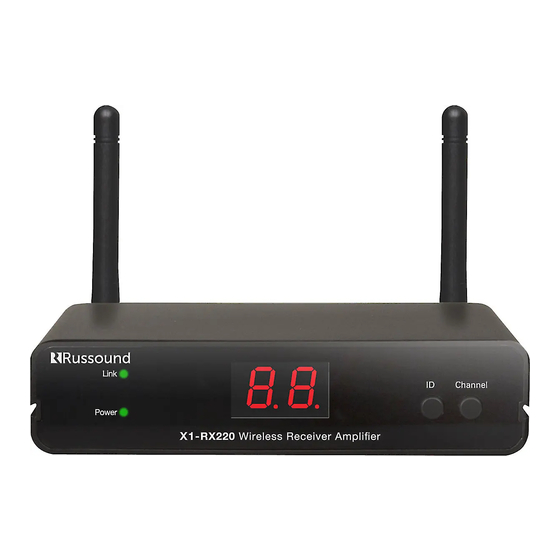
Page 10: X1-Rx220 Front, Back Panel
X1-TX8 Sets Channel (inputs on the back of X1-TX8 (see page 8) Channel# ID Number Displays input # on back of X1-TX8 Displays specifi c band (see page 8) used/desired (see page 8) Back panel Power Plug Inlet Gain... -
Page 11: Connection Diagram
X1 CONNECTION DIAGRAM Russound X1 Products Installation Manual... -
Page 12: Installation Overview
X1. Note: For wall mount installations make sure that the bracket fl ap is oriented on the bottom to prevent the X1 from sliding downward. Groove Ridge Bracket Screw holes Flap Russound X1 Products Installation Manual... -
Page 13: Features
• Wireless Signal Range 30M (100ft) from TX8 Dimensions (without antennas): 5.125" W x 4.75"D x 1.1875"H via proprietary digital RF (131 x 121 x 30mm) • Requires TX8 transmitter Weight: 0.86 lbs. (0.39 kg) • Hides easily, small footprint Russound X1 Products Installation Manual... -
Page 14: Warranty
If service other manner not authorized by Russound shall void the is necessary, it must be performed by Russound. The unit warranty on the applicable product. must be returned to Russound at the owner’s expense and with prior written permission. - Page 15 ATTN: Service 5 Forbes Road Newmarket, NH 03857 Due to continual eff orts to improve product quality as new technology and techniques become available, Russound/FMP, Inc. reserves the right to revise system specifi cations without notice. Russound X1 Products Installation Manual...
- Page 16 All trademarks are the property of their respective owners. 5 Forbes Road, Newmarket, NH 03857 Specifi cations are subject to change without notice. tel 603.659.5170 • fax 603.659.5388 Russound is not responsible for typographical errors or omissions. email: tech@russound.com www.russound.com 28-1383 01.24.14, Rev.5...