Advertisement
Table of Contents
- 1 Included Hardware
- 2 Prepare Retention Ring for Installation
- 3 Assemble and Install Intel Backplate
- 4 Install Assembled Intel Retention Ring and Clip Onto Pump Head
- 5 Install the Radiator
- 6 Install Assembled Pump Head Onto CPU
- 7 Connect Power to Fan and Pump
- 8 Assemble and Install AMD Backplate
- 9 Install Assembled AMD Retention Ring and Clip Onto Pump Head
- 10 Faq
- Download this manual
support@corsair.com
EMAIL:
facebook.com/corsairmemory
FACEBOOK:
BLOG:
corsair.com/blog/
USA and CANADA: (800) 205-7657 | INTERNATIONAL: (510) 657-8747 | FAX: (510) 657-8748
46221 Landing Parkway • Fremont • California • 94538 • USA
© 2013 Corsair Components, Inc. All Rights Reserved. The Corsair logo is a registered trademark, and Hydro Series are trademarks of Corsair in the United States
and/or other countries. All other names and products are trademarks and property of their respective owners. Printed in China.
Document Number: 49-000182 rev AB
corsair.com
forum.corsair.com
FORUM:
twitter.com/corsairmemory
TWITTER:
H55 PAGE:
corsair.com/h55
QUICK START GUIDE
GUIDE DE DÉMARRAGE RAPIDE
SCHNELLSTARTANLEITUNG
GUIDA INTRODUTTIVA
GUÍA BREVE DE INICIO
КРАТКОЕ РУКОВОДСТВО
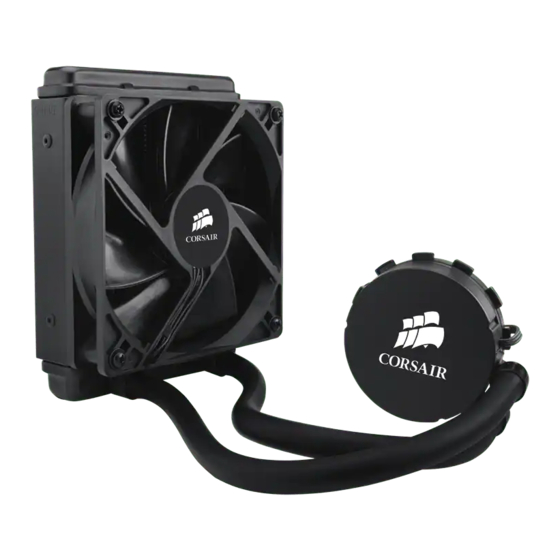
LIQUID CPU COOLING UPGRADE KIT
TM
Advertisement
Table of Contents

Related Manuals for Corsair H55


Summary of Contents for Corsair H55
- Page 1 LIQUID CPU COOLING UPGRADE KIT © 2013 Corsair Components, Inc. All Rights Reserved. The Corsair logo is a registered trademark, and Hydro Series are trademarks of Corsair in the United States and/or other countries. All other names and products are trademarks and property of their respective owners. Printed in China.
- Page 2 Note: Most newer PC cases include a CPU cutout to Included Hardware Highlighted parts for Intel installation only • Les sections en surbrillance concernent allow access to the bottom of the motherboard. If uniquement l'installation Intel • Die markierten Passagen beziehen sich nur auf die Intel • Parti evidenziate solo per l'installazione di Intel •...
- Page 3 Prepare Retention Ring for Installation Assemble and Install Intel Backplate Préparez l'anneau de retenue pour l'installation • Halterungsring für die Installation präparieren • Assemblez et installez la plaque arrière Intel • Intel-Rückwand zusammenbauen und montieren • Preparare l'anello di sicurezza per l'installazione • Prepare la anilla de sujeción para Assemblare e installare la piastra posteriore Intel •...
- Page 4 Install Assembled Intel Retention Ring and Clip onto Pump Head Install the Radiator Installez l'anneau de retenue et le clip sur la tête de pompe • Intel-Halterungsring und -clip Installez le radiateur • Kühler installieren • Installare il radiatore • Instale el radiador • auf dem Pumpenkopf montieren •...
- Page 5 Install Assembled Pump Head onto CPU Connect Power to Fan and Pump Installez la tête de pompe assemblée sur le processeur • Zusammengebauten Pumpenkopf Reliez les ventilateurs et la pompe à l'alimentation • Lüfter und Pumpe anschließen • auf Prozessor montieren • Installare la testina della pompa assemblata sulla CPU • Collegare ventole e pompa all'alimentazione •...
- Page 6 Included Hardware Highlighted parts for AMD installation only • Les sections en surbrillance concernent uniquement l'installation AMD • Die markierten Passagen beziehen sich nur auf die AMD • Prepare Retention Ring for Installation Parti evidenziate solo per l'installazione di AMD • Componentes de instalación solamente para AMD •...
- Page 7 Assemble and Install AMD Backplate Install Assembled AMD Retention Ring and Clip onto Pump Head Assemblez et installez la plaque arrière AMD • AMD-Rückwand zusammenbauen und montieren • Installez l'anneau de retenue et le clip AMD sur la tête de pompe • AMD-Halterungsring Assemblare e installare la piastra posteriore AMD •...
- Page 8 Install the Radiator Install Assembled Pump Head onto CPU Installez le radiateur • Kühler installieren • Installare il radiatore • Instale el radiador • Installez la tête de pompe assemblée sur le processeur • Zusammengebauten Pumpenkopf Установите радиатор auf Prozessor montieren • Installare la testina della pompa assemblata sulla CPU • Instale sobre la CPU el cabezal de bombeo ensamblado •...
- Page 9 Une flèche située sur le côté du ventilateur indique la direction du flux. 2. Est-il possible de réutiliser la pâte thermique pré-appliquée sur le H55 en vue d'e ectuer une nouvelle installation ? Pour réinstaller le dissipateur thermique H55, il vous faudra d'abord nettoyer la pâte thermique pré-appliquée pour la remplacer par une autre pâte neuve.
- Page 10 2. ¿Puedo reutilizar la pasta térmica que venía aplicada en el H55 para volver a instalar el refrigerador? Die Schnellstartanleitung führt Sie durch die Installation des H55. Para volver a instalar el refrigerador H55 es preciso limpiar a fondo la pasta térmica que venía aplicada de fábrica Auf corsair.com/h55 können Sie ein umfassendes Benutzerhandbuch y aplicar una capa de pasta nueva, adquirida a tal efecto.