
Summary of Contents for Curtis DVBTUK-T3
-
Page 1: Digital Terrestrial Receiver
DIGITAL TERRESTRIAL RECEIVER USER’S MANUAL DVBTUK-T3 Please read this User’s Manual carefully to ensure proper use of this product and retain for future reference. - Page 3 IMPORTANT SAFETY INSTRUCTIONS WARNINGS TO REDUCE THE RISK OF BURNS, ELECTRIC SHOCK, FIRE OR INJURY TO PERSONS, PLEASE CAREFULLY READ ALL SAFETY INSTRUCTIONS. THE SEPARATE OPERATING MANUAL MAY CONTAIN ADDITIONAL SAFETY INSTRUCTIONS. THIS PRODUCT IS DESIGNED FOR DOMESTIC USE ONLY. COMMERCIAL OR ANY OTHER USE MAY INVALIDATE THE GUARANTEE AND MIGHT BE DANGEROUS.
- Page 4 Mains plug and mains lead We have fitted this equipment with a standard mains plug. If you cut off the mains plug or fit a different type, destroy the old plug, as it is dangerous to insert it into a live power outlet. If a fuse is fitted to the plug, remove the fuse before throwing the plug away.
-
Page 5: Table Of Contents
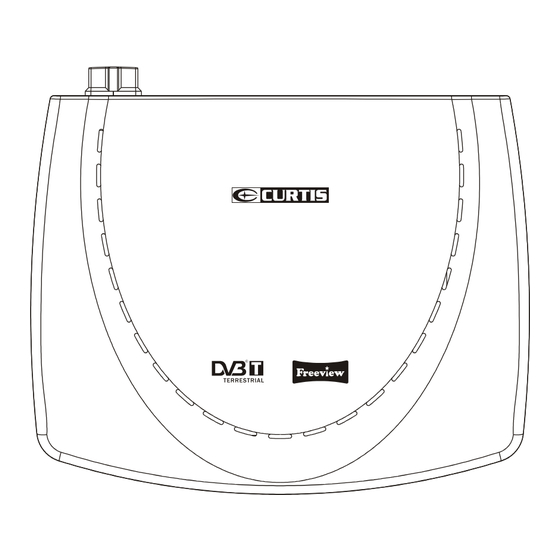
Table of Contents P a n el I l l u s t r a t i o n s ..........1 Remote Control ............2 Connections..............4 User Interface... - Page 6 1. Front panel 1. REMOTE CONTROL SENSOR: Used to receive the signal from the remote control. USB JACK(Optional): Used to connect to an external USB 2.0 device. Note: Not all receivers have the USB Jack. 1. RF IN : This socket connects to your external aerial. 2 .
-
Page 7: Remote Control
Remote Control Remote Key Function: 1. MUTE Used to turn the sound on or off. 2. NUMBER KEYS:Used to select channel numbers or input numbers in menus. 3.TV/RADIO: Used to switch between TV channels and Radio stations. 4. INFO Used to display information about the channel being viewed or further information about the programme when in normal play mode. - Page 8 Installing the Batteries Remove the battery cover from the remote control and install 2XAAA (not supplied) size batteries inside the compartment. The diagram inside the battery compartment shows the correct way (polarity) to install 1.Open the cover 2.Install batteries 3.Close the cover Using the Remote Control To use the remote control, point it towards the front of the digital set top box The remote control has a range of up to 7 metres from the...
-
Page 9: Connections
Connections Caution: Make sure to check the voltage specification of your mains supply is the same rating as the receiver. To prevent the risk of electric shock, do not open the cover or the back of the receiver. Note: When connecting the receiver to other equipment, e.g., TV, VCR and amplifier, make sure to refer to relevant user manual for instruction. -
Page 10: User Interface
User Interface The 'Exit ' key will close on screen menus . All menus will automatically be removed after 30 seconds unless otherwise stated. 1)Welcome Screen When the STB is powered up for the first time or is brought out of standby a welcome screen will be displayed. - Page 11 7) Digital Information When viewing a digital programme, a single press of the info key will bring up the first level of program information shown below. This shows the time, logical channel number, channel name and 'Now' program information. It also shows the current favourite list that has been used/selected.
- Page 12 Icons are used to notify the user of some information about the displayed event: DVB subtitles are available for this programme. An MHEG application is available for this programme. This programme is encrypted. Even if a CAM module is decrypting the programme. DVB subtitles are NOT available for this programme.
- Page 13 8) Channel Change OSD Banner This is the graphic seen after using CH+/CH- or when a direct digit entry channel change is completed. It times out after 4 seconds If CH+/CH- is used then the new service will be the next/previous service in the currently selected favourites list.
- Page 14 10) Subtitle Pressing the subtitle key will display the following menu. This menu displays all the subtitle streams available on the current service and a subtitle off option. The selection is done using the up/down keys. Pressing the OK key selects the new subtitle language. This selection is only valid until power-down or service change.
- Page 15 Also a video/audio preview is given which shows the program that is currently being watched if the user selects the ''INFO'' button the preview will change to show the user what is currently being shown on the selected/highlighted service. The user can scroll through the service list, select between now or next information and also use the RED key to add a timer programming event.
- Page 16 Service Organiser PIN request for deletion The UHF column shows the channel that the service is on. If the user wishes to delete a service, then the first time this is selected the user must enter the PIN. This is to prevent deletion of services without a parent’s content.
- Page 17 Depending on which list the user has selected the help will Change: Left List (Service List) Right List (Favourite List) Left List Help Info Right List Help Info To re-order a favourite service the user must select the required service using the up/down key and then use the green key to enter re- order mode.
- Page 18 3. Setup Menu This menu options allow the user to set up the system. Languages Menu Setup Menu 3.1) Languages This menu allows the user to set-up default languages for Audio and OSD. The values are used on power up. In addition, the 'Audio' value are used on channel change.
- Page 19 Standard This option sets the SCART output mode. The options are CVBS, RGB, RGB provides best picture pliality 3.3) Parental control The default Parental control PIN is “0000”. 3.3.1) Viewing a Locked Cannel Selecting a channel that is locked results in the following OSD being displayed: Entering a valid PIN will give access to the required service.
- Page 20 Change PIN Lock or Unlock Services 3.3.4) Change PIN Selecting the option to change the PIN takes the user to a further sub menu that handles the confirmation and storing of the new PIN. The menu prompts for a new PIN. The select option allows the user to edit the numbers being entered.
- Page 21 3.4.1) Full Scan Add New Services When the 'Full Scan Add New Services' option is selected, the end of the service list is displayed. When new services are found , they are displayed at the end of the existing list in a highlighted yellow colour. During the scan a progress bar is displayed and a message giving the estimated time remaining to complete the scan.
- Page 22 Information: Modulation The modulation type of the locked stream. The values can be QPSK, QAM16 or QAM64. The FEC rate of the locked stream. The values can be 1/2, 2/3, 3/4, 5/6 or 7/8. Network ID The network id of the locked stream. Transport ID The transport id of the locked stream.
- Page 23 If the video can't be displayed then one of the following messages will be displayed in the preview area: ENCRYPTED SERVICE AUDIO SERVICE PARENTAL LOCKED NO SIGNAL 3.4.5) Full Scan Setup When the “Full Scan Setup” option is selected, an option list will be displayed allowing the user to modify what parameters will be used during the full scan procedure.
- Page 24 3.5) Check For Download The option allows the user to update the software. Check For Download 3.5.1) Update by USB This menu for the SW upgrading by USB jack. (1) First Copy the provided *.ssu(for example, CT216T-M.ssu) upgrade file to the root directory of the USB disk and then insert the USB to the USB port of the box, you should see the USB indicator flashing while reading.
- Page 25 Some downloads may be signalled as high priority which means the manufacturer of the receiver wants the user to perform the download. In this case the download will automatically start when detected or after leaving standby. If a download is not available when manually checking for a download or the download becomes not available while the above menu is being shown, then the following menu will be displayed.
- Page 26 Don't Switch Off the Receiver Download Completed (3) Download message after restart When the receiver restarts after a download, the following menu will be displayed. This can contain either a success or failure message and any other information about the new software. 3.6) Technical Information The Technical Information screen displays the hardware version number and software version numbers.
- Page 27 Press “OK” to view. Press “OK” a second time to view all the images on your USB Memory Stick as a Slide Show. Available Options are: 4.1.1 Thumbnail Mode BLUE Folder Shows the Folder containing the images MENU Returns to the top level Multimedia menu EXIT Exits from the Multimedia mode 4.1.2 Single Image Mode MENU...
- Page 28 Pause Pause Play, press again to resume Music Select Music to accompany your slide/s GREEN Repeat Repeat show YELLOW BLUE Period Choose from “Slow”, “Middle” or “Fast” slide transitions Previous or Next Image EXIT Exits from the Multimedia mode Play music during Photo playing 4.2 My Music Select “My Music”...
- Page 29 INFO Provides information on the connected USB Memory Stick EXIT Exits from the Multimedia mode My Album-Browser 4.3 My Movie Select “My Movie” from the Menu. A listing of available movie files will be displayed. Use the keys to select a movie. Press “OK” to view. Available Options are: 4.3.1 Top Menu INFO Provides information on the connected USB Memory Stick...
-
Page 30: Troubleshooting
Troubleshooting If you experience problems with this receiver or its installation, please read carefully the relevant sections of this User Manual and this Troubleshooting section. The Scart interface is not Reconnect the STB connected properly and the TV set... -
Page 31: Specifications
Specifications USB JACK For file playback or software upgrade , Center Cutout, Full Frame...