Table of Contents
Advertisement
Advertisement
Table of Contents

Related Manuals for Siemens Gigaset A 200


Summary of Contents for Siemens Gigaset A 200
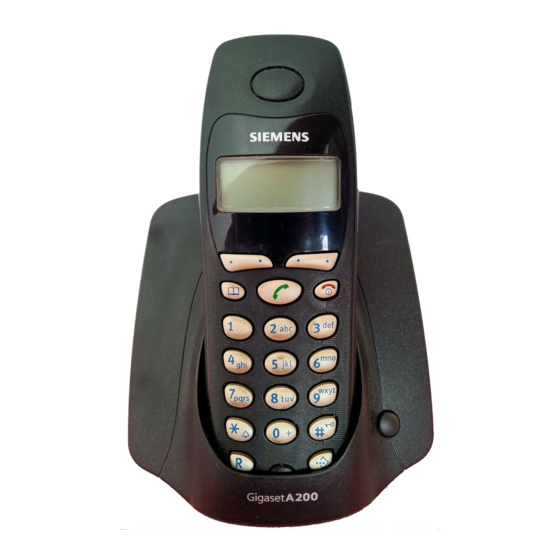
- Page 1 Be inspired Gigaset A 200 A 200 Duo...
-
Page 2: Brief Overview
Brief overview Brief overview Internal number of handset Time Battery charging status Caller list flat full Access to flashing: battery almost Answering empty machine/mail box 22-35 Display Caller list ÞÜ Redial Menu INTMENU keys Activate current functions Internal list in display End call and Talk key on/off key... -
Page 3: Table Of Contents
Contents Contents Brief overview ....... II Safety precautions ......4 Making the phone ready for service . - Page 4 Contents Using the directory and other lists ... . 24 Directory and network access list ........24 Redial list .
- Page 5 Contents Main menu ............49 Directory key and network operator list key .
-
Page 6: Safety Precautions
Safety precautions Safety precautions Use only the power unit supplied, as indicated on the underside of the base station. Insert only approved rechargeable batteries of the same type (page 46)! Never use ordinary (non-rechargeable) batteries as they may pose a health hazard or cause injury. -
Page 7: Making The Phone Ready For Service
Making the phone ready for service Making the phone ready for service Positioning the base station Advice on a suitable place The base station is designed for use in a dry, closed space with a temperature range between +5 °C and +45 °C. Place the base station in a central position in the flat/house, e.g. -
Page 8: Step 1: Connecting The Base Station
Making the phone ready for service Step 1: Connecting the base station First connect your base station to the mains supply and the telephone socket. Power supply unit Telephone jack with (220/230V) telephone cable with power cable Cable channels Underneath the base station Insert small power cable plug into the socket under the base station. -
Page 9: Step 2: Making The Handset Ready For Service
(page 46)! Never use normal batteries, since these could lead to a health hazard or cause injury. Do not use a non-Siemens charging unit as this could damage the batteries. Step 3: Registering the handset with the base station and charging the batteries Place your handset in the base station with the display visible at the front –... -
Page 10: Switching The Handset On And Off
Making the phone ready for service Now leave the handset in the base station to allow the batteries to charge, since these are not charged prior to delivery. The battery charging process is indicated on the hand- set by a flashing battery symbol Flat batteries Batteries charged... -
Page 11: Operating The Phone And Menu Management
Operating the phone and menu management Operating the phone and menu management Display keys Display keys are the long keys directly below the display. Your handset has two display keys. Each of these is operated like a rocker key, i.e. it can be pushed down on the left- hand as well as the right-hand side. -
Page 12: Signal Tones
Operating the phone and menu management Inserting a character to the left of the cursor If you have left out a character, jump to the place where the character should be inserted with the help of the display key , and enter the missing character. Overwriting a character to the right of the cursor The number of digits you can enter for the date or time is fixed and the field contains a default. - Page 13 Operating the phone and menu management There are two ways to access a function by scrolling with the keys, by entering the relevant combination of digits (page 49). Extract from the menu overview BASE SET DATE/TIME 3-1-1 DATE SET 3-1-2 CLOCK SET 3-1-3 CLOCK...
- Page 14 Operating the phone and menu management 1 1 1 1 The sub-menu DATE/TIME is shown in the dis- play. DATE/TIME Press on the right display key under OK, to con- firm DATE/TIME the selection. Instruction display: [______________________________________________] [__________] DATE/TIME The sub-menu DATE SET is shown in the dis- 1 1 1 1 play.
-
Page 15: Time Functions
Time functions Time functions Set date and time Settings for date and time are needed to ensure that these are shown correctly for incoming calls. For the time you can choose between a 12-hour and 24-hour display (default setting). Date Press display key to open menu. - Page 16 Time functions Display mode (24-hour or 12-hour display) Press display key to open menu. [_______________] MENU Select and confirm. [__________] [______________________________________________] [__________] BASE SET Confirm. [______________________________________________] [__________] DATE/TIME Select and confirm. [__________] [______________________________________________] [__________] CLOCK MODE either ... Select 12-hour display: Select and confirm.
-
Page 17: Making Calls
Making calls Making calls Making external calls and ending a call External calls are calls using the public telephone network. Enter the phone number and press the talk key. The phone number is dialled. Finish call: Press end call key. You can also first press the talk key (you will hear the dial tone) and then enter the phone number. -
Page 18: Displaying The Caller's Phone Number (Clip/Cli)
Making calls Displaying the caller's phone number (CLIP/CLI) The phone number of the caller is shown in the display during a call. Requirements: 1. You have asked your network operator to enable the caller's phone number to be shown in your display (CLIP). 2. -
Page 19: Special Services
Special services Special services Special services are functions offered by your network operator. You can only use these services if you have requested them from your network operator. The following selected services are those offered by your network provider. Contact your network operator to see which special and standard services are available to you. -
Page 20: Callback
Special services Callback If the number you are calling is engaged (busy tone), you can set up a callback. As soon as the line is free again, you will receive an automatic callback. Setting up callback You hear the busy tone. After approx. 8 secs. the display changes. Then: Press display key to open menu. -
Page 21: Call Waiting During An External Call
Special services Call waiting during an external call During an external phone call, a call waiting tone signals that another external party is trying to call you. Activating/deactivating call waiting Press display key to open menu. [_______________] MENU Confirm. [______________________________________________] [__________] SEL SERVICES Select and confirm. -
Page 22: Call Divert (External)
Special services Call divert (external) You can divert calls to another phone number. The following variations are available: immediately: Calls are diverted immediately. No calls are signalled on your phone. if no answer: Calls are diverted if no-one takes the call after a number of rings. if busy: Calls are diverted if your number is engaged. -
Page 23: Enquiry Calls, Toggling, Conference
Special services Enquiry calls, toggling, conference You can speak with up to two external parties. Enquiry calls With this function you can call a second number whilst the person on the first number is put on hold. Requirement: You are on an external call. After a conversation lasting approx. - Page 24 Special services Conference You can phone with two external parties at the same time. Requirement: You are on an external call and have then called a second number (Enquiry calls, page 21). Press display key to open menu. [_______________] MENU Confirm.
-
Page 25: Using An Operator-Provided Mailbox
Using an operator-provided mailbox Using an operator-provided mailbox An operator-provided mailbox is a personal answering machine provided within an operator's network. You can only use this if you have requested the service from the operator. Please contact your network operator if you have questions about the service. -
Page 26: Using The Directory And Other Lists
Using the directory and other lists Using the directory and other lists Directory and network access list Both lists are used in the same way, except that the key is pressed to open the direc- tory and the key to open the network access list. You can save up to 20 phone numbers and names in the directory . -
Page 27: Dialling With The Directory
Using the directory and other lists Character map and text entry Either press the relevant key several times, or hold down. 2 x 3 x 4 x 5 x 6 x blank ß Control the cursor with . Delete characters with . - Page 28 Using the directory and other lists Dialling with the network access list (call-by-call) With this function the prefix for a network operator can be inserted in front of a phone number ("chained"). Open network access list. Select entry and press display key. [_________] [______________] MENU Confirm.
- Page 29 Using the directory and other lists In order to use speed dialling: either ... Hold down speed dial number e.g. The previously saved network operator number is displayed. Enter phone number to be "linked". or ... Open directory. Select entry and confirm. [__________] [______________ ] Press the talk key.
-
Page 30: Redial List
Using the directory and other lists Redial list The last five numbers dialled are shown in the redial list. If names have been saved for these numbers in the directory, then these names will be displayed. Redialling You can dial a phone number from the redial list. Þ... -
Page 31: Caller List
Using the directory and other lists Caller list Û Use the display key to access the caller list and the answering machine/mail box. The caller list contains the numbers of the last 10 missed calls. Missed calls are dis- Û played by a flashing symbol when the phone is in idle mode. - Page 32 Using the directory and other lists Delete complete caller list Open caller list (see above). Then: Press display key to open menu. [_______________] MENU Select and confirm. Caution: All old and new entries [__________] [______________________________________________] [__________] DELETE LIST will be deleted. Long press (return to idle mode).
-
Page 33: Cost-Effective Telephony
Cost-effective telephony Cost-effective telephony Make phone calls using a network that offers particularly cheap tariffs. You can manage entries in the network access list (call-by-call numbers) in the same way as you manage directory entries,by using the network á access list instead of the directory. - Page 34 Cost-effective telephony ... then Select entry and press display key. [_________] [______________] MENU Enter or change the first digits of the phone number, [______] then confirm. Long press (return to idle state). Dialling with and without preselection (automatic call-by-call numbers) The phone numbers entered are checked by your phone during dialling.
-
Page 35: Registering And De-Regestering Handsets
Registering and de-regestering handsets Registering and de-regestering handsets You can register up to six handsets with your base station. Registration of a Gigaset A 2 handset that has not yet been registered with a base sta- tion takes place automatically. You must register manually all handsets from the 1000, 2000, 3000 and 4000 Gigaset ranges, as well as C1, C2 and S1 Gigaset handsets and those from other manufacturers. -
Page 36: De-Regestering Handsets
Registering and de-regestering handsets Specific registration: other handsets Handsets from the 1000, 2000, 3000 and 4000 Gigaset ranges, C1, C2 and S1 Gigaset handsets, as well as other GAP-capable handsets can be registered as follows: 1. At the handset Start the registration of your handset as described in the relevant operating manual. 2. -
Page 37: Operating More Than One Handset
Operating more than one handset Operating more than one handset Making internal calls and ending calls Internal calls are those between handsets that are registered with the same base sta- tion. They cost nothing. Open list of handsets. [_______] Your own handset is identified by a "<". either ... -
Page 38: Accepting/Rejecting A Waiting Call During An Internal Call
Operating more than one handset Open list of handsets. [_______] The external caller hears the music on hold. Select handset and press talk key. End enquiry call: Press display key to open menu. [_______________] MENU Confirm. You are reconnected with the external [______________________________________________] [__________] GO BACK caller. -
Page 39: Paging
Operating more than one handset Barging in LINE IN USE is shown on your handset display. You would like to link up with an existing external call. Press the talk key. You are linked into the call. All parties hear a signal tone. CONFERENCE is shown in your handset display. -
Page 40: Handset Settings
Handset settings Handset settings Your handset has default settings. You can change these settings individually. Change display language You can set the display texts to appear in one of a number of languages. Press display key to open menu. [_______________] MENU Using the keys call up the procedure. -
Page 41: Change Volume And Ringtone
Handset settings Change volume and ringtone Loudspeaker volume You can set the loudspeaker volume at three levels – even during an external call. Press display key to open menu. [_______________] MENU Select and confirm. [__________] [______________________________________________] [__________] AUDIO SET Confirm. The current setting is marked with a , e.g. [______________________________________________] [__________] H/SET VOL "H/SET VOL 1 ". -
Page 42: Activate/Deactivate Ringer
Handset settings Activate/deactivate ringer All handsets ring to indicate an incoming external call. You can deactivate the ringer on your handset permanently or just for the current call. This can be done in the idle status or during an incoming call before it is accepted. Deactivating the ringer permanently: Press the star key until the ringer can no longer be heard. - Page 43 Handset settings Factory settings of handset Default settings Status after Description reset Loudspeaker volume page 39 Ringer volume page 39 Ringtones page 39 Directory empty unaffected page 24 Redial list empty empty page 28 Caller list empty unaffected page 29 Network ccess list empty unaffected...
-
Page 44: Base Station Settings
Base station settings Base station settings All base station settings are made via a registered Gigaset A 2 handset. Changing the system-PIN To protect the system settings from unauthorised access you should change the system- PIN (factory setting: 0000) to a PIN that only you know. Press display key to open menu. -
Page 45: Operation With A Pabx
Operation with a PABX Operation with a PABX The following settings are only necessary if your PABX requires them, please refer to the operating instructions for your PABX. Dialling procedure and flash time The phone is supplied with DTMF preset (DTMF = Dual Tone Multifrequency Dialling) ‰... -
Page 46: Setting Pauses
Operation with a PABX Setting pauses Changing pause after line seizure You can set the length of the pause that is inserted between pressing the talk key and sending the phone number (default setting: 3 secs.). Press display key to open menu. [_______________] MENU N O 1 L... -
Page 47: Appendix
Appendix Questions and Answers If you have questions about your phone, look under www.my-siemens.de/kundenservice where we can be contacted around the clock. In addition we have included here the most frequently asked questions and their answers. What happens if …... -
Page 48: Care
Appendix Care Wipe the base station and handset with a damp cloth or with an antistatic wipe. A dry cloth must never be used. This can cause static discharge. Contact with liquid Should the handset come in contact with liquid, under no circumstances switch on the device. -
Page 49: Service (Customer Care)
Power cable length approx. 3 m Service (Customer Care) Our online support on the Internet: www.my-siemens.de/kundenservice If you need any repair work, or have a guarantee claim to submit, our Service-Center Ireland 18 50 77 72 77 will give you quick and reliable assistance. Keep your till receipt handy. - Page 50 Appendix Excerpt from the original declaration: „We, Siemens AG, declare, that the above mentioned product is manufactured according to our Full Quality Assurance System certified by CETECOM ICT Services GmbH with the registration number „Q810820M“ in compliance with ANNEX V of the R&TTE-Directive 99/05/EC. The presumption of conformity with the essential requirements regarding Council Directive 99/05/EC is ensured.“...
-
Page 51: Menu Overview
Menu overview Menu overview You can select a menu function more quickly by opening the menu and then entering a combination of digits, rather than scrolling through ("shortcut"). I 1 2 For example: MENU to set the time. Main menu Open the phone menu while it is in idle mode. -
Page 52: Directory Key And Network Operator List Key
Menu overview Directory key and network operator list key Press key or key to open the relevant list, and press MENU. The following menu functions will then be available: EDIT ENTRY Extend phone number and use to dial NEW ENTRY Save new phone number SHOW ENTRY Show/change phone number... -
Page 53: Index
Index Index Calling external ..... A200 Duo ..... . Calls Access protection . - Page 54 Index caller's number (CLIP) ... change display language ..Keypad in idle status ....lock .
- Page 55 Index OK key Safety precautions ........on/off key Service .
- Page 56 Index View notification of voicemail ..Volume loudspeaker ....ringer ..... . Withhold display of phone number .
- Page 57 A3 1 0 0 8 - A2 0 0 - B1 0 1 - 1 - 7 6 1 9 Issued by Information and Communication mobile Schlavenhorst 88 D-46395 Bocholt © Siemens AG 2002 All rights reserved. Subject to availability. Right of modification reserved. Printed in Germany (11/2002). Siemens Aktiengesellschaft http://www.my-siemens.com...