Table of Contents
Advertisement
Quick Links
Thank you for your choosing our product. We hope you will find the instructions
on this user manual clearly and easily to follow. If you take a few minutes to look
through it, you'll learn how to use all the features of your new Unit for maximum
enjoyment.
After you have finished reading the instructions, please keep this manual in a
safe place for future reference.
Note
Note: : : : 1. certain descriptions in this book may differ from the actual unit.
Note
Note
2. Some pictures or icons in the book may differ from actual display.
3. Specifications subject to change without notice.
1
Advertisement
Table of Contents

Summary of Contents for NavSure N420i
- Page 1 Thank you for your choosing our product. We hope you will find the instructions on this user manual clearly and easily to follow. If you take a few minutes to look through it, you’ll learn how to use all the features of your new Unit for maximum enjoyment.
-
Page 2: Table Of Contents
Table Table of of of of Contents Contents Table Table Contents Contents Part 1 Head Unit Preparetion......................6 Features......................6 Tools and Supplies..................6 Warnings......................6 Disconnecting the Battery................7 Controls and Indicators..................8 Button Operation.................... 8 LCD Display / Indicators................10 Remote Control.................... - Page 3 9.1.3 Setting password of Rating..............28 CD Player User Interface................29 MP3/WMA Discs..................30 JPEG Discs....................31 10 Navigation Operation...................32 10.1 Access the Navigation mode............... 32 10.2 Navigation Operation................... 32 10.3 How to Listen to an Audio program While Using/viewing the Navigation..32 11 Troubleshooting....................33 12 Specifications......................
- Page 4 3.6.2.1 3D Map (switch)................60 3.6.2.2 Zoom & Tilt (switch)...............61 3.6.2.3 Night Mode (switch)...............61 3.6.2.4 Popup Information (switch)............61 3.6.2.5 Manage Track Logs...............62 3.6.3 Route tab....................63 3.6.3.1 Recalculate..................64 3.6.3.2 Delete.................... 65 3.6.3.3 Itinerary..................65 3.6.3.4 Fly Over..................67 3.6.3.5 Edit....................67 3.6.3.6 Info....................
-
Page 5: Part 1 Head Unit
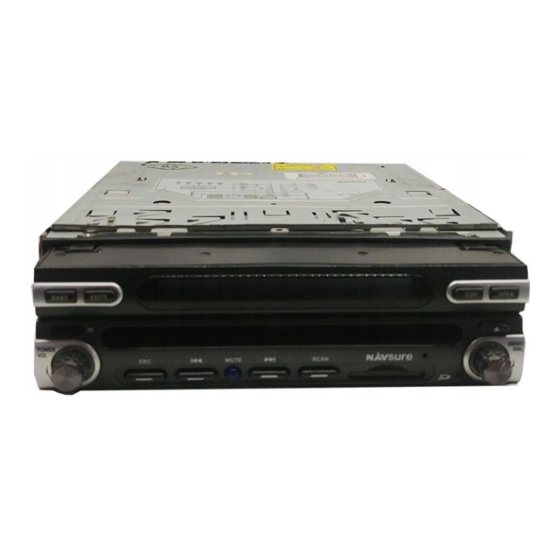
Part Part Part 1 1 1 1 Head Head Head Unit Unit Part Head Unit Unit N420i N420i (V02) (V02) N420i N420i (V02) (V02) -
Page 6: Preparetion
1 1 1 1 Preparation Preparation Preparation Preparation Please read all of the instructions before beginning the installation. We recommend having your unit installed by a credible installation shop. Features Features 1.1 Features Features � Single DIN size, all-in-one integrated entertainment system. �... -
Page 7: Disconnecting The Battery
10. The monitor employs an automatic motorized mechanism. To prevent damage to the core mechanism, please do not push, pull or swivel the monitor manually. Disconnecting Disconnecting Battery Battery 1.4 Disconnecting Disconnecting the the Battery Battery To prevent a short circuit, turn off the ignition and remove the negative (-) battery cable prior to starting the installation. -
Page 8: Controls And Indicators
2 2 2 2 Controls Controls Controls Indicators Indicators Controls and and Indicators Indicators Button Button Operation Operation Button Button Operation Operation 1.AS/PS AS/PS AS/PS AS/PS (Auto store/program scan) Press to auto store strong radio stations in the 6 preset channels in the current band. - Page 9 MUTE 8. MUTE MUTE MUTE Press the MUTE button to mute the volume, and press the button again to restore the volume. NEXT NEXT 9. NEXT NEXT Select the next chapter/track for playback. Seek an available radio station by increasing tuning frequency SCAN SCAN 10.
-
Page 10: Lcd Display / Indicators
LCD Display Display Display Display / / / / Indicators Indicators Indicators Indicators 1. Main display area, displays the time, tuning frequency and other text information. 2. Loudness indicator, Indicates the LOUD function is activated or not. 3. Alternative Frequency (AF) indicator. 4. -
Page 11: Remote Control
3 3 3 3 Remote Remote Control Remote Remote Control Control Control F F F F ront ront ront ront Zone Zone Zone Zone Remote Remote Remote Remote Control Control Control Control Name Name Name Name Ref # # # # Signal Signal Signal... - Page 12 Picture Adjust the parameter of TFT settings Repeat Set start point A and end point B to repeat A�B continually Start or pause playback, confirm the settings Direction Up/down/left/right to select items for setting buttons Also can activate and disable SCAN mode while Title playing DVD/CD Root...
-
Page 13: Tft Monitor Operation
4 4 4 4 TFT Monitor Monitor Operation Operation TFT Monitor Monitor Operation Operation Open/Close Open/Close Monitor Monitor Open/Close Open/Close the the TFT TFT Monitor Monitor OPEN OPEN OPEN OPEN Press the (OPEN OPEN) button on the front panel or press the OPEN OPEN button on the remote control to open/close the monitor. -
Page 14: Parking Brake Interlock
Parameters: 3. Set Set Parameters: Parameters: Parameters: ANGLE ANGLE Press the ( / ) buttons on the remote or press the ANGLE ANGLE button ( ) on the front panel to adjust the selected feature to the desired setting. Rotate the “VOL”... -
Page 15: Operating Instructions
5 5 5 5 Operating Operating Operating Instructions Instructions Operating Instructions Instructions Power Power On / / / / Off Power Power On POWER/VOL POWER/VOL Press the POWER/VOL POWER/VOL button to turn the unit on. The buttons on the front of the unit are illuminated and start up message is briefly displayed on the LCD screen, and then displays the current mode status. -
Page 16: System Reset
Audio Adjustments Audio Audio Audio Adjustments Adjustments Adjustments Audio Audio Function Function Adjustable Adjustable Range Range Audio Audio Function Function Adjustable Adjustable Range Range User Flat Jazz Classic Rock News Urban Rave Movie Techno BASS -7 to +7 TREBLE -7 to +7 FADE -9 to +9 -9 to +9... -
Page 17: System Setup Menu
6 6 6 6 System System Setup Menu System System Setup Setup Setup Menu Menu Menu 6.1 MAIN MAIN MAIN MAIN Menu Menu Menu Menu MAIN MAIN There are three methods to access the MAIN MAIN menu. ·Press the SMART SMART SMART DIAL... - Page 18 Selecting Selecting a a a a Feature Feature Adjustment Selecting Selecting Feature Feature for for Adjustment Adjustment Adjustment Press the direction buttons on the remote control or touch the option directly on the screen to select the feature to be adjusted. Adjusting Adjusting a a a a Feature Feature...
-
Page 19: Asp Configuration Menu
ASP(Audio ASP(Audio ASP(Audio ASP(Audio Signal Signal Signal Signal Processing) Processing) Processing) Processing) Config Config Config Configuration uration uration uration Menu Menu Menu Menu The ASP Configuration menu allows you to make fine audio adjustment. Accessing Accessing Accessing Accessing the the ASP ASP Config Config Config... -
Page 20: Screen Setup Menu
Setting Setting Options Options Function Function Setting Setting Options Options Function Function 60Hz 80Hz Depending on the audio source, select the Bass Bass Freq Center Frequency to achieve the best Bass effect. 100Hz 200Hz 10KHz 12.5KHz Depending on the audio source, select the Treble Treble Freq Center Frequency to achieve the best Treble effect. - Page 21 Selecting Selecting a a a a Feature Feature Adjustment Selecting Selecting Feature Feature for for Adjustment Adjustment Adjustment Press the ( ) buttons on the remote to select a feature to be adjusted. Rotate SMART SMART SMART SMART DIAL DIAL DIAL DIAL clockwise/counterclockwise to select a feature to be adjusted.
-
Page 22: Tuner Operation
7 7 7 7 Tuner Tuner Tuner ( ( ( ( FM/AM) FM/AM) Operation Tuner FM/AM) FM/AM) Operation Operation Operation Tuner Tuner Tuner Tuner TFT TFT display display display display MAIN 1. Current Source information, touch this area to return to MAIN MAIN MAIN menu. -
Page 23: Switch To Radio Tuner Source
You get display of Program Service Name and PTY, tuning to stations broadcasting a desired PTY, automatic tuning to traffic information, and emergency broadcasts and radio text display. RDS service was not available in AM broadcasting. RDS service availability depends on the FM broadcasting provider. Switch Switch Switch... -
Page 24: Seek The Pty
Storing Storing a a a a Station Station Storing Storing Station Station 1. Select a band (if needed), then select a station. 2. Touch and hold an onscreen preset button for three seconds. The preset number appears at the top of the screen. Recalling Recalling Recalling a a a a Station... -
Page 25: Dvd/Cd Player Operation
8 8 8 8 DVD/ DVD/ DVD/ Player Player Operation Operation DVD/CD CD Player Player Operation Operation Opening/Closing Opening/Closing Video Video Screen Screen Opening/Closing Opening/Closing the the TFT TFT Video Video Screen Screen Opening Opening Screen Screen Opening Opening the the TFT TFT Screen Screen... -
Page 26: Dvd/Cd/Mp3/Wma/Jpeg Operation
9 9 9 9 DVD/ DVD/ DVD/ CD/MP3/WMA CD/MP3/WMA /JPEG /JPEG Operation Operation DVD/CD/MP3/WMA CD/MP3/WMA/JPEG /JPEG Operation Operation Instructions for Insert/Eject, Play/Pause, Stopping Playback, Track Selection, Fast Forward/Fast Reverse, Scan, and Random Play are the same for DVD/CD and MP3 operation. Please see the DVD/CD Player Operation section for information about these topics. -
Page 27: General Setup
·Touch the left up corner of the screen while playing DVD to access the main menu ·Touch the right up corner of the screen while playing DVD to access the search menu below Touch to select the playing time and title/chapter then input the numeric buttons to the white underlines. -
Page 28: Language Menu
9.1.2 9.1.2 9.1.2 9.1.2 Touch the DVD button of General setup menu to access the language menu below 1. Touch to set the languages 2. Touch to set the video mode 3. Touch to set passwords /rating / load factory functions 4. -
Page 29: Cd Player User Interface
9.2 CD CD Player Player Player Player User User User User Interface Interface Interface Interface 1. Current source indicator, touch this area to access MAIN MAIN MAIN MAIN menu. 2. Disc title 3. Track title 4. Current time :Touch to play/pause :Touch to stop:... -
Page 30: Mp3/Wma Discs
9.3 MP3/WMA MP3/WMA MP3/WMA MP3/WMA Discs Discs Discs Discs This player allows you to playback MP3 files recorded on CDROM, CD-R, CD- RW, CD+R/RW and CD-R/RW. For CD-RW discs, please make sure it is formatted using the full method and not the quick method to prevent illegal disc operation. -
Page 31: Jpeg Discs
18. Loud Setting Indicator 19. Volume indicator Playing MP3/WMA Files Playing Playing Playing MP3/WMA MP3/WMA MP3/WMA Files Files Files After inserting a MP3/WMA disc, files will play in the sequence of the all directory. In playing back, you can press the numeric button on the remote control or touch a track directly to play. -
Page 32: Navigation Operation
Navigation Navigation Operation Operation 10 Navigation Navigation Operation Operation 10.1 10.1 10.1 A A A A ccess ccess ccess Navigation Navigation mode mode 10.1 ccess the the Navigation Navigation mode mode MAIN MAIN NAVI NAVI 1. Access the MAIN MAIN menu and select the NAVI NAVI button on the touch-screen to enter the Navigation Operation interface. -
Page 33: Troubleshooting
Troubleshooting Troubleshooting 11 Troubleshooting Troubleshooting Problem Problem Cause Cause Corrective Corrective Action Action Problem Problem Cause Cause Corrective Corrective Action Action GENERAL GENERAL GENERAL GENERAL Radio Fuse blown Install new fuse with correct rating Car battery fuse blown Install new fuse with correct Unit will not rating power on... - Page 34 Auto antenna not Connect the auto antenna control properly connected cable properly LOCAL function is Turn LOCAL function off activated DISC DISC DISC DISC Cannot insert Disc already inside Eject current disc and insert new disc unit Disc is warped or Use disc in good condition scratched Disc is dirty or wet...
- Page 35 Remote control Remote Remote Remote control control control Battery is covered with Pull out the insulation tape insulation tape Remote control Battery depleted Replace battery with new one does not function Battery installed Remove battery and install incorrectly correctly 1. When using the remote for the first time, you must pull out the insulation tape. 2.
- Page 36 Insert the battery holder Note Note: : : : Note Note Use only one CR2025(3V) lithium battery. Danger of explosion if battery is incorrectly replaced. Replace only with the same or equivalent type. Do not recharge, disassemble, heat or dispose of the battery in fire. Keep batteries away from children to avoid the risk of accident.
-
Page 37: Specifications
Specifications Specifications 12 Specifications Specifications Main Main Amplifier Amplifier Main Main Amplifier Amplifier Power Output: 20 watts X 4 channels into 4-ohms @ < 10% THD+N Signal to Noise Ratio: 70dBA below reference. (Reference: 1 watt, 4-ohms) MAX Power: 40 X 4 watts into 4-ohms, all channels driven Frequency Response: 20Hz to 20 kHz, -3dB. -
Page 38: Part 2 Navigation
Part Part Part 2 2 2 2 Navigation Navigation Navigation Part Navigation English English UK English English N420i N420i N420i ( ( ( ( V V V V 0 0 0 0 2) 2) 2) 2) N420i... -
Page 39: Warnings And Safety Information
If you are the driver of the vehicle, we recommend that you operate Navsure before beginning your journey. The driver’s attention should always be on the road. Plan your route before departure and pull over if you need to change route parameters. -
Page 40: General Information
When using Navsure, you do not need to ‘double tap’ or ‘tap & hold’ the touch screen as these functions cannot be used reliably in a moving vehicle. A single tap triggers most of the screen controls. -
Page 41: Discovering The Program Through The Screens
The best way to discover Navsure is to explore each screen in detail, and to find out how to move from one to another. Read this chapter for a guided tour. Main Main menu menu 3.1 Main... -
Page 42: About Screen
The elements of the map are described here. For the controls and special functions of the two map screens see Page 47. The current version of Navsure is primarily intended for land navigation. That is why maps in Navsure look similar to paper roadmaps (when using daytime colours and 2D map mode). -
Page 43: Zoom Levels
Zoom levels levels Navsure uses high quality vector maps that let you see the map at various zoom levels, always with optimised content (the density of the map details can be independently set for Map and Cockpit screens in Map settings). Street names and... -
Page 44: Daylight And Night Colour Schemes
The different colour schemes let you adjust Navsure to the brightness of the environment. Use the daylight and night colour schemes accordingly. Daylight colours are similar to paper roadmaps, while the night colour schemes use dark tints... -
Page 45: Streets And Roads
The alternative is a kind of virtual signpost stuck into the street itself. You need not choose between the two modes. Navsure will use the one best for the current tilt and zoom level. Zoom in to have only a few streets on the map, and start tilting up and down to see how Navsure switches between the two modes in an instant. -
Page 46: Other Objects
Navsure has a built-in Lock-on-Road feature that always puts the position arrow on the road, on the axis of the street in case of one-way streets, or on the side of the road where you drive (e.g. -
Page 47: Selected Map Point, Also Known As The Cursor
Pin is visible at all zoom levels and remains in its position until you unpin it, or delete all Pins in Advanced settings. The colour of the Pin is automatically selected by Navsure. Different colours help you identify a Pin in the History list later. There they are shown together with their address and GPS Coordinates. -
Page 48: Gps Data Displayed
The GPS Data screen is a collection of information received from the GPS device and it also serves as the entry point to the following screens: • Time Sync. 3.4.1 data displayed 3.4.1 3.4.1 3.4.1 GPS GPS data data data displayed displayed displayed The virtual sky on the left represents the currently visible part of the sky above you,... -
Page 49: Gps Data Quality Indicator
GPS. Turn on the Auto Correction switch to let Navsure frequently check and correct the internal clock of the device with the GPS time. -
Page 50: Screens With Map
This screen is usually used in 2D North-up mode. You can set Navsure so it always opens the Map screen in 2D North-up mode (Page 74). The Cockpit screen is for driving purposes. Besides showing the map, it contains... - Page 51 Display Display Control Control Display Display Control Control (Cockpit only) Turn preview* Opens Route menu* Zooms in (optional) Zooms out (optional) Tilts down (optional) Tilts up (optional) Indicates that Lock to GPS position and Re-enables Lock-to-Position / Smart Zoom heading is inactive Selected map point (Cursor) Opens Popup Info and Cursor menu (Map only) Map scale...
-
Page 52: Turn Preview (No. 1)
(automatic tilting and rotating remains active). You need to press Enter, or tap the Follow button (Page 50) to return the zoom control to Smart Zoom. You can also set Navsure to do this automatically after a few seconds in case of the Cockpit screen. -
Page 53: Follow Mode - Lock To Gps Position And Heading (No. 6)
You need to tap the Follow button (Page 50) to return the tilt control to Smart Zoom. You can also set Navsure to do this automatically after a few seconds .Follow mode - lock to GPS position and heading (No. 6) This semi-transparent icon is displayed if GPS position is available, and the map has been moved. -
Page 54: Cursor (No. 7)
You can view the map screens in three different presentation modes. This switch will cycle through them in the following order. The usual map orientation for navigation is Track-up. It means Navsure rotates the map during navigation to always face the direction of your travel. In this mode an arrow (compass) points towards North. -
Page 55: Gps Position Quality (No. 11)
You cannot rotate the map in Overview mode. This mode is strictly north-up. You can set up Navsure so that it will switch to Overview mode during navigation when the next turn is far away. You can specify this distance and the fixed zoom level of Overview in Advanced settings . -
Page 56: Sound Muting (No. 12)
• A black dish and two arcs represent a 3D GPS position. Navsure is ready to navigate. 3.5.10 Sound muting (No. (No. 1 1 1 1 2 2 2 2 ) ) ) ) 3.5.10 3.5.10 3.5.10 Sound Sound Sound muting muting muting (No. - Page 57 To: use the Cursor as the destination of your route. This button is to start a new route. The previous route (if it exists) will be deleted and replaced. If a multi- point route is active, Navsure will ask you whether you really want to delete it together with all its via points.
-
Page 58: Current Street (No. 15)
Pin: push a coloured pin in the map at the selected point for later use. This pin is visible at all zoom levels and also appears in the History list together with its exact position. The colour of the pin is automatically selected by Navsure. Unpin: Unpin: •... -
Page 59: Distance To Next Turn (No. 17)
This field shows the road or street that comes next in the route itinerary. If you are not yet in the settlement where this next street is, Navsure will display the name of the settlement instead of the name of the road or street. A bullet symbol will appear next to the name of settlements to help you tell them apart from street names. -
Page 60: Menu
Menu 3.6 Menu Menu Menu Tapping this button brings up a menu that allows you to access some of the most frequently used functions of Navsure. 3.6.1 3.6.1 3.6.1 3.6.1 Find Find Find Find tab The first page of the Menu is Find. It lets you select a destination without first having to locate it on the map. -
Page 61: Zoom & Tilt (Switch)
Note: Note: Note: Note: When you reach 2D view by tilting the map, Smart Zoom will tilt the map as you press the Follow button or it disappears after the timeout (set in Advanced settings) expires. Use the 3D Map toggle to permanently switch to 2D view. Note: Note: Note:... -
Page 62: Manage Track Logs
Logs Logs Logs Using Navsure it is also possible to save the track logs of your journeys. This screen lets you manage all your track logs. When it comes up, it shows a list of all track logs already saved. -
Page 63: Route Tab
(Page 53) will appear on the map screens to let you know it is a simulation only. • Delete: Delete: Delete: Delete: you can delete a track log if it is not needed any more. Navsure will ask you to confirm this action. 3.6.3 3.6.3 3.6.3 Route... -
Page 64: Recalculate
Bypass Bypass When you run into a traffic jam or roadblock, you may want to have Navsure calculate a route that departs the original route as soon as it can. You will need to select the minimum distance along the original route where your new route is allowed to rejoin the original route. -
Page 65: Delete
Avoid function in Itinerary instead (Page 62). Note: Note: Note: Note: When you use this feature, Navsure will keep on excluding the same part of the map from later routes until you manually delete the route (Page 62), or restart Navsure. Cancel... - Page 66 Navsure will recalculate the route excluding that turn. If the next street is important in the route, it is likely that Navsure will replace the turn with several easier ones to get to the same street. Road: Road: •...
-
Page 67: Fly Over
Bypass function of Recalculate (Page 61). Note: Note: Note: Note: When you use this feature, Navsure will keep on excluding the same part of the map from later routes until you manually delete the route (Page 62), or restart Navsure. 3.6.3.4 Over 3.6.3.4... -
Page 68: Info
POI, coordinates, one of your favourite destinations, or select a point from the History list. As soon as you select any of these, Navsure returns to the Edit screen and your selection appears right under the highlighted line. -
Page 69: Settings
Settings Settings Navsure provides several settings in order to let you customise the functions of the program. The Settings screen can be accessed directly from the Main menu screen (Page 38) and from the map screens by using the battery icon, while some of its sub- screens are accessible from other parts of the program. -
Page 70: Automatic Night Colours
GPS. Once you set a permanent colour scheme in the Quick menu (Page 58), this automatic mode turns off. If you need Navsure to switch between colours for you again, you need to re- enable this feature. -
Page 71: Disabled
If you stick to the original route, and you wish to get back to it on your own, you can disable recalculation. This way guidance will stop until you return to the recommended route on your own. settings settings 4.2 Map Map settings settings You can set a few parameters determining the appearance of the maps in Navsure. -
Page 72: Daylight / Night Colour Profile
Note: Note: Note: You can only disable street names and POI icons if Navsure follows your position. As soon as you move the map and Lock-to-Position (Page 50) is disabled, street names and icons become visible again. Tap Follow to re-enable Lock-to- Position and have the labels and icons disappear again. -
Page 73: Method
Note: Note: Note: Note: Since Navsure calculates routes very quickly, the position of this slide is only used for long routes. Short routes are always calculated to give you the optimal result independent of the slider. 4.3.2 4.3.2... -
Page 74: Road Types To Include/Exclude
If your destination can only be accessed using some of the excluded road types, Navsure will use them but only as much as necessary. In this case a warning icon will be shown on the Route Information screen, and the road not matching your preference will be displayed in alternate colour on the map. -
Page 75: Permit Needed
4.3.4.6 Toll Toll Roads Roads Toll roads are included in your routes by default. If you wish to travel more to avoid paying a toll, disabling them will make Navsure plan the best toll-free route for you. Note: Note: Note: Note: You have a few more ways to influence routing and route recalculation in Advanced settings Route options. -
Page 76: Voice Language
Units 4.4.3 You can set the distance units to be used by the program. Navsure may not support all of the listed units in some voice guidance languages. If you select a measurement unit that is not supported by the chosen voice guidance language, you will see a red warning message under the selector. -
Page 77: Display Options
When this switch is turned off, Navsure will centre the map to the location selected in Find but will not change the zoom level. If you turn this switch on, Navsure will also zoom in to the selected point. -
Page 78: Coordinate Display Format
4.5.1.4 4.5.1.4 Coordinate Coordinate display display format format 4.5.1.4 4.5.1.4 Coordinate Coordinate display display format format Positions are sometimes displayed with their addresses, and sometimes with their coordinates. This setting lets you choose between displaying coordinates in degrees (dd.dddddd); degrees and minutes (dd mm.mmm); or degrees, minutes and seconds (dd mm ss.s).