Table of Contents
Advertisement
Available languages
Available languages
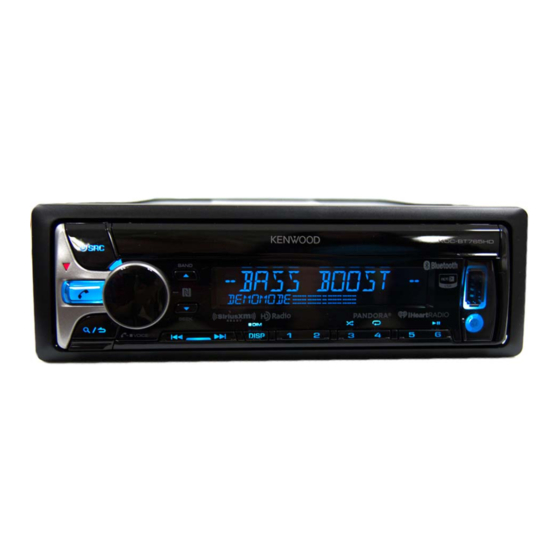
KDC-X700
KDC-BT765HD
CD-RECEIVER
INSTRUCTION MANUAL
AMPLI-TUNER LECTEUR DE CD
MODE D'EMPLOI
REPRODUCTOR DE DISCOS COMPACTOS RECEPTOR DE FM/AM
MANUAL DE INSTRUCCIONES
For your records
Record the serial number, found on the back of the unit, in the spaces designated on the warranty card, and in the space provided below.
Refer to the model and serial numbers whenever you call upon your Kenwood dealer for information or service on the product.
Model KDC-X700/ KDC-BT765HD
Serial number
US Residents Only
Register Online
Register your Kenwood product at www.Kenwoodusa.com
© 2015 JVC KENWOOD Corporation
B5A-0889-00 (KW)
Advertisement
Chapters
Table of Contents

Related Manuals for Kenwood KDC-BT765HD


Summary of Contents for Kenwood KDC-BT765HD
-
Page 1: Instruction Manual
Record the serial number, found on the back of the unit, in the spaces designated on the warranty card, and in the space provided below. Refer to the model and serial numbers whenever you call upon your Kenwood dealer for information or service on the product. - Page 2 Los equipos eléctricos y electrónicos al final de la vida útil, deberán ser reciclados en instalaciones JVC KENWOOD Corporation que puedan dar el tratamiento adecuado a estos productos y a sus 2967-3, ISHIKAWA-MACHI, subproductos residuales correspondientes.
- Page 3 IC (Industry Canada) Notice CAUTION This device complies with Industry Canada licence-exempt RSS standard(s). This equipment complies with FCC/IC radiation exposure limits set forth for an uncontrolled Operation is subject to the following two conditions: environment and meets the FCC radio frequency (RF) Exposure Guidelines in Supplement C (1) This device may not cause interference, and to OET65 and RSS-102 of the IC radio frequency (RF) Exposure rules.
- Page 4 SOFTWARE LICENSE AGREEMENT Article 3 Conditions for Grant of License 1. When the User transfers the Product, it may also transfer the license to use the Licensed Software The software embedded in the Product (hereinafter the "Licensed Software") provided by Licensor embedded in the Product (including any related materials, updates and upgrades) on condition is copyrighted to or sublicensable by the Licensor, and this Agreement provides for the terms and that no original, copies or related materials continue in the possession of the User, and that the...
- Page 5 Important Notice concerning the Software Article 8 Termination In case the User falls under any of the events described in the following items, the Licensor may immediately terminate -jansson this Agreement or claim that the User compensates for the damage incurred by the Licensor due to such event: (1) when the User violated any provision of this Agreement;...
-
Page 6: Table Of Contents
CONTENTS BEFORE USE BEFORE USE IMPORTANT • To ensure proper use, please read through this manual before using this product. It is especially important BASICS that you read and observe Warning and Caution in this manual. • Please keep the manual in a safe and accessible place for future reference. GETTING STARTED 1 Select the display language Warning... -
Page 7: Basics
BASICS Faceplate Remote control (RC-406) Volume knob Display window Remote sensor (Do not expose to bright sunlight.) Pull out the insulation sheet when using for the first time. Detach button Attach Detach How to reset How to replace the battery Press the switch twice within 5 seconds after detaching the faceplate. -
Page 8: Getting Started
GETTING STARTED To set the date Turn the volume knob to select [DATE FORMAT], then press the knob. Turn the volume knob to select [DD/MM/YY] or [MM/DD/YY], then press the knob. Turn the volume knob to select [DATE SET], then press the knob. Turn the volume knob to make the settings, then press the knob. -
Page 9: Hd Radio™ Tuner
Press S / T (or press S / on RC-406) to search for a For details on how to update the firmware, see: www.kenwood.com/cs/ce/ station or channel. FACTORY RESET YES: Resets the settings to default (except the stored station). ; NO: Cancels. • To change the searching method for S / T: Press CLOCK repeatedly. - Page 10 HD Radio™ tuner Default: XX Direct Access Tuning (using RC-406) TUNER SETTING Press DIRECT to enter Direct Access Tuning. Press the number buttons to enter a frequency. IF BAND AUTO: Increases the tuner selectivity to reduce interference noises from Press to search for a station or channel. adjacent FM stations.
-
Page 11: Cd / Usb / Ipod / Android
ALL RANDOM. * Press and hold When connecting an Android device, “Press [VIEW] to install KENWOOD MUSIC PLAY APP” is shown. Follow the Micro USB 2.0 cable * instructions to install the application. You can also install the latest version of KENWOOD MUSIC PLAY application (commercially available) on your Android device before connecting. - Page 12 While in ANDROID source, press 5 repeatedly. – Not applicable for iPod. BROWSE MODE : Control Android device from this unit via KENWOOD MUSIC PLAY application installed in (or) the Android device. Press S / T to search at a preset skip search ratio. ( 9, [SKIP SEARCH])
-
Page 13: Aux
CD / USB / iPod / ANDROID Preparation: Direct Music Search (using RC-406) Select [ON] for [BUILT-IN AUX]. ( 5) Press DIRECT. Start listening Press the number buttons to enter a track/file number. Press to search for music. Connect a portable audio player (commercially available). •... -
Page 14: Pandora
Pandora® Preparation: Create and save a new station Install the latest version of the Pandora application on your device Press (iPhone/ iPod touch), then create an account and log in to Pandora. Turn the volume knob to select [NEW STATION], then press the knob. •... -
Page 15: Iheartradio
iHeartRadio® Pandora® Preparation: Delete a station Install the latest version of iHeartAuto application on your device (iPhone/ iPod touch), then While listening to PANDORA... create an account and log in to iHeartRadio. Press the volume knob to enter [FUNCTION]. • Select [ON] for [IHEART SRC]. ( 5) Turn the volume knob to select [SYSTEM], then Start listening press the knob. -
Page 16: Siriusxm® Radio
SiriusXM® Radio iHeartRadio® Only SiriusXM® brings you more of what you love to listen to, all in one place. Get over Search and store a station 140 channels, including commercial-free music plus the best sports, news, talk, comedy Press and entertainment. Welcome to the world of satellite radio. A SiriusXM Vehicle Tuner and Turn the volume knob to select a category, Subscription are required. - Page 17 SiriusXM® Radio When channel keymode is selected... Turn the volume knob to select a channel, then press the knob. On the faceplate On the remote control (or) Press S / T. Press S / Press S / T to search for a channel manually. Select a channel •...
- Page 18 SiriusXM® Radio Default: XX TuneScan™ CHANNEL LOCK To unlock settings: You can get a short preview of the songs that you have missed 1 Turn the volume knob to select a number. on each of your SmartFavorite music channels or currently 2 Press S / T to move to the entry position.
-
Page 19: Bluetooth
– Bluetooth function of the connected devcie is turned on. Secure using cord clamps (not – [AUTO PAIRING] is set to [ON]. ( 19) supplied) if necessary. – KENWOOD MUSIC PLAY application is installed on the Android device ( 7) and [BROWSE MODE] is selected ( 8). ENGLISH... - Page 20 BLUETOOTH® BLUETOOTH — Mobile phone Connect with a remote device by One-touch (NFC) Near Field Communication (NFC) enables short-range wireless communication between the unit and remote devices. By holding an NFC-compatible remote device near to the N-Mark on the unit (volume knob), the unit and remote device proceed to complete pairing and established the BLUETOOTH connection automatically.
- Page 21 BLUETOOTH® Default: XX On the faceplate On the remote control MIC GAIN –10 — +10 (–4): The sensitivity of the While talking on the first incoming call... microphone increases as the number increased. Answer another incoming Press Press NR LEVEL –5 — +5 (0): Adjust the noise reduction level call and hold the current call until the least noise is being heard during a Reject another incoming call...
- Page 22 BLUETOOTH® Make a call NUMBER DIAL 1 Turn the volume knob to select a number (0 to 9) or character ( , #, +). You can make a call from the call history, phonebook, or dialing the number. Call by 2 Press S / T to move the entry position.
- Page 23 BLUETOOTH® Default: XX Settings in memory BT MODE Store a contact in memory PHONE SELECT Selects the phone or audio device to connect or disconnect. You can store up to 6 contacts into the number buttons (1 to 6). “ ”...
-
Page 24: Bluetooth Audio
BLUETOOTH® BLUETOOTH — Audio Bluetooth test mode You can check the connectivity of the supported profile between the Bluetooth device and the unit. • Make sure there is no Bluetooth device paired. Press and hold “PLEASE PAIR YOUR PHONE PIN 0000” appears. Search and select this unit model name (KDC-X7 / KDC-BT7... -
Page 25: Audio Settings
AUDIO SETTINGS BLUETOOTH® While listening to any source... Internet radio via Bluetooth Press the volume knob to enter [FUNCTION]. Listen to Pandora Turn the volume knob to select [AUDIO CONTROL], then press the knob. You can listen to Pandora on the Android device via Bluetooth on this Turn the volume knob to select an item (see the following table), unit. - Page 26 AUDIO SETTINGS LOUDNESS LEVEL1/ LEVEL2: Selects your preferred low and high SPEAKER SIZE frequencies boost to produce a well-balanced sound at a low FRONT SIZE 3.5"/ 4"/ 4.75"/ 5"/ 6.5"/ 6.75"/ 7"/ 4×6/ 5×7/ volume level. ; OFF: Cancels. 6×8/ 6×9/ 7×10: Selects according to the connected SUBWOOFER SET ON: Turns on the subwoofer output. ;...
-
Page 27: Display Settings
DISPLAY SETTINGS AUDIO SETTINGS REAR HPF R - HPF FRQ R - HPF SLOPE (Refer FRONT HPF, 22.) R - HPF GAIN SUBWOOFER LPF SW LPF FRQ 30HZ/ 40HZ/ 50HZ/ 60HZ/ 70HZ/ 80HZ/ 90HZ/ 100HZ/ 120HZ/ 150HZ/ 180HZ/ 220HZ/ 250HZ: Adjusts the crossover frequency for the subwoofer : ZONE 1 (low pass filter). ;... -
Page 28: References
OFF: Cancels. More information * Preset colors: RED1/ RED2/ RED3/ PURPLE1/ PURPLE2/ PURPLE3/ PURPLE4/ BLUE1/ Visit also the following website <www.kenwood.com/cs/ce/> for: – Latest firmware updates and latest compatible item list BLUE2/ BLUE3/ SKYBLUE1/ SKYBLUE2/ LIGHTBLUE/ AQUA1/ AQUA2/ GREEN1/ –... - Page 29 - iPhone 3G, 3GS, 4, 4S, 5, 5S, 5C, 6, 6 Plus • Signal conditions vary, depending on the surroundings. • You cannot operate iPod if “KENWOOD” or “ ” is displayed on iPod. • Compatible remote device for NFC function: •...
- Page 30 REFERENCES About HD Radio™ Technology Source name Display information • Adjacent to traditional main stations are HD2/HD3 Channels, providing iPod or ANDROID Track title (Artist) Track title (Album name) Track title (Date/Clock)* new original programming on the FM dial. Playing time (Date/Clock)* (back to the beginning) •...
-
Page 31: Troubleshooting
TROUBLESHOOTING Symptom Remedy Symptom Remedy • Adjust the volume to the optimum level. • This unit can only display uppercase letters, numbers, Sound cannot be heard. Correct characters are not • Check the cords and connections. displayed (e.g. album name). and a limited number of symbols. - Page 32 TROUBLESHOOTING Symptom Remedy Symptom Remedy • Make sure KENWOOD MUSIC PLAY APP is installed on Cannot playback at iHeartRadio station If “Explicit Content” in [Account Settings] is checked in [BROWSE MODE]. the Android device. ( 7) cannot be selected. the web version of iHeartRADIO, custom stations become •...
- Page 33 TROUBLESHOOTING Symptom Remedy Symptom Remedy • Search from the Bluetooth device again. No Bluetooth device is “N/A VOICE TAG” Make sure the same voice as the registered voice tag is • Reset the unit. ( 3) detected. used. • Make sure you have entered the same PIN code to both Bluetooth pairing cannot “NOT SUPPORT”...
-
Page 34: Installing/Removing Unit
Warning Installing the unit (in-dash mounting) • The unit can only be used with a 12 V DC power supply, negative ground. • Disconnect the battery’s negative terminal before wiring and mounting. • Do not connect Battery wire (yellow) and Ignition wire (red) to the Do the required wiring. -
Page 35: Wiring Connection
If no connections are made, do not let the wire come out from the tab. (C) Mounting sleeve To front speaker (left) White/Black Gray Brown To connect the Kenwood navigation To front speaker (right) Gray/Black (Mute control wire) system, refer your navigations manual Green... -
Page 36: Specifications
SPECIFICATIONS Frequency Range 87.9 MHz — 107.9 MHz (200 kHz space) USB Standard USB 1.1, USB 2.0 (Full speed) Usable Sensitivity (S/N = 26 dB) 8.2 dBf (0.71 μV/75 Ω) File System FAT12/ 16/ 32 Quieting Sensitivity (DIN S/N = 46 dB) 17.2 dBf (2.0 μV/75 Ω) Maximum Supply Current DC 5 V 1.5 A Frequency Response (±3 dB) HD Radio Broadcast: 20 Hz —... - Page 37 SPECIFICATIONS Maximum Output Power 50 W × 4 Full Bandwidth Power 22 W × 4 (at less than 1 % THD) Speaker Impedance 4 Ω — 8 Ω Tone Action Band 1: 62.5 Hz ±9 dB Band 2: 100 Hz ±9 dB Band 3: 160 Hz ±9 dB Band 4: 250 Hz ±9 dB Band 5: 400 Hz ±9 dB Band 6: 630 Hz ±9 dB Band 7: 1 kHz ±9 dB Band 8: 1.6 kHz ±9 dB...
- Page 38 TABLE DES MATIERES AVANT L’UTILISATION AVANT L’UTILISATION IMPORTANTES • Pour utiliser correctement l’appareil, veuillez ce manuel complément avant de l’utiliser. Il est particulièrement important que FONCTIONNEMENT DE BASE 3 vous lisiez et acceptiez les avertissements et les précautions de ce manuel. •...
-
Page 39: Fonctionnement De Base
FONCTIONNEMENT DE BASE Façade Télécommande (RC-406) Bouton de volume Fenêtre d’affichage Capteur de télécommande (Ne l’exposez Pas à la lumière directe du soleil.) Retirez la feuille d’isolant lors de la première utilisation. Touche de détachement Attachez Détachez Comment réinitialiser Comment remplacer la pile Appuyez deux fois sur le bouton avant 5 secondes après avoir détaché... -
Page 40: Prise En Main
PRISE EN MAIN Pour régler la date Tournez le bouton de volume pour choisir [ DATE FORMAT ], puis appuyez sur le bouton. Tournez le bouton de volume pour choisir [ DD/MM/YY ] ou [ MM/DD/YY puis appuyez sur le bouton. Tournez le bouton de volume pour choisir [ DATE SET ], puis appuyez sur le... -
Page 41: Tuner Hd Radio
(ou appuyez sur / sur la RC-406) Pour en savoir plus sur la mise à niveau du micrologiciel, référez-vous à: pour rechercher une station ou un canal. www.kenwood.com/cs/ce/ • Pour changer la méthode de recherche pour / : Appuyez FACTORY RESET YES : Réinitialise les réglages aux valeurs par défaut (sauf la station mémorisée). ;... - Page 42 Tuner HD Radio™ Défaut: Syntonisation à accès direct (en utilisant la RC-406) TUNER SETTING DIRECT Appuyez sur pour entrer en mode de Syntonisation à accès direct. IF BAND AUTO : Augmente la sélectivité du tuner pour réduire les interférences des stations FM A l’aide des touches numériques, entrez une fréquence.
-
Page 43: Cd / Usb / Ipod / Android
(en vente dans le commerce) Lors de la connexion d’un périphérique Android, “Press [VIEW] to install KENWOOD MUSIC PLAY APP” apparaît. Suivez les instructions pour installer l’application. Vous pouvez aussi intaller la dernière version de l’application KENWOOD MUSIC PLAY sur votre périphérique Android avant la connexion. - Page 44 Tournez rapidement le bouton de volume pour parcourir la liste rapidement. BROWSE MODE : Commandez le périphérique Android à partir de cet – Ne peut pas être utilisé pour iPod. appareil via l’application KENWOOD MUSIC PLAY installée (ou) sur le périphérique Android. Appuyez sur / ...
-
Page 45: Aux
CD / USB / iPod / ANDROID Préparation: Recherche directe de morceau (en utilisant la RC-406) Sélectionnez [ ] pour [ BUILT-IN AUX ]. ( DIRECT Appuyez sur A l’aide des touches numériques, entrez le numéro de plage/fichier. Démarrez l’écoute Appuyez sur pour rechercher un morceau. -
Page 46: Pandora
Pandora® Préparation: Création et sauvegarde d’une nouvelle station Installez la dernière version de l’application Pandora sur votre appareil (iPhone/ iPod touch), puis créez un compte et connectez-vous sur Pandora. Appuyez sur • Sélectionnez [ ] pour [ PANDORA SRC ]. ( Tournez le bouton de volume pour choisir [ NEW STATION ], puis appuyez... -
Page 47: Iheartradio
iHeartRadio® Pandora® Préparation: Suppression d’une station Installez la dernière version de l’application sur votre appareil (iPhone/ iPod touch), puis créez un compte et Lors de l’écoute de PANDORA... connectez-vous sur iHeartRadio. • Appuyez sur le bouton de volume pour entrer Sélectionnez [ ] pour [ IHEART SRC... -
Page 48: Radio Siriusxm
Radio SiriusXM® iHeartRadio® Seul SiriusXM® vous apporte plus de ce que vous aimez écouter, en un seul endroit. Obtenez plus de 140 Recherche et mémorisation d’une station canaux, y compris de la musique sans pauses publicitaires, le meilleur du sport, les nouvelles, les discussions, les Appuyez sur comédies et de les divertissements. - Page 49 Radio SiriusXM® Quand le mode de touche de canal est sélectionné... Tournez le bouton de volume pour choisir un canal, puis appuyez sur le bouton. Pour Sur la façade Sur la télécommande (ou) S / T Appuyez sur pour rechercher un canal Sélectionnez un canal S / ...
- Page 50 Radio SiriusXM® Défaut: TuneScan™ CHANNEL LOCK Pour déverrouiller les réglages: Vous pouvez obtenir un bref aperçu des morceaux que vous avez manqués Tournez le bouton de volume pour sélectionner un numéro. sur chacun de vos canaux de musique SmartFavorite ou sur le canal de S / T Appuyez sur pour déplacer la position d’...
-
Page 51: Bluetooth
La fonction Bluetooth du périphérique connecté est activée. – AUTO PAIRING ] est réglé sur [ ]. ( – L’application KENWOOD MUSIC PLAY est installée sur le périphérique Android ( ) et [ BROWSE MODE ] est sélectionné ( Ajustez l’angle du microphone Fixez si nécessaire en utilisant des... - Page 52 BLUETOOTH® BLUETOOTH — Téléphone portable Faites la connexion avec un périphérique distant avec Une seule touche (NFC) Near Field Communication (NFC) permet la communication sans fil à courte distance entre l’appareil et les dispositfs distants. En maintenant un périphérique distant NFC-près de la marque N de l’appareil (bouton de volume), l’appareil et le périphérique distant procèdent au pairage et établisse automatiquement une connexion BLUETOOTH.
- Page 53 BLUETOOTH® Défaut: Pour Sur la façade Sur la télécommande MIC GAIN –10 –4 — ( ): La sensibilité du microphone Pendant que vous parlez pour le premier appel entrant... augmente quand le numéro augmente. Répondez à un autre appel Appuyez sur Appuyez sur NR LEVEL –5...
-
Page 54: Faire Un Appel
BLUETOOTH® Faire un appel NUMBER DIAL Tournez le bouton de volume pour sélectionner un numéro (0 à 9) ou un caractère ( , #, +). Vous pouvez faire un appel à partir de l’historique, du répertoire d’adresses ou composer le numéro. S / T Appuyez sur pour déplacer la position d’... - Page 55 BLUETOOTH® Défaut: Réglages en mémoire BT MODE Stockage d’un contact en mémoire PHONE SELECT Permet de sélectionner le téléphone ou le périphérique audio à connecter ou Vous pouvez mémoriser un maximum de 6 contacts sur les touches numériques ( à déconnecter.
- Page 56 BLUETOOTH® BLUETOOTH — Audio Mode de vérification Bluetooth Vous pouvez vérifier la connectivité du profile pris en charge entre le périphérique Bluetooth et l’appareil. • Assurez-vous qu’il n’y aucun périphérique Bluetooth apparié. Maintenez enfoncée “PLEASE PAIR YOUR PHONE PIN 0000” apparaît. Recherchez et sélectionnez le nom de ce modèle (KDC-X7 / KDC-BT7...
-
Page 57: Réglages Audio
RÉGLAGES AUDIO BLUETOOTH® Pendant l’écoute de n’importe quelle source... Internet radio via Bluetooth FUNCTION Appuyez sur le bouton de volume pour entrer [ Tournez le bouton de volume pour choisir [ AUDIO CONTROL ], puis appuyez Écoute de Pandora sur le bouton. Vous pouvez écouter Pandora sur votre périphérique Android via le Bluetooth de cet Tournez le bouton de volume pour sélectionner un élément (voir le appareil. - Page 58 RÉGLAGES AUDIO LOUDNESS LEVEL1 LEVEL2 SPEAKER SIZE : Sélectionner votre accentuations préférée pour les basses et hautes fréquences pour produire un son plus équilibré aux faibles niveaux de FRONT SIZE 3.5" 4" 4.75" 5" 6.5" 6.75" 7" 4×6 5×7 volume. ; : Annulation. 6×8 6×9 7×10...
-
Page 59: Réglages D'affichage
RÉGLAGES D’AFFICHAGE RÉGLAGES AUDIO REAR HPF R - HPF FRQ R - HPF SLOPE FRONT HPF (Reportez-vous a , R - HPF GAIN SUBWOOFER LPF SW LPF FRQ 30HZ 40HZ 50HZ 60HZ 70HZ 80HZ 90HZ 100HZ 120HZ 150HZ 180HZ 220HZ 250HZ Ajuste la fréquence de transition pour le caisson de grave (filtre... -
Page 60: Références
: Sélectionne de faire défiler automatiquement l’information sur l’affichage, Plus d’informations ou de la faire défiler une seule fois. ; : Annulation. Consultez aussi le site web suivant <www.kenwood.com/cs/ce/> pour: – Les dernières mise à jour du micrologiciel et la liste de compatibilité la plus récente RED1... - Page 61 Périphérique distant compatible pour la fonction NFC: • Il n’ e st pas possible d’utiliser un iPod lorsque “KENWOOD” ou “ ” est affiché sur l’iPod. Périphériques distants avec une fonction NFC (OS: Android™ 2.3.3 ou ultérieur, sauf Android 3.x).
- Page 62 RÉFÉRENCES À propos de la technologie HD Radio™ Nom de la source Informations sur l’affichage • En plus des stations principales ordinaires, les canaux HD2/HD3 offrent des nouveaux iPod ou ANDROID Titre de plage (Artiste) Titre de plage (Nom de l’album) Titre de plage (Date/Horloge)* programmes originaux sur le cadran FM.
-
Page 63: Guide De Dépannage
GUIDE DE DÉPANNAGE Symptôme Remède Symptôme Remède • • Le son ne peut pas être entendu. Ajustez le volume sur le niveau optimum. Les caractères corrects ne Cet appareil peut uniquement afficher les lettres majuscules, les • Vérifiez les cordons et les connexions. sont pas affichés (ex.: nom de chiffres et un nombre limité... - Page 64 Symptôme Remède • Lecture impossible en mode Assurez-vous que KENWOOD MUSIC PLAY APP est installé sur le La station iHeartRadio ne peut Si “Explicit Content” est coché pour [Account Settings] dans la version web BROWSE MODE périphérique Android. ( ...
- Page 65 GUIDE DE DÉPANNAGE Symptôme Remède Symptôme Remède • Aucun périphérique Bluetooth Faites de nouveau une recherche à partir du périphérique Bluetooth. “N/A VOICE TAG” Assurez-vous que la même voix que la voix enregistrée est utilisée. • n’ e st détecté. Réinitialisez l’appareil.
- Page 66 Avertissement Installation de l’appareil (montage encastré) • L’appareil peut uniquement être utilisé avec une alimentation de 12 V CC, à masse négative. • Déconnectez la borne négative de la batterie avant le câblage et le montage. • Ne connectez pas le fil de batterie (jaune) et le fil d’allumage (rouge) au châssis de la Réalisez les connexions voiture ou au fil de masse (noir) pour éviter les courts-circuits.
- Page 67 Si aucune connexion n’ e st faite, ne laissez pas le câble sortir de la languette. Manchon de montage À l’ e nceinte avant (gauche) Blanc/Noir Gris Marron Pour connecter au système de navigation Kenwood, À l’ e nceinte avant (droite) Gris/Noir (Câble de contrôle de la reportez-vous à votre manuel de navigation sourdine) Vert À...
-
Page 68: Spécifications
SPÉCIFICATIONS Plage de fréquences 87,9 MHz — 107,9 MHz (intervalle de 200 kHz) Standard USB USB 1.1, USB 2.0 (Vitesse maximale) Sensibilité utilisable (S/B = 26 dB) 8,2 dBf (0,71 μV/75 Ω) Système de fichiers FAT12/ 16/ 32 Seuil de sensibilité (DIN S/N = 46 dB) 17,2 dBf (2,0 μV/75 Ω) Courant d’alimentation maximum CC 5 V 1,5 A Réponse en fréquence (±3 dB) Diffusion HD Radio:... - Page 69 SPÉCIFICATIONS Puissance de sortie maximum 50 W × 4 Pleine Puissance de Largeur de Bande 22 W × 4 (avec moins de 1% DHT) Impédance d’ e nceinte 4 Ω — 8 Ω Action en tonalité Bande 1: 62,5 Hz ±9 dB Bande 2: 100 Hz ±9 dB Bande 3: 160 Hz ±9 dB Bande 4: 250 Hz ±9 dB Bande 5:...
-
Page 70: General
CONTENIDO ANTES DEL USO ANTES DEL USO IMPORTANTE • Antes de utilizar este producto y para asegurar su uso correcto, lea completamente este manual. En especial, lea y observe las PUNTOS BÁSICOS Advertencias y Precauciones incluidas en este manual. • Guarde el manual en un lugar seguro y accesible para futuras consultas. -
Page 71: Puntos Básicos
PUNTOS BÁSICOS Placa frontal Mando a distancia (RC-406) Rueda de volumen Ventanilla de visualización Sensor remoto (DO lo exponga a la luz solar brillante.) Retire la hoja aislante cuando se utilice por primera vez. Botón de liberación Fijar Desmontar Cómo reinicializar Cómo cambiar la batería Pulse dos veces el interruptor en menos de 5 segundos... -
Page 72: Procedimientos Iniciales
PROCEDIMIENTOS INICIALES Para ajustar la fecha Gire la rueda de volumen para seleccionar [ DATE FORMAT ] y luego púlsela. Gire la rueda de volumen para seleccionar [ DD/MM/YY ] o [ MM/DD/YY luego púlsela. Gire la rueda de volumen para seleccionar [ DATE SET ] y luego púlsela. -
Page 73: Sintonizador Hd Radio
F/W UP xx.xx YES : Se empieza a actualizar el firmware. ; : Se cancela (la actualización no se activa). RC-406) para seleccionar FM1/ FM2/ FM3/ AM. Para obtener información sobre cómo actualizar el firmware, consulte: www.kenwood.com/cs/ce/ Pulse / (o pulse / ... - Page 74 Sintonizador HD Radio™ Predeterminado: Sintonización de acceso directo (mediante RC-406) TUNER SETTING DIRECT Pulse para ingresar a la Sintonización de acceso directo. Pulse los botones numéricos para ingresar una frecuencia. IF BAND AUTO : Aumenta la selectividad del sintonizador para reducir las interferencias Pulse para realizar la búsqueda de una emisora o un canal.
-
Page 75: Cd / Usb / Ipod / Android
Cuando conecte un dispositivo Android, se mostrará “Press [VIEW] to install KENWOOD MUSIC PLAY APP”. Siga las instrucciones para instalar la aplicación. Antes de la conexión, también puede instalar la versión más reciente de la aplicación KENWOOD MUSIC PLAY en su dispositivo Android. - Page 76 BROWSE MODE : Controla el dispositivo Android desde esta unidad a través – No aplicable para iPod. de la aplicación KENWOOD MUSIC PLAY instalada en el dispositivo Android. Pulse / para realizar una búsqueda a un índice de búsqueda por salto...
-
Page 77: Aux
CD / USB / iPod / ANDROID Preparativos: Búsqueda directa de música (mediante RC-406) Seleccione [ ] para [ BUILT-IN AUX ]. ( DIRECT Pulse Pulse los botones numéricos para ingresar un número de pista/archivo. Comience a escuchar Pulse para realizar la búsqueda de música. -
Page 78: Pandora
Pandora® Preparativos: Crear y guardar una emisora nueva Instale la última versión de la aplicación Pandora en su dispositivo (iPhone/ iPod touch) y, a continuación, cree una cuenta e inicie sesión en Pandora. Pulse • Seleccione [ ] para [ PANDORA SRC ]. -
Page 79: Iheartradio
iHeartRadio® Pandora® Preparativos: Eliminación de emisoras Instale la última versión de la aplicación iHeartAuto en su dispositivo (iPhone/ iPod touch) y, a continuación, cree Mientras escucha PANDORA... una cuenta e inicie sesión en iHeartRadio. • Pulse la rueda de volumen para ingresar en Seleccione [ ] para [ IHEART SRC... -
Page 80: Radio Siriusxm
Radio SiriusXM® iHeartRadio® Solo SiriusXM® ofrece todo lo que quiere escuchar, en un solo lugar. Con más de 140 canales, incluida música Busque y sintonice la emisora sin publicidad además de lo mejor en deportes, noticias, entrevistas, comedia y entretenimiento. Bienvenido al Pulse mundo de la radio satelital. -
Page 81: Pulse Direct
Radio SiriusXM® Cuando se selecciona el modo de tecla Canal... Gire la rueda de volumen para seleccionar un canal y luego púlsela. Para En la placa frontal En el mando a distancia S / T Pulse para la búsqueda manual de un canal. Seleccionar un canal S / ... - Page 82 Radio SiriusXM® Predeterminado: TuneScan™ CHANNEL LOCK Para desbloquear los ajustes: Puede obtener una pequeña vista previa de las canciones que se perdió Gire la rueda de volumen para seleccionar un número. en cada uno de los canales de música SmartFavorite o el canal de música S / T Pulse para mover la posición de ingreso.
-
Page 83: Bluetooth
AUTO PAIRING ] está ajustado a [ ]. ( Asegúrelo mediante abrazaderas – La aplicación KENWOOD MUSIC PLAY está instalada en el dispositivo Android ( ) y la opción para cable (no suministradas) si fuera BROWSE MODE ] seleccionada ( necesario. - Page 84 BLUETOOTH® BLUETOOTH — Teléfono móvil Conectar con un dispositivo remoto a través de un solo toque (NFC) La comunicación de campo cercano (NFC) permite una comunicación inalámbrica de corto alcance entre la unidad y los dispositivos remotos. Al mantener un dispositivo remoto compatible con NFC cerca de la N-Mark situada en la unidad (rueda de volumen), la unidad y el dispositivo remoto se emparejarán y quedarán conectados por BLUETOOTH automáticamente.
- Page 85 BLUETOOTH® Predeterminado: Para En la placa frontal En el mando a distancia MIC GAIN –10 –4 — ( ): La sensibilidad del micrófono Mientras habla con la primera llamada entrante... aumenta a medida que aumenta el número. Responder a otra llamada Pulse Pulse NR LEVEL...
-
Page 86: Realizar Una Llamada
BLUETOOTH® Realizar una llamada NUMBER DIAL Gire la rueda de volumen para seleccionar un número (0 a 9) o un carácter ( , #, +). Puede realizar una llamada desde el historial de llamadas, la guía telefónica o mediante marcación del S / T Pulse para mover la posición de ingreso. -
Page 87: Otros Ajustes
BLUETOOTH® Predeterminado: Ajustes en la memoria BT MODE Almacenar un contacto en la memoria PHONE SELECT Selecciona el teléfono o el dispositivo de audio que desea conectar o desconectar. Puede guardar hasta 6 contactos en los botones numéricos ( Al conectarse, aparece “ ”... - Page 88 BLUETOOTH® BLUETOOTH — Audio Modo de prueba Bluetooth Puede comprobar la conectividad del perfil compatible entre el dispositivo Bluetooth y la unidad. • Asegúrese de que no haya ningún dispositivo Bluetooth emparejado. Pulse y mantenga pulsado Aparece “PLEASE PAIR YOUR PHONE PIN 0000”. Busque y seleccione el nombre de modelo de esta unidad (KDC-X7 / KDC-BT7...
-
Page 89: Ajustes De Audio
AJUSTES DE AUDIO BLUETOOTH® Mientras se escucha desde cualquier fuente... Radio Internet a través de Bluetooth FUNCTION Pulse la rueda de volumen para ingresar en [ Gire la rueda de volumen para seleccionar [ AUDIO CONTROL ] y luego Escuchar Pandora púlsela. - Page 90 AJUSTES DE AUDIO LOUDNESS LEVEL1 LEVEL2 SPEAKER SIZE : Selecciona los niveles preferidos de refuerzo para frecuencias altas y bajas para producir un sonido bien equilibrado a bajos niveles FRONT SIZE 3.5" 4" 4.75" 5" 6.5" 6.75" 7" 4×6 5×7 6×8 de volumen. ;...
-
Page 91: Ajustes De Visualización
AJUSTES DE VISUALIZACIÓN AJUSTES DE AUDIO REAR HPF R - HPF FRQ R - HPF SLOPE FRONT HPF (Consulte , R - HPF GAIN SUBWOOFER LPF SW LPF FRQ 30HZ 40HZ 50HZ 60HZ 70HZ 80HZ 90HZ 100HZ 120HZ 150HZ 180HZ 220HZ 250HZ... -
Page 92: Referencias
: Selecciona entre el desplazamiento automático de la información en pantalla Más información o un desplazamiento único. ; : Se cancela. Visite también el siguiente sitio web <www.kenwood.com/cs/ce/> para: – Últimas actualizaciones de firmware y lista de los últimos elementos compatibles RED1 RED2... - Page 93 Si la versión del sistema operativo del dispositivo remoto es posterior a Android 4.1.x, descargue e inicie la aplicación • El iPod no se puede utilizar si se visualiza “KENWOOD” o “ ” en el iPod. “NFC Easy Connect”. (“NFC Easy Connect” es una aplicación gratuita disponible en Google Play.) •...
- Page 94 REFERENCIAS Acerca de la Tecnología HD Radio™ Nombre de la fuente Información en pantalla • Junto a las principales emisoras tradicionales se encuentran los canales HD2/HD3, que iPod o ANDROID Título de la pista (Artista) Título de la pista (Nombre del álbum) proporcionan nuevas y originales programaciones en el dial FM.
-
Page 95: Localización Y Solución De Problemas
LOCALIZACIÓN Y SOLUCIÓN DE PROBLEMAS Síntoma Solución Síntoma Solución • • El sonido no se escucha. Ajuste el volumen al nivel óptimo. No se visualizan los caracteres Esta unidad visualiza sólo letras mayúsculas, números, y un número • Inspeccione los cables y las conexiones. correctos (por ej.: nombre del limitado de símbolos. - Page 96 Síntoma Solución • No se puede reproducir en Asegúrese de que KENWOOD MUSIC PLAY APP esté instalado en el No se pudo seleccionar Si se marca “Explicit Content” en [Account Settings] en la versión web de BROWSE MODE dispositivo Android. ( ...
- Page 97 LOCALIZACIÓN Y SOLUCIÓN DE PROBLEMAS Síntoma Solución Síntoma Solución • No se detecta ningún dispositivo Vuelva a buscar el dispositivo Bluetooth. “N/A VOICE TAG” Asegúrese de utilizar la misma voz que la etiqueta de voz registrada. • Bluetooth. Reinicialice la unidad. ( “NOT SUPPORT”...
- Page 98 Advertencia Instalación de la unidad (montaje en el tablero) • La unidad puede utilizarse solamente con una fuente de alimentación de 12 V CC con negativo a masa. • Desconecte el terminal negativo de la batería antes de realizar el cableado y el montaje.
- Page 99 Si no se ha realizado ninguna conexión, no deje que el cable sobresalga de la lengüeta. Manguito de montaje Blanco/Negro (izquierdo) Gris Marrón Para conectar el sistema de navegación Kenwood, Al altavoz delantero Gris/Negro (Silenciar cable del control) consulte el manual de navegación (derecho)
- Page 100 ESPECIFICACIONES Gama de frecuencias 87,9 MHz — 107,9 MHz (espacio 200 kHz) Estándar USB USB 1.1, USB 2.0 (Alta velocidad) Sensibilidad útil (Relación señal/ruido = 26 dB) 8,2 dBf (0,71 μV/75 Ω) Sistema de archivos FAT12/ 16/ 32 Sensibilidad de silenciamiento 17,2 dBf (2,0 μV/75 Ω) Corriente máxima de alimentación 5 V CC ...
- Page 101 ESPECIFICACIONES Potencia de salida máxima 50 W × 4 Potencia en todo el ancho de banda 22 W × 4 (a menos del 1 % THD) Impedancia del altavoz 4 Ω — 8 Ω Acción tonal Banda 1: 62,5 Hz ±9 dB Banda 2: 100 Hz ±9 dB Banda 3: 160 Hz ±9 dB Banda 4: 250 Hz ±9 dB Banda 5:...
- Page 104 • The Bluetooth® word mark and logos are registered trademarks owned by Bluetooth SIG, Inc. and any use of BE LIABLE FOR ANY DIRECT, INDIRECT, INCIDENTAL, SPECIAL, EXEMPLARY, OR such marks by JVC KENWOOD Corporation is under license. Other trademarks and trade names are those of their CONSEQUENTIAL DAMAGES (INCLUDING, BUT NOT LIMITED TO, PROCUREMENT OF respective owners.