Table of Contents
Advertisement
Available languages
Available languages
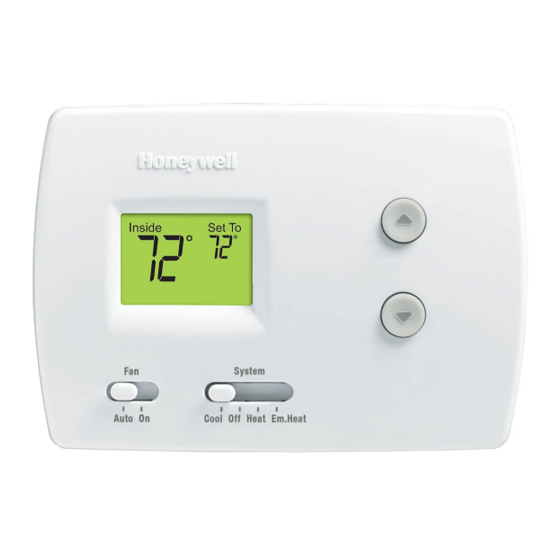
Non-Programmable
Non-Programmable
Digital
Digital Thermostat
Thermostat
Installation
Installation Instructions
Instructions
Wallplate installation
Remove the wallplate from the
thermostat by pulling from the bottom,
then follow directions below for
mounting.
1. Pull wires through wire hole.
2. Position wallplate on wall, level and
mark hole positions with pencil.
3. Drill holes at marked positions as
shown below, then tap in supplied
wall anchors.
4. Place wallplate over anchors, insert
and tighten mounting screws.
Drill 3/16"
holes for
drywall.
Drill 7/32"
holes for
plaster.
PRO
3000
HIPS
Wire hole
Series
PULL HERE
Mounting
screws
Advertisement
Table of Contents

Related Manuals for Honeywell Pro 3000 Series


Summary of Contents for Honeywell Pro 3000 Series
-
Page 1: Wallplate Installation
Non-Programmable Non-Programmable 3000 Digital Digital Thermostat Thermostat Series Installation Installation Instructions Instructions Wallplate installation Remove the wallplate from the thermostat by pulling from the bottom, then follow directions below for mounting. HIPS 1. Pull wires through wire hole. 2. Position wallplate on wall, level and mark hole positions with pencil. -
Page 2: Power Options
Power options Insert batteries for primary or backup power Keep wires in this Remove factory- shaded installed jumper only area for two-transformer systems. Connect C for primary AC power TH3110D Terminal block (optional if batteries are installed). shown Wiring terminal designations TH3110D TH3210D 24 Vac common. -
Page 3: Wiring Conventional And Heat Pump Systems
L terminal sends a continuous output when thermostat is set to Em. Heat. Connect Common connection must come from cool- to Honeywell zoning panels to switch the ing transformer. panel to Emergency Heat. Use either O or B terminals for changeover valve. -
Page 4: Thermostat Mounting
Fan operation settings (TH3110D only) Gas or Oil: For gas or oil heating systems, leave the fan operation switch in this factory-set position. (This setting is for systems that control the fan in a call for heat.) Electric or Heat Pump: Change the switch to this setting for heat pump or electric heat systems. -
Page 5: Installer Setup
Installer Setup Follow the procedure below to configure the thermostat to match the installed heating/cooling system, and customize feature operation as desired. To begin, press and hold the buttons until the display changes. • Press to change settings. • Press to advance to next function. -
Page 6: Installer System Test
Installer system test 1. Set SYSTEM switch to Heat. 2. Press to turn on and check systems (see table, below). 3. Press until systems turn off. 4. Set SYSTEM switch to Em Heat and repeat steps 2-3 above (TH3210D only). 5. -
Page 7: Troubleshooting
Troubleshooting If you have difficulty with your thermostat, please try the following suggestions. Most problems can be corrected quickly and easily. Display is • Check circuit breaker and reset if necessary. blank • Make sure power switch at heating & cooling system is • Make sure furnace door is closed securely. -
Page 8: Need Help
Need Help? For assistance with this product, please Pull at bottom visit customer.honeywell.com. to remove thermostat Or call Honeywell Customer Care toll- from free at 1-800-468-1502. wallplate. Turn thermostat over to find model number and date code. CAUTION: EQUIPMENT DAMAGE HAZARD Compressor protection is bypassed during testing. - Page 9 Non-Programmable Thermostat 3000 numérique non Digital Thermostat programmable Série Notice Installation Instructions D’installation Installation de la plaque murale Séparer la plaque murale du thermostat comme l’indique l’illustration ci-contre, puis suivre les directives d’installation. 1. Faire passer les fils par l’ouverture HIPS réservée aux fils.
-
Page 10: Options D'alimentation
Options d’alimentation Insert batteries for primary or backup power Garder les fils dans Retirer le cavalier installé cettezone en usine seulement si ombragée le système est à deux transformateurs Raccorder la borne C pour l’alimentation principale Bornier du TH3110D en c.a. (optionnel si des piles sont installées). Désignation des bornes TH3110D TH3210D... - Page 11 à Em. Heat. La connexion commune doit provenir du Raccorder aux tableaux de régulation transformateur de refroidissement. par zones Honeywell pour que le tableau Utiliser soit la borne O soit la borne B pour passe au chauffage d’urgence. la vanne d’inversion.
- Page 12 Réglage du ventilateur (TH3110D seulement) Gaz ou mazout : Dans le cas de systèmes de chauffage au gaz ou au mazout, laisser le sélecteur du ventilateur à la position réglée en usine. (Ce réglage convient aux systèmes qui commandent le fonctionnement du ventilateur lors d’une demande de chauffage.) Électricité...
- Page 13 Mode de configuration par l’installateur Suivre les directives ci-dessous pour configurer le thermostat pour qu’il corresponde au système de chauffage- refroidissement installé, et pour personnaliser son fonctionnement. Pour commencer, appuyer sur les touches les maintenir enfoncés jusqu’à ce que l’affichage change. • Appuyer sur la touche pour modifier les réglages.
- Page 14 Test du système par l’installateur 1. Régler le sélecteur SYSTEM à Heat. 2. Appuyer sur pour mettre les systèmes en marche et les vérifier (voir le tableau ci-dessous). 3. Appuyer sur jusqu’à ce que les systèmes se mettent à l’arrêt. 4.
-
Page 15: Dépannage
Dépannage Si vous éprouvez des difficultés, nous vous proposons d’essayer les solutions suivantes. La plupart des problèmes peuvent être corrigés rapidement et facilement. • S’assurer que le coupe-circuit n’est pas déclenché et le Rien n’apparaît à l’écran remettre en position de marche au besoin. • S’assurer que le bouton de marche-arrêt du système de chauffage ou de refroidissement est à... -
Page 16: Services À La Clientèle
Services à la plaque murale. clientèle de Honeywell en composant le 1-800-468-1502. Retourner le thermostat pour trouver le numéro de modèle et le code de date. -
Page 17: Installation Instructions
Non-Programmable Termostato 3000 digital Digital Thermostat no programable Series Instrucciones para Installation Instructions la instalación Instalación de la placa para pared Quite la placa para pared del termostato como se muestra a la izquierda, y luego siga las instrucciones para el montaje. 1. - Page 18 Opciones de fuentes de energía Coloque las baterías para suministro de energía principal o de respaldo. Mantenga los Quite el puente instalado cables en en la fábrica sólo en esta área los sistemas con dos sombreada transformadores. Se muestra el bloque de Conecte C para suministrar corriente CA terminales del modelo (opcional si las baterías están instaladas)
- Page 19 La conexión común debe provenir del la posición “Em. heat”. Conéctelo a los transformador de refrigeración. paneles de separación de Honeywell para Use terminales O o B para la válvula cambiar a “Em. heat”. inversora.
-
Page 20: Montaje Del Termostato
Configuraciones de funcionamiento del ventilador (TH3110D solo) Gas o aceite: Para sistemas de calefacción a gas o a aceite, deje el interruptor del ventilador en esta posición predeterminada de fábrica (esta posición es para los sistemas que controlan el ventilador cuando se necesita calefacción). -
Page 21: Configuración De Instalación
Configuración de instalación Siga el procedimiento que aparece a continuación para configurar el termostato a fin de que se corresponda con el sistema de calefacción y refrigeración instalado, y seleccione las funciones según lo desee. Para comenzar, pulse y mantenga presionados los botones hasta que cambie la pantalla. -
Page 22: Prueba Del Sistema
Prueba del sistema 1. Coloque el interruptor SYSTEM en la posición Heat. 2. Presione para encender los sistemas (vea el cuadro de abajo). 3. Presione hasta que se apague el sistema. 4. Coloque el interruptor SYSTEM en la posición Em Heat y repita los pasos 2 y 3 de arriba (TH3210D únicamente). -
Page 23: Localización Y Solución De Problemas
Localización y solución de problemas Si tiene dificultades con el termostato, intente seguir las sugerencias que se indican a continuación. La mayoría de los problemas pueden corregirse rápida y fácilmente. • Controle el interruptor de circuito y, si es necesario, La pantalla está... -
Page 24: Asistencia Al Cliente
Automatización y control desenlace Honeywell International Inc. 1985 Douglas Drive North Golden Valley, MN 55422 customer.honeywell.com ® Marca Registrada en los E.U.A © 2013 Honeywell International Inc. 69-1929EFS—03 M.S. Rev. 04-13 69-1929EFS-03 Impreso en EE. UU.