
Related Manuals for Sylvania SB379W


Summary of Contents for Sylvania SB379W
- Page 1 39 INCHES BLUETOOTH SOUND BAR SPEAKER WITH WIRELESS SUBWOOFER MODEL:SB379W INSTRUCTION MANUAL PLEASE READ CAREFULLY BEFORE OPERATING AND KEEP FOR FUTURE REFERENCE...
-
Page 2: Important Safety Instruction
IMPORTANT SAFETY INSTRUCTION The lighting flash with arrowhead symbol within an equilateral triangle is intended to alert the user to the presence of uninsulated “dangerous voltage within the product’s enclosure that may be of sufficient magnitude to constitute a risk of electric shock to persons. - Page 3 IMPORTANT SAFETY INSTRUCTION...
-
Page 4: Placing And Mounting
PLACING AND MOUNTING 1. Placing the device on table Ventilation When placing the Sound Bar on an entertainment center, bookshelf, or any type of enclosed space, be sure to allow space around the Sound Bar for ventilation. If the Sound Bar is enclosed in a tight space, without ventilation, heat generated from the Sound Bar could pr oduce a potential heat hazard. - Page 5 PLACING AND MOUNTING 2.2 Mounting to the brick wall supplied plastic insert supplied screw A. Mark the position of the mounting holes on the wall using a pencil. B. Drill appropriate holes by powerful electric drill on wall. C. Insert the supplied plastic inserts into the holes by hammer. D.
-
Page 6: Product Overview
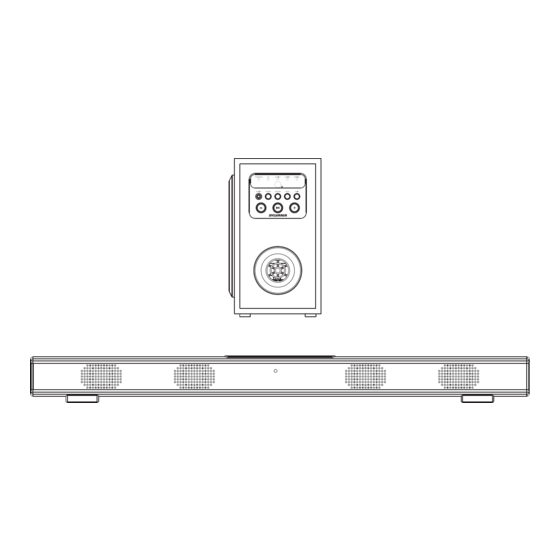
PRODUCT OVERVIEW SOUND BAR Indicator Speakers Speakers DC IN 13V WIRELESS SUBWOOFER DC IN Jack(13V) POWER/FM AUX IN 1 AUX IN 2 OPTICAL AUX IN 1 SCAN PAIR POWER SOURCE OPTICAL IN AUX IN 2 DC IN 18V OPTICAL IN AUX IN 2 DC IN 18V 1. -
Page 7: Remote Control
REMOTE CONTROL 1. SOURCE Butto POWER 2. Standby Button SOURCE (Previous) TUNE-(Tune Down) TUNE+ TUNE- (Next) TUNE+(Tune Up) 4. VOL-/+(Volume Down/Up) Mute Button ST/MO lay/Pause Button 7. ST/MO(Stereo/Mono) Button 8. EQ(Equalizer) BATTERY INSTALLATION - Before installation Remove and discard the insulation tab. Out of the box the Remote Control has a battery and will be usable after the tab is removed. -
Page 8: General Operation
GENERAL OPERATION 1. Insert both AC/DC Adapter plug of the wireless subwoofer and the sound bar into a conveniently located AC outlet having 100-240V~50/60Hz. 2. Press the Power button on the subwoofer or remote control to power on the unit. 3. - Page 9 FM RADIO Power on the unit and external sound bar, press the SOURCE Button repeatedly to turn to FM mode until the POWER/FM indicator color turns Red. 1. Press /TUNE- or TUNE+ button on remote control to search manually to play the searched station.
- Page 10 AUX IN 1 AUX IN 1 sources may include: · Personal audio players · Personal computers or laptops AUX IN 1 connection Connect a stereo 3.5mm jack cable between the headphone or LINE/ Audio output of the personal audio player and the AUX IN 1 jack on the unit. Power on the unit and external sound bar press SOURCE button repeatedly until the AUX IN 1 indicator color turns Red.
- Page 11 AUX IN 2 AUX IN 2 sources may include: · TV/DVD/VCR Connect the Audio cable to audio output jack(white jack=L, red jack=R) on DVD Player AUX IN 2 jack on the rear of the unit. 2. Power on the unit and external sound bar, press SOURCE button repeatedly until the AUX IN 2 indicator color turns Red.
- Page 12 OPTICAL IN 1. Power on the unit and sound bar and press SOURCE Button on unit or remote control to turn to Optical mode, and the Indicator color will be Red. 2. Follow the figure below to make the connections. (For PCM format only.) DVD or TV, etc.
- Page 13 (see your user manual). Turn on Bluetooth connectivity and make your device “discoverable”. 4. Choose “add a new Bluetooth device”or “setup Bluetooth device”on your device. SB379W It will start to search. Once “ ”shows on your device, select it.
-
Page 14: Troubleshooting Guide
TROUBLESHOOTING GUIDE Check the followings before requesting service SYMPTOM POSSIBLE CAUSE POSSIBLE SOULTION AC/DC adapter plug not No power Plug to the wall outlet. connected to the wall outlet Raise volume level by pressing the VOL Volume in minimum position (Volume) + button Play the music/movie in the connected The connected device is not... -
Page 15: Specifications
SPECIFICATIONS Output of AC/DC adaptor(Soundbar)........DC 13V 1.8A Output of AC/DC adaptor(Subwoofer)........DC 18V Power Consumption(Soundbar)................4x5W Power Consumption(Subwoofer)................50W Bluetooth Working Rang................Up to 10m FM 87.5 -108.0 MHz Radio Coverage................Remote Working Distance..............Up to 15 feet Bluetooth is a registered trademark of Bluetooth SIG Inc. Other trademarks and trade names are those of their respective owners. - Page 16 HAUT-PARLEUR BARRE DE 39 POUCES AVEC CAISSON DE BASSES SANS FIL MODÈLE : SB379W MODE D'EMPLOI LISEZ CE MODE D'EMPLOI AVEC ATTENTION ET CONSERVEZ-LE POUR RÉFÉRENCE FUTURE...
-
Page 17: Consignes De Sécurité Importantes
CONSIGNES DE SÉCURITÉ IMPORTANTES ATTENTION RISQUE DE CHOC ELECTRIQUE NE PAS OUVRIR ATTENTION : AFIN DE RÉDUIRE LES RISQUES DE CHOC ÉLECTRIQUE, NE PAS RETIRER LE COUVERCLE (OU LE CAPOT ARRIÈRE). NE CONTIENT AUCUNE PIÈCE REMPLAÇABLE PAR L'UTILISATEUR. CONTACTEZ LE PERSONNEL QUALIFIÉ POUR TOUTE OPÉRATION DE MAINTENANCE. - Page 18 Le symbole représentant un éclair dans un triangle signifie que cet appareil comporte des composants non isolés qui pourraient comporter une intensité suffisante pour causer des chocs électriques si le boîtier est ouvert. Le point d'exclamation dans un triangle attire votre attention sur des points importants de ce manuel concernant l'utilisation ou l'entretien de l'appareil.
- Page 19 CONSIGNES DE SÉCURITÉ IMPORTANTES Avant d'utiliser l'appareil, veuillez vous assurer de lire attentivement les instructions. Remarquez que ce sont des précautions générales et pourraient ne pas s'appliquer à votre appareil. Par exemple, cet appareil pourrait ne pas avoir la capacité d'être branché à une antenne extérieure.
- Page 20 contactez un électricien pour faire remplacer la prise obsolète. 10. Ne placez pas le cordon d'alimentation là où il risque d'être écrasé ou plié, principalement près des prises, prises de sécurité ou au point depuis lequel le câble sort de l'appareil. 11.
- Page 21 INSTALLATION ET MONTURE 1. Installation de l'appareil sur une table Aération Posez le produit sur un centre de divertissement, sur une étagère ou dans un espace clos en veillant à laisser un espace libre sur son pourtour pour assurer le bon déroulement de son aération.
-
Page 22: Présentation Du Produit
INSTALLATION ET MONTURE 2.2 Fixation sur un mur de briques e l l A. Utilisez un crayon pour marquer l'endroit des trous de fixation sur le mur. B. Percez les trous à l'aide d'une perceuse électrique puissante. C. Utilisez un marteau pour encastrer les chevilles en plastique dans les trous. D. -
Page 23: Caisson De Basses Sans Fil
CAISSON DE BASSES SANS FIL POWER/FM AUX IN 1 AUX IN 2 OPTICAL AUX IN 1 POWER SOURCE SCAN PAIR OPTICAL IN AUX IN 2 DC IN 18V OPTICAL IN AUX IN 2 DC IN 18V 1. VOYANTS 2. CAPTEUR DE LA TÉLÉCOMMANDE 3. -
Page 24: Installation De La Pile
TÉLÉCOMMANDE POWER SO U R C E TUNE+ TUNE- 1. BOUTON SOURCE 2. BOUTON VEILLE ST/MO (Précédent) FRÉQUENCE-(Réduire la fréquence) (Suivant) FRÉQUENCE+(Augmenter la fréquence) 4. VOL-/+(Augmentation/réduction du volume) Bouton muet Bouton Lecture/Pause 7. Bouton ST/MO (stéréo ou mono) 8. EQ (Égalisateur) INSTALLATION DE LA PILE -Avant installation Retirez puis jetez la languette d'isolation. -
Page 25: Fonctionnement Général
• Appuyez sur VEILLE pour mettre l'unité en marche -Pour éteindre le haut-parleur • Appuyez sur VEILLE sur la télécommande. REMARQUE : Si vous prévoyez de ne pas utiliser l'appareil pendant une période prolongée, débranchez-le. FONCTIONNEMENT GÉNÉRAL 1. Branchez les deux prises d'alimentation CA/CD du caisson de basses et du haut-parleur dans une prise secteur aussi proche que possible offrant les caractéristiques d'alimentation suivantes : 100-240V~50/60Hz. - Page 26 RADIO FM Allumez l'unité et la barre son externe, appuyez sur SOURCE de manière répétée pour activer le mode FM jusqu'à ce que le voyant ALIMENTATION/FM s'illumine en rouge. 1. Appuyez sur /FRÉQUENCE- ou FRÉQUENCE+ sur la télécommande pour rechercher manuellement la station désirée. 2.
- Page 27 POWER RESET Computer POWER/FM AUX IN 1 AUX IN 2 OPTICAL Connexion à la prise de sortie du dispositif audio externe (MP3, ordinateur, etc.) AUX IN 1 POWER SOURCE SCAN PAIR POWER/FM AUX IN 1 AUX IN 2 OPTICAL AUX IN 1 POWER SOURCE SCAN...
-
Page 28: Entrée Aux
ENTRÉE AUX 2 Les sources AUX IN 2 sont typiquement : · TV/DVD/Magnétoscope 1. Raccordez le câble audio à la prise de sortie (prise blanche=G, prise rouge=D) du lecteur DVD puis branchez-en l'autre extrémité à l'unité. 2. Allumez l'unité et la barre son externe, appuyez sur SOURCE de manière répétée jusqu'à... - Page 29 PRISE OPTICAL IN (Entrée optique) 1. Allumez l'unité et la barre son externe, appuyez sur SOURCE de manière répétée jusqu'à ce que le voyant Optical s'illumine en rouge. 2. Consultez l'illustration ci-dessous pour en savoir plus sur la connexion. (Pour format PCM seulement.) DVD ou TV, etc.
- Page 30 4. Sélectionnez « Ajouter un nouveau dispositif Bluetooth » ou « Configurer un dispositif Bluetooth ». Ce dernier commencera alors une recherche. Une fois « SB379W » trouvé, sélectionnez-le. Si votre dispositif vous demande un mot de passe, saisissez 0000. Si la tentative de jumelage échoue ou ne se termine pas à...
-
Page 31: Dépannage
DÉPANNAGE Consultez les solutions suivantes avant de faire appel au centre de services SYMPTÔME CAUSE POSSIBLE SOLUTION POSSIBLE Pas d'alimentation La prise CA/CD n'est pas Branchez la prise secteur. branchée dans la prise murale. Pas de son Le volume est au minimum Augmentez le volume en pressant sur le bouton VOL (Volume) +... -
Page 32: Caractéristiques
CARACTÉRISTIQUES Caractéristiques de l'adaptateur secteur CA/CD (barre son)..CD 13V 1,8A Caractéristiques de l'adaptateur secteur CA/CD (caisson de basses)..CD 18V Consommation (barre son)...................4x5W Consommation (caisson de basses)................50W Portée de fonctionnement optimale Bluetooth......jusqu'à 10 mètres Up to 10m Plage de bande radio................FM 87,5 -108,0 MHz Distance de fonctionnement de la télécommande........Jusqu'à...