Table of Contents
Advertisement
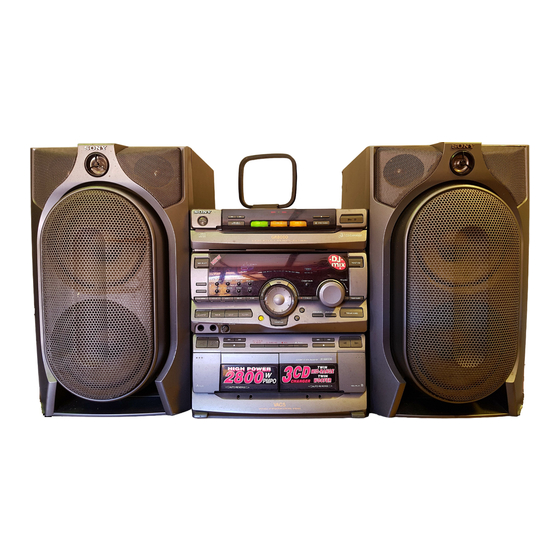
Mini Hi-Fi
Component
System
Operating Instructions
Owner's Record
The model and serial numbers are located on the rear panel. Record the serial
number in the space provided below. Refer to them whenever you call upon your
Sony dealer regarding this product.
Model No.
f
MHC-GR8000
©1997 by Sony Corporation
3-861-185-11(1)
Serial No.
Advertisement
Table of Contents

Related Manuals for Sony MHC-GR8000


Summary of Contents for Sony MHC-GR8000
-
Page 1: Operating Instructions
Owner’s Record The model and serial numbers are located on the rear panel. Record the serial number in the space provided below. Refer to them whenever you call upon your Sony dealer regarding this product. Model No. Serial No. MHC-GR8000... - Page 2 WARNING To prevent fire or shock hazard, do not expose the unit to rain or moisture. To avoid electrical shock, do not open the cabinet. Refer servicing to qualified personnel only. Do not install the appliance in a confined space, such as a bookcase or built-in cabinet.
-
Page 3: Table Of Contents
Table of Contents Getting Started Sound Adjustment Step 1: Hooking up the system ... 4 Adjusting the sound ......27 Step 2: Setting the time ......6 Selecting the audio emphasis ..... 28 Step 3: Presetting radio stations ..6 Adjusting the audio emphasis ... -
Page 4: Getting Started Step 1: Hooking Up The System
Getting Started Step 1: Hooking up the system Do the following procedure 1 to 5 to hook up your system using the supplied cords and accessories. AM loop antenna FM antenna Right speaker Left speaker Connect the speakers. Connect the FM/AM antennas. Connect the speaker cords to the Set up the AM loop antenna, then SPEAKER jacks of the same color. - Page 5 Inserting two size AA (R6) Set VOLTAGE SELECTOR to batteries into the remote position of your local power line voltage. Singaporean and Malaysian models VOLTAGE SELECTOR 220-230V 110-120V 240V With normal use, the batteries should last for about six months. When the remote no longer operates Other models the system, replace both batteries with new ones.
-
Page 6: Step 2: Setting The Time
Step 2: Setting the Step 3: Presetting time radio stations You must set the time before using the timer functions. You can preset up to 40 stations, 20 for FM, 10 for MW and 10 for SW. For Latin American models, you can preset up to 30 stations, 20 for FM and 10 for AM. - Page 7 To tune in a station with a weak Turn the jog dial. signal The frequency indication changes and Press TUNING MODE repeatedly to select scanning stops when the system tunes in “MANUAL” in step 2, then turn the jog dial a station.
-
Page 8: Connecting Optional Av Components
Connecting an MD deck for analog Connecting optional recording Make sure to match the color of the plugs and AV components the connectors. To listen to the sound of the connected MD deck, press FUNCTION repeatedly until “MD” appears. To enhance your system, you can connect To the audio output To the audio input optional components. -
Page 9: Connecting A Vcr
Connecting a VCR Connecting outdoor antennas Make sure to match the color of the plugs and the connectors. To listen to the sound of the Connect the outdoor antenna to improve the connected VCR, press FUNCTION repeatedly reception. until “VIDEO” appears. FM antenna To the audio output of the VCR Connect the optional FM outdoor antenna. -
Page 10: Basic Operations
Basic Operations Playing a CD Press § OPEN/CLOSE and place up to two CDs on the disc tray. — Normal play If a disc is not placed properly it will not be recognized. You can play up to three CDs in a row. With the label π... - Page 11 Tips Do this • Pressing ·∏ when the power is off Stop play Press π (p on the remote). automatically turns the power on and starts CD Pause Press ·∏ (P on the remote). playback if there is a CD in the tray (One Touch Press again to resume play.
-
Page 12: Recording A Cd
Recording a CD Press § OPEN/CLOSE and place a — CD Synchro Recording Then press again to close the disc tray. If the indicator for the tray you want to record is not lit green, press DISC SKIP The CD SYNCHRO button lets you record EX-CHANGE repeatedly so that it lights from a CD to a tape easily. -
Page 13: Listening To The Radio
Listening to the radio Press TUNING MODE repeatedly so that “PRESET” appears in the –– Preset Tuning display. MANUAL n AUTO n PRESET Preset radio stations in the tuner's memory first (see “Step 3: Presetting radio stations”). Turn the jog dial (or press = or POWER + on the remote) to tune in the desired preset station. -
Page 14: Recording From The Radio
Listening to the radio (continued) Recording from the radio To listen to non-preset radio stations Press TUNING MODE repeatedly so that You can record the radio program on a tape “MANUAL” appears in step 2, then tune in by calling up a preset station. You can use the station by turning the jog dial. -
Page 15: Playing A Tape
Press § EJECT and insert a blank Playing a tape tape into deck B. With the side You can use any type of tape, TYPE I ‚ º you want to · ª π (normal), TYPE II (CrO ) or TYPE IV (metal) , record facing since the deck automatically detects the tape forward... - Page 16 Playing a tape (continued) Tips • Pressing · or ª when the power is off automatically turns the power on and starts tape playback if there is a tape in the deck (One Touch Press § EJECT and insert a Play).
-
Page 17: Recording From A Tape
Recording from a Press ∏. Dubbing starts. tape — High-speed Dubbing To stop dubbing Press π on deck A or B. You can use TYPE I (normal) or TYPE II (CrO ) tapes. The recording level is Tips automatically adjusted. •... -
Page 18: The Cd Player Using The Cd Display
The CD Player Using the CD display Playing the CD tracks repeatedly You can check the remaining time of the –– Repeat Play current track or that of the CD. DISPLAY/DEMO POWER This function lets you repeat a single CD or all CDs in normal play, Shuffle Play and Program Play. -
Page 19: Playing The Cd Tracks In Random Order
To cancel Shuffle Play Playing the CD tracks Press PLAY MODE repeatedly until “SHUFFLE” or “PROGRAM” disappears in random order from the display. The tracks continue playing in their original order. –– Shuffle Play To select a desired CD Press DISC 1~3. You can play all the tracks on one CD or all CDs in random order. -
Page 20: Programming The Cd Tracks
Programming the CD Press one of the DISC 1~3 buttons to select a CD. tracks Turn the jog dial until the desired –– Program Play track appears in the display. You can make a program of up to 32 tracks Disc number from all the CDs in the order you want them to be played. -
Page 21: Playing Cds Without Interruption
Press Playing CDs without Check the program CHECK on the remote repeatedly. After the last interruption track, “CHECK END” appears. –– Non Stop Play Clear a track from CLEAR on the remote in the end stop mode. You can play CDs without pausing between Clear a specific CHECK on the remote tracks. -
Page 22: The Tape Deck
The Tape Deck Recording on a tape Press ∏ on deck B. Recording starts. manually Start playing the source to be You can record from CD, tape, or radio as recorded. you like. For example, you can record just the songs you want or record from the middle of the tape. -
Page 23: Recording A Cd By Specifying Track Order
Recording a CD by Place a CD and insert a blank tape into deck B. specifying track order Press FUNCTION repeatedly until — Program Edit “CD” appears in the display. You can record tracks from all the CDs in the Press PLAY MODE repeatedly until order you want. - Page 24 Recording a CD by specifying track Selecting tape length order (continued) automatically — Tape Select Edit Press ∏ on the remote to insert a You can check the most suitable tape length pause at the end of side A. for recording a CD. Note that you cannot use “P”...
-
Page 25: Dj Effects
DJ Effects Looping part of a CD Flashing part of a CD — Loop — Flash With the loop function, you can repeat part of With the flash function, you can “flash” the a CD during playback. This lets you create CD sound during playback. -
Page 26: Waving The Equalizer
Waving the equalizer — Wave With the Wave function, you can fluctuate the graphic equalizer automatically. This effect can be used with any source, but it cannot be recorded. WAVE jog dial POWER π ·∏ § Press and hold WAVE to start the Wave function, and release to resume normal listening. -
Page 27: Sound Adjustment Adjusting The Sound
Sound Adjustment Notes Adjusting the sound • With some songs, the music will sound distorted when you use the DBFB system with the graphic equalizer if the bass is too strong. Adjust the bass slowly while listening to music so that you can You can reinforce the bass, create a more monitor the effect of the adjustment. -
Page 28: Selecting The Audio Emphasis
To cancel the effect Selecting the audio Press EFFECT ON/OFF repeatedly (or MUSIC MENU ON/OFF on the remote) so emphasis that “EFFECT OFF” appears in the display. The audio emphasis menu lets you select the Music menu options sound characteristic according to the sound “SUR ”... -
Page 29: Adjusting The Audio Emphasis
To change the equalizer display Adjusting the audio Each time you press SPECTRUM ANALYZER, the equalizer display changes to emphasis show one of the four displays below. Spectrum analyzer pattern 1 You can adjust the audio emphasis using the graphic equalizer and surround effect. VOLUME Adjusting the graphic equalizer... -
Page 30: Activating The Surround Effect
Adjusting the audio emphasis Activating the surround (continued) effect You can enjoy the surround effect. Turn the jog dial to adjust level. POWER VOLUME π ·∏ § Repeat steps 2 and 3. Press ENTER/NEXT when finished. Note If you choose another menu audio emphasis (other º... -
Page 31: Making A Personal Audio Emphasis File
To call up the personal file Making a personal 1 Press P FILE (or MUSIC MENU V/v on the remote repeatedly) to display the last audio emphasis file selected personal file. 2 Use the jog dial (or press MUSIC MENU —... -
Page 32: Other Features Singing Along: Karaoke
Other Features Adjusting the microphone level Singing along: (Middle Eastern model only) Turn ECHO LEVEL to adjust the echo effect. Karaoke To cancel the echoing, turn ECHO LEVEL to You can sing along with any stereo CD or When you are done tape by turning down the singer’s voice. -
Page 33: Falling Asleep To Music
Press r. Falling asleep to music Press ∏. — Sleep Timer Press · to start playing the CD player (or tape deck A). You can let the system turn off at the preset Playback starts. Start singing along with time, so you can sleep to the music. You can the music. -
Page 34: Waking Up To Music
Waking up to music Set the time to start playback. Turn jog dial to set the hour, then press — Wake-up Timer ENTER/NEXT. The minute indication starts flashing. You can wake up to music at a preset time every day. Make sure you have set the clock (see “Step 2: Setting the time”). -
Page 35: Timer-Recording Radio Programs
To check the setting Timer-recording radio Press TIMER SELECT and turn the jog dial to select the respective mode (DAILY 1 or programs DAILY 2), then press ENTER/NEXT. To change the setting, start over from step 1. To cancel the timer operation To timer-record, you must preset the radio station (see “Step 3: Presetting radio Press TIMER SELECT and turn the jog dial to... - Page 36 Timer-recording radio programs To check the setting (continued) Press TIMER SELECT and turn the jog dial to select “REC”, then press ENTER/NEXT. To change the setting, start over from step 1. Turn jog dial to select REC, then To cancel the timer operation press ENTER/NEXT.
-
Page 37: Additional Information Precautions
Remove the CD and leave the system turned on for about an hour until the moisture evaporates. • When you move the system, take out any discs. If you have any questions or problems concerning your stereo system, please consult your nearest Sony dealer. -
Page 38: Troubleshooting
Should any problem persist, consult your The tape is very elastic. Do not change the tape nearest Sony dealer. operations such as play, stop, and fast-winding etc. frequently. The tape may get entangled in the tape General deck. - Page 39 Speakers There is severe hum or noise. •A TV or VCR is placed too close to the Sound comes from one channel or stereo system. Move the stereo system away from the TV or VCR. unbalanced left and right volume. •Check the speaker connection and The sound from the connected source is speaker placement.
-
Page 40: Tape Deck
Troubleshooting (continued) Tuner Severe hum or noise (“TUNED” or Tape Deck “STEREO” flashes in the display. •Adjust the antenna. The tape does not record. •The signal strength is too weak. Connect •No tape in the cassette holder. the external antenna. •The tab has been removed from the A stereo FM program cannot be received in cassette (see “To save a tape... -
Page 41: Specifications
1% THD, AC 120 V) Frequency response 60 – 13,000 Hz (±3 dB), 105 + 105 watts (DOLBY NR OFF) using Sony TYPE I cassette (6 ohms at 1 kHz, 1% THD, 60 – 14,000 Hz (±3 dB), AC 220 V/AC 110 V) - Page 42 Antenna AM loop antenna Supplied accessories: AM loop antenna (1) External antenna terminal Remote RM-SD70 (1) Sony SUM-3 (NS) batteries (2) FM lead antenna (1) Speaker cords (2) Optional accessories: Front Speaker pads (8) Design and specifications are subject to change...
-
Page 43: Index
Index Saving recordings 37 Normal Play 10 Selecting the audio emphasis Setting the time 6 One Touch Play 11, 14, 16 Shuffle Play 19 Adjusting Sleep Timer 33 the audio emphasis 29 P , Q Sound adjustment 27 the sound 27 Speakers 4 Personal file 31 the volume 11, 13, 16... - Page 44 Sony Corporation Printed in Malaysia...