Table of Contents
Advertisement
Quick Links
Advertisement
Table of Contents

Related Manuals for TrekStor SurfTab xiron


Summary of Contents for TrekStor SurfTab xiron
- Page 1 SurfTab xiron 10.1 3G ® OPERATING INSTRUCTIONS...
-
Page 2: Table Of Contents
Contents 1) About the SurfTab ……………………………………………………… 4 2) Safety information ……………………………………………………… 5 Operational safety ………………………………………………………… 5 Repair …………………………………………………………………… 6 Intended operating conditions …………………………………………… 7 Power supply ……………………………………………………………… 7 Care and maintenance …………………………………………………… 7 Notes on devices with a suction cup……………………………………… 7 Information on the memory capacities indicated …………………………... - Page 3 Activating the data connection …………………………………………… 19 Customising the 3G function …………………………………………… 19 Removing the SIM card …………………………………………………… 20 15) Setting up/removing an email account ……………………………… 21 Setting up an email account ……………………………………………… 21 Removing an email account ……………………………………………… 21 16) Installing/uninstalling apps …………………………………………… 22 Downloading and installing apps …………………………………………...
-
Page 4: About The Surftab
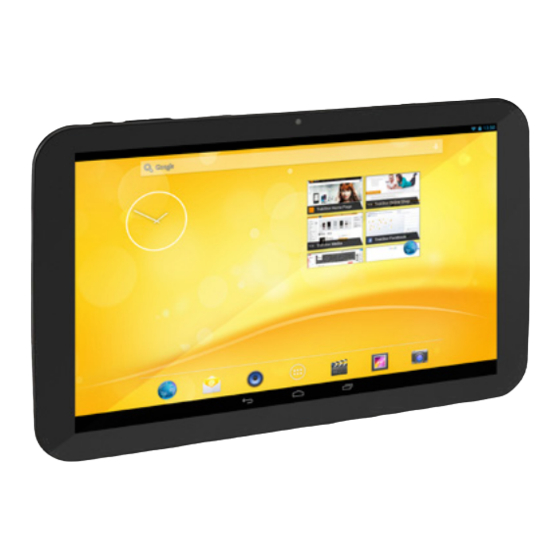
Visit www.trekstor-onlineshop.de for additional products and accessories. 1) About the SurfTab The TrekStor SurfTab xiron 10.1 3G is a tablet PC with IPS touch screen for surfing the Internet, using apps and playing music, videos and games. Only use the device for its intended purpose. The manufacturer is not liable for damages resulting from improper use. -
Page 5: Safety Information
2) Safety information These instructions use the following warning symbols and key words: DANGER Indicates possible danger to life and/or danger of severe, irreversible injuries. CAUTION Follow instructions to avoid injuries and material damage. WARNING Follow instructions to avoid material damage. NOTE Further information about the use of the device. -
Page 6: Repair
DANGER Do not cover the device or charger during operation or while charging. This may cause the device/charger to overheat and potentially catch fire! CAUTION This device can generate high sound volumes. Never listen at high volumes for long periods. Doing so can result in immediate or gradual hearing damage. -
Page 7: Intended Operating Conditions
Intended operating conditions Protect the device from extremely high or low temperatures and fluctuations in temperature. Use it at an ambient temperature between 10º C and 40º C. Do not place the device near a heat source and protect it from direct sunlight. Never expose the device to humidity, condensation or moisture. -
Page 8: Technical Specifications
Camera: 5.0 MP (auto focus) / 2.0 MP Operating system: Android™ 4.2.2 (Jelly Bean) 4) Package contents • TrekStor SurfTab xiron 10.1 3G • USB cable (Micro-USB/USB-A) • USB host adapter cable (Micro-USB/USB-A (female)) • Power adapter (100 V – 240 V) •... -
Page 10: Controls And Connections
5) Controls and connections A) Rear camera B) Flash/video light C) microSD/SDHC card slot D) Microphone E) Audio out socket F) On/off switch G) Volume control + H) Volume control – Micro SIM card slot Micro-USB socket K) Loudspeaker Front camera 6) Charging the SurfTab Please fully charge your SurfTab before you use it for the first time. -
Page 11: Elements On The Home Screen
8) Elements on the home screen A) Status display and quick menu (swipe the status display on the right downwards to see the quick menu) B) Google™ Search C) Microphone D) Quick start bar E) Back to the previous screen F) Applications menu G) Home icon (back to the home screen) H) View all open elements... -
Page 12: Using The Touch Screen
9) Using the touch screen Scrolling The home screen of your SurfTab extends two pages to the right and left of the middle window. To reach these pages, slide your finger from left to right (or the reverse) across the screen. In an open window (for example, in a menu, browser, app or in folders), you "drag"... -
Page 13: Selecting An Element
Selecting an element To open an element or select an option, briefly touch the icon you require with your finger. If you want to close a recently used element (app, widget, menu), tap the display of all open elements. Place your finger on the element that you want to close and drag the element down to close it. -
Page 14: Enlarging And Reducing The View
Enlarging and reducing the view To enlarge the display, move two fingers apart on the screen or tap the display twice in quick succession. Conversely, move two fingers towards each other on the screen to reduce the display again. Using the display keyboard If you tap a text field in order to enter text (for example, a Web address), the display keyboard appears. -
Page 15: Personalising The Home Screen
10) Personalising the home screen You can set up the home screen (as well as the four additional pages) according to your wishes by adding or removing app shortcuts and widgets and altering the background. Adding apps to the home screen Tap the applications menu in the quick start bar on the home screen. -
Page 16: Changing The Screen Background
Changing the screen background Touch an empty area of the screen background until a window with the message "C " appears. hoose WallpapeR fRom b) Now tap the relevant icon to choose which source you would like to select the background motif from. Tap the desired picture in the selected folder and confirm your choice with "[h ]". -
Page 17: Connecting To The Internet Via Wifi
d) Confirm with "s ". The lock screen appears. et up noW As soon as you have unlocked the screen, a configuration assistant will start. This assistant will guide you through the process of setting up a new user account. You arrive at the individual user accounts by tapping the relevant icon at the bottom of the lock screen and then unlocking the screen. -
Page 18: Connecting To The Internet Via 3G
14) Connecting to the Internet via 3G The 3G function on your SurfTab means that you are independent of available WiFi networks and can connect to the Internet via a data card. Inserting the SIM card Switch off your SurfTab completely. The card will not be recognised if you only put the SurfTab in standby mode! b) Press the supplied SIM removal tool or a bent paper clip into the eject mechanism (small round opening) next to the SIM card slot. -
Page 19: Activating The Data Connection
e) Now push the tray with the inserted micro SIM card into the micro SIM card slot. When you hold the tray, the golden contacts on the micro SIM card should face the rear side of the device. The illustration on the SIM card slot on the rear side of the device provides further assistance in inserting the SIM card. -
Page 20: Removing The Sim Card
Default Settings The mobile communications provider via which your data connection is set up is displayed here. You can change this setting under "s " "m ..." "m ettings obile " "n " "s ". netWoRks etWoRk opeRatoRs elRCt manually You can call up a list of all available mobile communications providers. -
Page 21: Setting Up/Removing An Email Account
15) Setting up/removing an email account Setting up an email account Make sure that your SurfTab is connected to the Internet. b) Tap the email icon in the quick start bar or in the applications menu. Enter a valid email address in the upper input field and the associated password in the lower input field. -
Page 22: Installing/Uninstalling Apps
16) Installing/uninstalling apps Downloading and installing apps Thanks to Google Play™ access, you can add apps, widgets, programs and eBooks to your SurfTab to supplement those that come pre-installed. The Play Store app is already installed on your SurfTab. You can find it on the applications menu. -
Page 23: Using The Camera
17) Using the camera Tap the camera icon in the applications menu or in the quick start bar. The following screen appears: Taking a photo Several modes are available for taking a photo. Smile recognition (15 A) The camera automatically takes a photo when it recognises a smiling face. Panorama mode (15 B) Here you can create a wide panorama picture. -
Page 24: Editing Images
Face recognition (15 C) The camera recognises human faces and automatically focuses as soon as it has recognised a face. The focus will follow the recognised face; you merely need to press the shutter release button (15 I). In this mode, you can switch between the rear and front cameras. To do so, briefly tap the photo camera symbol with the arrow (15 G). -
Page 25: Recording A Video
b) Tap the image that you would like to edit. The following symbol appears at the bottom left of the screen: Tap this symbol. Various options for the image, including exposure options, are now displayed beneath the image. d) Tap the option that you require and save your change by tapping “Back to the previous screen”. -
Page 26: Connecting Other Devices
18) Connecting other devices Connecting the SurfTab to a computer Connect the SurfTab to your computer with the micro USB cable provided. b) A short moment later, the memory of the SurfTab will be shown as an external drive in your computer’s file explorer. From here you can load, copy, delete or move files as usual. -
Page 27: Connecting To A Television Via Miracast
Connecting to a television via Miracast™ Miracast technology is a peer-to-peer standard for image transfer. The SurfTab supports this standard and enables wireless transfer of image and sound from the SurfTab to a WiFi and Miracast-enabled television device. The SurfTab can connect to your television via Miracast only if the television also supports Miracast technology. -
Page 28: Activating Standby Mode
Switch off your SurfTab. b) Press the "volume +" button and keep it pressed. Please also press the on/off switch and keep it pressed. d) As soon as the TrekStor logo appears, release the on/off switch. -
Page 29: Switching Off The Surftab
e) A little while later, the recovery mode menu is displayed. You can now release the "volume +" button. Use the volume control buttons to navigate through the menu, and use the on/off switch to select an option. To restore the SurfTab to its factory state, select the " "... -
Page 30: Notes On Copyright And Trademarks
Google Permissions. The Bluetooth word mark and logos are registered trademarks owned by Bluetooth SIG, Inc. and any use of such marks by TrekStor GmbH is under license. Other trademarks and trade names are those of their respective owners. -
Page 31: Notes On Disposal
23) Notes on disposal Disposal This symbol indicates that this product and/or the battery used contain components that are harmful to the environment and/or human health if not disposed of correctly. As the owner of a used electrical or electronic device, you may not dispose of this device together with unsorted domestic waste. - Page 32 Product: SurfTab xiron 10.1 3G (ST10416-2) I I I I I I I I I I I I I I I I I I I I I I I I I I I I I I I I I I I I I I I I I I I I I I I I I I I I I I I I I I I I I I I I I I I I I I I I I I I I I I I I I I I I I I I I I I I I I I I I I I I I I I I I I I I I I I I I I I I I I I I I I I I I I I I I I I I I I I I I I I I I I I I I I I I I I I I I I I I I I I I I I I I I I I I I I I I I I I I I...
- Page 33 Supportinformationen Sollten Sie Fragen zu Ihrem TrekStor Produkt haben, gehen Sie bitte wie folgt vor: • Überprüfen Sie anhand der Produkteigenschaften und der Funktionen Ihres Gerätes (auf der Verpackung ersichtlich), ob Sie die richtigen Einstellungen vorgenommen haben. • Lesen Sie aufmerksam die gesamte Bedienungsanleitung.