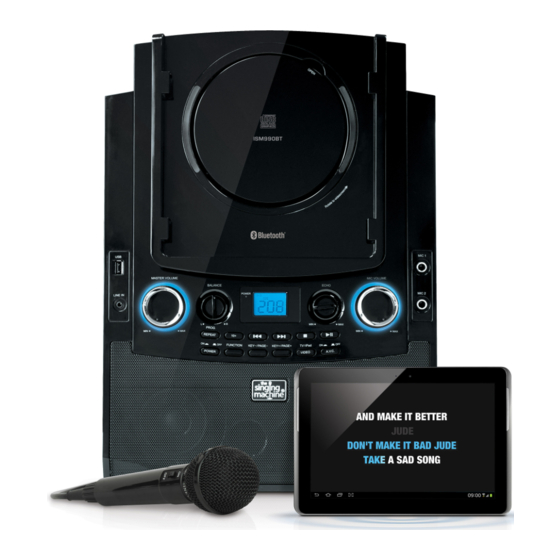
The Singing Machine Classic iSM990BT Instruction Manual
Hide thumbs
Also See for Classic iSM990BT:
- Instruction manual (23 pages) ,
- Instruction manual (22 pages) ,
- Instruction manual (11 pages)
Table of Contents
Advertisement
Available languages
Available languages
Quick Links
Advertisement
Table of Contents

Related Manuals for The Singing Machine Classic iSM990BT


Summary of Contents for The Singing Machine Classic iSM990BT
- Page 1 Instruction Manual Manual de Instrucciones iSM990BT Please read before using this unit. THE SINGING MACHINE® is a registered trademark of The Singing Machine Company, Inc. THE SINGING MACHINE® es marca registrada de The Singing Machine Company., Inc.
- Page 2 This device complies with Industry Canada licence-exempt RSS standard(s). Operation is subject to the following two conditions: (1) this device may not cause interference, and (2) this device must accept any interference, including interference that may cause undesired operation of the device. Le présent appareil est conforme aux CNR d'Industrie Canada applicables aux appareils radio exempts de licence.
-
Page 3: Location Of Controls
Location of Controls Front 1. CD Compartment 15. KEY –/PAGE – Button (for MP3 and MP3+G only) 2. Cradle 3. USB Port 16. CD OPEN Area 4. LINE IN Jack Mic 1 Jack 5. MASTER VOLUME Control Mic 2 Jack 6. - Page 4 Location of Controls Rear 1. Handle 4. AUDIO OUT Left Jack 2. VIDEO OUT Jack 5. DC Jack 3. AUDIO OUT Right Jack Display 1. PLAY/PAUSE, REPEAT ONE, REPEAT 3. TRACK NUMBER/FUNCTION MODES FOLDER, REPEAT ALL 2. MP3(MP3+G) PLAYBACK, CD(CD+G) PLAYBACK, USB FUNCTION MODE, PROGRAM ON E - 3...
- Page 5 Connection Connecting the Unit to an External TV, Stereo, etc. Your Singing Machine is designed to connect to your TV the same way you would connect most video cameras, DVD players or video game consoles, as follows: Connect the Audio/Video cable’s REAR VIEW OF SINGING MACHINE yellow plug to the yellow VIDEO VIDEO OUT...
- Page 6 Connection Insert the small end of the AC adapter into the DC IN jack on the rear of the unit. Insert the other end (with the 2 blades) into a conveniently located AC outlet having 110-240V AC, 50/60Hz. Notes: • Only use the supplied AC adapter. Failure to do so may cause a fire or damage the unit.
-
Page 7: Operation
Operation Playing a CD (with or without MP3+G files), CD+G or USB Drive Connect the unit as described previously. Press the Power ON/OFF button to turn the unit on; the Power indicator will light. Lift open the CD door and insert a CD (with standard or MP3+G files) or a CD+G by gently pressing it on the center spindle. - Page 8 Operation Playing a CD (with or without MP3+G files), CD+G or USB Drive Adjust the volume to a comfortable level using the MASTER VOLUME control. Notes: • Never place anything other than a CD in the compartment, as foreign objects can damage the unit.
- Page 9 Operation Playing a CD (with or without MP3+G files), CD+G or USB Drive Press the AVC (Auto Voice Control) ON/OFF button to the On position and the vocals on a multiplex recording will be muted as soon as the singer begins singing into the microphone.
- Page 10 Operation Playing a CD (with or without MP3+G files), CD+G or USB Drive SKIP 10 TRACKS: During playback, you can press the 10+ button to skip foward 10 tracks. REPEAT: To repeat the current track, press the PROGRAM/REPEAT button once during playback. REP1 will appear in the display and the current track will be repeated.
- Page 11 Operation Playing a CD (with or without MP3+G files), CD+G or USB Drive PAUSE: During playback, if you wish to pause the disc momentarily, press the Play/Pause button; “ ” will appear in the display. Press again to resume normal playback. Note: Pausing the unit while playing a CD+G may distort the lyrics on the screen.
- Page 12 Operation Using a Bluetooth Device Connect the unit as described previously. Press the Power ON/OFF button to turn the unit on; the Power indicator will light. Repeatedly press the FUNCTION button until “bt” blinks in the display to select the Bluetooth mode. “bt”...
- Page 13 Operation Using a Bluetooth Device PLAY/PAUSE: Press the Play/Pause button to start playback. Make sure the Bluetooth device has its volume set to mid range, then adjust the volume to a comfortable level using the MASTER VOLUME control. Note: If connected to a TV or other audio source, adjust the volume of the TV using its own volume control.
- Page 14 Operation Using a Bluetooth Device BALANCE: Balance allows you to eliminate the lead singer’s voice by rotating the knob to the left when playing a multiplex recording, or eliminate the music by rotating the knob to the right. Note: This feature only works with multiplex media.
- Page 15 Operation Using the LINE IN Jack Connect the unit as described previously. Press the Power On button to turn the unit on; the Power indicator will light. Connect the external unit to the LINE LINE IN IN jack. AUDIO OUTPUT / HEADPHONE JACK Notes: YOUR iPHONE/iPOD OR...
- Page 16 Operation Using the LINE IN Jack Adjust the Echo and Balance effects as shown on pages E - 7 and E - 8. Press the Power ON/OFF button to turn the unit off; the Power indicator will turn off. E - 15...
- Page 17 Machine Download Store. • Remove (eject) the USB flash drive from your computer. Download your selected purchase(s) Turn on the Singing Machine and connect the USB from the Singing Machine Digital Locker flash drive. to your USB flash drive. Insert the USB flash drive as shown on •...
-
Page 18: Care And Maintenance
Care and Maintenance Care for Compact Discs Treat the compact disc carefully. Handle the compact disc only by its edges. Never allow your fingers to come in contact with the shiny, unprinted side of the compact disc. Do not attach adhesive tape, stickers, etc. to the compact disc label. -
Page 19: Troubleshooting Guide
Troubleshooting Guide Should this unit exhibit a problem, check the following before seeking service: No Power • Power is not on; press the Power ON/OFF button to turn power on. • Make sure the unit is connected to AC power. No Sound –... -
Page 20: Specifications
Specifications AUDIO Output Power (Maximum) ................10W + 10W (RMS) 10% THD Output Impedance ..........................8 Ohms CD PLAYER Frequency Response ......................100 Hz-20 KHz Signal to Noise Ratio..........................50 dB Sampling System ....................8 Times Oversampling Disc Diameter ........................4.72" (120 mm) .......................... - Page 21 Advertencias ADVERTENCIA: PARA EVITAR INCENDIOS O PELIGROS DE DESCARGA, PRECAUCIÓN NO EXPONGA ESTA UNIDAD A LA LLUVIA O HUMEDAD. RIESGO DE DESCARGA ELÉCTRICA NO ABRIR AVISO DE LA FCC: Este equipo puede generar o usar energía de radio frecuencia. Los cambios o modificaciones realizados en el aparato pueden provocar PRECAUCIÓN: PARA REDUCIR EL RIESGO DE DESCARGAS ELÉCTRICAS, NO QUITE interferencia perjudicial, a menos que dichas modificaciones estén autorizadas en el manual de instrucciones.
- Page 22 Ubicación de controles Delantero Compartimiento del CD 15. Botón CLAVE –/PÁGINA – (KEY–/PAGE–) (solo para MP3 y MP3+G) Soporte Puerto USB Área de APERTURA DE CD Entrada de LINE IN Entrada para micrófono 1 Entrada para micrófono 2 Control de VOLUMEN PRINCIPAL (MASTER VOLUME) Control de VOLUMEN DE MICRÓFONO Control de BALANCE...
- Page 23 Ubicación de controles Reverso 1. Manija 4. SALIDA DE AUDIO (Izquierda) 2. SALIDA DE VIDEO 5. Conector para CC 3. SALIDA DE AUDIO (Derecha) Pantalla REPRODUCIR/PAUSAR (PLAY/PAUSE), MODO PARA FUNCIÓN USB (USB FUNCTION REPETIR UNA (REPEAT ONE), REPETIR MODE), PROGRAMACIÓN ACTIVADA CARPETA (REPEAT FOLDER), REPETIR TODAS (PROGRAM ON) (REPEAT ALL)
- Page 24 Conexión Conexión de la unidad a un televisor externo, estéreo, etc. Singing Machine está diseñada para conectarse al televisor del mismo modo que conecta la mayoría de las cámaras de video, los reproductores de DVD o las consolas de videojuegos, de la siguiente manera: VISTA POSTERIOR DE LA SINGING MACHINE SALIDA DE VIDEO...
- Page 25 Conexión Introduzca el extremo pequeño del adaptador de CA en el conector de entrada de CC ubicado en la parte trasera de esta unidad. Introduzca el otro extremo (con 2 clavijas) en un tomacorriente con CA, correctamente ubicado y que posea 110-240V de CA, 50/60Hz.
- Page 26 Funcionamiento Reproducción de un CD (con o sin archivos MP3+G), CD+G o dispositivo USB Conecte la unidad como se describió previamente. Oprima el botón de ENCENDIDO/APAGADO (ON/OFF) para encender la unidad. El indicador de Encendido/Apagado (Power) se iluminará. Abra el compartimiento de CD e introduzca un CD (con archivos estándar o MP3+G) o un CD+G presionándolo cuidadosamente en el husillo central.
- Page 27 Funcionamiento Reproducción de un CD (con o sin archivos MP3+G), CD+G o dispositivo USB Ajuste el volumen a un nivel conveniente, usando el control de VOLUMEN PRINCIPAL (MASTER VOLUME). Notas: • Nunca coloque nada que no sea un CD en el compartimiento, como por ejemplo objetos extraños que puedan dañar la unidad.
- Page 28 Funcionamiento Reproducción de un CD (con o sin archivos MP3+G), CD+G o dispositivo USB Oprima el botón de ENCENDIDO/ APAGADO (ON/OFF) de AVC (control de voz automático) para encender esta opción y silenciar las voces en grabación multiplex en cuanto el cantante comience a cantar en el micrófono.
- Page 29 Funcionamiento Reproducción de un CD (con o sin archivos MP3+G), CD+G o dispositivo USB SALTAR 10 PISTAS: Durante la reproducción puede oprimir el botón 10+ para saltar 10 pistas. FUNCIÓN REPETIR: Para repetir la pista actual, oprima una vez PROGRAMAR/ REPETIR (PROGRAM/REPEAT) durante la reproducción.
- Page 30 Funcionamiento Reproducción de un CD (con o sin archivos MP3+G), CD+G o dispositivo USB PAUSA: Durante la reproducción, si desea pausar momentáneamente el disco, oprima el botón Reproducción/Pausa (Play/Pause) ; “ ” aparecerá en la pantalla. Oprima nuevamente para reanudar la reproducción normal. Nota: Si pausa la unidad mientras reproduce un CD+G esto puede distorsionar las letras de canciones que aparecen en pantalla.
- Page 31 Funcionamiento Utilizar un dispositivo Bluetooth Conecte la unidad como se describió previamente. Oprima ENCENDIDO/ APAGADO (Power ON/OFF) para encender la unidad. El indicador de Encendido/ Apagado (Power) se iluminará. Oprima varias veces FUNCIÓN (FUNCTION) hasta que “bt” parpadee en la pantalla para seleccionar el modo Bluetooth.
- Page 32 Funcionamiento Utilizar un dispositivo Bluetooth Oprima Reproducción/Pausa (Play/Pause) para iniciar la reproducción Asegúrese que el volumen de su dispositivo Bluetooth se encuentra en un nivel intermedio, luego ajuste el volumen al nivel deseado utilizando el control de VOLUMEN PRINCIPAL (MASTER VOLUME). Nota: Si se conecta a un televisor u otra fuente de audio, ajuste el volumen del televisor con su propio control de volumen.
- Page 33 Funcionamiento Utilizar un dispositivo Bluetooth BALANCE: El Balance le permite eliminar la voz del cantante principal al rotar la perilla hacia la izquierda cuando se reproduce una grabación multiplex o eliminar la música al rotar la perilla hacia la derecha. IMPORTANTE: Esta función sólo funciona con medios multiplex.
- Page 34 Funcionamiento Uso de la entrada LINE IN Conecte la unidad como se describió previamente. Oprima Encendido/Apagado (Power On) para encender la unidad. El indicador de Encendido/Apagado (Power) se iluminará. Conecte la unidad externa al conector de LINE IN ENTRADA DE LÍNEA (LINE IN). AUDIO OUTPUT / HEADPHONE JACK Notas:...
- Page 35 Funcionamiento Uso de la entrada LINE IN Ajuste los efectos de Eco (Echo) y Balance como lo muestran las páginas S - 7 y S - 8. Oprima el botón ENCENDIDO/APAGADO (Power ON/OFF) para apagar la unidad; el indicador también se apagará. S - 15...
- Page 36 Funcionamiento Dónde descargar archivos MP3+G Para adquirir y descargar música de Karaoke visite Recomendaciones útiles: http://store.singingmachine.com y acceda a más de Los archivos .mp3 y .cdg. se entregan para 12000 de sus canciones favoritas para karaoke. descargarse en un único archivo, comprimido MP3 Necesitará...
-
Page 37: Cuidado Y Mantenimiento
Cuidado y mantenimiento Cuidado de los discos compactos Trate con cuidado al disco compacto. Manipule el disco solo tomándolo de los bordes. Nunca apoye sus dedos en el lado brillante no impreso. No pegue cinta adhesiva, autoadhesivos, etc. a la etiqueta del disco compacto. -
Page 38: Guía De Resolución De Problemas
Guía de Resolución de Problemas Si esta unidad presentara un problema, lea el siguiente cuadro antes de llamar al servicio técnico: No hay energía • Si la unidad no está encendida, presione ENCENDIDO/APAGADO (Power ON/OFF) para encenderla. • Asegúrese de que la unidad esté conectada a la alimentación de corriente alterna. No hay sonido (General) •... -
Page 39: Especificaciones
Especificaciones AUDIO Potencia de salida (Máximo) ................10W + 10W (RMS) 10% THD Impedancia de salida......................... 8 Ohms REPRODUCTOR DE CD Respuesta de frecuencia ....................100 Hz-20 KHz Proporción de señal y ruido .........................50 dB Sistema de muestreo....................Sobremuestreo por 8 Diámetro del disco......................4,72"... - Page 40 4060 E. Jurupa St., Unit B, Ontario, CA 91761-1413 USA © 2014...