
Related Manuals for Kenmore 35712


Summary of Contents for Kenmore 35712
-
Page 1: Instructions For Use
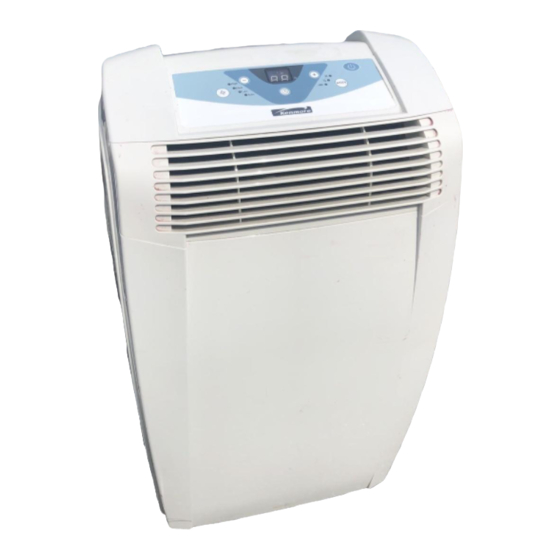
3 5 7 1 2 - 3 5 7 1 3 3 5 7 1 2 - 3 5 7 1 3 Instructions for use Keep these instructions Mode d'emploi Conservez cette notice ELECTRICAL SPECIFICATIONS 115V ~ 60Hz DONNEES ELECTRIQUES 115V~60Hz... - Page 2 DESCRIPTION ACCESSORIES • ACCESSOIRES...
-
Page 3: Important Safeguards
IMPORTANT SAFEGUARDS • Use this appliance only as described in this instruction manual. As with any electrical appliance, the instructions aim to cover as many eventualities as possible. Caution and common sense should be used when operating and installing this air conditioner. •... - Page 4 I NSTALLING YOUR PORTABLE AIR-CONDITIONER ELECTRICAL CONNECTIONS Before plugging the appliance into the mains socket, check that: • The mains power supply corresponds to the value indicated on the rating plate on the back of the appliance; • The mains socket and electrical circuit are adequate for the appliance; •...
- Page 5 Pre p a r i n g f o r u s e SEMI-PERMANENT INSTALLATION • Fit the wall flange into the hole. If required, your appliance can also be • Fit the air exhaust hose in the relevant installed semi-permanently (Fig. E). hose located on the rear side of the appli- ance.
-
Page 6: Control Panel
Control panel THE CONTROL PANEL DESCRIPTION OF THE CONTROL PANEL A ON/STAND-BY button B MODE selection button Air conditioning, dehumidifying, fan. C Fan speed selection button (HIGH/MED/LOW/AUTO) D Timer button E Programmed operation increase temperature/time button F Programmed operation decrease temperature/time button G Display Displays the temperature values set and the programmed operating time H Timer in operation indicator light I/L/M/N Fan speed lights and AUTO light... - Page 7 Operation TURNING THE APPLIANCE ON Plug into the mains socket. Two lines appear on the display indicating that the appliance is in stand- Press the ON/STAND-BY button (A). When turned on, the air conditioner starts operating in the same mode as when it was turned off. Press the MODE button (B) until the light corresponding to the required mode lights up: Light (Q)
- Page 8 Self-diagnosis SETTING THE TIMER The timer can be used to delay appliance start up or shutdown. This avoids wasting electricity by optimising operating periods. How to programme delayed start up • Plug the appliance into a mains socket and press the ON/STAND-BY button (A), then select the required operating mode and other settings (temperature, fan speed, etc).
- Page 9 Using the remote control unit MODELS WITH REMOTE CONTROL • Point the remote control at the receiver on the air-conditioner. • The remote control should be handled with extreme care and respect. Do not drop it, expose it to direct sunlight, or leave it near sources of heat.
- Page 10 Using the remote control unit TURNING THE APPLIANCE ON Plug into the mains socket. Press the ON/STAND-BY button (18) (when turned on, the air conditioner starts operating in the same mode as when it was turned off). Press the MODE button (19) to select the required mode: AIR-CONDITIONING ( DEHUMIDIFYING ( FAN ONLY (...
- Page 11 Using the remote control unit • Press the timer button ( ) 20 again to confirm the selection. The appliance emits a beep and the light (H) flashes on the control panel, confirming successful activation of the timer. A count- down of the time left is displayed on the remote control display and the light (H) flashes on the air conditioner display.
- Page 12 T i p s To get the best from your air conditioner, fol- • Never use the appliance in very damp low these recommendations: rooms (laundries for example). • Never use the appliance outdoors. • close the windows and doors in the room to be air conditioned.
- Page 13 C l e a n i n g START OF SEASON CHECKS Before cleaning or maintenance, turn the Make sure the power cable and plug are appliance off by pressing the ON/STAND-BY undamaged and the earth system is efficient. button (A) or in models with remote control Follow the installation instructions precisely.
-
Page 14: Troubleshooting
Troubleshooting PROBLEM CAUSE REMEDY The air conditioning • no electricity • restore electricity • it is not plugged into the socket • plug into the socket unit does not start • the safety device has tripped • reset the safety plug •... -
Page 15: Technical Specification
Technical specification TECHNICAL SPECIFICATION LIMIT CONDITIONS Power supply voltage see rating plate Max. absorbed power during air conditioning “ Room temperature for Refrigerant “ air conditioning 69.8 ÷ 95°F (21 ÷ 35°C) Cooling capacity “ Transport, filling, cleaning, recovery and dis- posal of refrigerant should be performed by Dimensions of appliance: a technical service centre appointed by the... - Page 16 Limited Warranty Get it fixed, at your home or ours! Just Call: 1-800-4-MY-HOME ® (1-800-469-4663) 24 hours a day, 7 days a week For the repair of major appliances in your own home… no matter who made it, no matter who sold it! For your nearest Sears Parts and Service location, to bring in products like vacuums, lawn equipment and electronics.
- Page 17 Av e r t i s s e m e n t s • Utilisez l'appareil en suivant exclusivement cette notice. Comme pour tous les appareils élec- triques, ces instructions essaient de contempler la plupart des situations possibles. Vous devrez toujours utiliser votre appareil avec bon sens et prudence.
- Page 18 Pr é p a ra t i o n à l ’ e m p l o i BRANCHEMENT ÉLECTRIQUE Avant de brancher la fiche sur la prise de courant, vérifiez si: • la tension du secteur correspond à celle indiquée sur la plaque signalétique au dos de l’appareil ; •...
- Page 19 Pr é p a ra t i o n à l ’ e m p l o i INSTALLATION SEMI-PERMANENTE • Appliquez dans le trou l’accessoire bride Si vous le désirez, l’appareil peut être aussi ins- 10 fourni avec l’appareil. tallé...
- Page 20 Tableau de commande LE TABLEAU DE COMMANDE DESCRIPTION DU TABLEAU DE COMMANDE A Touche ON/STAND-BY (marche/arrêt) B Touche sélection fonctions MODE Climatisation, déshumidification, ventilation C Touche sélection vitesse de ventilation (HIGH/MED/LOW/AUTO) D Touche Timer E Touche augmentation température/temps de fonctionnement programmé F Touche diminution température/temps de fonctionnement programmé...
- Page 21 Fonctionnement MISE EN MARCHE DE L’APPAREIL Branchez l’appareil. Deux lignes sur l’afficheur indiquent que l’appareil est en veille (stand-by). Appuyez sur la touche ON/ STAND-BY (A). Au démarrage, le climatiseur part de la dernière fonction programmée avant l’arrêt. Appuyez sur la touche MODE (B) jusqu’à ce que s’allume le témoin cor- respondant à...
- Page 22 Autodiagnostic PROGRAMMATION DE LA MINUTERIE La minuterie permet de régler la présélection de la mise en marche et de l’arrêt de l’appareil. Ce réglage vous évitera de gaspiller de l’énergie électrique tout en optimisant les périodes de fonc- tionnement. Comment programmer la présélection de la mise en marche •...
- Page 23 Fonctionnement avec télécommande MODÈLES AVEC TÉLÉCOMMANDE • Dirigez la télécommande vers le récep- teur du climatiseur. • Maniez la télécommande très douce- ment et prudemment: évitez de la faire tomber, de l’exposer aux rayons directs du soleil et de la laisser à proximité de sources de chaleur.
- Page 24 Fonctionnement avec télécommande MISE EN MARCHE DE L’ APPAREIL Branchez l’appareil. Appuyez sur le bouton marche/stand-by (18) de la télécommande (à la mise en marche, le climatiseur part de la dernière fonction programmée avant l’arrêt). Appuyez sur le bouton MODE (19) pour sélectionner la fonction désirée: CLIMATISATION ( DÉSHUMIDIFICATION ( SEULEMENT VENTILATION (...
- Page 25 Using the remote control unit grammation de la minuterie. Au fur et à mesure que le temps s'écoule, l'écran de la télécom- mande affiche le temps résiduel tandis que le témoin (H) clignote sur l’écran du climatiseur. • À la fin du temps programmé, l'appareil s'arrête automatiquement. •...
- Page 26 C o n s e i l s Voici quelques conseils pratiques pour obtenir • N’utilisez pas l’appareil dans des endroits un rendement optimal de votre climatiseur : très humides (buanderie) • N’utilisez pas l’appareil à l’extérieur. • fermez toutes les portes et les fenêtres de la pièce à...
- Page 27 N e t t o y a g e CONTRÔLES AU DÉBUT DE LA SAISON Avant toute opération de nettoyage ou d'entre- Vérifiez si le cordon d’alimentation et la prise tien, arrêtez l’appareil en appuyant sur la tou- sont parfaitement intacts et assurez-vous que che ON/STAND-BY (A) et, pour les modèles la mise à...
- Page 28 Si quelque chose ne marche pas … PROBLÈMES CAUSES SOLUTIONS Le climatiseur ne • Absence de courant • attendez • La fiche n’est pas branchée • branchez la fiche marche pas • Le dispositif de sécurité de la fiche s’est •...
- Page 29 Garantie/ caractéristiques techniques CARACTÉRISTIQUES TECHNIQUES CONDITIONS DE FONCTIONNEMENT Tension voir plaque CONSEILLÉES d’alimentation signalétique Puissance max. Température dans la pièce en orbée en climatisation “ Climatisation 69.8 ÷ 95°F (21 ÷ 35°C) Réfrigérant “ Puissance réfrigérante “ Le transport, la charge, le nettoyage, la récupération et l’évacuation du réfrigérant doivent être effectués exclusivement par les Dimensions de l’appareil:...
- Page 30 Limited Warranty De’Longhi est le distributeur de électroménagers de marque Kenwood. Cette garantie s’appli- que à tous les électroménagers portant les marques De’Longhi ou Kenwood. RÉSERVÉ UNIQUEMENT AUX ÉTATS-UNIS CONTIGUS Garantie limitée Nous garantissons que chaque CLIMATISEUR de DeLonghi est exempt de défauts de matériau et de fabrication.