Table of Contents

Related Manuals for Kaito KA600


Summary of Contents for Kaito KA600
- Page 1 KA600 FM/AM/SW/LW/WEATHER MUTI-BAND RECEIVER DYNAMO & SOLAR POWER SUPPLY WITH FLASHLIGHT & READING LIGHT TEMPERATURE AND MOISTER INDICATOR OPERATION MANUAL ALERT VOICE SIREN NOAA COUNTY SINGLE MULTIPLE ENABLE DISABLE...
- Page 2 KEY FEATURES Thank You: Thank you for purchasing the KA 600 muti-band receiver. Please read the manual thoroughly before operating and keep this book in a safe place for future reference. Hope the radio can give you much happiness. FM Band: 87.0-108.0MHZ AM (10K): 520-1710KHz...
-
Page 3: Table Of Contents
INDEX INDEX LOCATION OF CONTR........1 SET THE CLOCK............ 20 POWER ON AND POWER OFF MOISTER and TEMPERATURE DISPLAY....21 Power On and Power Off........4 USING FLASHLIGHT..........21 Sleep Timer............. 4 USING READING LIGHT......... 21 Alarm On and Alarm Off........5 KEY LOCK FUNCTION.......... -
Page 4: Location Of Contr
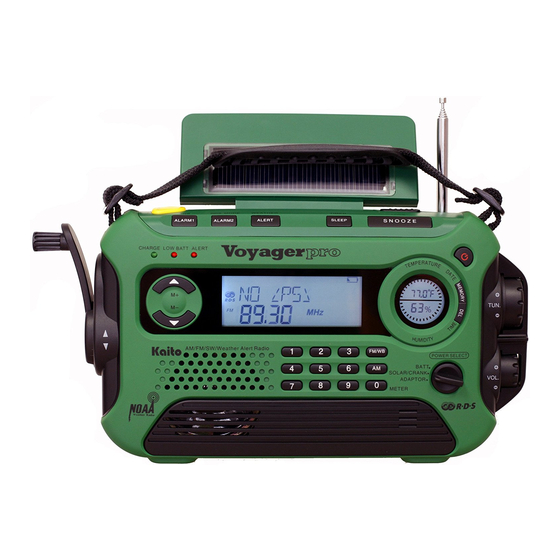
LOCATION OF CONTROLS LOCATION OF CONTROLS REAR FRONT 28 24 29 30 15 14 13 <LOW BATT> Light Telescopic Antenna <CHARGE> Light Battery Compartment M+/M- Button VOICE ALERT SIREN <CHARGE> Switch NOAA Speaker COUNTY SINGLE MULTIPLE ENABLE <DC IN 5V> Port DISABLE Numeric Button <CHARGE OUT>... -
Page 5: Power On And Power Off
LOCATION OF CONTROLS POWER ON/POWER OFF LEFT Power On and Power Off 1.Rotate the <POWER SELECT> to the valid charging position. ALKALINE. AA Battery Charging Flash Light ADAPTOR. External Adapter Charging 2.In the unit off mode, press the button <POWER> to turn on ALERT VOICE Crank Handle... - Page 6 POWER ON/POWER OFF POWER ON/POWER OFF Example:Set the ALARM1 on at 8:05, and alarm off NOTE:If the unit turn on by pressing the button<POWER>,you can also select the sleep timer by pressing the button <SLEEP> shortly to after 15 minutes. COUNTY select your desired sleep timer.
-
Page 7: Radio Operation
RADIO OPERATION RADIO OPERATION Frequency Diagram Activate and Cancel the Alarm Function In the unit off mode, press the button <ALARM1> or <ALARM2> shortly with the icon " " flashing in the display, FM 87-108MHz the alarm function is activated. Press the button <ALARM1> AM MW LW SW or <ALARM2>... -
Page 8: Select Am Step
TUNING INTO STATIONS RADIO OPERATION Select AM Step 9K/10K Auto Scan Tuning In the unit off mode, press and hold the button <AM> 1. Turn on the unit and select the band. about 5 seconds with the step 9K or 10K appearing in the display. -
Page 9: Auto Tuning Storage
TUNING IN STATIONS TUNING INTO STATIONS Auto Tuning Storage (ATS) ALERT VOICE SIREN Example1: Input FM 95.80MHz NOAA COUNTY SINGLE MULTIPLE 1. Select the band. ENABLE DISABLE 2. Adjust the volume. MONO 3. Press and hold the < MEMORY > button until frequency 95 80 starts auto tuning, then release the button, the unit will store the station while scanning the strong signal. -
Page 10: Listening To Preset Station
TUNING INTO STATIONS TUNING INTO STATIONS Listening to Preset Stations Manual Tuning Storage Press the <MEMORY> button shortly to enter into the (1) Manual memory mode with "M" and the preset memory 1. Select the band. address flashes, then press the <M+> or <M-> button 2. -
Page 11: Delete Preset Stations
DELETE PRESET STATIONS FM RDS FM RDS Delete A Preset Station 1. Select a strong signal station of FM. 1.Select the band. 2. Press the <RDS> button shortly with the icon " " in 2.Press the <M+> or <M-> shortly to select the address the display. -
Page 12: Weather Reception
WEATHER RECEPTION WEATHER RECEPTION Weather Band Channel Frequencies Listening to the Weather Report 1.Press the <FM/WB> button shortly to enter into CHANNEL FREQUENCY(MHz) weather reception mode. 162.400 2.Rotate the <TUN.> knob to select the local frequency 162.425 position. Then you can listen to the weather report. 162.450 162.475 VOICE... -
Page 13: Set The Date
SET THE DATE SET THE CLOCK Adjust the date Adjust the clock 1.In the unit off mode, press and hold the <MEMORY> 1.In the unit off mode, press and hold the <DEL> button button(about 2 seconds) with the year flashes. Then (about 2 seconds) with the hour flashes. -
Page 14: Moister And Temperature Display
RADIO OPERATION RADIO OPERATION Moister and Temperature Display Key Lock Function There is the moister and temperature indicator in the Press and hold the <SNOOZE> button(about 2 left side of the unit, the upper indicator displays seconds)with the icon " "... -
Page 15: Power Supply
POWER SUPPLY POWER SUPPLY AA Batteries Ni-MH Battery (1)Open the battery compartment's cover. (1)Remove the battery compartment's cover by pushing (2)Install 3 AA size batteries according to the polarity the cover in the direction of the arrow. diagram. (2)Install the Ni-MH batteries in its compartment, and (3)Rotate the <Power Select>... -
Page 16: Adapter
POWER SUPPLY CHARGING Ni-MH BATTERIES Adapter There are four ways to charge the Ni-MH batteries: (1)Plug one port of the adapter into the AC socket and dynamo charging, solar charging, external adapter plug the other port into the <DC IN 6V> jack. charging and PC charging. -
Page 17: External Adapter Charging
CHARGING GADGETS CHARGING Ni-MH BATTERIES External Adapter Charging Charging MP 3 or Cellphone You can charge the Ni-MH batteries either in radio on or 1.Push the <CHARGE> switch to "OUT" position. off mode. 2.Plug one port of the suppied USB cable into the 1.Connect the unit with external adapter correctly then <CHARGE OUT>... -
Page 18: Precautions
PRECAUTIONS SPECIFICATION Do not expose the radio to rain or humid enviroment. 1. Frequency Do not expose the radio to extreme stronge sunlight, 87 - 108 MHz close to heat sources, or leave it in the place with MW(10K) 520 - 1710 KHz excessive dust.