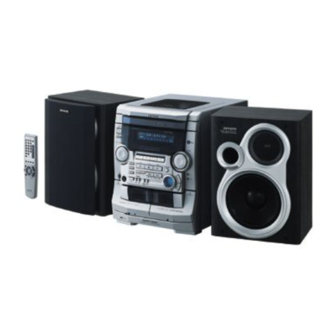
Aiwa NSX-HMA56 Service Manual
Cassette disc
stereo cassette recorder
Hide thumbs
Also See for NSX-HMA56:
- Operating instructions manual (80 pages) ,
- Service manual (49 pages)
Table of Contents
Advertisement
QQ
3 7 63 1515 0
SERVICE MANUAL
TE
L 13942296513
CASSETTE DISC
STEREO CASSETTE RECORDER
SYSTEM
CD CASSEIVER
NSX-HMA56
CX-HMA56
NSX-DP55
CX-DP55
• This Service Manual is the “Revision Publishing” and replaces “Simple Manual”
NSX-HMA56(U), NSX-DP55(EZ), (S/M Code No. 09-002-429-3T1 and 09-003-429-3T2).
• If requiring information about CD mechanism, see Service Manual of AZG-1, ZA3RDM/
YKZA3RDF(S/M Code No. 09-001-335-3NC), YKZD8RDF(S/M Code No. 09-001-335-3N6)
and ZA8RDC(S/M Code No. 09-001-335-3NA).
• This Service manual does not include “Electrical adjustment”, “IC BLOCK DIAGRAM”
www
and “IC DESCRIPTION”. These items will be issued in the next supplement.
.
http://www.xiaoyu163.com
DECK MECHANISM
U: ZZM-3 PR1NM
LH: 2ZM-3MK2 PR4NM
EZ,K: 2ZM-3MK2 PR4NM
6ZM-3 PR2NM
x
ao
u163
y
i
S/M Code No. 09-007-429-3R1
http://www.xiaoyu163.com
NSX-HMA56
2 9
8
NSX-DP55
Q Q
3
6 7
1 3
1 5
BASIC TAPE MECHANISM : ZZM-3, 2ZM-3MK2, 6ZM-3
BASIC CD MECHANISM : AZG-1
CD MECHANISM
USFD: AZG-1 YKZD8RDF
AZG-1 YKZA3RDF
USC: AZG-1 ZA8RDC
USM,LH,EZ,K: AZG-1 ZA3RDM
LH,EZ,K: AZG-1 ZA3RDM
co
.
U
9 4
2 8
LH,K,EZ
0 5
8
2 9
9 4
2 8
REMOTE
SPEAKER
CONTROLLER
U: SX-WNAJ50
SX-C605
SX-R275
RC-ZAS15
LH: SX-NSZ52
SX-CR677
EZ,K: SX-NDP54
SX-CR677
m
9 9
9 9
Advertisement
Table of Contents

Related Manuals for Aiwa NSX-HMA56


Summary of Contents for Aiwa NSX-HMA56
- Page 1 SX-CR677 • This Service Manual is the “Revision Publishing” and replaces “Simple Manual” NSX-HMA56(U), NSX-DP55(EZ), (S/M Code No. 09-002-429-3T1 and 09-003-429-3T2). • If requiring information about CD mechanism, see Service Manual of AZG-1, ZA3RDM/ YKZA3RDF(S/M Code No. 09-001-335-3NC), YKZD8RDF(S/M Code No. 09-001-335-3N6) and ZA8RDC(S/M Code No.
-
Page 2: Specifications
http://www.xiaoyu163.com SPECIFICATIONS 3 7 63 1515 0 Main unit Total harmonic distortion FM tuner section K,EZ: Tuning range Usable sensitivity (IHF) U,LH: K,EZ: Antenna terminals Inputs AM Tuner section Tuning range Outputs µ Usable sensitivity Antenna LW Tuner section (K,EZ) Tuning range µ... -
Page 3: Accessories / Package List
http://www.xiaoyu163.com 3 7 63 1515 0 Speaker system SX-NSZ52 <LH> Speaker system Speaker unit Impedance Sensitivity Dimensions(W Weight Speaker system SX-NDP54 <K,EZ> Speaker system Speaker unit Impedance Sensitivity Dimensions(W Weight L 13942296513 ACCESSORIES / PACKAGE LIST 1 8A-NFV-903-110 IB,U(EFS)M<USM,USFD> 1 8A-NFV-913-110 IB,U(EFS)B<USC>... -
Page 4: Protection Of Eyes From Laser Beam During Servicing
http://www.xiaoyu163.com PROTECTION OF EYES FROM LASER BEAM DURING SERVICING 3 7 63 1515 0 CAUTION This set employs laser. Therefore, be sure to follow carefully the instructions below when servicing. Use of controls or adjustments or performance of proce- dures other than those specified herin may result in WARNING!! hazardous radiation exposure. -
Page 5: Note On Before Starting Repair
http://www.xiaoyu163.com NOTE ON BEFORE STARTING REPAIR 1. Forced discharge of electrolytic capacitor of power supply block 3 7 63 1515 0 When repair is going to be attempted in the set that uses relay circuit in the power supply block, electric potential is kept charged across the electrolytic capacitors (C101, 102) even though AC power cord is removed. - Page 6 http://www.xiaoyu163.com 3 7 63 1515 0 In such a case, check also if the POWER AMPLIFIER circuit or power supply circuit has any abnormalities or not. 2-2. Regarding reset There are cases that the machine does not work correctly because the MICROCOMPUTER is not reset even though the AC power cord is re-inserted, or the software reset (pressing the STOP key + POWER key) is performed.
-
Page 7: Electrical Main Parts List
http://www.xiaoyu163.com ELECTRICAL MAIN PARTS LIST 3 7 63 1515 0 87-012-368-080 C-CAP,S 0.1-50 F 87-016-658-000 CAP,E 4700-35 M SMG 87-020-454-010 IC,DN6851<LH,EZ,K> 87-016-658-000 CAP,E 4700-35 M SMG 87-A21-398-010 IC,STK490-110<U> 87-010-406-080 CAP, ELECT 22-50 87-A21-355-010 IC,STK490-140<LH,EZ,K> 87-010-406-080 CAP, ELECT 22-50 8A-NFV-621-010 C-IC,LC866560W-5R03<LH> 8A-NFV-620-010 C-IC,LC866560W-5P32<EZ,K,U>... - Page 8 http://www.xiaoyu163.com 3 7 63 1515 0 C337 87-010-196-080 CHIP CAPACITOR,0.1-25 C452 87-A10-802-080 C-CAP,S 0.047-16 J B CM C339 87-010-196-080 CHIP CAPACITOR,0.1-25 C453 87-016-081-080 C-CAP,S 0.1-16 RK C340 87-010-196-080 CHIP CAPACITOR,0.1-25 C454 87-016-081-080 C-CAP,S 0.1-16 RK C351 87-012-140-080 CAP 470P C455 87-A10-801-080 C-CAP,S 0.022-16 J B CM C352...
- Page 9 http://www.xiaoyu163.com 3 7 63 1515 0 C796 87-010-197-080 CAP, CHIP 0.01 DM C983 87-010-197-080 CAP, CHIP 0.01 DM C797 87-010-405-080 CAP, ELECT 10-50V C984 87-010-197-080 CAP, CHIP 0.01 DM C798 87-010-197-080 CAP, CHIP 0.01 DM C985 87-010-322-080 C-CAP,S 100P-50 CH<EZ,K> C799 87-010-407-080 CAP, ELECT 33-50V...
- Page 10 http://www.xiaoyu163.com 3 7 63 1515 0 FRONT C.B L331 87-A50-408-010 COIL,OSC 5.76MHZ LED311 87-A40-589-040 LED,SLR-56VCT31 RED C201 87-010-322-080 C-CAP,S 100P-50 CH LED601 87-A40-803-010 LED,SELU1E10CXM-S LF38 BLUE C202 87-010-322-080 C-CAP,S 100P-50 CH LED602 87-A40-619-080 LED,SLR-56PT-TE7-W GRN C203 87-010-322-080 C-CAP,S 100P-50 CH LED603 87-A40-619-080 LED,SLR-56PT-TE7-W GRN...
- Page 11 http://www.xiaoyu163.com 3 7 63 1515 0 C117 87-010-196-080 CHIP CAPACITOR,0.1-25<EZ,K> AMP P-LOGIC<U> C119 87-010-197-080 CAP, CHIP 0.01 DM C120 87-010-197-080 CAP, CHIP 0.01 DM C101 87-010-181-080 CAP,CHIP S 1800P<U> C133 87-010-190-080 CAP,S 0.01-50 Z F C2912 C102 87-010-181-080 CAP,CHIP S 1800P<U> C153 87-010-188-080 CAP,CHIP 6800P...
-
Page 12: Transistor Illustration
http://www.xiaoyu163.com 3 7 63 1515 0 SFR1 87-024-581-010 SFR,3.3K DIA 6H 87-036-110-010 SW,MICRO SPPB62<LH> SOL1 82-ZM1-618-410 SOL ASSY,27 87-A90-248-010 SW,MICRO ESE11SH2CXQ<LH> SOL2 82-ZM1-618-410 SOL ASSY,27 87-A90-248-010 SW,MICRO ESE11SH2CXQ<LH> 87-A90-248-010 SW,MICRO ESE11SH2CXQ<LH,EZ,K> 82-ZM3-601-010 RBN,CORD,4P-75<LH,EZ,K> 87-A90-673-010 SW,MICRO ESE11SH1C<U> HEAD-1 C.B<LH,EZ,K> 87-A90-248-010 SW,MICRO ESE11SH2CXQ<LH,EZ,K> 87-A91-500-010 SW,MICRO MPU11470MLB0<U>... - Page 13 http://www.xiaoyu163.com 3 7 6 3 1 5 1 5 0 1 3 9 4 2 2 9 6 5 1 3 w w w u 1 6 3 http://www.xiaoyu163.com...
- Page 14 http://www.xiaoyu163.com SCHEMATIC DIAGRAM – 1 (MAIN : 1 / 6 <AMP SECTION> U) 3 7 6 3 1 5 1 5 0 1 3 9 4 2 2 9 6 5 1 3 FFC602 w w w u 1 6 3 –...
- Page 15 http://www.xiaoyu163.com SCHEMATIC DIAGRAM – 2 (MAIN : 1 / 6 <AMP SECTION> EZ, K, LH) 3 7 6 3 1 5 1 5 0 MUTE 1 3 9 4 2 2 9 6 5 1 3 FFC602 w w w u 1 6 3 –...
- Page 16 http://www.xiaoyu163.com SCHEMATIC DIAGRAM – 3 (MAIN : 3 / 6 <PRO LOGIC SECTION>) 3 7 6 3 1 5 1 5 0 1 3 9 4 2 2 9 6 5 1 3 w w w u 1 6 3 –...
- Page 17 http://www.xiaoyu163.com SCHEMATIC DIAGRAM – 4 (MAIN : 4 / 6 <DECK SECTION>) 3 7 6 3 1 5 1 5 0 <LH> 1 3 9 4 2 2 9 6 5 1 3 w w w u 1 6 3 –...
- Page 18 http://www.xiaoyu163.com SCHEMATIC DIAGRAM – 5 (MAIN : 5 / 6 <TUNER SECTION> U, LH) 3 7 6 3 1 5 1 5 0 1 3 9 4 2 2 9 6 5 1 3 w w w u 1 6 3 –...
- Page 19 http://www.xiaoyu163.com SCHEMATIC DIAGRAM – 6 (MAIN : 6 / 6 <TUNER SECTION> EZ, K) 3 7 6 3 1 5 1 5 0 1 3 9 4 2 2 9 6 5 1 3 w w w u 1 6 3 –...
- Page 20 http://www.xiaoyu163.com 3 7 6 3 1 5 1 5 0 1 3 9 4 2 2 9 6 5 1 3 w w w u 1 6 3 http://www.xiaoyu163.com...
- Page 21 http://www.xiaoyu163.com SCHEMATIC DIAGRAM – 7 (FRONT : LH) 3 7 6 3 1 5 1 5 0 1 3 9 4 2 2 9 6 5 1 3 FFC731 FFC104 w w w u 1 6 3 – 21 – http://www.xiaoyu163.com...
- Page 22 http://www.xiaoyu163.com SCHEMATIC DIAGRAM – 8 (FRONT : U, EZ, K) 3 7 6 3 1 5 1 5 0 1 3 9 4 2 2 9 6 5 1 3 FFC731 FFC104 w w w u 1 6 3 – 22 – http://www.xiaoyu163.com...
- Page 23 http://www.xiaoyu163.com 3 7 6 3 1 5 1 5 0 1 3 9 4 2 2 9 6 5 1 3 w w w u 1 6 3 http://www.xiaoyu163.com...
- Page 24 http://www.xiaoyu163.com SCHEMATIC DIAGRAM – 9 (AMP 1F) 3 7 6 3 1 5 1 5 0 FFC106 1 3 9 4 2 2 9 6 5 1 3 w w w u 1 6 3 – 24 – http://www.xiaoyu163.com...
- Page 25 http://www.xiaoyu163.com 3 7 6 3 1 5 1 5 0 1 3 9 4 2 2 9 6 5 1 3 w w w u 1 6 3 http://www.xiaoyu163.com...
- Page 26 http://www.xiaoyu163.com SCHEMATIC DIAGRAM – 10 (AMP P-LOGIC <U ONLY>) 3 7 6 3 1 5 1 5 0 1 3 9 4 2 2 9 6 5 1 3 HOLD SW w w w u 1 6 3 – 26 – http://www.xiaoyu163.com...
- Page 27 http://www.xiaoyu163.com 3 7 6 3 1 5 1 5 0 1 3 9 4 2 2 9 6 5 1 3 w w w u 1 6 3 http://www.xiaoyu163.com...
- Page 28 http://www.xiaoyu163.com SCHEMATIC DIAGRAM – 11 (PT : LH) 3 7 6 3 1 5 1 5 0 C15 0.1 C14 0.1 1 3 9 4 2 2 9 6 5 1 3 w w w u 1 6 3 – 28 – http://www.xiaoyu163.com...
- Page 29 http://www.xiaoyu163.com 3 7 6 3 1 5 1 5 0 1 3 9 4 2 2 9 6 5 1 3 w w w u 1 6 3 http://www.xiaoyu163.com...
- Page 30 http://www.xiaoyu163.com SCHEMATIC DIAGRAM – 12 (PT : U, EZ, K) 3 7 6 3 1 5 1 5 0 C15 0.1 1 3 9 4 2 2 9 6 5 1 3 w w w u 1 6 3 – 30 – http://www.xiaoyu163.com...
- Page 31 http://www.xiaoyu163.com 3 7 6 3 1 5 1 5 0 FROM FRONT C. B CN302 DECK C . B 1 3 9 4 2 2 9 6 5 1 3 w w w u 1 6 3 http://www.xiaoyu163.com...
- Page 32 http://www.xiaoyu163.com WIRING – 8 (HEAD : U) 3 7 63 1515 0 L 13942296513 u163 – 32 –...
- Page 33 http://www.xiaoyu163.com WIRING – 9 (DECK / HEAD-1 / HEAD-2 : LH) 3 7 63 1515 0 L 13942296513 u163 – 33 –...
- Page 34 http://www.xiaoyu163.com WIRING – 10 (DECK / HEAD – 1 : EZ, K) 3 7 63 1515 0 L 13942296513 u163 – 34 – http://www.xiaoyu163.com...
- Page 35 http://www.xiaoyu163.com MECHANICAL EXPLODED VIEW 1 / 1 <U> 3 7 6 3 1 5 1 5 0 AZG-1 P.C.B P.C.B HT-SINK FL101 HT-SINK VM 1 3 9 4 2 2 9 6 5 1 3 P.C.B PLATE,PT P.C.B w w w CHAS,MAIN u 1 6 3 ZZM-3...
-
Page 36: Mechanical Parts List
82-NF5-229-010 PLATE,LOCK 8A-NFV-027-010 COVER,REAR STEEL US 8A-NFV-002-010 PANEL,FR U 87-084-077-010 RIVET,NYL 3.5-4.5 8A-NFV-010-010 WINDOW,DISP U 87-064-185-010 HLDR,WIRE PVC 0.5 87-CE3-023-010 BADGE,AIWA 30N SILV 8A-NF6-217-010 HLDR,PWB PT 8A-NF8-009-010 PANEL,CD 8A-NFV-604-010 PT,ANF-V U 8A-NF8-007-010 PANEL,LEFT V-2 8A-NF7-208-010 HLDR,HT R 8A-NF8-005-010 PANEL,TOP 87-A80-110-010... - Page 37 http://www.xiaoyu163.com TAPE MECHANISM EXPLODED VIEW 1 / 1 <U> 3 7 6 3 1 5 1 5 0 TERMINAL, TERMINAL,LB1 IC, EW732 1 3 9 4 2 2 9 6 5 1 3 IC, EW732 P.C.B w w w u 1 6 3 –...
-
Page 38: Tape Mechanism Parts List
http://www.xiaoyu163.com TAPE MECHANISM PARTS LIST 1 / 1 <U> 3 7 63 1515 0 REF. NO. PART NO. KANRI DESCRIPTION REF. NO. PART NO. KANRI DESCRIPTION 8Z-ZM3-227-010 BELT,MAIN M3 8Z-ZM3-233-010 SPR-T,BRG M3 8Z-ZM3-235-010 BELT,MAIN L 84-ZM2-227-310 SPR-C,AZIMUTH 8Z-ZM1-235-010 PULLEY,MOT 87-A90-403-110 HEAD,RPH MS15R 87-045-347-010 MOT,SHU2L 70... - Page 39 http://www.xiaoyu163.com MECHANICAL EXPLODED VIEW 1 / 1 <LH> 3 7 6 3 1 5 1 5 0 AZG-1 P.C.B P.C.B FL101 HT-SINK T5 HT-SINK VM2 1 3 9 4 2 2 9 6 5 1 3 P.C.B WIRE,BINDER PLATE,PT P.C.B PLATE SHLD 2T PLATE,EARTH MIC w w w...
- Page 40 FAN,3110GL-B4W-B34-H02-400MM 82-NF5-229-010 PLATE,LOCK 8A-NF6-217-010 HLDR,PWB PT 8A-NFV-004-010 PANEL,FR H 87-085-221-010 FOOT,H13.5 8A-NFV-012-010 WINDOW,DISP H 8A-NF7-208-010 HLDR,HT R 87-CE3-023-010 BADGE,AIWA 30N SILV 8A-NF7-207-010 HLDR,HT L 8A-NF8-009-010 PANEL,CD 8A-NF7-226-010 HLDR,IC2-T2 8A-NF8-007-010 PANEL,LEFT V-2 8Z-NB8-254-010 COVER, PL M3 8A-NF8-005-010 PANEL,TOP 8Z-NB8-240-010 COVER, PL...
- Page 41 http://www.xiaoyu163.com TAPE MECHANISM EXPLODED VIEW 1 / 1 <LH> 3 7 6 3 1 5 1 5 0 PH(DECK 1) RPH(DECK 2) DECK C.B CUSH-G,DIA3.7-8-3.2 CUSH-G,DIA3.7-8-3.2 HLDR,IC HLDR,IC CAPSTAN N 2.2-41.7 1 3 9 4 2 2 9 6 5 1 3 CAPSTAN N 2.2-41.5 HEAD 1 C.B(DECK 1) BELT D2...
- Page 42 http://www.xiaoyu163.com TAPE MECHANISM PARTS LIST 1 / 1 <LH> 3 7 63 1515 0 REF. NO. PART NO. KANRI DESCRIPTION REF. NO. PART NO. KANRI DESCRIPTION 1 82-ZM3-301-610 CHAS ASSY,M2 31 82-ZM1-255-310 SPR-E,LVR DIR 2 82-ZM1-258-210 SPR-T,PINCH L 32 82-ZM3-305-210 GEAR,CAM M2 3 82-ZM1-341-210 LVR ASSY,PINCH L2...
- Page 43 http://www.xiaoyu163.com MECHANICAL EXPLODED VIEW 1 / 1 <EZ, K> 3 7 6 3 1 5 1 5 0 AZG-1 P.C.B P.C.B FL101 HT-SINK T5A HT-SINK VM2 1 3 9 4 2 2 9 6 5 1 3 P.C.B WIRE,BINDER PLATE,PT P.C.B PLATE SHLD 2T PLATE,EARTH MIC...
- Page 44 PANEL,REAR EZSM<EZSM> 82-NF5-229-010 PLATE,LOCK 8A-NFV-024-010 PANEL,REAR KSM<KSM> 8A-NFV-003-010 PANEL,FR EZ 8A-NHU-053-010 COVER, REAR H 8A-NFV-011-010 WINDOW,DISP E 87-084-077-010 NYLON RIVET, 3.5-4.5 87-CE3-023-010 BADGE,AIWA 30N SILV 87-064-185-010 HLDR,WIRE 8A-NF8-009-010 PANEL,CD 8A-NF6-219-010 HLDR,FAN 8A-NF8-007-010 PANEL,LEFT V-2 87-A91-711-010 FAN,3110 GL-B4W,B34H 8A-NF8-005-010 PANEL,TOP 8A-NF6-217-010...
- Page 45 http://www.xiaoyu163.com TAPE MECHANISM EXPLODED VIEW 1 / 1 <EZ, K> 3 7 6 3 1 5 1 5 0 P.C.B SOL 2 (DECK L only) SOL 1 (DECK L SIDE) (DECK R SIDE) LEVER EJECT R 1 3 9 4 2 2 9 6 5 1 3 P.C.B PLATE CAPSTAN N 2.2-41.7...
- Page 46 http://www.xiaoyu163.com TAPE MECHANISM PARTS LIST 1 / 1 <EZ, K> 3 7 63 1515 0 REF. NO. PART NO. KANRI DESCRIPTION REF. NO. PART NO. KANRI DESCRIPTION 1 86-ZM3-215-010 CHAS ASSY,RS 41 82-ZM1-216-310 GEAR,REEL 2 86-ZM3-202-010 BASE,HEAD S 42 86-ZM3-213-010 S-SCREW,HLDR,MOT 3 3 86-ZM3-205-010 SPR-C,RPH S...
- Page 47 http://www.xiaoyu163.com SPEAKER DISASSEMBLY INSTRUCTIONS 3 7 63 1515 0 Type.1 Type.4 Insert a flat-bladed screwdriver into the position indicated by the TOOLS arrows and remove the panel. Remove the screws of each speaker 1 Plastic head hammer unit and then remove the speaker units. 2 (() flat head screwdriver 3 Cut chisel How to Remove the PANEL, FR...
-
Page 48: Speaker Parts List
GILLE,FRAME ASSY<YUSL> 2 81-VSA-009-010 CORD,BUSH<277> 3 8A-NS8-006-010 GILLE,FRAME ASSY U<YUSC9> 3 87-010-384-010 CAP,E 100-25 M SME<277> 4 87-YS6-002-010 SPKR,CORD Y<277> 4 8A-NSJ-006-010 BADGE,AIWA S35 5 8Z-YS1-601-010 SPKR,100<277> 5 8A-DS8-009-010 PROTECTOR 6 88-NS5-610-010 CORD,SPKR 6 87-YS7-012-010 PANEL,FR S<607> 7 88-NS5-611-010 CORD,SPKR B/L 7 81-VSA-009-010 CORD,BUSH<607>... - Page 49 http://www.xiaoyu163.com 3 7 63 1515 0 L 13942296513 u163 2–11, IKENOHATA 1–CHOME, TAITO-KU, TOKYO 110, JAPAN TEL:03 (3827) 3111 912204 0251431 Printed in Singapore http://www.xiaoyu163.com...