Table of Contents
Advertisement
Quick Links
Advertisement
Table of Contents

Related Manuals for Motorola i856 H74XAN6JR7AN

Summary of Contents for Motorola i856 H74XAN6JR7AN
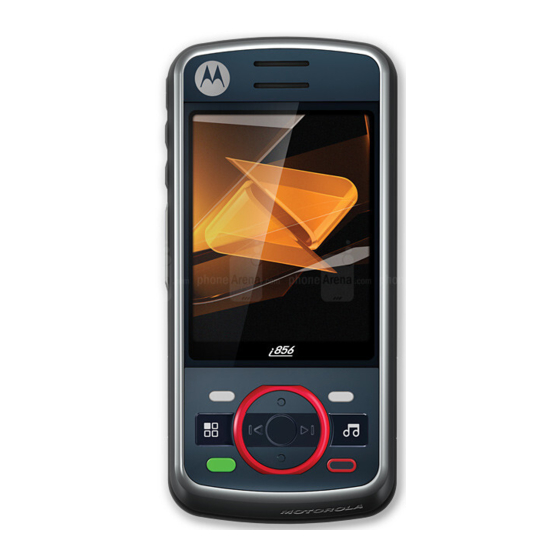
- Page 1 i856 User’s Guide...
-
Page 3: Declaration Of Conformity
FCC ID in the format FCC-ID: IHDT56KC1 on the product label. Motorola has not approved any changes or modifications to this device by the user. Any changes or modifications could void the user’s authority to operate the equipment. See 47 CFR Sec. 15.21. - Page 4 Motorola reserves the right to change or modify any information or specifications without notice or obligation.
- Page 5 HELLOMOTO Introducing your new Motorola i856 wireless phone. Here’s a quick anatomy lesson. i856w Camera Ready 5/10/09 Speaker Key Volume Keys Contcs Mesgs PTT Button Micro USB Connector Connects charger and accessories. Left Soft Key Perform function in lower left display.
-
Page 6: Check It Out
check it out Ready Press and hold the Power Key for a 5/10/09 few seconds, or until the screen lights up, to turn on your phone. Contcs Mesgs Customizable r key that can be used to open the Settings screen. Press the Navigation key up, down, left or right to highlight a menu feature. -
Page 7: Table Of Contents
contents check it out ... 2 menu map... . 5 use and care ..7 essentials . - Page 8 Battery Charging ..96 Specific Absorption Rate . AGPS and Emergency Calls....97 Motorola Limited Warranty for the United States and Canada..98 Hearing Aid Compatibility With Mobile Phones .
-
Page 9: Menu Map
main menu Recent Calls Contacts • [New Contact] Messages • [Create Message] • Voice Mail • Inbox • Drafts • Outbox • Sent Items • Net Alert Multimedia • Media Center • My Images • My Music • My Videos •... -
Page 10: Settings Menu
settings menu Display/Info • Wallpaper • [Buy More] • Auto Cycle • Wallpaper • Text Size • Theme • Home Icons • Backlight • Timer • Java Timer • PTT Backlight • Slide Close • Continue Task • End Task •... -
Page 11: Use And Care
Use and Care To care for your Motorola phone, please keep it away from: liquids of any kind Don’t expose your phone to water, rain, extreme humidity, sweat, or other moisture. If it does get wet, don’t try to... -
Page 12: Essentials
essentials Caution: Before using the phone for the first time, read the Important Safety and Legal information included in the gray-edged pages at the back of this guide. about this guide This guide shows how to locate and access menu feature as follows: Find it: / >... -
Page 13: Sim Card
You can connect your phone using a Motorola data cable directly to your computer, access the memory card loaded in the phone to save or delete music, images, videos, or audio files. -
Page 14: Insert The Memory Card
insert the memory card 1 Remove the battery door, lift the black plastic indicator and slide the memory card in place. Return the battery cover when you are done. Note: The first time you insert a memory card in your phone, you will see the following options: [Do Nothing], Go To Audio Player, Go To Camera, and Go To Media Center. -
Page 15: Battery
4 Lift the black plastic indicator and, with your fingernail, slide the memory card out of the slot. 5 Close the memory card slot cover. battery Note: Please consult “Battery Use and Safety” on page 94 before using this product. battery installation 1 With your fingernail, pull the battery door cover lock toward the front of the... -
Page 16: Battery Charging
2 Slide the battery door upwards until it is released from the phone. 3 Remove the battery door. Note: You must remove the battery door to attach a lanyard to the phone. essentials 4 Push the battery down until it snaps in place. -
Page 17: Turn It On & Off
You can partially charge your phone’s battery by connecting a Motorola-approved USB cable from your phone’s micro-USB port to a high power USB connector on a computer (not a low-power one, such as the USB connector on your keyboard or bus-powered USB hub). -
Page 18: Enable Security
enable security You must enable security the first time you power on you phone or within 10 days of first activation of your phone. 1 Press K under Ok. 2 You are prompted to enable security. Press K under Yes. A series of screens followed by the default home page displays. -
Page 19: Make A Private Call
feature any key To answer phone calls by answer pressing any key on the keypad press / > Phone Calls > Any Key Ans > On. make a private call Your Private ID is the number at which you receive one-to-one Private calls. Note: PTT means Push To Talk/ Walkie-Talkie. -
Page 20: Answer A Private Call
answer a private call 1 When your phone emits a chirping sound or vibrates to indicate you are receiving a Private call, wait for the caller to finish speaking. 2 Press and hold the PTT button and begin talking after your phone emits a chirping sound. -
Page 21: Store A Phone Number Or Private Id
2 A confirmation screen will appear asking to Start Call To:. 3 Press K under Yes or press r to begin the call. store a phone number or private ID You can store a phone number or private ID in Contacts: Find it: / >... -
Page 22: Call A Stored Phone Number Or Private Id
feature Press K under Contacts. set picture Select a contact and press / > Edit > [Ring Tone/Picture]. Select Picture and choose your desired picture. Press K under Back > K under Save. call a stored phone number or private ID Find it: / >... -
Page 23: Mms Features
MMS. Additionally, MMS allows you to send and receive messages that may include text, pictures, videos, and audio files. create and send messages 1 From the home screen press K under Mesgs > [Create Message]. 2 Enter the phone number of the person you want to send the message to and press r or press K under Search. -
Page 24: More Message Options
more message options To view more message fields in a message you are creating, select ...More... The following options become available: option Subject: Create or edit the subject line. Attach: Attach a picture, audio file or voice record. Cc: Send a copy of this message to someone else. - Page 25 remove an inserted item To remove an item from the message you are creating, highlight it and press K under Delete. attach a picture, video, or audio recording You can attach one or more pictures, audio or voice recordings from your phone into the body of the message.
-
Page 26: Record A Video
3 Take the picture. For instructions on how to take the picture see “camera” on page 60. 4 When you have captured the picture you want, press K under Save. To discard the picture, press K under Discard. You can then take another picture. 5 When finished, press K under Done. -
Page 27: Inbox
6 The voice record is attached to the message and saved to the media center and the list of voice records. remove an attachment To remove an attachment in a message you are creating: 1 Select Attach. 2 Scroll to the attachment you want to remove. -
Page 28: Forward A Message
2 To dismiss the message notification press K under Exit. While reading a text and numeric message that contains a phone number, you can press , to call that number. threaded inbox The threaded Inbox allows you to organize your messages by subject or sender. 1 From the Message Center, Press / >... -
Page 29: Send A Call Alert
2 Press / > Lock Message or Unlock Message. call a number in a message If a message you receive contains a phone number or Private ID in the From field, the To field, the Cc field, the Subject field, or the body of the message, you can call or send a call alert to that number. - Page 30 1 View the message you want to reply to. 2 To reply to the sender only, press K under Reply or press K under Reply All to reply to all recipients. 3 A list of short phrases appears. Select any of these phrases to add it to your messages or select [Create Reply].
-
Page 31: Open Attachments
attachment to view the picture or play the video or audio recording. open attachments 1 View the message. 2 Highlight the attachment you want to open. Attachments appear at the end of a message. 3 Press r. Attachments of an unknown type cannot be opened, but can be deleted. -
Page 32: Outbox
save attachments 1 View the message. 2 Highlight the attachment you want to save. 3 Press / > Save Attachment. Selected items save to the default storage location. delete attachments 1 View the message. 2 Highlight the attachment you want to delete. -
Page 33: Customize Messaging
forward items from sent items 1 Scroll to the message you want to forward. 2 Press / > Forward. 3 Make edits if you wish, select the recipient and press K under Send. check delivery status If a message was successfully sent and you set the message to confirm delivery, you can check the delivery status: 1 Scroll to the message you want to view. -
Page 34: Mms Setup
option Cleanup: Controls how long messages remain in the Inbox and Sent Items before being deleted. Delivery Rpt Default: Allows you to be automatically notified when your message is delivered. Memory Size: Shows a report on used and free memory in your phone. MMS Setup: opens a submenu to set MMS options. - Page 35 The following options become available: option Friendly Name: Allows you to create a friendly name. Your friendly name is displayed in the From field on other iDEN handsets when your message is received. Download Options: Controls whether your phone downloads new messages. Set this option to Automatic if you want your phone to download new messages automatically.
- Page 36 edit quick notes or replies You can edit only Quick Note phrases you have created. 1 From the Setup menu, select Quick Notes, or select MMS Setup > Replies. 2 Select the quick note or reply you want to edit. 3 Edit the text and press r.
-
Page 37: Delete All Messages
2 Choose a clean up option from the following list: option Off: Messages are never automatically deleted. 5 Messages: If you have more than 5 messages, messages are deleted in the order they were received, starting with the oldest, until 5 are left. 10 Messages: If you have more than 10 messages, messages are deleted in the order they were received, starting with the... -
Page 38: Message Notifications
3 Press K under Yes to confirm. delete a thread To delete a thread from the Inbox: 1 From the Inbox, select a thread. 2 Press / > Delete Thread. 3 Press K under Yes to confirm. message notifications When you receive a message, your phone notifies you with text on the display, a notification tone or vibration. - Page 39 option Message Mail Only: Tones sound during calls for mail messages; tones for all other types of messages are held until you end calls. Delay All: Tones for all types of messages are held until you end calls. Note: Delay All is the default setting. To set notification options during a call press / >...
-
Page 40: Basics
basics See page 1 for a basic phone diagram. display The home screen shows when you turn on the phone. To dial a number from the home screen, press number keys and ,. Note: Your home screen may look different. Ready Time Date... -
Page 41: Main Menu
2 Active Phone Line: % indicates phone line 1 is ready to make calls. 3 Speaker On/Off: Sounds associated with Private calls can be set to come through the earpiece rather than through the speaker. 4 Ringer Vibe/Off: Your phone is set to not ring. -
Page 42: Text Entry
auto hide 1 Press / > > Personalize > Carousel > Auto Hide. 2 Select from Off, 2 seconds, 4 seconds, or 8 seconds. Note: When Auto Hide is set to Off, the Carousel Menu will always be visible on the idle screen. - Page 43 entry method Symbols Enter symbols. Numeric Enter numbers by pressing the numbers on the keypad. Text Input Selects the desired entry Settings languages and Word Prediction features. Insert Selects a item to be inserted, such a picture, an audio/video clip or a voice recording.
-
Page 44: Alpha Method
To accept a word completion (such as Billion when you entered Bill), press ; right. If you get a word you don’t want, you can press the 0 key to see more word choices and pick the one you want. alpha method To enter characters by tapping the keypad: 1 Select the Alpha method. -
Page 45: Volume
characters Back When entering text, press and hold # to switch between lowercase and uppercase letters. The icons in the upper left-hand corner of the screen show the character type. character type Q or T Lowercase R or U Uppercase S or V Shift Lock Numerical Symbols... -
Page 46: Navigation Key
navigation key Press the navigation key up, down, left, or right to scroll to items in the display. When you highlight the desired item, press r to select handsfree speaker You can use your phone’s handsfree speaker to make calls without holding the phone to your ear. -
Page 47: Features For The Hearing Impaired
features for the hearing impaired using your phone with a hearing aid For best results use the following optimization procedures and handset setting. They generally apply as well for users with cochlear implants: optimize your handset position and orientation While in a phone call slide your phone up and down, then left and right until best microphone coupling is obtained. -
Page 48: Tty
Approximate telecoil location is within 6-13 mm of this location. Approximate telecoil location is just above the battery. choose your hearing aid setting Find it: / > > Phone Calls > Hearing Aid. 1 Set this option to Microphone. Microphone coupling is now optimized. -
Page 49: Security Features
security features feature phone lock To lock the phone press / > > Security > Phone Lock > Lock Now or Auto Lock. keypad lock To lock the keypad press / > > Security > Keypad Lock. Select Lock Now, or select Auto Lock and select from Off, 2 seconds, 4 seconds, or 8 seconds. -
Page 50: Main Attractions
main attractions multimedia Your phone comes with several multimedia applications to let you access pictures, videos, and audio files stored in your phone’s memory or in the Audio, Music, Podcast, Image and Video folders on a memory card inserted in your phone’s memory card slot: •... - Page 51 • Audio files saved from MMS messages received • Audio files downloaded to your phone Because the memory card inserted in your phone may contain files saved to it using a device other than your phone, not all types of pictures, videos, and audio files on the memory card may be accessed through your phone’s media center.
- Page 52 Format Bit Rate / Info AMR-WB 6.6 kbps - 23.85 .awb, .3ga, Kbps (supports all .3gp 3GPP specified rates) iMelody 1 – 3.5 kHz .imy Monophonic MIDI XMF 64 channels .xmf, .mmf, .xmf0, .xmf1, .mxmf MIDI 64 channels Stand .mid, .midi, .smf Up to 320kbps .mp3...
- Page 53 Format Bit Rate / Info Real Audio 5 kbps (fixed Sipro rate) ® (ACELP .net) 8.5/6.5 kbps (dual .rm, .ra, ram rate) 16 kpbs (wide band) Real Up to 192 kbps Audio 10 .rm, .ra, ram WMA v9 L2 Up to 320 kbps (also WMA v3, v7, v8) .wma...
-
Page 54: My Music
Format Resolution / Bit and Frame Rate H.264 Up to 320 kbps, 320 x 240, 15 fps WMV8 / WMV 9 Up to 384 kbps, 320 x 240, 24 fps my music Your handset includes a music player that you can use to play music files stored in the phone memory and the MUSIC/AUDIO/ PODCAST directories on the memory card... - Page 55 Connect your phone to your computer using a compatible USB cable. (Wait for the connection to be completed. When connected, the host computer will automatically detect your phone.) If your service provider offers MMS, you can send details of the podcast to a friend and send feedback to the podcast creator using MMS messages.
-
Page 56: Play Music Files
play music files Find it: / > > My Music or press [. Note: The i856w does not have a Music Key and a Play Key. 1 Scroll to choose how you want your music played (Songs, Playlists, Albums, etc.). Tip: The Songs folder contains all the music files on the memory card in a single list. -
Page 57: Set Up The Music Player
The following options become available through the navigation panel: option Pause and Resume: Press K under Pause or y to pause, and press K under Play or y to resume playing paused music files. Skip to Next or Previous: Press and release ; right or left to skip to the next or previous music file. -
Page 58: Create A Playlist
option Album View: Lets you choose to view either a list view or an image view. Auto Update: Lets you reload all music files every time you launch My Music. If you set Auto Update to Off, it will follow the last known music library configuration in order to save loading time. - Page 59 3 Select each file you want on the playlist. A checkmark appears by each selected file. Tip: To deselect a selected item, scroll to a selected file and press r. 4 When you are finished selecting files, press K under Done and K under Save. The following options are available for existing playlists by pressing / >...
- Page 60 option Edit a Playlist: You can change a playlist name, add music files, remove music files, and change the order of the music files. Select a playlist and press / > Edit Playlist. Make changes and press K under Save. Delete all Playlists: While in the music player select Playlists.
- Page 61 podcast details, but does not play the podcast. To play the podcast, press K under Play. After you begin playing the podcast, pressing y pauses and resumes the podcast. • If the podcast you are playing contains highlights, pressing and releasing the ;...
-
Page 62: My Images
Find it: / > > My Music > Podcasts > / > Forward Details > Send. background music Your handset has the capability to play music in the background while you are accessing other features like Settings, Media Center, Bluetooth, GPS, Contacts, MMS, Datebook, Memo, Recent Calls, and others. -
Page 63: My Videos
option Slideshow: Starts a slide show containing images from the currently highlighted image. Save as New: Lets you save an image with a new filename. Preview: Displays the highlighted image. Send Via BLuetooth: Lets you send the image via Bluetooth. Rename: Lets you rename the image filename. -
Page 64: Camera
viewing videos My Videos will display the video in portrait mode by default. Tip: To change the default to landscape mode press / > Full Screen. my videos setup menu Find it: / > > My Videos > / > Setup The My Videos Setup Menu allows you to change the following settings: option... - Page 65 From the camera viewfinder, you can press / to enter Menu Options. The following options become available: option Media Center: Opens the Media Center application. Record Video: To switch the camera to camcorder mode. Zoom: To set the camera’s zoom to 1x, 2x, or Remove Card: To safely remove the memory card from the phone.
-
Page 66: Customize The Camera
option Memory Card: Allows you to remove the memory card, set where videos are stored: On Phone or Prefer On Card, format the memory card, and to display Help. Camera Setup: To access the camera set up screen. access the media center You can access the media center from the camera at any time by pressing / >... -
Page 67: Camcorder
camcorder You can use your phone’s camcorder feature to record videos. Find it: / > > Camcorder record video 1 Press K under Record, or press r. 2 To stop recording and discard the partially recorded video, press K under Cancel. 3 To stop recording the video press K under Stop. - Page 68 option Video Length: Allows you to choose between Short, to limit video length for sending via MMS message, or Maximum for longer videos. Note: When set to Maximum, video length is limited to 60 seconds when stored to your phone’s memory. When stored to a memory card, video length is limited to available space on the memory card, or two hours.
-
Page 69: Ptx Features
sending video via MMS message To send the recorded video via an MMS message, press K under Send. The video will be automatically attached to a new MMS message. Note: To ensure the video file is small enough to be sent via MMS, set the Camcorder video length to Short. -
Page 70: Send Messages
send messages The Push to Send Messages feature lets you send short text messages through Private calls. When you send a message, it appears on the display of the phone you are engaged in the Private call with. begin a message and choose a recipient You can begin a message during a Private call, from the Contacts list, the Recent Calls list, or from... -
Page 71: Create Messages
create messages After you have begun a message and chosen a recipient, a screen appears that lets you create the text of the message you want to send. Your message may be up to 400 characters long. You can choose from a list of ready-made words or short phrases called Quick Notes. -
Page 72: Start A Call By Sending A Picture
The first time you send a stored picture after turning the phone on, Picture Fees May Apply Continue? appears and you are prompted to respond. Note: You cannot make or receive Private calls while transmitting or receiving a picture. send a picture during a call 1 While in a Private call, press K under Picture or press / >... -
Page 73: Clear A Picture From The Display
from the PT Manager: Find it: / > S > PT Manager > Send Picture. 1 Select A Contact or A Recent Call. A list of contacts that have Private IDs and are able to receive pictures appears. 2 Select the name of the person you want to send the picture to. -
Page 74: Send My Info
in a private call with is not able to receive Datebook events. 2 If you want to create a new datebook event, press K under New and create the event in your datebook. If you want to chose an existing event do so. 3 If the event is a recurring event: Select This Event Only to send only the event selected. -
Page 75: Send Contact Information
automatic sending To control whether you send your information automatically: Find it: / > S > PT Manager > Configure > PTT My Info > Auto Send 1 Select On or Off 2 When you make a call in which your information is sent automatically, the name you entered in the My Name field of My Info appears on the display of the... -
Page 76: One Touch Ptt
• Relative Location or Direction and distance from the sender in Miles or Kilometers Find it: / > > PT Manager > Send Location. 1 Select A Contact or A Recent Call. A list of contacts that have Private IDs and are able to receive locations appears. -
Page 77: Pt Manager
option Last Call: Call the most recent Private ID or Group on the recent calls list. Assigned Number: Call a Private ID you assign. Enter the number using your keypad, or press K under Search. Select Contacts, Recent Calls, or Memo. PT Manager: Go to PT Manager. -
Page 78: Bluetooth
2 Press K under Done. 3 Push the PTT button. PT manager The PT Manager lets you quickly access PTT features, and other Private call features, from the main menu. Find it: / > S > PT Manager 1 Select Quick PTT, Send Message, Send Picture, Send Event, Send My Info, Send Contact, Send Location, or Configure. -
Page 79: Make A Bluetooth Connection
1234 as your phone’s PIN. 5 Press K under Ok. This handset offers the Bluetooth auto pair feature with auto pair compatible Motorola devices. When bonded via Bluetooth with a certain device, the pin will not be required connect your handset with another Bluetooth device Find it: / >... -
Page 80: Send Information Via Bluetooth
1 Select the device you want from the list of found devices on your screen. 2 Create a bond if you are prompted to do If you have previously connected to a device, the device will be stored on your phone so you can connect with it easily. - Page 81 4 If prompted, bond with the device. Your phone connects with the devices and transfers the information. how to check if your PC supports Bluetooth FTP 1 Right click on the Bluetooth icon in the system tray and open Bluetooth configuration.
-
Page 82: Call Features
call features turn off a call alert You can press the volume keys to turn off a call alert before answering the call. recent calls The recent calls list contains information associated with calls you have made and received and call alerts you have received. When you send or receive Private calls, the recent call list contains the following PTX items with those calls:... -
Page 83: Redial
can be stored to the Contacts list from the Recent Calls list. Find it: / > Recent Calls. 1 Scroll to or select the item you want to store. 2 Press K under Save to store the information as a new entry in the Contacts list. -
Page 84: Voice Names
different numbers depending on the reason you missed the call. You can forward phone lines 1 and 2 independently. Find it: / > Phone Calls > Call Forward. 1 To forward all calls select All Calls and select To to enter the phone number you want all your calls forwarded to. -
Page 85: Emergency Calls
emergency calls Your service provider programs one or more emergency phone numbers that you can call under any circumstances. Emergency calls can be made without a SIM card, when your phone is locked, or when the SIM card is blocked. Note: Emergency numbers vary by country. -
Page 86: Speed Dial
international access code (indicated by +). Then, press the keypad keys to dial the country code and phone number. speed dial Each phone number stored in Contacts is assigned a Speed Dial number, which you can use to call that number. 1 From the home screen, use the keypad to enter the Speed Dial number assigned to the phone number you want to call. -
Page 87: Customize
customize ring tones To set the ring tone your phone makes when you receive phone calls, call alerts, message notifications, pictures sent using Send via PTT or Datebook reminders: Find it: / > > Ring Tones 1 Make sure Vibrate All is set to Off. 2 Scroll through the list of ring tones and select the one you want to assign. -
Page 88: Backlight
Setting this option to On lets you turn Vibrate All off by pressing the up volume control. Setting this option to Locked requires you to press and hold the up volume control to turn Vibrate All off. The Locked option helps prevent you from accidentally turning Vibrate All off. -
Page 89: Datebook
You can set the wallpapers to change automatically after a certain period of time by turning on the Auto Cycle feature located in the Wallpaper menu. You can select from 5 minutes, 15 minutes, 1 hour, 8 hours, Daily, or Startup. datebook feature create... -
Page 90: Hide Or Show Location Information
datebook setup Find it: / > C > Datebook > / > Setup You can view or change these options: options Start View: Sets Datebook to start in day view, week view, or month view when you access Datebook. Daily Begin: Sets the beginning of your day. This is the earliest time of day displayed in week view, if you have a 12-hour day view. - Page 91 without your request or permission. GPS-enhanced 911 is not available in all areas. set your privacy options Find it: / > C > GPS > Privacy Select from the following options: option Restricted: No Java or similar software applications may view the location of your phone.
-
Page 92: Legal And Safety
RF energy. Portable Radio Product Operation and EME Exposure Your Motorola radio product is designed to comply with the following national and international standards and guidelines regarding exposure of human beings to radio frequency electromagnetic energy (EME): Legal and Safety •... -
Page 93: Operational Precautions
Motorola approved clip, holder, holster, case or body harness. If you do not use a body-worn accessory supplied or approved by Motorola and are not using the mobile device in the intended use positions along side the head in... -
Page 94: Bluetooth
This device supports Bluetooth 1.2 including HSP, HFP, OPP, DUN, PBAP, and BPP. In order for Bluetooth devices to communicate with one another, they must utilize the same Bluetooth profile. To determine the profiles supported by other Motorola devices, visit www.hellomoto.com/bluetooth. For other devices, contact their respective manufacturer. -
Page 95: Caring For The Environment By Recycling
Alternatively, you may return unwanted mobile devices and electrical accessories to any Motorola Approved Service Center in your region. Details of Motorola approved national recycling schemes, and further information on Motorola recycling activities can be found at: www.motorola.com/recycling Disposal of your Mobile Device Packaging and User’s Guide... -
Page 96: Symbol Key
Symbol Key Your battery, charger, or portable radio may contain symbols, defined as follows: Symbol Definition Important safety information 032374o follows. Do not dispose of your battery 032376o or phone in a fire. Your battery or phone may 032375o require recycling in accordance with local laws. -
Page 97: Open Source Software Information
For instructions on how to obtain a copy of any source code being made publicly available by Motorola related to software used in this Motorola mobile device you may send your request in writing to the address below. Please make sure that the request includes the model number and the software version number. -
Page 98: Service And Repairs
USA. The Motorola website opensource.motorola.com also contains information regarding Motorola’s use of open source. Motorola has created the opensource.motorola.com to serve as a portal for interaction with the software community-at-large. To view additional information regarding licenses, acknowledgments and required copyright notices for open source packages used in this Motorola mobile device, please select Main Menu >... - Page 99 Consumers should confirm that any battery they purchase has a “Motorola Original” hologram. Motorola recommends you always use Motorola-branded batteries and chargers. Motorola mobile devices are designed to work with Motorola batteries. If you see a message on your Legal and Safety...
-
Page 100: Battery Charging
• Remove the battery and inspect it to confirm that it has a “Motorola Original” hologram; • If there is no hologram, the battery is not a Motorola battery; • If there is a hologram, replace the battery and retry charging it;... -
Page 101: Calls
0.88 W/kg, and when worn on the body, as described in this guide, is 1.15 W/kg. Body-worn measurements can differ, depending upon available accessories and regulatory requirements. The SAR information includes the Motorola testing protocol, assessment procedure, and measurement uncertainty range for this product. -
Page 102: Motorola Limited Warranty For The United States And Canada
Note: FOR IDEN SUBSCRIBER PRODUCTS, ACCESSORIES AND SOFTWARE PURCHASED IN THE UNITED STATES OR CANADA Subject to the exclusions contained below, Motorola, Inc. warrants its Motorola iDEN Digital Mobile and Portable Handsets ("Products"), Motorola-branded or certified accessories sold for use with these Products ("Accessories") and Motorola software contained on CD-Roms or other tangible media and sold for use with these Products ("Software") to be free from defects in... - Page 103 (d) other acts which are not the fault of Motorola, are excluded from coverage. Use of Non-Motorola Products and Accessories. Defects or damage that result from the use of Non-Motorola branded or certified Products, Accessories, Software or other peripheral equipment are excluded from coverage.
- Page 104 Who is covered? This warranty extends only to the first consumer purchaser, and is not transferable. What will Motorola Do? Motorola, at its option, will at no charge repair, replace or refund the purchase price of any Products, Accessories or Software that does not conform to this warranty.
-
Page 105: Patent And Software Provisions
MOTOROLA will defend, at its own expense, any suit brought against the end user purchaser to the extent that it is based on a claim that the Product or parts infringe a patent, and Motorola will pay those costs and damages finally awarded against the end user... -
Page 106: Hearing Aid Compatibility With Mobile Phones
No other use including, without limitation, alteration, modification, reproduction, distribution, or reverse engineering of such MOTOROLA software or exercise or rights in such MOTOROLA software is permitted. No license is granted by implication, estoppel or otherwise under MOTOROLA patent rights or copyrights. -
Page 107: Information From The World Health Organization
Product registration is an important step toward enjoying your new Motorola product. Registering permits us to contact you for product or software updates and allows you to subscribe to updates on new products or special promotions. Registration is not required for warranty coverage. -
Page 108: Patent And Trademark Information
MOTOROLA, the Stylized M Logo and all other trademarks indicated as such herein are trademarks of Motorola, Inc. ® Reg. U.S. Pat. & Tm. Off. © 2009 Motorola, Inc. All rights reserved. Microsoft and Microsoft Internet Explorer are registered trademarks of Microsoft Corporation. -
Page 109: Smart Practices While Driving
If you choose to use your phone while driving, remember the following tips: • Get to know your Motorola mobile device and its features such as speed dial and redial. If available, these features help you to place your call without taking your attention off the road. - Page 110 • Do not engage in stressful or emotional conversations that may be distracting. Make people you are talking with aware you are driving and suspend conversations that can divert your attention away from the road. • Use your mobile device to call for help. Dial 911 or other local emergency number in the case of fire, traffic accident, or medical emergencies (wherever wireless phone service is available).
-
Page 111: Index
index accessories 8 active phone line 37 advanced calling 14 call waiting 14 alert set 41, 83 turn off 41, 78 answer a call 14 auto replies 26 backlight 84 battery charging 12 battery indicator 37 battery installation 11 Bluetooth 74 connect 74 send information 76 setting your phone 74... - Page 112 drafts see also text messages, drafts earpiece volume 41 emergency number 81 end a call 14 end key 14 frequently asked questions service and repairs 94 GPS enabled emergency calls 81 GPS, see GPS enabled index handsfree speaker 42 hearing aid 43 Hearing Aid Compatibility home screen 36 images...
- Page 113 optional accessory 8 optional feature 8 packet data 37 phone number 18 power key 13 private calls answer 16 call alerts 15 make 15 receive a call alert 16 PT Manager 73 PTX features 64 radio frequency 88 received calls 78 recent calls 78 recycling 103 redial 79...
- Page 114 videos my videos 59 viewing 59 voice names 80 voicemail 82 message indicator 82 receiving 82 setting up 82 voicerecord 46 volume 41 wallpaper 84 WHO information 103 your phone number 18 index...
- Page 116 NNTN7815A xxxxxxxx xx xx MAY/09 Printed in USA...