Advertisement
Table of Contents
- 1 Table of Contents
- 2 Important Safety Instructions
- 3 Operating for the First Time
- 4 Installing Oven Accessories
- 5 Using the Gas Cooker
- 6 Using the Electric Cooker
- 7 Button Programmable Clock
- 8 General Hints and Tips
- 9 Cleaning the Cooker
- 10 Getting to Know Your Oven
- 11 Oven Guide
- 12 Trouble Shooting
- 13 Installation
- 14 Replacing the Oven Light
- 15 Service Fuse
- 16 Warranty
- Download this manual
Advertisement
Table of Contents

Related Manuals for Westinghouse WLE522WA


Summary of Contents for Westinghouse WLE522WA
- Page 1 USER MANUAL 540MM UPRIGHT COOKERS WLE522WA, WLE525WA, WLE527WA, WLE533WA, WLE535WA, WLE537WA, WLE547WA, WLG503WA, WLG505WA, WLG517WA...
-
Page 2: Table Of Contents
CONGRATULATIONS CONTENTS Congratulations and thank you for choosing our Westinghouse Important safety instructions �������������������������������������������������������������������3 upright cooker� We are sure you will find your new appliance Operating for the first time �����������������������������������������������������������������������5 a pleasure to use and a great asset to your cooking� Before Installing oven accessories ������������������������������������������������������������������������6... -
Page 3: Important Safety Instructions
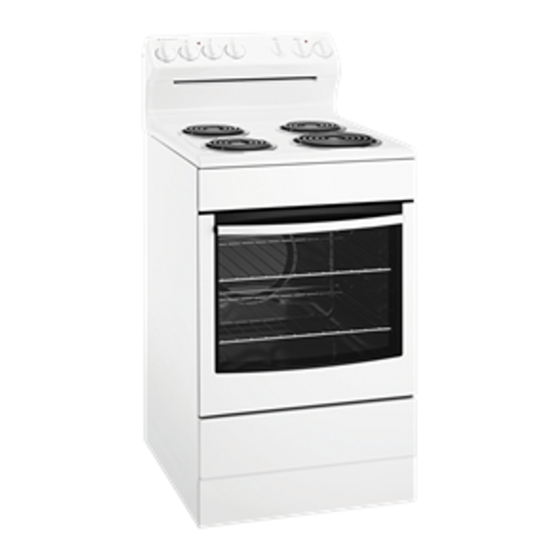
IMPORTANT SAFETY INSTRUCTIONS WARNING WARNING WARNING CAUTION Separate grill model: Grill with door open� To avoid an electric shock or fire Grill in oven model: Grill with door closed� This appliance is NOT intended for use by persons (including children) with reduced physical, sensory or mental capability, or lack of experience and knowledge, unless they WARNING WARNING... - Page 4 GENERAL APPLIANCE DESCRIPTION Electric Separate Grill Oven depicted� Control panel Removable spill tray (radiant hotplate models only) Hotplate Grill element/ burner Grill with removable grill dish side supports, grill dish & rack (where fitted) Grill door (Fan forced (where fitted) models only) Removable shelves Anti-tilt plate...
-
Page 5: Operating For The First Time
OPERATING FOR THE FIRST TIME Choosing utensils for electric hotplates Refer to the diagram below� GOOD (recessed base) (convex base) (undersize) (oversize) (moisture on hotplate) (no utensil) (recessed base) (convex base) (undersize) (oversize) (moisture on hotplate) (no utensil) Before operating first time... -
Page 6: Installing Oven Accessories
INSTALLING OVEN ACCESSORIES Fitting the grill dish supports FITTING OVEN SHELVES • Insert the rear hook into the rear hole� 1� Ensure shelf orientation is correct (refer to diagram below)� • Align the front peg to the front hole and push in firmly� 2�... -
Page 7: Using The Gas Cooker
USING THE GAS COOKER Gas oven features and descriptions Gas oven conventional baking WLG503WA The heat comes from the bottom oven burner� The temperature at the centre of the oven is the same temperature set on the control knob� When oven is used on this mode, shelf position is important, (refer to ‘Oven Guide’)�... - Page 8 USING THE GAS COOKER Gas hotplate LIGHTING GAS HOTPLATE, GRILL AND OVEN Ensure burner caps, crowns and trivets are properly assembled� Hotplate Ignition – (Electronic) For wok ONLY use the trivet and burner dedicated for wok cooking� While pressing the Electronic Ignitor Switch, push and turn the appropriate Burner Control Knob to maximum�...
-
Page 9: Using The Electric Cooker
– sets hotplate temperature� Grill in Oven Models 2� Hotplate Indicator Light – comes on when a hotplate control knob is operated� WLE522WA 3� Grill/Oven Function Control Knob – sets grill or oven function� 4� Grill/Oven Control knob – sets grill/oven temperature�... -
Page 10: Button Programmable Clock
This tray can be removed by sliding it out through the lower part of the oven approximately 10°C cooler� the open grill door (except model WLE522WA)� For grill in oven models, the grill dish must be removed Radiant elements also swivel for easy cleaning�... - Page 11 3 BUTTON PROGRAMMABLE CLOCK 3� Press MODE button until the end time ‘indicator’ Your oven is equipped with a 3 button timer that has begins flashing� the following features: 4� Enter the time of day you want to finish cooking by •...
-
Page 12: General Hints And Tips
GENERAL HINTS AND TIPS Fan Forced WARNING CAUTION • Make sure shelves are evenly spaced� • When baking more than one dish in fan forced oven, place Using the grill dishes centrally on shelves rather than several dishes on one shelf�... -
Page 13: Cleaning The Cooker
CLEANING THE COOKER Ceramic hotplates Ovens and hotplates are made from steel and enamel� Do not use abrasives and harsh scourers as they may scratch Remove all spilt food with a razor blade scraper while the the surface� hotplate is still warm – NOT HOT� •... - Page 14 GENERAL HINTS AND TIPS Cleaning the oven door • To remove the top trim, press the ribbed release clips at Cool air circulates through the door to lower the surface each end and lift top trim away from the door� temperature on the outside of the oven door�...
- Page 15 Re-Assembling the oven door inner glass • Replace the top trim ensuring the clips snap back into position� • Fully open the door, rotate the stirrups back to their original position and close the door� • When replacing the door inner glass, make sure the black dot is positioned as shown in the image (where applicable)�...
-
Page 16: Getting To Know Your Oven
GETTING TO KNOW YOUR OVEN Getting to know your new oven with this simple Method: ‘Test Cake’ 1� Butter base and sides of two, 20cm straight-sided round or square cake pans� Then line the base with grease proof When baking, it is normal to experience some slight variation paper or baking paper�... -
Page 17: Oven Guide
OVEN GUIDE The following is intended as a guide� Cooking variation is natural and to be expected� You should experiment with times, temperatures and recipes to obtain the best results to your own taste� Get to know your oven before making a service call� Where the gas models vary from the electric models, details for gas cooking is shown in brackets�... -
Page 18: Trouble Shooting
TROUBLE SHOOTING PROBLEM CAUSES WHAT TO DO Uneven cooking Incorrect shelf position Select shelf that puts food in centre of oven Oven tray too large Try other trays or dishes Trays not in centre Put trays in centre Air flow in oven uneven Rotate food during cooking Grill tray affecting thermostat Remove grill tray from oven on bake modes... - Page 19 TROUBLE SHOOTING If you have a problem with your appliance check the following before you ring the service line� PROBLEM WHAT TO DO Operational problems Check the electricity is turned on Check your fuses� If the fuse continues to blow, call the Service Centre i�e�...
-
Page 20: Installation
INSTALLATION Location Position anti-tilt plate to the rear wall and 25mm from side of cupboard� Securely fix anti-tilt plate to the floor with fasteners� The appliance has been designed to fit a 550mm gap in Adjust levelling feet on cooker as required� kitchen cabinetry or have free space on either side�... -
Page 21: Replacing The Oven Light
REPLACING THE OVEN LIGHT WARNING WARNING Ensure the appliance is switched off at power supply (not just the control knobs) before replacing the light globe to avoid possibility of electric shock� Turn oven light glass anti-clockwise to remove it for globe replacement A special high temperature resistant globe should be used�... - Page 22 INSTALLATION Removing the oven door 4� Lift the door slightly and evenly while continuing to slowly close the door� (to be done by qualified personnel only) 1� With door fully open, rotate the two stirrups to its rest position� Stirrup 5�...
-
Page 23: Service Fuse
nstallation INSTALLATION Replacing the oven door 4� Open door fully and rotate stirrups away from you back to their original position� (to be done by qualified personnel only) 1� Hold door with both hands� cedure to assemble the door 2� Locate both hinges into the frame slots at the Procedure to assemble the door (to be done by qualified personnel only). - Page 24 INSTALLATION Electric wiring requirements Hard wiring The cooker MUST be installed in compliance with: 1� Remove rear panel� • Wiring connections in AS/NZS3000 wiring rules� 2� Fit wires through hole at bottom centre using the appropriate gland to protect insulation of wires from the •...
- Page 25 INSTALLATION Gas requirements The burner crowns, burner caps and trivets can be fitted to the hob� This appliance must be installed by an authorised person, The regulator or test point fitting installation is described in the according to all codes and regulations of: front of the manual with UNPACKING�...
- Page 26 INSTALLATION Wiring connection for gas cooker Operation on universal LPG/propane To allow for disconnection of the appliance after installation, 1� The appliance inlet fitting provided MUST be orientated the plug must be accessible after installation� so that the pressure nipple is accessible� If the supply cord is damaged, it must be replaced by the 2�...
- Page 27 INSTALLATION Checking the gas supply Testing Burner Performance 1� Check the manometer zero point is correct� • Observe the flame appearance on each burner when set to max� If it is smaller or larger than expected, then the 2� Connect the manometer to the cooker pressure test point� injector size needs checking (refer to table)�...
- Page 28 NOTES NOTES...
- Page 29 NOTES NOTES...
- Page 30 NOTES NOTES...
-
Page 31: Warranty
Warranty FOR SALES IN AUSTRALIA AND NEW ZEALAND APPLIANCE: BUILT-IN OVEN, COOKTOP AND FREESTANDING COOKERS 7. You may not make a claim under this warranty unless the defect claimed This document sets out the terms and conditions of the product warranties for Electrolux Appliances. - Page 32 Top Service encompasses the after sales service provided by The Electrolux Group to consumers including delivery, home service and spare parts� Westinghouse. We are part of the Electrolux family. Share more of our thinking at electrolux.com P/No: A03786001 Rev 003 ECN No. 052773C ©...