Table of Contents
Advertisement
CARBON MONOXIDE HAZARD
DANGER
• This appliance can produce
carbon monoxide which has no
odor.
• Using it in an enclosed space
can kill you.
• Never use this appliance in
an enclosed space such as a
camper, tent, car or home.
WARNING
FOR YOUR SAFETY:
For Outdoor Use Only
(outside any enclosure)
WARNING
FOR YOUR SAFETY:
Improper installation, adjustment,
alteration, service or maintenance can
cause injury or property damage.
Read the installation, operation, and
Maintenance instructions thoroughly
before installing or servicing this
equipment.
Failure to follow these instructions could
result in fire or explosion, which could
cause property damage, personal injury, or
death.
Made from 70% Bagasse
(Environmentally Friendly Sugar
Cane Pulp By-product)
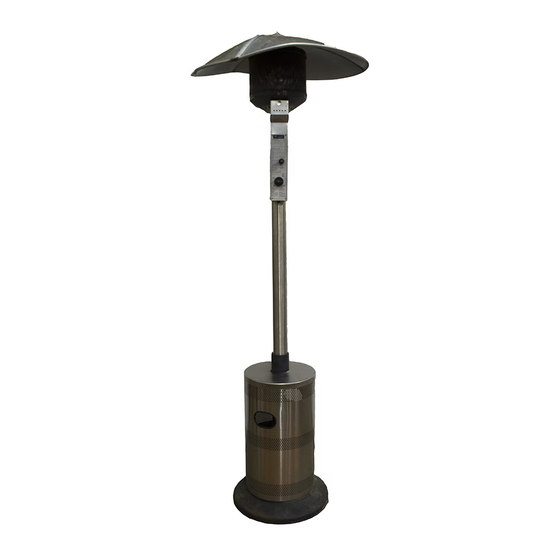
Outdoor Patio Heater
Model No. 200605
Table of Contents
Important Safeguards . . . . . . . . . . . . . . . . . . . . . . . . . . . . . . . . . . . . . . . . . . . Page 2
Exploded View & Hardware . . . . . . . . . . . . . . . . . . . . . . . . . . . . . . . . . . . . . . . . . . . 3
Assembly Instructions. . . . . . . . . . . . . . . . . . . . . . . . . . . . . . . . . . . . . . . . . . . . . . . 4
Installling Lp Gas Tank . . . . . . . . . . . . . . . . . . . . . . . . . . . . . . . . . . . . . . . . . . . . . . 8
Insert Lp Gas Tank. . . . . . . . . . . . . . . . . . . . . . . . . . . . . . . . . . . . . . . . . . . . . . . 8
Secure Lp Gas Tank. . . . . . . . . . . . . . . . . . . . . . . . . . . . . . . . . . . . . . . . . . . . . . 8
Connect Lp Gas Tank . . . . . . . . . . . . . . . . . . . . . . . . . . . . . . . . . . . . . . . . . . . . . 8
Disconnect Lp Gas Tank. . . . . . . . . . . . . . . . . . . . . . . . . . . . . . . . . . . . . . . . . . . 8
Operating Instructions. . . . . . . . . . . . . . . . . . . . . . . . . . . . . . . . . . . . . . . . . . . . . . . 8
Checking For Leaks . . . . . . . . . . . . . . . . . . . . . . . . . . . . . . . . . . . . . . . . . . . . . . 8
Before Lighting . . . . . . . . . . . . . . . . . . . . . . . . . . . . . . . . . . . . . . . . . . . . . . . . . 8
Lighting . . . . . . . . . . . . . . . . . . . . . . . . . . . . . . . . . . . . . . . . . . . . . . . . . . . . . . . 8
When Heater Is On. . . . . . . . . . . . . . . . . . . . . . . . . . . . . . . . . . . . . . . . . . . . . . . 9
Re-Lighting . . . . . . . . . . . . . . . . . . . . . . . . . . . . . . . . . . . . . . . . . . . . . . . . . . . . 9
Shutdown . . . . . . . . . . . . . . . . . . . . . . . . . . . . . . . . . . . . . . . . . . . . . . . . . . . . . 9
Cleaning And Care . . . . . . . . . . . . . . . . . . . . . . . . . . . . . . . . . . . . . . . . . . . . . . . . . 9
Cleaning Surfaces . . . . . . . . . . . . . . . . . . . . . . . . . . . . . . . . . . . . . . . . . . . . . . . 9
Maintenance . . . . . . . . . . . . . . . . . . . . . . . . . . . . . . . . . . . . . . . . . . . . . . . . . . . 9
Storage . . . . . . . . . . . . . . . . . . . . . . . . . . . . . . . . . . . . . . . . . . . . . . . . . . . . . . . 9
Product Registration . . . . . . . . . . . . . . . . . . . . . . . . . . . . . . . . . . . . . . . . . . . . . . . . 9
Limited Warranty . . . . . . . . . . . . . . . . . . . . . . . . . . . . . . . . . . . . . . . . . . . . . . . . . 10
Troubleshooting . . . . . . . . . . . . . . . . . . . . . . . . . . . . . . . . . . . . . . . . . . . . . . . . . . 10
Specifications. . . . . . . . . . . . . . . . . . . . . . . . . . . . . . . . . . . . . . . . . . . . . . . . . . . . .10
The use and installation of this product must conform to local codes. In absence of local codes,
use the National Fuel Gas Code, ANSI Z223.1/NFPA 54, CAN/CGA-B149.1, Natural Gas and
Propane Installation Code.
California Proposition 65: Chemicals known to the State of California to cause cancer, birth
defects, or other reproductive harm are created by the combustion of propane.
Save these instructions for future reference. If you are assembling this unit for someone else,
give this manual to him or her to read and save for future reference.
Manufactured in China for:
Blue Rhino Global Sourcing, Inc
Winston-Salem, NC 27105 USA •1.800.762.1142, www.bluerhino.com
© 2007 Blue Rhino Global Sourcing, Inc. All Rights Reserved.
Charmglow
OWNER'S MANUAL
is a Registered Trademark of Homer TLC, Inc. All Rights Reserved
®
200605-OM-110 ES
Advertisement
Table of Contents

Related Manuals for Charmglow 200605


Summary of Contents for Charmglow 200605
- Page 1 OWNER’S MANUAL Outdoor Patio Heater Model No. 200605 CARBON MONOXIDE HAZARD DANGER • This appliance can produce carbon monoxide which has no odor. Table of Contents • Using it in an enclosed space can kill you. Important Safeguards ......... . . Page 2 •...
-
Page 2: Model No
Outdoor Patio Heater Model No. 200605 DANGERS and WARNINGS: FOR YOUR SAFETY DANGER WARNING FOR YOUR SAFETY If you smell gas - 1. Do not store spare LP cylinder within 10 feet (3.05 m) of this appliance. 1. Shut off gas to appliance. - Page 3 page no. Contact 1.800.762.1142 for assistance. Do not return to place of purchase. Parts List Exploded View Finial 56-01-103 Dome Cap 56-01-104 Dome Plate 56-01-105 Dome Panel (3) 56-01-106 Dome Rib (3) 56-01-109 Dome Pin* (3) 56-01-459 Bottom Plate 56-01-110 Emitter Top* 56-01-399 Emitter Screen*...
-
Page 4: Assembly Instructions
Outdoor Patio Heater Model No. 200605 Assembly Instructions DO NOT RETURN PRODUCT TO STORE. Remove Base For assistance call 1.800.762.1142 toll free. Please have your Note: Retain these nuts as you will use them in another step. owner’s manual and serial number available for reference. - Page 5 page no. Contact 1.800.762.1142 for assistance. Do not return to place of purchase. Attach Platform Insert Gas Line TIP: To tighten use a 7/16” wrench on Bolt and a 7/16” socket wrench on Nut. Attach Shroud Attach Valve Housing Note: One hole is at a different level than the rest. Make sure all holes line up perfectly before...
- Page 6 Outdoor Patio Heater Model No. 200605 Assembly Instructions (continued) Attach Engine Assembly/Post Attach Gas Line Note: Make sure gas line comes out bottom of pole before securing engine to pole. Note: Use the Allen Wrench to secure the post. Attach Gas Line Clip...
- Page 7 page no. Contact 1.800.762.1142 for assistance. Do not return to place of purchase. Attach Dome Assembly Attach Control Knob Insert Battery...
-
Page 8: Insert Lp Gas Tank
Outdoor Patio Heater Model No. 200605 Installing LP Gas Tank Operating Instructions To operate you will need (1) precision-filled standard grill LP gas tank (20 lbs.) with external valve threads. Checking for Leaks Note: An empty standard grill LP gas tank weighs approximately 18 lbs. -
Page 9: When Heater Is On
page no. Contact 1.800.762.1142 for assistance. Do not return to place of purchase. Cleaning and Care (continued) Note: the burner may be noisy when initially turned on. To eliminate excessive noise from Maintenance the burner, turn the control knob to the pilot position. Then, turn the knob to the level of heat To enjoy years of outstanding performance from your heater, make sure you perform the desired. -
Page 10: Limited Warranty
Outdoor Patio Heater Model No. 200605 Troubleshooting If the problem is: And this condition exists: Then do this Pilot won’t light Tank valve is closed Open valve Blockage in orifice or pilot tube Clean or replace orifice or pilot tube...