Table of Contents
Advertisement
Quick Links
Advertisement
Table of Contents

Related Manuals for Eclipse 180


Summary of Contents for Eclipse 180
- Page 2 Precautions • If you do not use your Eclipse for over 24 hours, please switch it to OFF. • Avoid using your Eclipse under extremely hot, cold, dusty or wet environments.
- Page 3 prompt. Where there is no response when pressing keys and the battery icon displays The player turns off automatically. • Static electricity may cause damage to interior hardware of the player. • Do not disconnect the player while formatting, uploading, or downloading files to the player, as it may cause program errors, or cause the unit to be unable to power on.
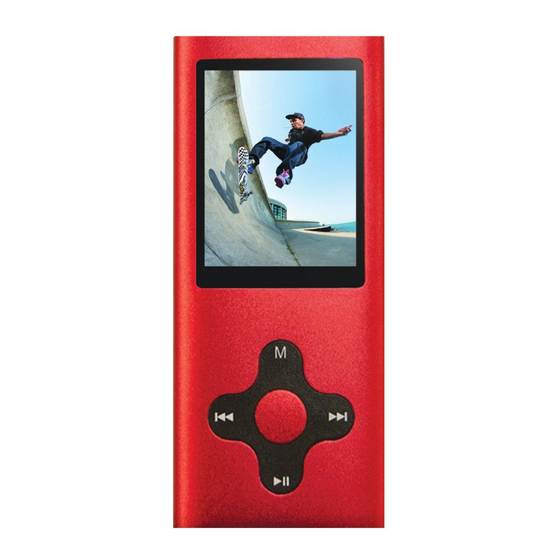
- Page 4 Buttons Basic operations 1) Power on: Set the ON/OFF switch to the ON position, and press and hold the [>II] (play/stop) button for 3 seconds. 2) Power off: Press and hold the [>II] (play/stop) button for 5 seconds, until the player powers off.
- Page 5 Note: When battery power is low, the player will automatically power off. 3) Adjusting volume: In Music, Voice, or Movie modes, press the [VOL] button, then press [NEXT] or [PREV] button to decrease/increase the volume. 4) Charging: Set the ON/OFF switch to the ON position and connect the player to your computer’s USB port.
- Page 6 text The text function allows you to read .TXT files you have loaded to your player. To access text mode, use the [PREV] or [NEXT] buttons to select “text” on the main menu and press [MENU]. When you first enter the text reader, a list of the files on your player will be displayed. Use [PREV] and [NEXT] to highlight the file you would like to view, press [MENU] to enter the file submenu.
- Page 7 you must use [PREV] or [NEXT] to flip to the previous or next page. Auto is a slideshow setting. Once you have selected Auto, use [PREV] or [NEXT] to select the timer between pages, from 2 seconds to 10 seconds. Delete File- Allows you to delete a file file.
- Page 8 When in setting, press the [MENU] button to return to the main menu. Use [PREV] or [NEXT] to highlight an item and press [MENU] to select it. Setting Menu • LCD set- Allows you to adjust several LCD settings o Dark mode- allows you to set the length of time before the screen powers off to conserve battery life (0 disables dark mode) •...
- Page 9 Tools To access Tools mode, use the [PREV] or [NEXT] buttons to select “Tools” on the main menu and press [MENU]. • Set calendar—Press [MENU] to enter, press [PREV] or [NEXT] to choose date . • System time---- - Allows you to set the system time. This is used to create a timestamp on voice recordings.
- Page 10 Music mode allows you to listen to your music files. To access music mode, use the [PREV] or [NEXT] buttons to select “Music” on the main menu and press [MENU]. NOTE- To return to the main menu, you must pause the music before holding the [MENU] button When in the music mode, the player will display the first song you have loaded on the player.
- Page 11 Equalizer- Natural, Rock, Pop, Classic, Soft, jazz, DBB, SRS WOW mode- Allows you to adjust your SRS WOW settings Tempo rate - Allows you to adjust the song speed Replay mode- Allows you to set the A-B repeat mode. Once this is selected, you will be returned to your song.
- Page 12 pressing [NEXT] or skip to the previous file by pressing [PREV]. While a movie is playing, you can press and hold the [NEXT] or [PREV] buttons to fast forward or rewind. To adjust your volume, press the [PLAY] button to pause the file, and then press [VOL] to enter volume adjustment.
- Page 13 Record mode: Record mode allows you to record voice notes. To access record mode, use the [PREV] or [NEXT] buttons to select “Record” on the main menu and press [MENU]. Press the [PLAY] button to begin recording. You can pause the recording by pressing the [PLAY] button again.
- Page 14 recordings in. the default location is the “Voice” folder on the player. • Setting---repeat Setting---- Repeat- Repeat allows you to adjust the play mode. Select from Normal, Repeat One, Folder, Repeat Folder, Repeat all, Random and Intro • Tempo rate - Allows you to adjust the song speed •...
- Page 15 COMPUTER COMMUNICATION Using Windows Media Player (Note: you must use Windows Media Player 10 or later to use this feature.) (Note: this player does not support DRM encrypted audio files, such as those downloaded from the Windows Media Player download service.) Open Windows Media Player and connect the MP3 player to a working USB port.
- Page 16 2. Once you have named your MP3 player, select Finish, and your Windows Media Player will open to the Sync tab. 3. Drag your music to the sync list (on the right of the screen) from the list on the left. Once you have selected the music you wish to add to the player, press Sync.
- Page 17 3. Windows Media player will load the songs on to your MP3 player. 4. Once all the songs you have added are synced to the unit, and Windows Media Player says that is safe to disconnect your MP3 player, disconnect the device.
- Page 18 COPY AND PASTE 1. Connect the MP3 player to a working USB port. 2. When the unit is connected to your computer, it will create a gray and green icon in the system tray (lower right hand corner of your desktop). The icon will be called safely remove hardware.
- Page 19 4. Locate the drive created by the unit, generally just called Removable Disk, with a letter in Parenthesis. Drive letters vary depending on your system configuration. 5. Open the drive by either double left clicking on the drive itself, or by right clicking to open the option menu then left click on the desired drive.
- Page 20 7. Once you have located the song files, you can right click on the song itself, and select “copy”. Open the removable disk drive, right click on in the empty space, and select Paste. This will transfer the song on to your MP3 player.
- Page 21 8. Repeat step 7 for as many songs as you want to copy on to the unit. NOTE: MAC Computers When connected to your MAC computer, the device will act as a removable drive. Simply drag your MP3 files to the device.
- Page 22 Eclipse...
- Page 26 Caution Modifications not approved by the party responsible for compliance could void the user’s authority to operate the equipment. NOTE- This equipment has been tested and found to comply with the limits for Class B Digital device, pursuant to part 15 of the FCC rules. These limits are designed to provide reasonable protection against harmful interference in a residential installation.