Siemens hicom 150 e User Manual
Hide thumbs
Also See for hicom 150 e:
- Service manual (672 pages) ,
- User and installation manual (130 pages) ,
- User manual (67 pages)

Related Manuals for Siemens hicom 150 e


Summary of Contents for Siemens hicom 150 e
-
Page 1: User Manual
User Manual Hicom 150 E optiset E entry, optiset E basic optiset E advance plus/comfort optiset E advance conference/conference optiset E memory optiset E key module G281-0660-00... - Page 2 Valid for Hicom® 150 E Office (Release 2.0 and Release 2.2) with the following sys- tem telephones: optiset E standard, optiset E advance plus/comfort, optiset E advance conference/conference, optiset E memory, optiset E key module. This User Manual describes all functions that can be implemented with your system telephone.
-
Page 3: Table Of Contents
Table of Contents Table of Contents Hicom 150 E Office and optiset E ..............8 Before You Start....................9 Labeling Keys ....................10 Attaching a Station Number Label ..............10 Key Labeling Program (not for U.S.) ............... 10 Symbols ........................ 11 Optiset E entry Faceplate .................. - Page 4 Table of Contents Entering an Appointment/Appointment Reminder ..........51 Making Calls With a Headset (optiset E standard, optiset E advance plus/comfort, optiset E advance confer- ence/conference, and optiset E memory) ............. 53 Answering Calls ....................55 Answering a Call ....................55 Speakerphone Mode (optiset E standard, optiset E advance plus/comfort, optiset E advance confer- ence/conference, and optiset E memory) ............
- Page 5 Table of Contents Trunk Flash ......................85 Associated Dialing/Dialing Aid ................86 Release Trunk ......................88 Consultation/Extending Calls/Conference ............89 Consultation ......................89 Parking Calls ......................91 Hold/Retrieve ......................93 Toggle ........................94 Conference ......................96 Call Transfer ......................99 Call Transfer After a Speaker Call (Announcement) to a Group (Release 2.2 and Lat- er) ........................
- Page 6 Table of Contents Smart Communication ................... 121 Callback, Automatic ................... 121 Setting/Storing a Callback ................122 Answering a Callback ................... 122 Checking/Canceling Stored Callbacks ............123 Call Waiting (Camp-On) ..................124 Override ....................... 125 Silent Monitor (U.S. Only) .................. 125 Sending a Message .....................
- Page 7 Table of Contents General System Features ................161 Reset All Services (On One Phone) ..............161 Room Monitor (Baby Phone) ................162 Phone Test ......................164 Relay On/Off ...................... 164 Displaying Call Charges (Not for U.S.) ..............166 Display/Retrieve Call Charges (Not for U.S.) ............167 Toll Fraud Monitoring (optiset E standard, optiset E advance plus/comfort, optiset E advance confer- ence/conference, and optiset E memory) ............
-
Page 8: Hicom 150 E Office And Optiset E
Hicom 150 E Office and optiset E Hicom 150 E Office and optiset E Hicom® 150 E Office is a state-of-the-art commu- nication system with system-based optiset E® telephones that feature outstanding user-friendli- ness. It is connected to the public network via ISDN and/ or conventional analog trunks. -
Page 9: Before You Start
This User Manual is intended primarily for the per- son responsible for overseeing and administering the Hicom 150 E Office system and/or the system telephones connected to it. It is also a useful refer- ence work for all system telephone users who want more information. -
Page 10: Labeling Keys
Hicom 150 E Office and optiset E Labeling Keys Key labeling sheets containing pre-cut cards are supplied with each system telephone and key module in an accessory pack. These cards can be used on both sides, and are inserted into the tele- Æ... -
Page 11: Symbols
Hicom 150 E Office and optiset E Symbols The following symbols are used for the operating procedures: Step 1 Step 2, and so on Lift the handset (off-hook). Speak. Replace the handset (on-hook). Dial a telephone number or code. Press the specified keys on the keypad. - Page 12 Hicom 150 E Office and optiset E Press the “OK” dialog key to confirm, run, or acti- vate the displayed function. Press the “Next” or “Previous“ dialog key to dis- play or scroll through the available functions. Check the display. Follow the user prompts and respond with a dialog key, if necessary.
-
Page 13: Optiset E Entry Faceplate
Hicom 150 E Office and optiset E Optiset E entry Faceplate On the optiset E entry system telephone, which does not have a display, you activate functions by pressing fixed function keys or by entering codes. For details of the procedures and codes, refer to the operating instructions for this telephone. -
Page 14: Optiset E Basic Faceplate
Hicom 150 E Office and optiset E Optiset E basic Faceplate On the optiset E basic system telephone , which does not have a display, you activate functions by pressing fixed function keys or by entering codes. For details of the procedures and codes, refer to the operating instructions for this telephone. -
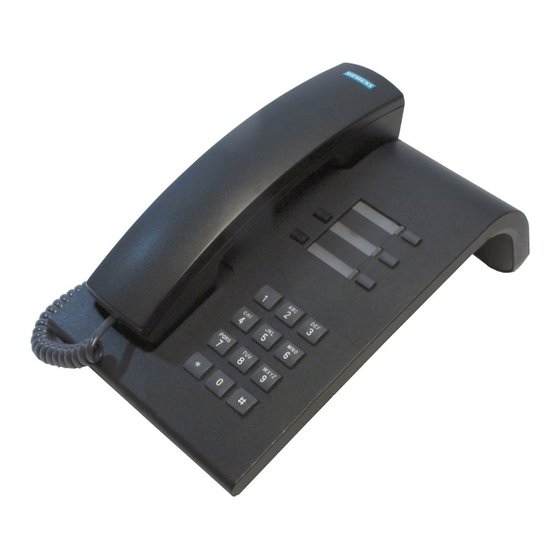
Page 15: Optiset E Standard, Optiset E Advance Plus/Comfort, Optiset E Advance Conference/Conference Faceplate
Hicom 150 E Office and optiset E Optiset E standard, optiset E advance plus/comfort, optiset E advance conference/conference Faceplate Four fixed function keys – Program/Service – Redial – Internal or Mute Handset – Speaker Display, 2 lines, 24 characters per line... -
Page 16: Optiset E Memory Faceplate
Hicom 150 E Office and optiset E Optiset E memory Faceplate Speaker for Keys for Four fixed function keys ring tones, programming the – Program/Service open listen. telephone – Redial – Internal or Mute Handset Keypad – Speaker Display, 8 lines, 24... -
Page 17: Optiset E Key Module
Hicom 150 E Office and optiset E Optiset E Key Module Sixteen programmable keys for station numbers Æ (repdial keys 41) and functions. LEDs Adapters The optiset E adapters are plug-in cards for easy in- stallation on the bottom of the optiset E basic, ad- vance plus/comfort, advance conference/confer- ence, and memory system telephones. - Page 18 Hicom 150 E Office and optiset E optiset E acoustic adapter (Not for U.S.) Allows you to connect telephone accessories: ex- ternal speaker, second handset, desk microphone. optiset E analog adapter Allows you to connect analog telephones (such as a telephone, group 3 fax machine, or modem) to the System telephone.
- Page 19 Hicom 150 E Office and optiset E optiset E ISDN adapter Allows you to connect ISDN telephones with an S0 interface that is not connected to the power supply (PC with S card, group 4 fax machine, video re- corder).
-
Page 20: Cleaning The Telephone
Hicom 150 E Office and optiset E Cleaning the Telephone Always use a damp or antistatic cloth to clean the surface of the telephone. Never use a dry cloth. Use only diluted neutral cleaners containing surfactants to clean very dirty telephones. Af- terwards remove all traces of the cleaner with a damp cloth (using water only). - Page 21 Hicom 150 E Office and optiset E System telephones – are not intended or approved for opera- tion in connection with main stations. – must not be operated in the immediate vicinity of radio equipment. – must not be installed on sensitive sur- faces.
-
Page 22: General Telephone Features
General Telephone Features General Telephone Features Operating Principle/User Prompting The display on your system telephone and the menu guidance system keep you informed of the available features and functions, how you can acti- vate and deactivate them, which ones you have al- ready activated, and what you should do next. -
Page 23: Dialog Keys
General Telephone Features Dialog Keys “OK” dialog key for selecting and activating the displayed function. “Next“ dialog key for scrolling to the next menu or the next function. “Previous“ dialog key for scrolling to the preced- ing menu or the preceding function. Display Texts On line one of the display (line seven on an optiset E memory telephone) -
Page 24: Symbols On The Display
General Telephone Features Symbols on the Display When the symbol (>) appears to the right on the ............. > last line of the display, additional functions are available for selection. You can scroll through them with the “Next” and “Previous” dialog keys. -
Page 25: Idle Menu
General Telephone Features Idle Menu The Idle menu and its functions are available when the telephone is idle. Use the “Next” and “Previous” keys to scroll to the desired function. Use the “OK” key to select a function, then follow the user prompts. Functions that are currently active automatically appear on the display. - Page 26 General Telephone Features Ringer cutoff on Night answer on Night answer off Trunk FWD off Trunk FWD on Send message View sent message View callbacks US:Directory UK:Phonebook HF answerback off HF answerback on Ringing group off Leave hunt group Join hunt group Restore caller ID Suppress call ID Call wait.term.on...
-
Page 27: Program/Service Menu
General Telephone Features Program/Service Menu You can access the Program/Service menu by pressing the key. This menu Program/Service supports available functions that go beyond mak- ing simple telephone calls. The Program/Service menu contains all the func- tions you need to configure the programmable Æ... - Page 28 General Telephone Features Account code Show call charges Page Answer page (paging) Timed reminder on Timed reminder off Open door Door opener on Door opener off Control Relay On Control Relay Off Reset services DTMF dialing Trunk flash Room monitor Ringing group on Temporary MSN Associated dial...
- Page 29 General Telephone Features 403 Work on #403 Work off 402 Available #402 Not available 404 UCD night on #404 UCD night off 405 Calls in queue Previous to main menu UCD US:System admin UK:System features More features Caller list Save number Forwarding on Forwarding off Changeover on...
- Page 30 General Telephone Features HF answerback on HF answerback off Join hunt group Leave hunt group Suppress call ID Restore caller ID 490 Call wait.term.on #490 Call wait.trm.off Waiting tone off Waiting tone on Override Call waiting Pickup - group Ret. to held call Toggle/Connect Conference Conference off...
-
Page 31: Example: How To Set Up A Conference
General Telephone Features Example: How to Set Up a Conference You are conducting a call and want to add a third party to a conference. Your call partner (station no. or name) and the (Station no. or name) US:Consult UK:Enquiry? >... -
Page 32: Overview Of The Functions And Codes (Alphabetical)
General Telephone Features Overview of the Functions and Codes (Alphabetical) You can access any of the features and functions configured in your system: Interactively: The features and functions available when you scroll with the dialog keys are useful primarily when off-hook or en- gaged in a call, for example, Call waiting, Start transfer, Start conference, Toggle/Connect, US:Consult UK:Enquiry. - Page 33 General Telephone Features Functions 2. Via the Pro- 3. With Func- (Display) Interac- gram/Service tion Keys tively Menu (Programma- Æ Program/Service Code Page Æ Account code Æ Advisory msg. on Advisory msg. off Æ Associated dial Æ Associated serv. Æ Call waiting Æ...
- Page 34 General Telephone Features Functions 2. Via the Pro- 3. With Func- (Display) Interac- gram/Service tion Keys tively Menu (Programma- Æ Program/Service Code Page Æ Control Relay On Control Relay Off Æ US:Directory UK:Phonebook Æ DISA Æ DND on DND off Æ...
- Page 35 General Telephone Features Functions 2. Via the Pro- 3. With Func- (Display) Interac- gram/Service tion Keys tively Menu (Programma- Æ Program/Service Code Page Æ Page Answer page (not for U.S.) Æ Park a call Retrieve call Æ Phone test Æ Pickup - directed Æ...
- Page 36 General Telephone Features Functions 2. Via the Pro- 3. With Func- (Display) Interac- gram/Service tion Keys tively Menu (Programma- Æ Program/Service Code Page Æ Speaker call Æ Start transfer Æ Suppress call ID Restore caller ID Æ Tel. data service Æ...
-
Page 37: Setting/Programming Your Telephone
Setting/Programming Your Telephone Setting/Programming Your Telephone Setting the Receiving Volume If you are conducting a call using the handset, you can adjust the volume for the handset. If you are conducting a call using the speaker (speakerphone mode), you can adjust the receiving volume for the speaker. -
Page 38: Setting The Volume Of The Ring Tone
Setting/Programming Your Telephone Setting the Volume of the Ring Tone You can adjust the volume of the call signal (Setting Æ procedure 39). Setting the Pitch of the Ring Tone You can adjust the pitch of the call signal to distin- guish your telephone from others in the room (Set- Æ... -
Page 39: Setting Procedure
Setting/Programming Your Telephone Setting Procedure optiset E entry und optiset E basic: For details of the procedures refer to the operating instructions for this telephone Precondition: Your telephone is in the idle state. Call up the menu for telephone settings. Scroll to “Ring volume:?”, “Ring tone:?“, or “Speakerphone mode?”... -
Page 40: Assigning Programmable Keys
Setting/Programming Your Telephone Assigning Programmable Keys Internal and external numbers (repdial keys for rep- ertory dialing) and frequently required Hicom func- tions (function keys) can be stored on the program- mable keys of the system telephone (optiset E standard, advance plus/comfort, advance conference/conference, memory) and the optiset E key module. - Page 41 Setting/Programming Your Telephone The default setting stores the first seven internal numbers on the seven program- mable keys on the system telephone. The sixteen programmable keys on the key module do not have a presetting. Store functions that you frequently use on programmable keys.
- Page 42 Setting/Programming Your Telephone Callback US:Directory UK:Phonebook HF answerback on/off Hunt group join/leave Caller ID suppression Call wait.term. Waiting tone off Call waiting Toggle/Connect Conference Speaker call Call key Trunk group key Retrieve line Reserve trunk Release trunk Temporary MSN Override Park a call Pickup - directed Pickup - group...
- Page 43 Setting/Programming Your Telephone Timed reminder Open door Door opener on/off Control Relay US:Mute on/off UK:Microphone On/Off DTMF dialing Recall-key Room monitor Fax details Ringing group on Hold key Consultation Trunk key Associated dial Associated serv. Tel. data service Log on Work on/off Available on/off Night answer on/off...
- Page 44 Setting/Programming Your Telephone LED operating states When the following functions are stored on pro- grammable keys, the associated LEDs indicate certain operating states, as shown below: Call forwarding, US:Night answer UK:Night Service, Do not disturb, Ringer cutoff, Hunt group join/leave, Caller ID suppression, Door opener on/off, Waiting tone off, Control Relay, Ringing group on, Changeover, HF answerback on/off, Advisory mes- sage Call wait.term., Boss Ringing, Boss 2 Ringing LED off...
- Page 45 Setting/Programming Your Telephone Caller list LED off = No call request saved LED on = Call request saved Log on LED on = Team member is logged on Work LED on = Work state Available LED on = Team member is available Night service LED on = UCD night answer is active Internal number...
-
Page 46: Station Cos Changeover (Locking And Unlocking Your Telephone)
Setting/Programming Your Telephone Station COS Changeover (Locking and Unlocking Your Telephone) You can temporarily disable your telephone and the Electronic Notebook ENB in the optiset E memory for external dialing and programming, for example to prevent unauthorized use during your absence. optiset E entry, optiset E basic and com- mercially available telephones: For details of the procedures refer to the... -
Page 47: Saving Your Personal Identification Number Pin
Setting/Programming Your Telephone You can still answer external calls and con- duct internal calls while your telephone is in the “changeover on” state. When an at- tempt is made to place an external call, “Telephone lock active” appears on the display. - Page 48 Setting/Programming Your Telephone Program/Service Press the Program/Service key; the LED lights up. Scroll to “Change PIN?“ and confirm your selec- tion. Enter the code for “Change PIN.“ Enter the default PIN “00000” or a PIN that you 0 0 0 0 0 have already specified yourself.
-
Page 49: Mute On/Off
Setting/Programming Your Telephone Mute On/Off To prevent your call partner from listening in, for ex- ample, while you consult with someone in your of- fice, you can temporarily switch off the handset mi- crophone or the handsfree microphone. You can also switch on the handsfree microphone to an- swer an announcement via the telephone speaker Æ... - Page 50 Setting/Programming Your Telephone Mute off (microphone on) Precondition: You are conducting a call. The mi- crophone is switched off. Scroll to “Mute off?“ and confirm your selection. Program/Service Press the Program/Service key; the LED lights up. Enter the code for “Mute off”. Mute Press the Mute key;...
-
Page 51: Entering An Appointment/Appointment Reminder
Setting/Programming Your Telephone Entering an Appointment/Appointment Reminder You can enter a single appointment that will take place in the next twenty four hours, or you can en- ter a daily recurring appointment. At the time set for the appointment, your tele- phone rings for approximately twenty seconds to remind you of your appointment. - Page 52 Setting/Programming Your Telephone Deleting and checking a set appointment. Program/Service Press the Program/Service key; the LED lights up. Scroll to “Timed reminder off?“ and confirm your selection. Enter the code for “Timed reminder off”. From this point on, follow the user prompts. Acknowledging an appointment Press the Speaker key twice.
-
Page 53: Making Calls With A Headset
Setting/Programming Your Telephone Making Calls With a Headset (optiset E standard, optiset E advance plus/comfort, optiset E advance conference/conference, and optiset E memory) Precondition: Your telephone rings. The display shows “Answer?” . Answering a call Press the “OK” dialog key and conduct the call with the headset. - Page 54 Setting/Programming Your Telephone Continuing the call with the handset Precondition: You are conducting a call using the headset and you want to continue it using the handset (not possible when using a headset adapt- er). Lift the handset. Continue the call. As soon as you lift the handset, the head- set and speaker (if it was switched on) are switched off.
-
Page 55: Answering Calls
Answering Calls Answering Calls Answering a Call The telephone rings with a specific call signal. When you receive an internal call, your tele- phone rings once every four seconds (single- tone sequence). When you receive an external call, your tele- phone rings twice in rapid succession every four seconds (dual-tone sequence). -
Page 56: Speakerphone Mode
Answering Calls Ending the call Replace the handset. Speakerphone Mode (optiset E standard, optiset E advance plus/comfort, optiset E advance conference/conference, and optiset E memory) You want to conduct a call via the telephone micro- phone and speaker, leaving your hands free for oth- er activities. -
Page 57: Receiving A Call In Speakerphone Mode
Answering Calls Speakerphone mode in conference rooms An optiset E telephone with a speakerphone should be set up on the conference table so that the conference parties participating in the speakerphone call are sitting in a semi-cir- cle in front of the phone. This enables the par- ty at the other end to hear them distinctly. -
Page 58: Switching From Handset Mode To Speakerphone Mode
Answering Calls Switching From Handset Mode to Speakerphone Mode Hold down the Speaker key Speaker (In U.S. only: press the Speaker key). replace the handset. Then release the Speaker key and continue your call in speakerphone mode (In US. only: replace the handset). Ending the call Press the illuminated Speaker key;... -
Page 59: Open Listening
Answering Calls Open Listening (optiset E basic, optiset E standard, optiset E advance plus/comfort, optiset E advance conference/conference, and optiset E memory) While engaged in a call and using the handset you can switch on the telephone speaker temporarily to enable others in the room to listen to the call. Let the other party know that you have turned on the speaker. - Page 60 Answering Calls Program/Service Press the Program/Service key; the LED lights up. Scroll to “Pickup - directed?“ and confirm your se- lection. The called parties are shown on the dis- play. Enter the code for “Pickup - directed”.The called parties are shown on the display. Scroll to the desired party and confirm your selec- tion to pick up the call.
-
Page 61: Accepting A Waiting Call (Call Waiting)
Answering Calls Accepting a Waiting Call (Call Waiting) You can remain available to callers even when you are engaged in a call. During the call, you are in- formed by an alerting tone that another call is wait- ing. You can then accept the waiting call. You can also disable this automatic call waiting fea- Æ... - Page 62 Answering Calls Follow the user prompts. Program/Service Press the Program/Service key; the LED lights up. Enter the code for “Ret. to held call“. Replace the handset after you have completed your conversation. “Recall” appears on your dis- play. Your telephone rings. Lift the handset.
-
Page 63: Call Waiting Tone On/Off
Answering Calls Call Waiting Tone On/Off You can suppress the call waiting tone for external calls. You will still be informed visually on the dis- play, and with a light (if a key has been pro- Æ grammed 40), that a second call is waiting. Switching off the call waiting tone Scroll to “Waiting tone off?“... -
Page 64: Preventing/Allowing Automatic Call Waiting (Second Call)
Answering Calls Preventing/Allowing Automatic Call Waiting (Second Call) Æ You can prevent or allow a second call ( 61) from being signaled by automatic call waiting during an ongoing call. Preventing call waiting Press the Program/Service key; the LED lights up. Program/Service Scroll to “Call wait.trm.off?”... -
Page 65: Trace Call (Not For U.s.)
Answering Calls Trace Call (Not for U.S.) Provided that this feature has been applied for and authorized, you can have your carrier trace and identify malicious calls from external sources. To obtain this feature you must apply to your carrier separately. -
Page 66: Do Not Disturb (Dnd)
Answering Calls Do Not Disturb (DND) You can temporarily block incoming calls to your telephone; outgoing calls can still be made. When do not disturb is activated, internal callers hear a busy signal and external callers are rerouted to a telephone assigned for this purpose (system sup- port). -
Page 67: Ringer Cutoff Function
Answering Calls Ringer Cutoff Function You can temporarily deactivate the ring signals for incoming calls if you do not want to be disturbed by them. Calls are only identified by one ring signal, an indication on the display, and a key which has been programmed to flash (such as a trunk key). -
Page 68: Entrance Telephone/Door Opener
Answering Calls Entrance Telephone/Door Opener If an entrance telephone has been programmed, you can use your telephone to speak to someone at the entrance telephone and to activate a door opener. If you are authorized and you activate the door re- lease feature, visitors can open the door them- selves by entering a five-digit code (for example via a DTMF transmitter or an installed keypad). - Page 69 Answering Calls Opening the door from your telephone without a call to the entrance telephone Program/Service Press the Program/Service key; the LED lights up. Scroll to “Open door?“ and confirm your selec- tion. Enter the code for “Open door?“ Dial the internal number for the entrance tele- phone.
- Page 70 Answering Calls Activating function door release Press the Program/Service key; the LED lights up. Program/Service Scroll to ” Door opener on?“ and confirm your se- lection. Enter the code for “Door opener on?“. From this point on, simply follow the user prompts.
-
Page 71: Call Pickup From An Answering Machine
Answering Calls Deactivating function door release Press the Program/Service key; the LED lights up. Program/Service Scroll to “Door opener off?“ and confirm your se- lection. Enter the code for “Door opener off.” Call Pickup From an Answering Machine an answering machine is connected to your sys- tem and you have programmed the answering ma- Æ... -
Page 72: Display Number Of Waiting Calls/Overload
Answering Calls Display Number of Waiting Calls/Overload You can show the number of external waiting calls on the display by pressing the Waiting Calls key. If you are already engaged in a call and the number of waiting calls exceeds a certain threshold value (overload) specified by the service technician, the LED in the key indicates overload. -
Page 73: Making Calls
Making Calls Making Calls The “Abbreviated dialing” section contains additional simple options for establishing connections. Making Internal Calls In order to call an internal user or a group of internal users (hunt group/group call), just dial the respec- tive station number (Prime Line is not active). Lift the handset. -
Page 74: Making External Calls
Making Calls Making External Calls To call an external party, you have to enter an exter- nal code before dialing the party’s telephone num- ber (Prime Line is not active) Lift the handset. Dial external code and the external number. Press the Line key. -
Page 75: Reserve Trunk
Making Calls Reserve Trunk If you have tried to obtain a trunk but it was busy, the message “US:Currently busy UK:busy at the moment” appears on the display. You can reserve this trunk for yourself. When the trunk is free, you receive a call and a message appears on the dis- play. - Page 76 Making Calls When the reserved trunk becomes free Trunk is free You receive a recall and “Trunk is free“ appears on > the display. Lift the handset. You hear the CO dial tone. Speaker Press the Speaker key. You hear the CO dial tone. Dial the external number.
-
Page 77: Tone Dialing (Dtmf Dialing), Dtmf Suffix-Dialing
Making Calls Tone Dialing (DTMF Dialing), DTMF Suffix-Dialing You can use this function to transmit DTMF signals (dual-tone multifrequency signaling) during a call, for example to control an answering machine. Whether automatic tone dialing is active or inactive on your system determines whether you first have to switch to tone dialing. - Page 78 Making Calls If automatic tone dialing is inactive during a call you do not have to press the Program/ Service key before entering the code. You can activate a function simply by entering the correct code, for example “ 56 = Park a call?”...
-
Page 79: Caller Id Suppression
Making Calls Caller ID Suppression Your service technician can prevent your internal number or your name from appearing on the dis- play of the called party’s telephone when you set up an external call. You can also prevent your telephone number from being displayed. -
Page 80: Assigning A Station Number (Not For U.s.)
Making Calls Assigning a Station Number (Not for U.S.) Provided this feature is configured, you can selec- tively assign a specific number (DID number) to your telephone before making an external call. The assigned number then appears on the called par- ty’s display. -
Page 81: Account Code/Project Calls
Making Calls Account Code/Project Calls The charges for external calls can be recorded and billed in relation to specific individuals, customers or projects, or as personal calls by using account codes. The account code is included in the data printout and can consist of no more than eleven characters. -
Page 82: Speaker Call (Announcement), Handsfree Answerback
Making Calls Speaker Call (Announcement), Handsfree Answerback You can issue a speaker announcement to any in- ternal user who has a system telephone, without them having to do anything. When you receive a speaker announcement, you can use the handset or the speakerphone to reply. You can make a one-way announcement to a group of users simultaneously by way of the speakers in Æ... -
Page 83: Handsfree Answerback
Making Calls Handsfree Answerback You hear a beep (your telephone rings briefly) fol- lowed by an announcement over the telephone speaker. The name or number of the calling party appears on the display. Lift the handset. Confirm “Mute off?“ on the display. Mute Press the Mute key;... -
Page 84: Handsfree Answerback On/Off
Making Calls Handsfree Answerback On/Off (optiset E standard, optiset E advance plus/comfort, optiset E advance conference/conference, and optiset E memory) This facility allows you to control whether or not your microphone switches on automatically when you receive a speaker call. If you have disabled handsfree answerback, the option “Mute off”... -
Page 85: Trunk Flash
Making Calls Trunk Flash To activate ISDN-type services and features through the network carriers’ analog trunks or those of other Hicom systems (such as “US:Con- sult UK:Enquiry”), you must send a signal to the trunks before dialing the service code or telephone number. -
Page 86: Associated Dialing/Dialing Aid
Making Calls Associated Dialing/Dialing Aid You can use a dialing aid to assist you in dialing numbers (connection setup) with system tele- phones. The operating procedure depends on whether the dialing aid is connected to the S bus or the a/b (T/R) port (ask your service technician). - Page 87 Making Calls Dialing aid from your system telephone for another telephone Program/Service Press the Program/Service key; the LED lights up. Scroll to “Associated dial?“ and confirm your se- lection. Enter the code for “Associated dial?.“ From this point on, simply follow the user prompts.
-
Page 88: Release Trunk
Making Calls Release Trunk If your telphone is configured as an attendant con- sole (AC), you can release busy external trunks. Ac- tive calls on that trunk are disconnected. The trunk is free again and can be used for new external calls. -
Page 89: Consultation/Extending Calls/Conference
Consultation/Extending Calls/Conference Consultation/Extending Calls/Conference Consultation You are conducting a call and want to consult a col- league without the party on hold hearing your con- versation. optiset E entry, optiset E basic and com- mercially available telephones: For details of the procedures refer to the operating instructions for this telephone Confirm “US:Consult UK:Enquiry?“... - Page 90 Consultation/Extending Calls/Conference In addition, you can: Transfer the party on hold to the sec- Æ ond call partner (call transfer Alternately speak to both call partners Æ (toggle Speak to both call partners at the Æ same time (conference 96). If the party you would like to consult is busy and you have set up the disconnect Æ...
-
Page 91: Parking Calls
Consultation/Extending Calls/Conference Parking Calls You can park up to ten calls, either internal, exter- nal, or both. Parked calls can be displayed on and picked up from another telephone. You can use this feature to continue a call at another worksta- tion, for example. - Page 92 Consultation/Extending Calls/Conference Retrieving a parked call Precondition: One or more calls have been parked. The telephone is idle. Press the Program/Service key; the LED lights up. Program/Service Scroll to “Retrieve call?“ and confirm your selec- tion. Enter the code for “Retrieve call.” Enter the noted park slot number.
-
Page 93: Hold/Retrieve
Consultation/Extending Calls/Conference Hold/Retrieve If you have programmed a key on your telephone Æ as a hold key ( 40), you can place external calls on hold. This enables all other parties to retrieve the call on the assigned line. Placing a call on hold Hold Press the Hold key. -
Page 94: Toggle
Consultation/Extending Calls/Conference Æ Press the Retrieve line key (if configured 40); Retrieve line the LED goes out. Enter the noted line number. If a trunk key has been set up for the trunk on hold, simply press the trunk key (slowly flashing). Toggle You can switch back and forth (toggle) between two calls and talk to each of the parties in turn. - Page 95 Consultation/Extending Calls/Conference Precondition: During a call, you have activated Æ “US:Consult UK:Enquiry“ ( 89), or you have an- swered a second call during an existing call. optiset E entry, optiset E basic and com- mercially available telephones: For details of the procedures refer to the operating instructions for this telephone Switch to the party on hold Go to “Toggle/Connect?“...
-
Page 96: Conference
Consultation/Extending Calls/Conference Conference During an internal or external call you can call up to four internal or external parties and invite them to join the call, thus setting up a conference call. During the conference call you hear a reminder tone every thirty seconds;... - Page 97 Consultation/Extending Calls/Conference Adding a party to the conference As the initiator of the conference, you can add par- ties to the conference. Scroll to “Add party?“ and confirm your selection. Follow the user prompts. (Enter the number of the party you want to add.) Leaving a conference Replace the handset.
- Page 98 Consultation/Extending Calls/Conference Checking which parties are in the conference As the initiator of the conference, you can view which parties are involved in the conference.. Scroll to “View conf parties?“ and confirm your selection. Follow the user prompts. (On an optiset E memory phone, use the cursor keys to mark the individual lines;...
-
Page 99: Call Transfer
Consultation/Extending Calls/Conference Call Transfer If your call partner wants to speak to another party, you can call the other party and transfer the con- nection either before or after the other party an- swers (screened or unscreened transfer). Precondition: You are conducting a call. Confirm “US:Consult UK:Enquiry?”... - Page 100 Consultation/Extending Calls/Conference Screened transfer Speak. Replace the handset. Scroll to “Transfer?“ and confirm your selection.
-
Page 101: Call Transfer After A Speaker Call (Announcement) To A Group (Release 2.2 And Later)
Consultation/Extending Calls/Conference Call Transfer After a Speaker Call (Announcement) to a Group (Release 2.2 and Later) Æ You can use a speaker call (announcement to announce a call in progress to a group of users Æ 146), if the service technician has configured this function. -
Page 102: Recall
Consultation/Extending Calls/Conference Transfer the call: Replace the handset. Scroll to “Transfer?“ and confirm your selection. Recall If a call transfer attempt is unsuccessful, after a brief interval you receive a recall from your original call partner. You are recalled: Immediately, if you have made an operating error Forty-five seconds after transfer, if the re- quested party fails to answer. - Page 103 Consultation/Extending Calls/Conference Precondition: You are conducting a call with a user who does not have the necessary class of service. Release 2.0 Confirm “US:Consult UK:Enquiry? on the display or scroll to “Start transfer?“ and confirm your se- lection. The other party is on hold. Press the trunk key;...
-
Page 104: Abbreviated Dialing
Abbreviated Dialing Abbreviated Dialing Redial The last three external telephone numbers dialed are stored automatically. You can selectively re- trieve and dial one as your next call, for instance if the line was previously busy. optiset E entry und optiset E basic: Only the last telephone number dialed is stored automatically. -
Page 105: Telephone Directory (Optiset E Standard, Optiset E Advance Plus/Comfort, Optiset E Advance Conference/Conference, And Optiset E Memory)
Abbreviated Dialing Option two Press the Redial key. Redial Confirm “Next“ on the display within two sec- onds. You can retrieve any one of the last three station numbers that you dialed. Follow the user prompts. Telephone Directory (optiset E standard, optiset E advance plus/comfort, optiset E advance conference/ conference, and optiset E memory) If System Support has assigned a name for at... - Page 106 Abbreviated Dialing optiset E standard, advance plus/comfort, or ad- vance conference/conference telephone: Enter the name you want to find, or just the first few letters, from the keypad. The system search- es for the name. Briefly press the key as often as needed, depend- ing on the position of the letter on the keypad (first, second, third, or fourth position).
- Page 107 Abbreviated Dialing Check the screen. When an entry (name) appears, follow the user prompts. (“Scroll Next?”” = go to next entry (name), “Scroll Previous?”= go to previous entry (name), “Call?”= call the displayed party (name), “Delete Character?”= delete all characters except the first one, “Delete Line?”...
-
Page 108: Repertory Dialing
Abbreviated Dialing Repertory Dialing Repdial key You can use your system telephone and key mod- ule to dial numbers by pressing a single key (pro- Æ gramming and checking numbers on keys 40). Repdial key Press the Repdial key to dial the station number. When the other party answers, lift the handset or use the speakerphone. - Page 109 Abbreviated Dialing Function key You can use your system telephone and key mod- ule to select functions by pressing a single key (programming and checking functions on key Æ 40). Press the function key to initiate (activate) the Æ function; the LED may light up Press the illuminated function key to deactivate the function;...
-
Page 110: Speed Dialing
Abbreviated Dialing Speed Dialing System Speed Dialing System Support can store frequently used tele- phone numbers at a central location for all users. You can then dial these numbers from any tele- phone. The system speed dial numbers that are available are: 000 through 299 (OfficeStart, OfficeOne, OfficePoint) -
Page 111: Storing Individual Speed Dialing Numbers
Abbreviated Dialing Storing Individual Speed Dialing Numbers Program/Service Press the Program/Service key; the LED lights up. Scroll to “Change Speed Dial?“ and confirm your selection. Enter the code for “Change Speed Dial.” Form this point on, simply follow the user prompts. -
Page 112: Electronic Notebook Enb (Optiset E Memory Only)
Abbreviated Dialing Electronic Notebook ENB (optiset E memory only) In the electronic notebook of your optiset E mem- ory telephone you can enter telephone numbers and additional information (such as addresses and fax numbers) under associated names and key- words. Entries are automatically arranged in alpha- betical order. -
Page 113: Explanation Of The Special Enb Function Keys
Abbreviated Dialing Explanation of the Special ENB Function Keys Enter digits using the keypad; enter letters and special characters using the alphanumeric key- board. Open the ENB: Enter new data/information or EDIT change existing entries. Retrieve entries. CARD Call up the menu to display special ENB functions. MENU Close the ENB and save new or changed entries. - Page 114 Abbreviated Dialing Cursor down: Move the cursor down one line on the display (the cursor appears as an underline or a black square at the beginning of the line). Cursor up: Move the cursor up one line on the dis- play (the cursor appears as an underline or a black square at the beginning of the line).
-
Page 115: Entering Names, Phone Numbers, And Additional Information
Abbreviated Dialing Entering Names, Phone Numbers, and Additional Information Press the Edit key; check line six on the display EDIT MENU Press the Menu key, select “New entry” and press “Enter” to confirm your selection. Make your entries; each line can contain a maxi- mum of twenty-two characters. -
Page 116: Modifying Names, Phone Numbers, And Additional Information
Abbreviated Dialing Modifying Names, Phone Numbers, and Additional Information Enter a name (at least one letter). A maximum of five names appear on the display; the first is high- lighted at the beginning of the line. Search letters that you have entered appear on the right in line six. -
Page 117: Searching For/Displaying Names, Dialing Numbers, And Displaying Additional Entries
Abbreviated Dialing Searching For/Displaying Names, Dialing Numbers, and Displaying Additional Entries Searching for and displaying names Search/display: Enter the name (at least one let- ter). Up to five names or keywords are displayed. The cursor is positioned at the start of the line of the first one. - Page 118 Abbreviated Dialing Dialing station numbers Search for or enter a name. Press the DIAL or Enter key to dial the phone num- DIAL ber stored under the highlighted name. Displaying entries Search for or enter a name. Press the CARD key to display the entries stored CARD under the highlighted name on the screen.
-
Page 119: Deleting Entries
Abbreviated Dialing Deleting Entries You can delete all entries in the electronic note- book or only those entries stored under a particular name. Deleting individual names with the corresponding entries Precondition: You have searched for and marked the required name or you call up the relevant en- Æ... -
Page 120: Displaying The Enb Main Menu
Abbreviated Dialing Displaying the ENB Main Menu You can display the main menu, which contains special electronic notebook functions, and activate one of the displayed functions. Press the MENU key to display the special ENB MENU functions on the screen. Press one of these keys to highlight the line or function you wish to use. -
Page 121: Smart Communication
Smart Communication Smart Communication Callback, Automatic If a user is busy or is not answering, you can store an automatic callback. This feature saves you from having to make repeated attempts to reach the us- er. The system or user calls you in one of the fol- lowing situations: When the busy user and you are both free When the user who did not answer has con-... -
Page 122: Setting/Storing A Callback
Smart Communication Setting/Storing a Callback Precondition: The party you are trying to reach is busy or does not answer. Scroll to “Callback?” and confirm your selection. Enter the code for “Callback.” Callback set “Callback set” appears on the display. > Answering a Callback Your telephone rings. -
Page 123: Checking/Canceling Stored Callbacks
Smart Communication Checking/Canceling Stored Callbacks You would like to know which callback requests are still pending or you wish to delete a callback re- quest. Scroll to “View callbacks?” and confirm your se- lection. Enter the code for “View callbacks.”... -
Page 124: Call Waiting (Camp-On)
Smart Communication Call Waiting (Camp-On) In urgent situations, you can request to join a call already in progress at an internal station. The call waiting feature can be prevented (service Æ technician 64). Precondition: You have dialed an internal station number and hear the busy tone. -
Page 125: Override
Smart Communication Override If authorized, in an emergency you can intrude on calls already in progress at an internal station and talk to the other party. When you do this, an alert- ing tone is heard. To prevent a party from intruding unnoticed on a call, the message “Override: (station number or name)”... -
Page 126: Sending A Message
Smart Communication Sending a Message You can send a predefined message text, or one which you have written yourself (optiset E memory only), to users with a system telephone. Transmitted message texts are signaled in the same way as a callback request on the optiset E entry and optiset E basic models. - Page 127 Smart Communication If you have an optiset E memory tele- phone, you can write your own messages using the alphanumeric keyboard (each dis- play line is twenty-four characters long). Af- ter you see “Msg. for” , simply type the re- quired message or scroll to “Enter message text”...
-
Page 128: Leaving Advisory Messages
Smart Communication If you have programmed the “Mailbox” Æ key ( 40), the associated LED lights up when a message has arrived for you (also when messages have arrived in connected voicemail systems). Leaving Advisory Messages You can leave predefined advisory messages, or ones which you have written yourself (optiset E memory only), on the display of your telephone for all internal callers who have a system telephone... - Page 129 Smart Communication Activating an advisory message Scroll to “Advisory msg. on?” and confirm your se- lection. Enter the code for “Advisory msg. on.” From this point on, simply follow the user prompts. (Enter the number of the advisory message that you want to use (0 - 9), with extra digits as neces- sary.) If you have an optiset E memory tele-...
-
Page 130: Caller List
Smart Communication Caller List (optiset E standard, optiset E advance plus/comfort, optiset E advance conference/conference, and optiset E memory) If you are unable to accept an external or internal call, the call attempt is stored in a caller list. Call re- quests are also stored if you are a member of a hunt group or group call group. - Page 131 Smart Communication Retrieving a call attempt Scroll to “Caller list?” and confirm your selection. Enter the code for “Caller list”. To activate additional functions, you must select the caller you want to reach. optiset E standard, advance plus/comfort, ad- vance conference/conference: Confirm display “Next?”.
- Page 132 Smart Communication Displaying the call time of the displayed (selected) caller optiset E standard, advance plus/comfort, ad- vance conference/conference: Scroll to “Time/date sent?” and confirm your se- lection. optiset E memory: Scroll to “Add'l information?” and confirm your se- lection. Press the Card key.
- Page 133 Smart Communication Entering a call request While dialing or during a call, you can store the oth- er party’s station number in your caller list, ready to use it for number redial if necessary. Scroll to “Save number?” and confirm your selec- tion.
-
Page 134: Radio Paging Equipment (Not For U.s.)
Smart Communication Radio Paging Equipment (Not for U.S.) If radio paging equipment is connected to your sys- tem, you can try to contact people through their as- signed pocket receivers. The pocket receiver indicates to the person you are looking for that someone is trying to get in touch. The person can then go to the nearest telephone and call you. -
Page 135: Enhanced Paging Equipment (Officepro Only)
Smart Communication Enhanced Paging Equipment (OfficePro Only) Paging Program/Service Press the Program/Service key; the LED lights up. Scroll to “Page?” and confirm your selection. Enter the code for “Page.” From this point on, simply follow the user prompts. (Enter the station number of the person you are contacting, and mode “1=Display informa- tion”... -
Page 136: Informing Of Receipt Of Fax/Message On Answering Machine
Informing of Receipt of Fax/Message on Answering Machine If a fax or answering machine is connected to your Hicom 150 E Office and you have assigned the “Fax details” function to a programmable key Æ 40), the key lights up when a fax or a message has been received. -
Page 137: Call Forwarding
Call Forwarding Call Forwarding You can immediately forward internal or external calls to different internal or external telephones (destinations). The availability of external destina- tions depends on the system configuration. Activating call forwarding Scroll to “Forwarding on?” and confirm your selec- tion. - Page 138 Call Forwarding To enter a destination number with au- tomatic trunk seizure: Internal destination: Press the Internal key + internal station number External destination: external number only To enter a destination number without automatic trunk seizure: Internal destination: Internal station number only External destination: Enter the external code (such as 0, 9, or trunk key) + external station number...
-
Page 139: Trunk Fwd (Not For U.s.)
Call Forwarding Trunk FWD (Not for U.S.) All incoming calls that are received from the public network can be forwarded through a basic access (system number or system port) directly to an ex- ternal destination in the public network. For exam- ple, in the evening you can transfer calls received at your company to your private residence. -
Page 140: Msn Trunk Fwd
Call Forwarding Deactivating trunk FWD Scroll to “Trunk FWD off” and confirm your selec- tion. Enter the code for “Trunk FWD off.” MSN Trunk FWD (Only With Multi-Device Connection in Release 2.2 and Later, Not for U.S.) You can forward all incoming calls that are received from the public network via a multiple subscriber number (MSN) directly to an external destination in the public network. - Page 141 Call Forwarding Activate MSN trunk FWD Scroll to “Trunk FWD on?” and confirm your selec- tion. Enter the code for “Trunk FWD on.” From this point on, simply follow the user prompts. (Enter the forwarding method , your own DID number, and the destination number without the external code.) Deactivate MSN trunk FWD Scroll to “Trunk FWD off”...
-
Page 142: Night Answer
Call Forwarding Night Answer When night answer mode is active, for example during a lunch break or after office hours, all exter- nal calls are immediately forwarded to a specific in- ternal telephone (night station). The night station can be defined by the service technician (= stan- dard night answer service) or by you (= temporary night answer service). - Page 143 Call Forwarding Deactivating night answer Scroll to “Night answer off?” and confirm your se- lection. Enter the code for “Night answer off?.” The night answer message is removed from the displays of all system telephones.
-
Page 144: Special Group Features
Special Group Features Special Group Features Call Pickup in a Group You can pick up calls for telephones in a call pickup group (defined by the service technician) on your telephone. You can do this even when a call is in progress. -
Page 145: Call Ringing Group
Special Group Features Call Ringing Group You can have calls for your telephone signaled au- dibly at up to five other phones. The person who answers first receives the call. Programming and changing telephones for call ringing group Press the Program/Service key; the LED lights up. Program/Service Scroll to “Ringing group on?”... -
Page 146: Hunt Group/Group Call
Special Group Features Hunt Group/Group Call A group of users can be linked together to form a hunt group. The members of the user group have a common number for the hunt group in addition to their individual station numbers. This can be useful for order processing or complaints departments, for example. - Page 147 Special Group Features You can leave the hunt group/group call temporari- Leaving the hunt group Scroll to “Leave hunt group?” and confirm your se- lection. Enter the code for “Leave hunt group.” Joining the hunt group Scroll to “Join hunt group?” and confirm your se- lection.
-
Page 148: Uniform Call Distribution (Ucd)
Special Group Features Uniform Call Distribution (UCD) This function can be used to distribute calls in a team. An incoming call is always routed to the member of the team (agent) who has had the long- est period without a call. The team members may also be working at sepa- rate locations, for example at the company and at home. -
Page 149: Logging On/Logging Off
Special Group Features Logging On/Logging Off You must log on and log off with the system at the beginning and end of your duty period. Logging on Press the Program/Service key; the LED lights up. Program/Service Scroll to “UCD?” and confirm your selection. Confirm “Log on?”. - Page 150 Special Group Features Logging off Press the Program/Service key; the LED lights up. Program/Service Scroll to “UCD?” and confirm your selection. Scroll to “Log off?” and confirm your selection. 4 0 1 Enter the code for “Log off?”...
-
Page 151: Agent Available/Unavailable (Logging On/Logging Off Temporarily)
Special Group Features Agent Available/Unavailable (Logging On/Logging Off Temporarily) During your working hours you can log off and on with the system temporarily, such as for breaks. Logging on Program/Service Press the Program/Service key; the LED lights up. Scroll to “UCD?” and confirm your selection. Scroll to “Available?”... - Page 152 Special Group Features Logging off Press the Program/Service key; the LED lights up. Program/Service Scroll to “UCD?” and confirm your selection. Scroll to “ Not available?” and confirm your selec- tion. 4 0 2 Enter the code for “Not available?”...
-
Page 153: Work Time
Special Group Features Work time If you need additional time after answering a call to complete your paperwork, you can request/acti- vate a certain amount of work time for the last call. This may be a fixed amount of time, or a variable amount which you can specify yourself. - Page 154 Special Group Features Logging back on Press the Program/Service key; the LED lights up. Program/Service Scroll to “UCD?” and confirm your selection. Scroll to “Work off?” and confirm your selection. 4 0 3 Enter the code for “Work off?”...
-
Page 155: Ucd Night Answer Service
Special Group Features UCD Night Answer Service This is a separate night answer service for auto- matic call distribution; it is not affected by the sys- tem night answer service. All incoming calls are forwarded to a special call distribution destination. Activating a night destination Program/Service Press the Program/Service key;... - Page 156 Special Group Features Deactivating the night destination Press the Program/Service key; the LED lights up. Program/Service Scroll to “UCD?” and confirm your selection. Scroll to “UCD night off?” and confirm your selec- tion. 4 0 4 Enter the code for “UCD night off?”...
-
Page 157: Checking The Number Of Waiting Calls
Special Group Features Checking the Number of Waiting Calls You can call up the number of waiting calls for the team. Program/Service Press the Program/Service key; the LED lights up. Scroll to “UCD?” and confirm your selection. Scroll to “Calls in queue?” and confirm your selec- tion. -
Page 158: Executive/Secretary Features
Executive/Secretary Features Executive/Secretary Features If your telephone belongs to an executive/secre- tary group, special direct station selection keys will have been set up, for example, “Executive” or “Secretary” trunk keys for the executive line and the Boss Ringing key. Up to two executive telephones and two secretary telephones can be interconnected in one execu- tive/secretary group. -
Page 159: Direct Station Selection Keys, Trunk Key For Executive Line
Executive/Secretary Features Direct Station Selection Keys, Trunk Key for Executive Line In an executive/secretary group, the easiest way to reach other members of the group is through di- rect station selection keys. Implementing direct station selection Press the direct station selection key; the station Name number is dialed. -
Page 160: Boss Ringing Key
Executive/Secretary Features Picking up calls You want to pick up a call for another member on your own telephone. The direct station selection key or trunk key for the executive flashes. Lift the handset. Press the flashing direct station selection key or flashing trunk key for the executive. -
Page 161: General System Features
General System Features General System Features Reset All Services (On One Phone) There is a general reset procedure for activated functions. The following functions are canceled, if they are activated: Forwarding on Advisory msg. on Ringing group on Leave hunt group Suppress call ID Waiting tone off DND on... -
Page 162: Room Monitor (Baby Phone)
General System Features Room Monitor (Baby Phone) A telephone can be used to monitor a room. The function must be activated on the telephone that you want to monitor. When a call is made to this phone, the connection is switched through direct- ly. - Page 163 General System Features Executing the feature Press the Internal key (only necessary if automatic Internal trunk seizure is active). Dial the internal station number of the telephone in the room that you want to monitor. Lift the handset; the LED on the Speaker key goes out.
-
Page 164: Phone Test
General System Features Phone Test You can test your telephone at any time. To do this, your telephone must be idle, for example, not en- gaged in a call. In the course of the test, all LEDS flash (also the LEDs on the key module, if one is in- stalled), all pixels on the display are activated, and the ringing signal is heard. - Page 165 General System Features Switching on Press the Program/Service key; the LED lights up. Program/Service Scroll to “Control Relay On?” and confirm your se- lection. Enter the code for “Control Relay On.” From this point on, simply follow the user prompts. (Dial codes 1 to 4 for relays 1 to 4.) Switching off Program/Service Press the Program/Service key;...
-
Page 166: Displaying Call Charges (Not For U.s.)
General System Features Displaying Call Charges (Not for U.S.) Connection charges for the current call The display usually shows call charges at the end of a call (default setting). If you want the charges to be displayed continuously during an outgoing call, you must apply to the network carrier for this fea- ture. -
Page 167: Display/Retrieve Call Charges (Not For U.s.)
General System Features Display/Retrieve Call Charges (Not for U.S.) If configured by the service technician, you can Æ program the “View call charges” key ( 40) and see from the state of the LED whether chargeable calls have been conducted since the last time the call charges were retrieved (the LED is lit up). -
Page 168: Toll Fraud Monitoring
General System Features Toll Fraud Monitoring (optiset E standard, optiset E advance plus/comfort, optiset E advance conference/conference, and optiset E memory) If a predefined length of time (set by the service technician) is exceeded during an ongoing external - external call, a message to that effect appears on the display: Time exceeded “Time exceeded”... -
Page 169: Associated Service (Activate Function For Another Telephone)
General System Features Associated Service (Activate Function for Another Telephone) You can activate or deactivate the following func- tions if you are assigned the corresponding class of service for other telephones: Æ Reset all services (on one phone): #0 ( 161) Æ... - Page 170 General System Features Program/Service Press the Program/Service key; the LED lights up. Scroll to “Associated serv.” and confirm your se- lection. Enter the code for “Associated serv.?” From this point on, simply follow the user prompts. (Enter the internal station number and code such 97 to activate do not disturb or #97 to deacti- vate do not disturb or enter the procedure.)
-
Page 171: Central Cos Change/Station Cos Changeover
General System Features Central COS Change/Station COS Changeover If authorized, you can lock other telephones to pre- vent unauthorized use, and later unlock them again. If a telephone user has locked his or her telephone and forgotten the user-defined password, you can use this function to unlock the telephone. -
Page 172: Relocate Procedure (Phone Change)
General System Features Relocate Procedure (Phone Change) You can log off and disconnect your system tele- phone from its present connection and plug it in and log back on at a different connection (reloca- tion destination). When you do this, all settings applying to your sys- tem telephone (such as station number, DID num- ber, name and key assignments) are retained. -
Page 173: Telephone Data Service Tds (Officecom/Pro Only)
General System Features Telephone Data Service TDS (OfficeCom/Pro only) You can use your telephone to control connected computers and their programs, such as hotel ser- vices or information systems. Press the Program/Service key; the LED lights up. Program/Service Scroll to “Tel. data service?” and confirm your se- lection. -
Page 174: Preparing To Log On A Cmi Unit (Not For U.s.)
General System Features Preparing to Log On a CMI Unit (Not for U.S.) In order to log on a CMI unit (cordless telephone), you must prepare your system for logging on. You can then log on your CMI units during the next ap- proximately ten minutes. -
Page 175: Disa (Direct Inward System Access)
General System Features DISA (Direct Inward System Access) If you have the appropriate authorization, you can activate and deactivate functions on your system from an external location in the same way as an in- ternal user and also set up outgoing external con- nections via your system. - Page 176 General System Features Precondition: You have a telephone that uses tone dialing (DTMF dialing) or you can switch your telephone to tone dialing. The telephone is not connected to the system. Set up a connection to the system. Obtain the number from your service technician.
- Page 177 General System Features You can always only execute one function at a time, or set up one outgoing connec- tion. The connection is immediately released af- ter successful activation of a function. In the case of an external-external call, the connection is released as soon as either of the parties ends the call.
-
Page 178: Call Signals
General System Features Call Signals To enable you to distinguish between different call types, various cadences and tones are used in sig- naling. With internal calls, your telephone rings once every four seconds (single-tone sequence). With external calls, your telephone rings twice in rapid succession every four seconds (dual-tone sequence). -
Page 179: Music On Hold
General System Features Music On Hold Music is played for callers on hold, either with or without an announcement. This can also be sup- pressed (service technician). Sensors (OfficePoint/Com Only) If the service technician has installed sensors for the detection of signals, your telephone rings when a signal is detected and the specified mes- sage appears on your display. -
Page 180: Classes Of Service
General System Features Classes of Service A class of service is assigned to each extension ac- cording to the communication requirements of the user. The service technician defines the class of service, which can be on one of five levels. The higher levels include the lower ones. -
Page 181: Index
Index Index parking ......... 91 accepting a waiting call ....61 picking up from acknowledgment ......23 an answ. machine ....... 71 actuators ......... 164 pickup ........144 adapters (accessories) ...... 17 pickup, directed ......59 adapting speakerphone placing on hold ......93 mode to room acoustics .... - Page 182 Index cleaning ..........20 cleaning telephones ......20 available storage ......120 CMI unit logon ........ 174 data transfer ......120 CMI units ........174 deleting all entries ..... 119 codes deleting names ......119 default ........2, 32 dialing a station number .... 117 conference .........
- Page 183 Index making calls ........73 group call ........146 making calls with a headset ..... 53 group features ........ 144 making external calls ......74 making internal calls ......73 making trunk calls ......74 Handset ..........13 menus ..........24 handset ........
- Page 184 Index phone change ......... 172 speaker call ........82 phone test ........164 speakerphone mode ......56 pickup (call) ........144 speed dialing station ........110 configuring for a telephone ..46 system ........110 placing a call on hold ......93 station COS changeover ....
- Page 185 Index trunk, transferring ......102 UCD ..........148 undialed trunk ......... 102 user prompting ......22, 24 waiting calls ........72 work time ........153...
- Page 186 US FCC rules The Siemens optiset E phones for Hicom 150 E system are hearing-aid compatible and comply with the applicable FCC Rules, Part 68 and Industry Canada CS-03 Standard. This equipment has been tested and found to comply with the limits for a Class B digital device, pursuant to Part 15 of the FCC Rules.