Table of Contents
Advertisement
Advertisement
Table of Contents

Related Manuals for Safety 1st elite 80 air +


Summary of Contents for Safety 1st elite 80 air +
- Page 2 www.safety1st.com/airprotect...
- Page 4 A. Before You Begin .........Pages 3-8 A-1 Registration and Safety Notices A-2 Understanding Your Child Restraint B. Safety Information ......Pages 9-10 B-1 Vehicle Seating Position B-2 Installation in Vehicle B-3 Child Restraint Use C. Basic Use ..........Pages 11-32 C-1 Choosing Position for Your Child C-2 Preparing Child Restraint to Fit Your Child C-3 Securing Child in Child Restraint C-4 Removing Child From Child Restraint...
- Page 5 E. Installing Rear-Facing ....... Pages 45-55 E-1 Preparing to Install Rear-Facing E-2 Preparing to Install LATCH Rear-Facing E-3 Install Rear-Facing with LATCH E-4 Install Rear-Facing with Vehicle Belts F. Installing Forward-Facing Pages 56-66 F-1 Preparing to Install Forward-Facing F-2 Adjusting Top Anchorage Strap (Tether) F-3 Preparing to Install LATCH Forward-Facing F-4 Install Forward-Facing With LATCH F-5 Install Forward-Facing with Vehicle Belts...
- Page 6 A-1 Thank You... Thank you for choosing this car seat, referred to throughout this manual as a child restraint. The DJG family is committed to creating a child restraint with the most comfort and convenience available today. Remember, parents are a child’s first teachers and examples. If you always buckle your seat belt, your child will think it is the natural thing to do.
-
Page 7: Registration And Safety Notices
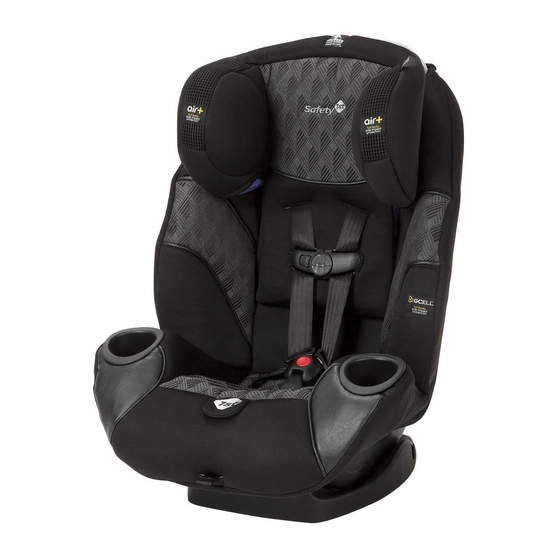
A-2 Registration and Safety Notices Please complete the postage-paid registration card that came with your child restraint, and send it to us. Child restraints could be recalled for safety reasons. You must register this restraint to be reached in a recall. Send your name, address, email address if available, and the restraint’s model number and manufacturing date to: Dorel Juvenile Group, Inc. - Page 8 A-3 Understanding Your Child Restraint Front View Adjustable Headrest Body Pillow (on select models) Headrest Adjustment Lever Cup Holders (on back of headrest) Harness Release Shoulder Belt Lever (under flap) Positioning Guide Harness Tightening Strap Upper Harness Slots...
- Page 9 Harness System Detail Chest Clip Buckle Strap Harness Straps Buckle Strap Slots Buckle Tongue Buckle Lower Harness Slots continued on next page.
- Page 10 Back View Top Anchorage LATCH Connector Strap (Tether) LATCH Adjuster Harness Straps LATCH Storage Splitter Plate Top Anchorage Recline Handle Hook (Tether) Storage...
- Page 11 Side View Forward-Facing Instruction Storage Belt Path (between headrest pad and headrest) Rear-Facing Belt Path Level to Ground Line (on side of plastic shell) Recline Base...
-
Page 12: Vehicle Seating Position
Failure to follow these warnings can result in the serious injury or death of your child. To help you recognize instructions which are most critical to your child’s safety, we use this symbol: B-1 Vehicle Seating Position Never place a child rear-facing in a seating position with an active frontal airbag. -
Page 13: Child Restraint Use
B-3 Child Restraint Use Never take your child out of the child restraint while the vehicle is moving. Never leave child unattended. Placing your child in a hot child restraint may result in burns. Do not use a child restraint with damaged or missing parts. - Page 14 C-1 Choosing Position for Your Child Your child’s height, weight and age determine how your child restraint should be placed in the vehicle. 5-40 lbs (2.3-18 kg) and 19-43 in. (48-110 cm) Rear-Facing using 5-point harness Child and child restraint are placed in the back seat, facing the back of the vehicle.
-
Page 15: Preparing Child Restraint To Fit Your Child
C-2 Preparing Child Restraint to Fit Your Child Make these adjustments with your child in the child restraint before you install in the vehicle. Loosen Harness Push down on the harness release lever (under flap on the front of child restraint) while pulling out on the harness straps just above the buckle. - Page 16 Place Child in Child Restraint Place the child’s bottom and back flat against the child restraint. This will increase comfort and allow the harness straps to be properly tightened. Check Buckle Position Determine which of the available buckle positions will be comfortable and provide a snug fit for your child.
- Page 17 Rotate metal retainer, then insert retainer up through the shell and pad. From the top, pull buckle free from shell and pad. With the red button facing away from the seat, insert the buckle’s metal retainer through the desired slot. Reach under seat and pull buckle’s metal retainer completely through pad...
- Page 18 Pull up on buckle to make sure it is secured. The buckle must not pull out. Failure to place buckle’s metal retainer completely through pad and shell can result in serious injury or death. Check Harness/Headrest Height With child in the child restraint, check the location of the harness slot.
- Page 19 Forward-Facing Position Harness slot must be even with or just above the shoulders. If the harness slot is below the child’s shoulders with the headrest in the highest position, do not use this child restraint. To Adjust Harness/ Headrest Height Loosen harness straps.
- Page 20 Do not use this child restraint rear- facing if the top of your child’s head is above the top of the child restraint’s headrest. Do not use this child restraint forward-facing if the midpoint of your child’s head is above the top of the child restraint’s headrest.
-
Page 21: Securing Child In Child Restraint
C-3 Securing Child in Child Restraint Position Harness Straps Over the Child’s Shoulders. Buckle Harness Push each buckle tongue into buckle until you hear a “click”. Remember to always pull up on harness straps to make sure buckle is locked. Close Chest Clip Insert right half of chest clip into left half and... - Page 22 Tighten Harness Pull on harness tightening strap to tighten harness snugly. NOTE: A snug strap should not allow any slack. It lies in a relatively straight line without sagging. It does not press on the child’s flesh or push the child’s body into an unnatural position.
-
Page 23: Removing Child From Child Restraint
C-4 Removing Child From Child Restraint Loosen Harness Press on harness release lever while pulling on harness straps above the buckle to loosen. Release Chest Clip Press on release button and pull apart. Unbuckle Press red button on buckle to release the buckle tongues. -
Page 24: Reclining Child Restraint
C-5 Reclining Child Restraint This child restraint has 4 recline positions: Rear-facing - For children 5-22 lbs (2.3- 10 kg), recline so that the bottom most recline level to ground line is level to the ground when installed. For children 22-40 lbs (10.1- 18 kg), rotate the restraint so the recline angle is between the 2 level to ground lines. - Page 25 C-6 Storing Harness Straps for Booster Use Harness system MUST be stored to use this child restraint as a Belt-Positioning Booster. Remove Harness Straps from Splitter Plate Fully loosen harness straps. Locate splitter plate on the back of the child restraint and unfasten the harness straps.
- Page 26 Pull Pad Off of Front of Shell From the front of the child restraint, pull the pad off shell and around the both cup holders. Pull harness straps, chest clip and buckle tongues down through the lower harness slots in the pad. Store Harness Straps Tuck the left harness strap, chest clip and buckle tongue...
-
Page 27: Removing Seat Pad For Cleaning
C-7 Removing Seat Pad for Cleaning Remove Harness Straps from Splitter Plate Fully loosen harness straps. Locate splitter plate on the back of the child restraint and unfasten the harness straps. Remove Harness Straps Pull harness through the slots from the front. Remove Buckle Fully recline the child restraint and locate the... - Page 28 Insert Metal Retainer Rotate metal retainer, then insert retainer up through the shell and pad. Pull Buckle Out of Seat From the front, pull buckle free from shell and pad. Place Headrest in the Middle of Seat Back...
- Page 29 Remove Seat Pad Slide the pad attachment tab down and out of the slot on both sides of the shell. At the top of the seat, undo the fastening strip by the metal bar. Pull the top anchorage (tether) strap out of the slot in the pad Starting from the front, pull the pad off shell...
- Page 30 Pull the harness straps out of the pad and then pull the pad out from behind the headrest. Remove Headrest Pad Pull the pad off the headrest by starting at the top and pull the pad down and off. DO NOT remove the Air Protect or side foam protection systems.
- Page 31 C-8 Replacing Seat Pad and Harness System Do not use child restraint without the seat pad. Replace Headrest Pad Starting from the bottom, slip the headrest pad on the headrest. Replace Seat Pad Starting from the top, slide the seat pad behind the headrest.
- Page 32 Pull both harness straps, chest clips and buckle tongues up through the lower harness slots. From the front, push the harness adjustment strap up through the pad. Fit the pad around the shell and tuck the pad under both cup holders. At the top, tuck the fastening strip flap under the metal bar and thread the tether in...
- Page 33 Refasten the fastening strip. Stretch pad over the side and reconnect the pad tab into the lower slot on both sides. Choose Correct Buckle Strap Slot Choose one of the three available buckle positions that will be comfortable and provide a snug fit for your child.
- Page 34 Insert Buckle’s Metal Retainer Through Desired Slot Make sure buckle is facing forward. With child restraint fully reclined, reach under seat between base and shell. Pull buckle’s metal retainer completely through pad and shell. Pull up on buckle to make sure it is secured.
-
Page 35: Accessories (On Select Models)
Attach Harness Straps to Splitter Plate Fit loops on harness ends completely on the splitter plate. Make sure harness straps are not twisted. Harness system must be reattached correctly. Failure to follow these steps can result in serious injury or death. C-9 Accessories (on select models) Body Pillow This seat has two pillows. -
Page 36: Understanding Your Vehicle
D-1 Understanding Your Vehicle Your vehicle’s features may be considerably different than those pictured here. Consult your vehicle owner’s manual to help identify your vehicle’s specific features and locations. Seat Bight Air Bags Anchor Brackets For Top Anchorage Consult your vehicle owner’s manual for Strap (Tether) all air bag locations. -
Page 37: Safety Tip
Safety Tip: To avoid your child being seriously burned, take the following precautions: 1. Park in the shade or where sun does not directly hit the child restraint. 2. Cover the child restraint with a sheet or blanket when not in use. 3. - Page 38 Use the child restraint only on vehicle seats that face forward. Do not use on seats that face the sides or rear of the vehicle. Safety Tip: Children are safer when properly restrained in rear seating positions than in the front seating positions.
-
Page 39: Choosing Latch Or Vehicle Belts
D-3 Choosing LATCH or Vehicle Belts LATCH Anchor Bars The LATCH System LATCH (Lower Anchors and Tethers for CHildren) is a universal system for installing child restraints without using vehicle seat belts. The LATCH system can ONLY be used in vehicles that have the LATCH anchor bars installed and designated LATCH seating positions. -
Page 40: Knowing Your Vehicle Belts
D-4 Knowing Your Vehicle Belts Review your vehicle’s owner manual for vehicle seat belt use with child restraints. This is your best source for information concerning your vehicle. Not all vehicle belts will work with this child restraint. This child restraint must be tightly locked in place at all times, during travel. - Page 41 To learn if you have this type of vehicle belt, gently pull the vehicle belt all the way out of the retractor (spool), let it return several inches, then pull on it again. If it moves freely, it is an ELR vehicle belt. If it is locked and will not allow any more vehicle belt to come out, it is a switchable retractor.
-
Page 42: Using The Locking Clip
You should not need to use a locking clip. Consult your vehicle owner’s manual. If the latch plate slides up and down on the vehicle belt, and you have an ELR retractor, you MUST use a locking clip to install the child restraint. - Page 43 Place Child Restraint in Vehicle Rear-Facing NOTE: Store top anchorage hook (tether) on the base. See section E-1. With child restraint fully reclined, place child restraint in the back seat. Check for proper recline. For children between 5-22 lbs (2.3-10 kg), the bottom level to ground line MUST be level to the ground.
-
Page 44: Child Restraint
Thread Vehicle Belt Thread the vehicle lap/ shoulder belt combination through the rear-facing belt slot. Pull Vehicle Belt Across Child Restraint Thread vehicle seat belt under pad in front of buckle strap to the opposite side. Buckle vehicle belt. Do not place vehicle belt over child’s legs. - Page 45 Locate Locking Clip Location Grasp both vehicle belts together just behind the latch plate and unbuckle. NOTE: If the latch plate ends up just at the belt path opening, grasp the vehicle belts on the opposite side of the child restraint, as close to the latch plate as possible.
- Page 46 Rebuckle Vehicle Belt Check Vehicle Belt Tightness Grasp the child restraint at the vehicle belt path with one hand. Push and pull the child restraint from side to side, forward and back. The child restraint should not move more than 1 inch.
- Page 47 D-6 Installing on Aircraft This restraint is certified for aircraft use when used with the internal harness. This child restraint is NOT certified for use in aircraft when used as a belt-positioning booster because aircraft seats do not have shoulder belts. Use only on forward-facing aircraft seats.
- Page 48 E-1 Preparing to Install Rear-Facing 5-40 lbs (2.3-18 kg) and 19-43 in. (48-110 cm) Rear-Facing using 5-point harness LATCH Belt Lap/Shoulder Belt Lap Belt...
- Page 49 Never place a child rear-facing in a seating position with an active frontal airbag. This can result in serious injury or death. This child restraint must always face the rear of the vehicle and be in the fully reclined position when the child is less than one year old.
- Page 50 Remove LATCH from Storage Push in on the red button on the LATCH connector and remove from the storage bar on both sides. Pull out the LATCH belt. Routing LATCH Belt Insert the LATCH connector with the adjuster into the rear-facing belt path.
- Page 51 Attach Pad to Shell Make sure the belt is not twisted. Stretch pad over the side and reconnect the pad tab into the lower slot on both sides. E-3 Install Rear-Facing with LATCH Do not use the LATCH system along with the vehicle lap or lap/shoulder belt.
- Page 52 Store Top Anchorage Hook (Tether) Attach the top anchorage hook (tether) to the back of base as shown. Tighten tether to remove the slack. Fully Recline and Place Child Restraint in the Back Seat Rear-Facing For children between 5-22 lbs (2.3-10 kg), the bottom level to ground line MUST be level to the ground.
- Page 53 Connect LATCH to Vehicle LATCH Anchor NOTE: The LATCH’s red release button MUST face away from child restraint and the arrows on connectors MUST face up. Fasten one LATCH connector to the anchor in the vehicle seat located in the vehicle seat bight. Repeat for other side of child restraint.
- Page 54 Check Belt Tightness Grasp the child restraint at the belt path with one hand. Push and pull the child restraint from side to side, forward and back. The child restraint should not move more than 1 inch. NOTE: If it moves more than an inch, try reinstalling the child restraint or try another seating location.
- Page 55 E-4 Install Rear-Facing with Vehicle Belts Do not use the LATCH system along with the vehicle lap or lap/shoulder belt. Secure LATCH belts when using the vehicle belts. Check the vehicle belt before each use. Use only if the belt is tightened properly and securely. Attach the top anchorage hook (tether) to recline stand when used rear-facing.
- Page 56 Fully Recline and Place Child Restraint in the Back Seat Rear-Facing For children between 5-22 lbs (2.3-10 kg), the bottom level to ground line MUST be level to the ground. For children 22-40 lbs (10.1-18 kg) and can sit up unassisted, rotate the child restraint between the 2 level to ground lines.
- Page 57 Thread Vehicle Belt Thread the vehicle lap or lap/shoulder belt combination through the rear-facing belt path. With an ALR belt, pull the belt all the way out before threading the child restraint. Pull Latch Plate Across to Opposite Side Reach under pad and pull the vehicle belt across the shell.
- Page 58 It may be easier to tighten the belt through the belt path opening as shown. With a switchable retractor, pull the shoulder belt all the way out to switch the retractor into the ALR mode before tightening. Feed the slack back into the retractor while tightening.
- Page 59 F-1 Preparing to Install Forward-Facing 22-80 lbs (10.1-36.2 kg) and 29-52 in. (73.6-132.1 cm) and at least 1 Year Old. Forward-Facing using 5-point harness Lap/Shoulder LATCH Belt Belt with with tether tether up to 40 lbs. up to 80 lbs. (18 kg) (36.2 kg) Lap Belt with...
-
Page 60: Safety Tip
Safety Tip: Experts agree that children should remain rear-facing as long as possible. In this child restraint, your child can remain rear-facing up to 40 pounds and up to 43 inches. F-2 Adjusting Top Anchorage Strap (Tether) The top anchorage strap (tether) is used for the forward-facing position only. - Page 61 To Adjust Top Anchorage Strap (tether): To tighten; After the Pull loose child restraint is locked end to into place with LATCH or tighten vehicle belt, put knee in child restraint and push down. Pull on free end of top anchorage strap. To loosen;...
- Page 62 Remove LATCH from Storage Push in on the red button on the LATCH connector and remove from the storage bar on both sides. Pull out the LATCH belt. Routing LATCH Belt Insert the connector without the adjuster through the forward-facing belt path. NOTE: You may need to raise the headrest to thread the LATCH belt.
-
Page 63: With Latch
F-4 Install Forward-Facing With LATCH Note: Review your vehicle’s owner manual for LATCH belt use. Do not use the LATCH system along with the vehicle belt. Check LATCH belt before each use. Use only if the belt can be tightened properly and securely. -
Page 64: Installation Tip
Installation Tip: Loosely attach the tether hook before attaching the LATCH belt. Consult vehicle’s owner manual for specific location. Connect LATCH to Vehicle LATCH Anchor NOTE: The LATCH’s red release button MUST face away from child restraint and the arrows on connectors MUST face up. - Page 65 Tighten Top Anchorage Strap Push firmly on the back of the seat and tighten top anchorage strap. Check Belt Tightness Grasp the child restraint at the belt path with one hand. Push and pull the child restraint from side to side, forward and back. The child restraint should not move more than 1 inch.
- Page 66 F-5 Install Forward-Facing With Vehicle Belts Secure LATCH Belts You MUST fasten the LATCH connectors to the side of base as shown when using the vehicle seat belts. NOTE: You may need to raise the headrest to thread the LATCH belt.
- Page 67 Place Child Restraint in Vehicle Forward-Facing Place child restraint flush against the back of the vehicle seat forward- facing in the back seat. Installation Tip: Loosely attach the tether hook before threading the vehicle belt. Consult vehicle’s owner manual for specific location.
- Page 68 Tighten Vehicle Belt Push down firmly on the child restraint and pull on the shoulder belt or free end of the lap belt to tighten. It maybe easier to tighten the belt through the belt path opening as shown. With a switchable retractor, pull the shoulder belt all the way out to switch the retractor into the ALR mode...
- Page 69 Check Belt Tightness Grasp the child restraint at the belt path with one hand. Push and pull the child restraint from side to side, forward and back. The child restraint should not move more than 1 inch. NOTE: If it moves more than an 1 inch, try reinstalling the child restraint or try another seating location.
- Page 70 G-1 Preparing Belt-Positioning Booster 40-100 lbs (18.1-45.4 kg) And 43-52 in. (110.1-132.1 cm) And At Least 4 Years Old. Belt-positioning booster using only vehicle lap/shoulder belt. You MUST store the harness system to use this seat as a belt-positioning booster. See section C-6 to store the hanress straps.
- Page 71 Use only the vehicle’s lap and shoulder belt system when restraining the child in this booster seat. Do not use the LATCH belts or top anchorage strap (tether) when using as a belt-positioning booster. Secure both LATCH and top anchorage strap. Do not use the harness system when using as a belt-positioning booster.
- Page 72 G-2 Installing Using the Lap and Shoulder Belts You DO NOT use a locking clip when using this seat as a belt- positioning booster. Place Child Restraint Forward-Facing in Vehicle Place child restraint in the back seat, flush against the back of the vehicle seat.
- Page 73 Buckle Lap and Shoulder Belt Lap belt should cross the child’s thighs. The shoulder belt should lay snugly across the center of the child’s shoulders and across the chest (not on the face or neck). Pull up on the shoulder belt to tighten.
- Page 74 Slightly adjust the headrest if needed to make a proper fit by raising or lowering the headrest. Bottom of the shoulder belt positioing guide should be above the top of the child’s shoulder. Check periodically to ensure your child has not moved out of position and loosened the shoulder belt.
-
Page 75: Warranty
Warranty Dorel Juvenile Group, Inc. (DJG) warrants this product to the original retail purchaser as follows: This product is warranted against defective materials or workmanship for one year from the date of original purchase. An original receipt is required to validate your warranty. -
Page 76: Replacement Parts Order Form
Replacement Parts Order Form Complete the form. Your model number with color code and manufacturer date code MUST be included on the form to ensure proper replacement parts. Your model number with color code and the date code can be found on a sticker on the side of child restraint. Payment in U.S. - Page 77 Ship To (Please Print): _________________________________ Name: _____________________________________________ Address: ___________________________________________ City: ______________________________________________ State/Province: __________________________ Zip _________ Telephone: _________________________________________ Email Address: ______________________________________ MUST have this information to process your order: Model Number (8 to 9 characters): ____________________ Manufacture Date (mm/dd/yyyy): _____________________...
- Page 78 Replacement Parts List NOTE: If requested color is not available, similar color will be substituted. Prices are subject to change. Part Cost Quantity Total Cost Buckle Strap/Buckle ..$4.99 X _____ = $ ______________ Seat Pad ....$24.99 X _____ = $ ______________ Chest Clip ....
-
Page 79: Troubleshooting
Trouble Shooting If the child restraint buckle or harness release lever sticks or you cannot get the straps tight enough around child: DO NOT LUBRICATE. Check around lever and retractor for dropped food, sticky spilled drinks, dirt, leaves, etc. Clean with warm water and/or remove object with tweezers.