Table of Contents
Advertisement
Quick Links
Advertisement
Chapters
Table of Contents

Related Manuals for Asus MyPal A620BT


Summary of Contents for Asus MyPal A620BT
- Page 1 MyPal A620BT User’s Manual...
- Page 2 Product warranty or service will not be extended if: (1) the product is repaired, modified or altered, unless such repair, modification of alteration is authorized in writing by ASUS; or (2) the serial number of the product is defaced or missing.
- Page 3 • Chapter 2 - Learn the basics ... 2-1 This chapter will teach you the basic functions in MyPal A620BT. You will learn how to enter, find, and organize information, customize the device, and use the bundled ASUS utilities.
- Page 4 • Bonus CD (optional) • User’s Manual • Quick Start Guide • Warranty card English version keyboard. Visit the ASUS website to check the availability of other language version keyboards. Intel PXA255 400 MHz Microsoft Pocket PC 2003 64MB SDRAM (55.2 MB user accessible)
-
Page 5: Table Of Contents
Chapter 1 Introducing MyPal ... 1-2 Front features ... 1-2 Left side features ... 1-3 Top features ... 1-4 Bottom features ... 1-4 Back features ... 1-5 The stylus ... 1-5 The cradle ... 1-6 Setting up MyPal ... 1-7 Placing on the cradle ... -
Page 6: Introducing Mypal
Front features Power button/ Backlight button Calendar button ASUS Launcher button • Power/Backlight button - turns the device power on or off if you press the button quickly. Pressing and holding the button for a few seconds turns the backlight on or off. Turning off the backlight saves battery power. -
Page 7: Left Side Features
The screen lumination is increased or decreased by changing the backlight settings. • ASUS Launcher, Calendar, Tasks, and Contacts buttons - allow you quick access to commonly used programs. • Navigation button - functions like the four arrow keys and the Enter key on a keyboard. -
Page 8: Top Features
Top features Headphone jack • Headphone jack - connects a headphone. • CF card slot - accommodates a CompactFlash (CF) card. See list of supported CF cards on page iv. • Stylus - used for tapping or writing on the LCD touch screen. Slide out the stylus from its compartment. -
Page 9: Back Features
Back features CF card slot cover Reset switch • Reset switch - allows you to perform a soft reset in case the device malfunctions, or when an application hangs. Press the tip of the stylus on the switch to reset the system. •... -
Page 10: The Cradle
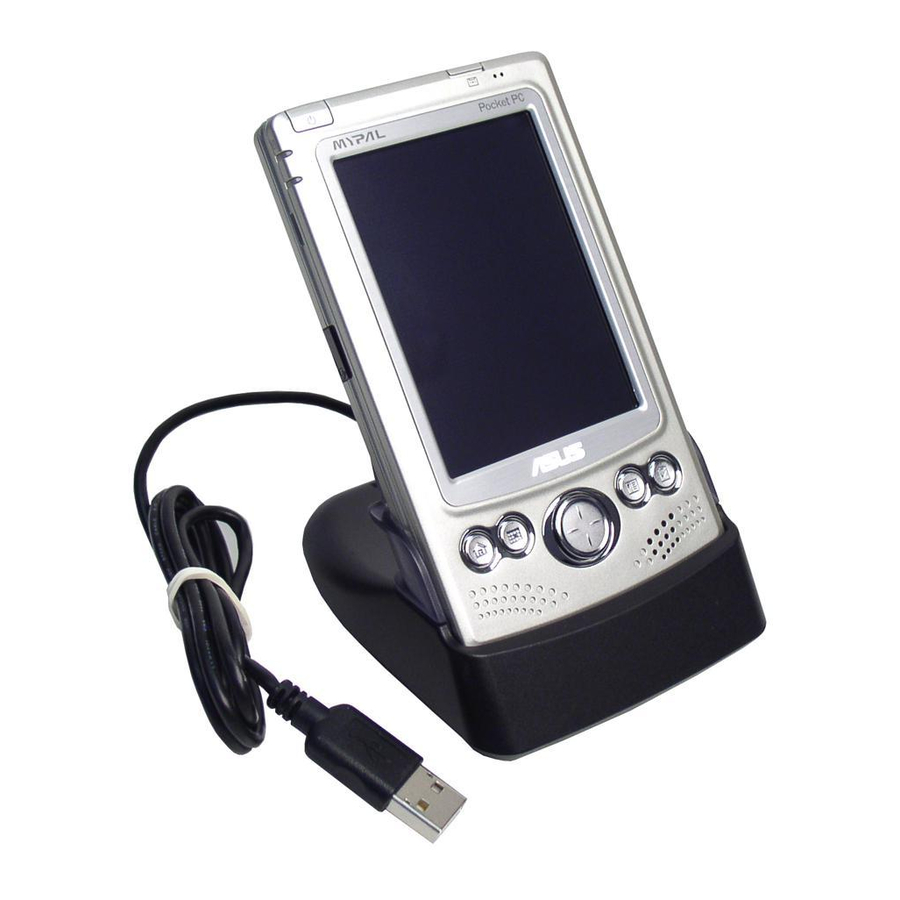
The cradle The cradle has three connectors. • Device connector - holds the device in place. This is a 26-pin connector that matches the connector on the bottom of the device. • USB connector - synchronizes the device with your PC. NOTE The USB cable/connector is not detachable from the back of the cradle. -
Page 11: Setting Up Mypal
Setting up MyPal Placing on the cradle Position the device on the cradle as shown. Match the connectors and carefully insert the device until it fits in place. Connecting the AC adapter • Connect the AC adapter cable to the connector at the back of the cradle. Connect the power plug to a grounded wall socket. -
Page 12: Installing And Removing A Cf Card
The CF card slot on your device supports several types of CF card. Refer to the list of supported cards under “Optional Accessories” on page iv of this manual. Install a CF card for additional storage, or if you wish to use the ASUS backup features. To install a CF card: 1. - Page 13 To remove a CF card: 1. Remove the CF card slot cover by pushing on the dent on the surface, and sliding the cover outward. Dent on the cover surface 2. Slide out the CF card. 3. Replace the cover back into the slot. Get started!
-
Page 14: Charging The Battery
Charging the battery Your device includes a rechargeable Lithium Ion battery. You must charge the battery before using the device the first time. The battery starts charging as soon as you connect the AC adapter to a power source. Use the AC adapter to plug your device to a power source whenever possible, especially when you are using a modem or other peripherals, using the device backlight,... -
Page 15: Basic Screens On Mypal
Basic screens on MyPal Today screen Normally, the Today screen appears when you turn on your device for the first time each day. NOTE When the device is already on and the screen displays another program, you can display the Today screen by tapping the Today. -
Page 16: Start Menu
Start menu From the Start menu, you can select programs, settings, and Help topics. To display the Start menu, tap the Icon Program ActiveSync Calendar Contacts Inbox Internet Explorer Notes Tasks Programs Settings Find Help 1-12 icon from the top of the screen. Tap to open a recently used program Tap to open a program Tap to open the Programs menu... -
Page 17: Command Bar
Command bar At the bottom of the screen is the Command bar. You can use the menus and buttons on the Command bar to perform tasks in programs. NOTE The menus and buttons vary depending on the programs you are using. Tap to select menu commands Pop-up menus... - Page 18 The pop-up menus are also available in most other programs in your device. The pop-up menu items vary depending on the program or application. For example, the File Explorer pop-up menu includes more items than in Tasks. 1-14 Tap outside the pop-up menu to close it without performing an action Tap the action that you wish to perform Tap and hold until the pop-up menu appears...
- Page 19 Adjusting settings ... 2-13 Selecting sounds and notifications ... 2-15 Using AsusLauncher ... 2-16 Adding or removing programs ... 2-20 ASUS utilities ... 2-23 ASUS SmartKeeper ... 2-23 ASUS Backup ... 2-29 ASUS Settings ... 2-35 Bundled programs ... 2-39 ASUS Programs ...
-
Page 20: Entering Information
Entering information You can enter information in your device in any of the following ways. • Use the input panel to enter text using the soft keyboard or the Letter Recognizer • Write directly on the screen with the stylus •... -
Page 21: To Use Letter Recognizer
When you use the Input Panel and the soft keyboard, your device anticipates the word you are typing and displays it above the Input Panel. When you tap the displayed word, it is inserted into your text at the insertion point. The more your use your device, the more words it learns to anticipate. -
Page 22: To Use Block Recognizer
To use Block Recognizer: With the Block Recognizer, you can input character strokes that are similar to those use on other devices. 1. Tap the arrow next to the Input Panel button, then tap Block Recognizer. 2. Write a letter in the box. When you write a letter, it is converted to a typed text that appears on the screen. -
Page 23: Writing On The Screen
Writing on the screen In any program that accepts writing, such as the Notes program, and in the Notes tab in Calendar, Contacts, and Tasks, you can use the stylus to write directly on the screen. Write the way you do on paper. You can edit and format what you have written and convert the information to text at a later time. -
Page 24: To Convert Writing To Text
To edit your writing: 1. Tap and hold the stylus next to the text that you wish to select until the insertion point appears. 2. Without lifting, drag the stylus across the text to select it. If you accidentally write on the screen, tap Tools, then Undo and try again. - Page 25 If the conversion is incorrect, you can select different words from a list of alternates or return to the original writing. 1. Tap and hold the incorrect word. 2. When the pop-up menu appears, tap Alternates to display a list of alternate words for the selection.
-
Page 26: Drawing On The Screen
Drawing on the screen You can draw on the screen in the same way that you write on the screen. The difference between writing and drawing on the screen is how you select items and how they can be edited. For example, selected drawings can be resized, while writing cannot. -
Page 27: Recording A Message
Recording a message In any program where you can write or draw on the screen, you can also quickly capture thoughts, reminders, and phone numbers by recording a message. In Calendar, Tasks, and Contacts, you can include a recording in the Notes tab. In the Notes program, you can either create a stand- alone recording or include a recording in a written note. -
Page 28: Using A Preset Message
To change the recording format: 1. In the note list, tap Tools then Options. 2. Tap the Global Input Options link. 3. Tap the Options tab. Mobile Voice is a 2.4KB audio codec. It is the recommended format because it provides good voice recording and less storage space. -
Page 29: Finding And Organizing Information
Finding and organizing information The Find and Help features on your device helps you quickly locate information. To find information: 1. Tap , then tap Find. 2. Enter the text that you want to find, select a data type, then tap Go to start the search. -
Page 30: Using The File Explorer
Using the File Explorer To use the File Explorer to find and organize files: 1. Tap , then tap Programs. 2. In the Program screen, tap the File Explorer icon to display the files in your device. 2-12 Tap to display sort options Tap to select a sort order Tap to display the contents of the Flash disk or the storage card... -
Page 31: Customizing Your Device
Power. Display the remaining battery power indicated by a bar chart. • Today. Customize the look and information displayed on the Today screen. NOTE Refer to the section “ASUS utilities” later in this chapter for details on the bundled ASUS programs. Learn the basics menu, and enable a pop-up 2-13... - Page 32 To change the date and time settings: 1. Tap Settings, then the System. 2. Tap the Clock icon. 3. Make your desired settings. To change the alarm settings: 1. Tap Settings, then the System. 2. Tap the Clock icon, then the Alarm tab. 3.
-
Page 33: Selecting Sounds And Notifications
Selecting sounds and notifications Your device can remind you of things you have to do in several ways. For example, if you have set up an appointment in Calendar, a task with a due date, or an alarm in Clock, you will be notified in any of the following ways. •... -
Page 34: Using Asuslauncher
This program allows you the convenience of classifying your frequently used programs, and quickly launching them with just a few taps. To access ASUS Launcher: 1. Tap , then Programs. 2. Tap ASUS Programs, then ASUS Launcher. NOTE To quickly access ASUS Launcher, press the button (leftmost) on your device. - Page 35 5. Tap Start Menu or Programs to display the default programs in them. NOTE Whatever category is selected, that category will be launched the next time you tap the AsusLauncher icon. To edit the name of a default category: 1. Tap Name, and select a category that you wish to rename. For example, Programs.
- Page 36 To customize an existing category: 1. Tap Editor, then Copy To. 2. Tap Name, then Programs (or Start Menu). 3. In the Programs screen, tap the program icon that you wish to copy. For example, Jawbreaker. A pop-up screen appears. 4.
- Page 37 To remove programs from a category: 1. Tap Editor, then Remove. 2. Tap Name, then any of the existing categories. 3. Tap the program icon that you wish to remove. For example, the Calculator icon in the Favorites screen. The icon disappears from the screen as soon as you tap it.
-
Page 38: Adding Or Removing Programs
Adding or removing programs Programs added to your device at the factory are stored in ROM (Read- Only Memory). You cannot remove this software, and you will never accidentally lose ROM contents. ROM programs can be updated using installation programs with a *.xip extension. All other programs and data files added to your device after factory installation are stored in RAM (Random Access Memory). -
Page 39: To Add A Program Directly From The Internet
5. Double-click the *.exe file. • If the file is an installer, the installation wizard begins. Follow the directions on the screen. Once the software is installed on your desktop computer, the installer automatically transfers the software to your device. •... -
Page 40: To Add A Program To The Start Menu
To add a program to the Start menu: 1. Tap , tap Settings, tap Menus, tap the Start Menu tab, and tap the check box for the program. If you do not see the program on the list, you can either use File Explorer on the device to move the program to the Start Menu folder, or use ActiveSync on the desktop computer to create a shortcut to the program and place the shortcut in the Start Menu folder. -
Page 41: Asus Utilities
ASUS SmartKeeper The ASUS SmartKeeper is an automatic backup feature that prompts you to backup the current system status in a CF memory card whenever the remaining battery power reaches a certain level. With the automatic option, the backup process is done whether the device is ON or OFF as long as a CF memory card is present in the slot. - Page 42 4. In the Automatic screen, check the Automatic system backup box to enable automatic backup. This box is checked by default. When SmartKeeper is set to Automatic, make sure that a CF memory card (64MB free space recommended) is present in the CF card slot.
- Page 43 To back up the current system status: 1. When prompted, tap the Yes button on the screen message window to start the backup process. a. If you set Flash Disk as your storage device, SmartKeeper saves your current system status to the file ASUSBKUP.SAV in the Flash Disk.
- Page 44 When the device is OFF When a low battery status occurs while the device is in standby or OFF, SmartKeeper wakes up the system to back up the system status. • If you selected Flash Disk as your storage device, SmartKeeper automatically backs up the system status to ASUSBKUP.SAV file in the Flash Disk.
- Page 45 The system detected a battery power low status and tried to back up the system status at 2003/04/08, 10:21:27 AM. Backup failed! Insufficient space in the CF memory card. The system detected a battery power low status and tried to back up the system status at 2003/04/08, 10:21:27 AM.
- Page 46 SmartKeeper error messages When backing up or restoring the system status, you may receive any one of the following error messages. The messages tell you the reason why the error occurred. Back up Restore 2-28 Chapter 2...
-
Page 47: Asus Backup
ASUS Backup The ASUS Backup utility lets you back up your system files and/or data contained in the main system memory. Unlike the ASUS SmartKeeper automatic backup feature that backs up the entire system status (system and data) into one backup file, this utility allows you to manually create separate backup files for your system files and data files. - Page 48 To back up all data on your device: 1. Return to the ASUS programs screen and tap the ASUS Backup icon. 2. Tap the Backup tab on the ASUS Backup screen. 3. Tap All Data button to back up all data on your device.
- Page 49 In case the program fails to back up any items, it will show the items on the screen. 7. Tap OK. To back up only PIM data on your device: 1. On the ASUS Backup screen, tap PIM Data button to back up only the personal information management (PIM) data on your device.
- Page 50 4. Type a name for your backup file and the folder where you wish to place it. You may opt not to specify a folder. 5. Check the boxes opposite the items that you wish to back up, or tap Select All to select all listed items.
- Page 51 Tap the ASUS Backup icon. When prompted, stop all running programs. See page 2-29 for instructions. 3. Tap the Restore tab on the ASUS Backup screen. 4. Tap All Data. 5. In the Backup File screen: • select the backup file name...
- Page 52 To restore PIM data: 1. On the ASUS Backup screen, tap PIM Data. 2. When prompted, select the storage device (Flash Disk or CF card) where you stored your backup file. Tapping Cancel returns you to the previous screen. 3. Tap the Restore tab.
-
Page 53: Asus Settings
1. Tap , then tap Settings. 2. Tap the System tab on the bottom of the Settings screen. 3. Tap the ASUS Settings icon to display the system information screen. This screen is displayed whenever you tap the Info tab. - Page 54 To change the Display settings: 1. Tap the Display tab. 2. Set the degree of brightness while on battery power by tapping the down arrow and selecting a value, or by dragging the slider to the left or to the right until you achieve your desired brightness.
- Page 55 To change the Microphone settings: Tap the AGC tab to adjust the settings for the microphone sensitivity and automatic gain control (AGC). The AGC features allows you to adjust the recording and environment noise level. • The MIC Sensitivity controls the sound recording input.
- Page 56 To select Autorun Devices: Tap the Autorun tab to select the source devices to execute the autorun program. 2-38 Chapter 2...
-
Page 57: Bundled Programs
ASUS Programs Tapping the ASUS Programs icon displays the ASUS Backup utility and the ASUS Launcher. Tap the ASUS Backup icon if you wish to use the utility. See section “ASUS Backup” on page 2-29 for details. Tap the ASUS Launcher icon to quickly display your frequently used programs. -
Page 58: Calculator
Calculator Tap the Calculator icon to use the calculator. File Explorer Tap the File Explorer icon to access your files. See page 2-12. Microsoft Reader Tap the Microsoft Reader icon to download and read online books. See Chapter 5. 2-40 Chapter 2... -
Page 59: Msn Messenger
MSN Messenger Tap the MSN Messenger icon to use the service. See Chapter 5. Pocket MSN Tap the Pocket MSN icon to get connected to the Internet through the Pocket Internet Explorer. See Chapter 6. Pocket Word Tap the Pocket Word icon to create Pocket Word documents. -
Page 60: Pocket Excel
Pocket Excel Tap the Pocket Excel icon to create spreadsheet documents. See Chapter 5. Pictures Tap the Pictures icon to view .jpg pictures stored on your device or on a storage card. Refer to the online help on your device for details on using this feature. - Page 61 Chapter 3 Microsoft Introduction ... 3-2 ® What is ActiveSync Installing ActiveSync Installing ActiveSync Synchronizing your device ... 3-5 Connecting your device to a computer ... 3-5 Setting up a partnership ... 3-6 Checking synchronized information ... 3-8 Manually initiating synchronization ... 3-9 Synchronization options ...
-
Page 62: Introduction
Introduction What is ActiveSync ® The Microsoft ActiveSync MyPal. With ActiveSync, you can synchronize the information on your desktop computer with the information on your device. Synchronization compares the data on your device with your desktop computer and updates both computers with the most recent information. For example: •... -
Page 63: Installing Activesync
Installing ActiveSync The ActiveSync program is already installed on your device. To synchronize information on your device with your computer, you must also install ActiveSync on your computer. Install ActiveSync from the Companion CD that came with your product package. NOTE Before starting the ActiveSync installation, make sure that you have Microsoft... - Page 64 4. Read the Overview before installing ActiveSync 3.7 to make sure that you perform the installation sequence correctly. 5. If you have not installed Outlook, install it now. Click Install Outlook 2002 and follow the screen instructions to complete the installation. 6.
-
Page 65: Synchronizing Your Device
Synchronizing your device Connecting your device to a computer To connect your device to your computer: 1. Place the device on the cradle. 2. Connect the AC adapter to the power connector on the cradle. 3. Connect the USB sync cable from the cradle to a USB port on your computer. -
Page 66: Setting Up A Partnership
Setting up a partnership Immediately after you have completed the installation, the New Partnership wizard will start automatically to help you establish a partnership and customize your synchronization settings. At this point, you can decide exactly which types of information you would like to synchronize with your computer. - Page 67 On the Calendar Synchronization Settings window, for example, select from the options how you wish to synchronize the appointments on your device with your computer. Click OK. 4. Click Finish to complete setting a partnership. Immediately after you set up a partnership, ActiveSync automatically and initiates the first synchronization between your...
-
Page 68: Checking Synchronized Information
Checking synchronized information After your first synchronization, take a look at Calendar, Contacts, and Tasks on your device. You will notice that the calendar information in Microsoft Outlook on your computer was copied to your device, and the information that you have on your device was copied to your computer. NOTE Open Microsoft Outlook on your desktop computer to see the details of copied information from your device. -
Page 69: Manually Initiating Synchronization
Manually initiating synchronization Once you have set up ActiveSync and completed the first synchronization process, you can initiate synchronization from your device at any time. To manually initiate synchronization: 1. Tap , then tap ActiveSync to display the ActiveSync screen. Tap to synchronize via IR or change synchronization settings 2. -
Page 70: Synchronization Options
Synchronization options The Microsoft ActiveSync program allows you to customize your synchronization settings at any time. You can select the items to synchronize, set the synchronization schedule, and specify the synchronization rules. To display the synchronization options: • From the ActiveSync window on your desktop computer, click on the Options icon, or •... - Page 71 To set synchronization schedule: 1. Click on the Schedule tab. 2. Select your desired synchronization schedule. 3. Click OK when done. To specify synchronization rules: 1. Click on the Rules tab. 2. Select your desired settings from the available options. 3.
- Page 72 3-12 Chapter 3...
- Page 73 Chapter 4 Microsoft Introduction ... 4-2 Calendar ... 4-2 Creating appointments ... 4-3 Using the summary screen ... 4-4 Creating meeting requests ... 4-4 Contacts ... 4-5 Creating contacts ... 4-6 Using the summary screen ... 4-6 Finding a contact ... 4-7 Tasks ...
-
Page 74: Introduction
Introduction ® Microsoft Pocket Outlook includes Calendar, Contacts, Tasks, Inbox, and Notes. You can use these programs individually or together. For example, e-mail address stored in Contacts can be used to address e-mail messages in Inbox. ® Using ActiveSync , you can synchronize information in Microsoft Outlook or Microsoft Exchange on your desktop computer with your device. -
Page 75: To Create An Appointment
Creating appointments To create an appointment: 1. If you are in Day or Week view, tap your desired date for the appointment, 2. Tap New. 3. Using the input panel, enter a description and a location. Tap to select the field. 4. -
Page 76: Using The Summary Screen
Using the summary screen When you tap an appointment in Calendar, a summary screen appears. To change the appointment, tap Edit. Tap to change details of the appointment Creating meeting requests You can use Calendar to set up meetings with users of Outlook and Pocket Outlook. -
Page 77: Microsoft Pocket Outlook
Contacts: Tracking friends and colleagues Contacts maintains a list of your friends and colleagues so that you can easily find the information you look for, whether you are at home or on the road. Using the infrared port (IR) on the device, you can quickly share Contacts information with other device users. -
Page 78: Creating Contacts
Creating contacts To create a contact: 1. Tap , then tap Contacts. 2. Tap New to display a blank contact form. 3. Using the input panel, enter a name and other contact information. You will need ot scroll down to see all available fields. 4. -
Page 79: Finding A Contact
Finding a contact There are four ways to find a contact. 1. On the contact list, enter a contact name in the box under the navigation bar. To show all contacts again, clear text from the box or tap the button to the right of the box. 2. -
Page 80: Creating Tasks
Tasks: Keeping a to do list Use Tasks to keep track of what you have to do. Tap to select the category of tasks you want to display Tap to create a new task Creating tasks To create a task: 1. -
Page 81: Using The Summary Screen
5. To assign the task to a category, tap Categories and select a category from the list. On the task list, you can display tasks by category. 6. To add notes, tap the Notes tab. You can enter text, draw, or create a recording. - Page 82 Notes: Capturing thoughts and ideas Quickly capture thoughts, reminders, ideas, and phone numbers with Notes. You can create a written note or a recording. You can also include a recording in a note. If a note is open when you create the recording, it will be included in the note as an icon.
-
Page 83: Creating Notes
Creating notes To create a note: 1. Tap , then tap Notes. 2. Tap New to display a blank note. 3. Create your note by writing, drawing, typing, or recording. For more information about using the input panel, writing and drawing on the screen, and creating recordings, see Chapter 2. -
Page 84: Synchronizing E-Mail Messages
Inbox: Sending and receiving e-mail messages Use Inbox to send and receive e-mail messages in one of these ways: • Synchronize e-mail messages with Microsoft Exchange of or Microsoft Outlook on your desktop computer • Send and receive e-mail messages by connecting directly to an e-mail server through an Internet service provider (ISP) or a network Synchronizing e-mail messages E-mail messages can be synchronized as part of the general... -
Page 85: Connecting Directly To An E-Mail Server
Connecting directly to an e-mail server In addition to synchronizing e-mail messages with your desktop computer, you can send and receive e-mail messages by connecting to an e-mail server using a modem or network card connected to your device. You need to set up a remote connection to a network or an ISP, and a connection to your e-mail server. -
Page 86: Using The Message List
Using the message list The messages you receive are displayed in the message list. By default, the most recently received messages are displayed first in the list. Tap to select the service, and the folder that you wish to display When you receive a message, tap it to open. - Page 87 When you connect to your e-mail server or synchronize with your desktop computer, by default, you will receive messages from the last five days only, the first 100 lines of each new messages, and file attachments of less than 100KB in size. The original messages remain on the e-mail server or your desktop computer.
-
Page 88: Composing Messages
Composing messages To compose a message: 1. Tap New. 2. In the To field, enter an e-mail or SMS address of one or more recipients, separating them with a semicolon, or select a name from the Contacts list by tapping the Address Book button. All e-mail addresses entered in the e-mail fields in Contacts appear in the Address Book. -
Page 89: Managing E-Mail Messages And Folders
Managing e-mail messages and folders The behavior of the folders you create depends on whether you are using ActiveSync, SMS, POP3, or IMAP4. • If you use ActiveSync, e-mail messages in the Inbox folder in Outlook will automatically be sunchronized with your device. You can select to synchronize additional folders by designating them for ActiveSync. - Page 90 4-18 Chapter 4...
- Page 91 Chapter 5 Companion programs Pocket Word ... 5-2 Creating Pocket Word documents ... 5-2 Saving Pocket Word documents ... 5-3 Opening an existing Pocket Word document ... 5-5 Modes of entering information ... 5-6 Pocket Excel ... 5-9 Creating Pocket Excel documents ... 5-10 Saving Pocket Excel documents ...
-
Page 92: Pocket Word
The companion programs consist of Microsoft Pocket Excel, MSN Messenger, Windows Media™ Player for Pocket PC, ® and Microsoft Reader. To switch to a companion program on your device, tap Programs on the menu, then tap the program that you wish to open. Pocket Word Pocket Word works with Microsoft Word on your desktop computer to give you easy access to copies of your documents. -
Page 93: Saving Pocket Word Documents
2. Tap New to display a blank document. 3. Use any of the tools in the input panel to type your text. Tap to show or hide the formatting toolbar Saving Pocket Word documents To save a Pocket Word document: When you have finished editing your document, tap OK. - Page 94 To specify save options: 1. With the document open, tap Tools. 2. From the pop-up menu, tap Save Document As... to display the Save As screen. 3. Change the file name by simply typing a new one in the Name field.
-
Page 95: Opening An Existing Pocket Word Document
Opening an existing Pocket Word document Pocket Word contains a list of the files stored on your device. Tap a file in the list to open. To delete, make copies of, and send files, tap and hold a file in the list, then select the appropriate action on the pop-up menu. Tap to select the folder you want to display Tap to change document settings Tap to create a new document... -
Page 96: Typing Mode
Modes of entering information You can enter information in Pocket Word in one of four modes (typing, writing, drawing, or recording), which are displayed on the View menu. Each mode has its own toolbar that you can show or hide by tapping the Show/Hide Toolbar button on the command bar. -
Page 97: Writing Mode
Writing mode In writing mode, use your stylus to write directly on the screen. Ruled lines are displayed as a guide, and the zoom magnification is greater than in typing mode to allow you to write more easily. For more information on writing and selecting writing, see Chapter 2. -
Page 98: Drawing Mode
Drawing mode In drawing mode, use your stylus to draw on the screen. Gridlines appear as a guide. When you lift your stylus off the screen after ther first stroke, you will see a drawing box indicating the boundaries of the drawing. Every subsequent stroke within or touching the drawing box becomes part of the drawing. -
Page 99: Pocket Excel
Pocket Excel Pocket Excel works with Microsoft Excel on your desktop computer to give you easy access to copies of your workbooks. You can create new workbooks on your device, or you can copy workbooks from your desktop computer to your device. Synchronize workbooks between your desktop computer and your device so that you have the most up-to-date contents in both locations. -
Page 100: Creating Pocket Excel Documents
Creating Pocket Excel documents To create a new Excel document: 1. Tap , tap Programs, tap Pocket Excel. 2. Tap New to display a blank document. If you selected a template for new documents in the Options dialog box, that template appears with the appropriate text and formatting already provided. - Page 101 To specify save options: 1. With the document open, tap Tools. 2. From the pop-up menu, tap Save Workbook As... to display the Save As screen. 3. Change the file name by simply typing a new one in the Name field.
-
Page 102: Securing Your Excel Document
Securing your Excel document If your workbook contains sensitive or confidental information, you can protect it with a password. To set a password for your workbook: 1. Open the workbook. 2. Tap Edit from the command bar, then tap Password... to display the password setting screen. -
Page 103: Tips For Working In Pocket Excel
Tips for working in Pocket Excel Take note of the following when working in large worksheets in Pocket Excel: • View in full-screen mode to see as much of your worksheet as possible. Tap View, then tap Full Screen. To exit full-screen mode, tap Restore. -
Page 104: Msn Messenger
MSN Messenger MSN Messenger on your device is an instant messaging program that allows you to: • See who is online • Send and receive instant messages • Have instant message conversations with groups of contacts To use MSN Messenger: You must have a Microsoft Passport™... -
Page 105: Signing Up
Signing up To sign in to MSN Mesenger service: 1. Tap Tools then tap Sign in... from the menu. Simply tap the Tap here to sign in area. 2. In the sign-in screen, enter your e-mail address and password. Tap Sign In. NOTE If you already use MSN Messenger on your desktop computer, your contacts will show up on your device without... -
Page 106: Working With Contacts
Working with contacts The MSN Messenger window shows all of your messenger contacts at a glance, divided into Online and Not Online categories. From this view, while connected, you can chat, send an e-mail, block the contact from chatting with you, or delete contacts from your list using the pop-up menu. To see others online without being seen, tap My Status in the Tools menu and select Appear Offline. -
Page 107: Chatting With Contacts
Chatting with contacts Tap a contact name to open a chat window. Enter your message in the text entry area at the bottom of the screen, or tap My Text to enter a preset message, then tap Send. To invite another contact to a multi-user chat, tap Invite in the Tools menu, then tap the contact that you want to invite. -
Page 108: Windows Media Player For Pocket Pc
Windows Media Player for Pocket PC ® Use Microsoft Windows Media Player for Pocket PC to play digital audio and video files that are stored on your device or on a network. To switch to Windows Media Player for Pocket PC, tap Windows Media. -
Page 109: Microsoft Reader
Microsoft Reader Use Microsoft Reader to read eBooks on your device. Download books to your desktop computer from your favorite eBook web site. Then, use ActiveSync to copy the book files to your activated device. The books appear in the Reader Library. Each book consists of a cover page, an optional table of contents, and the pages of the book. -
Page 110: Getting Books On Your Device
Getting books on your device You can download book files from the Web. Just visit your favorite eBook retailer and follow the instructions to download the book files. Sample books and a dictionary ar also included in the MSReader folder in the Extras folder on the Pocker PC Companion CD. -
Page 111: Reading A Book
Reading a book Each book consists of a cover page, and optional table of contents, and the pages of the book. Navigation options are listed in the bottom portion of the cover page. The first time you open a book, you will probably want to go to the first page or to the table of contents, if there is one. -
Page 112: Using Reader Features
Using Reader features Reading a book electronically gives you several options not available with paper books. These options are available from any book page. Select text by dragging across the text on the page. Then, tap an option on the pop-up menu, as described below. •... - Page 113 Chapter 6 Pocket Internet Explorer Introduction ... 6-2 Using Pocket Internet Explorer ... 6-2 Changing View settings ... 6-3 Browsing the Internet ... 6-3 AvantGo Channels... 6-4 Mobile Favorites folder ... 6-5 Favorite links ... 6-5 Mobile Favorites ... 6-5 Viewing mobile favorites and channels ...
-
Page 114: Introduction
Introduction Use Microsoft Pocket Internet Explorer to view Web or WAP pages in any of these ways. • During synchronization with your desktop computer, download your favorite links and mobile favorites that are stored in the Mobile Favorites sub-folder in the Internet Explorer on the desktop computer. •... -
Page 115: Changing View Settings
2. Tap the Home button to display the Pocket Internet Explorer welcome screen with links to some useful Web sites. 3. Tap any of the Web site buttons to go to a specific site. Changing View settings To change View settings: 1. -
Page 116: Avantgo Channels
AvantGo Channels AvantGo is a free interactive service that gives you access to personalized content and thousands of popular Web sites. You subscribe to AvantGo channels directly from your device. Then, synchronize your device and desktop computer, or connect to the Internet to download the content. For more information, visit the AvantGo web site at http://avantgo.com/ To activate AvantGo: 1. -
Page 117: Mobile Favorites Folder
Mobile Favorites folder Only items items stored in the Mobile Favorites sub-folder in the Favorites folder in the Internet Explorer on your desktop computer will be synchronized with your device. This folder was created automatically when you installed ActiveSync. Favorite links During synchronization, the list of favorite links in the Mobile Favorites folder on your desktop computer is synchronized with Pocket Internet Explorer on your device. - Page 118 To create a mobile favorite: 1. In Internet Explorer on your desktop computer, click Tools then Create Mobile Favorite. 2. To change the link name, enter a new name in the Name box. 3. Select your desired update schedule in Update. This is optional. 4.
-
Page 119: Viewing Mobile Favorites And Channels
Saving device memory Mobile favorites take up storage memory on your device. To minimize the amount of memory used: • In the settings for the Favorites information type in ActiveSync options, turn off pictures and sounds, or stop some mobile favorites from being downloaded to the device. -
Page 120: Adding/Deleting Mobile Favorites And Folders
Adding/Deleting mobile favorites and folders To add a favorite: 1. Tap to display your list of favorites. 2. Tap the Add/Delete button to display the Favorites screen. 3. Tap the Add... button to show the Add Favorite screen. 4. Type a name for the favorite that you wish to add in the Name field. - Page 121 To add a folder: 1. Tap to display your list of favorites. 2. Tap the Add/Delete button to display the Favorites screen. 3. Tap the New Folder button. 4. Type a name for the folder that you wish to create. 5.
- Page 122 6-10 Chapter 6...
- Page 123 Chapter 7 Introduction ... 7-2 Connect to the Internet ... 7-2 Connect to Work ... 7-3 Set up connections ... 7-3 Modem connections ... 7-3 VPN server connections ... 7-4 Proxy server settings ... 7-4 Network card connections ... 7-5 Wireless network connections ...
-
Page 124: Introduction
Introduction You can set up connections to the Internet and corporate network at work in order to do such activities as browse the Internet or intranet, send and receive e-mail and instant messages, and synchronize information using ActiveSync. Connections can be made using a modem, wireless network, or network (Ethernet) card. -
Page 125: Connect To Work
Connect to Work 1. Obtain the following information from your network administrator: server phone number, user name, and password. 2. Tap > Settings > Connections tab > Connections. 3. In My Work Network, set up either a modem, network card, wireless network, or VPN server connection. -
Page 126: Vpn Server Connections
VPN server connections A VPN connection helps you to securely connect to servers, such as a corporate network, via the Internet. Ask your network administrator for your user name, password, domain name, TCP/IP settings, and host name or IP address of the VPN server. To set up a VPN server connection: 1. -
Page 127: Network Card Connections
Network card connections Use a network (Ethernet) card to connect directly to a network. Once connected, you can view the Internet or intranet, or download e-mail. You do not need to create a new connection on your device. For more information, see your network administrator. -
Page 128: Wireless Network Connections
Wireless network connections Networks that you have already configured are preferred networks and are listed in Wireless networks. You can select to connect to only preferred networks or have your device search for and connect to any available network whether it is preferred or not. To set up a wireless network: 1. -
Page 129: Configure Authentication Settings
Configure authentication settings A wireless network can be added either when the network is detected, or manually by entering settings information. To determine if authentication information is needed, see your network administrator. To configure authentication settings: 1. To manually enter information, tap >... -
Page 130: End A Connection
End a connection • When connected via modem or VPN, tap then tap Disconnect. • When connected via cable or cradle, detach your device from the cable or cradle. • When connected via Infrared, move the device away from the other computer or device. -
Page 131: Use Dialing Rules
9. Create a modem connection. See section “Set up connections.” If necessary, set dialing rules. See section “Use dialing rules.” 10. If your device does not have a connection to a mobile phone network, insert a modem card. Use dialing rules Additional numbers may need to be dialed depending on your given location when connecting. -
Page 132: Infrared (Ir) Connection
Infrared (IR) connection By default, your device detects incoming infrared (IR) beams and prompts you to accept them. If you do not want your device to detect or receive beans, clear the Receive all incoming beams check box. To set the Beam options: 1. -
Page 133: Sending Information
Sending information To send information: 1. Switch to the program where you created the item that you want to send, and locate that item in the list. 2. Align the IR ports so that they are unobstructed and within a close range. - Page 134 7-12 Chapter 7...
- Page 135 Chapter 8 Introducing Bluetooth ... 8-2 Bluetooth for Windows CE (BTW-CE) ... 8-2 Bluetooth icon ... 8-2 Bluetooth settings ... 8-3 General ... 8-3 Accessibility ... 8-3 File Transfer ... 8-4 Information Exchange ... 8-4 Serial Port ... 8-4 Personal Network Server ... 8-5 Audio Gateway ...
-
Page 136: Introducing Bluetooth
Introducing Bluetooth™ Bluetooth is a short-range wireless communications technology. Devices with Bluetooth capabilities can exchange information over a distance of about 10 meters (30 feet) without requiring a physical connection. Unlike infrared, you don’t need to line up the devices to beam information with Bluetooth. -
Page 137: Bluetooth Settings
Bluetooth settings To configure the Bluetooth settings: 1. Tap from the lower right corner of the Today screen to display the Bluetooth menu. 2. Tap Bluetooth Settings. 3. Tap one of the tabs at the bottom of the Settings screen to make your desired changes. -
Page 138: File Transfer
File Transfer Allows you to customize the settings for file transfers, and set the highest level directory on your device that remote devices can access. Refer to section “Remote device services” for more information. Information Exchange Allows you to customize the service settings, and set the default business card. -
Page 139: Personal Network Server
Personal Network Server Allows you to customize the service settings for your personal network server. Refer to section “Remote device services” for more information. Audio Gateway Allows you to customize the service settings for the Audio Gateway. About ® Displays the Bluetooth™ for Windows CE (BTW-CE) information including the release version, copyright notice, website address, technical support... -
Page 140: Bluetooth Manager
Bluetooth Manager The Bluetooth Manager allows you to create, manage, and use Bluetooth to connect to remote devices. To launch the Bluetooth Manager: , then tap the Bluetooth Manager from the Start menu. The My Shortcuts screen displays a list of pre-configured connections, if any. -
Page 141: Bluetooth Connection Wizard
Bluetooth connection wizard The Bluetooth connection wizard helps you set up connections with remote Bluetooth devices. To launch the Bluetooth connection wizard: 1. Tap from the Bluetooth Manager command bar. The Bluetooth Connection Wizard screen appears. 2. Select a type of connection that you wish set up. -
Page 142: Business Card Exchange
Business Card Exchange The Business Card Exchange function allows you to: • send your business card to a remote device • receive a business card from a remote device • exchange business cards with one or more remote devices To launch the Business Card Exchange screen: 1. -
Page 143: Remote Device Services
Remote device services Wireless serial port Using a Bluetooth serial port is equivalent to using a physical cable serial port connection between two devices. As with a physical connection, you have to configure the application that will use the serial port. To configure the Bluetooth Serial Port: 1. -
Page 144: Dial-Up Networking
Dial-up networking The Dial-up Networking feature allows you to connect to a rmeote computer through a phone line. Once connected, you can browse the Internet, check/read emails, etc. NOTE The remote Bluetooth device that will provide the Dial-up Networking service should have access to a telephone system, either a hard-wired or a cellular connection, and capable of answering a call. -
Page 145: Bluetooth File Explorer
Bluetooth file explorer The Bluetooth File Explorer appears automatically after a file transfer connection is established. This service feature allows you to do the following operations: • Navigate the directory structure of the remote device • View the files and folders on the remote device •... - Page 146 To create a folder on the remote device: 1. Select the folder in which you wish to place the new folder. 2. From the File menu, tap Create a Folder. 3. Enter a name for the new folder while the default name New Folder is highlighted.
- Page 147 To set a local folder for incoming files: 1. From the Tools menu, tap Set Local Folder. 2. Use the drop-down menu at the top of the screen to go to your desired folder. 3. Tap OK to return to the main screen of Bluetooth File Explorer. You will see the Local Folder field is updated to reflect the new folder selection.
-
Page 148: Send Via Bluetooth
Send via Bluetooth You can conveniently send your Pocket Outlook contacts, calendar items, and tasks individually or collectively to the remote device via Bluetooth. To send data via Bluetooth: 1. Tap , then either Contacts, Calendar, or Tasks. 2. Highlight an item that you wish to send to the remote device. -
Page 149: Dial Via Bluetooth
Dial via Bluetooth The Dial via Bluetooth option allows you to select a contact from the Pocket Outlook contacts list, and have your paired cell phone dial the contact’s phone number. If a contact has more than one phone number, select the number that you wish to dial. -
Page 150: Bluetooth Personal Area Network
Bluetooth Personal Area Network A Bluetooth personal area network is a private, temporary, ad-hoc network of up to eight (8) devices. A Bluetooth personal area network allows you to easily exchange information that normally requires a TCP/IP network. Most chat utilities, multi-player games, etc. are fully functional in a Bluetooth personal area network environment. - Page 151 To join a personal network: 1. From the Bluetooth Manager, select New>Connect>Join a personal network. Tap Next. 2. On the wizard screen, select Join a personal network, then tap Next. The Bluetooth browser appears. 3. Select the host of the personal network, then tap Next to establish a connection to the personal area network.
- Page 152 8-18 Chapter 8...
- Page 153 Appendix Notices Notices...
-
Page 154: Federal Communications Commission Statement
Federal Communications Commission Statement This device complies with FCC Rules Part 15. Operation is subject to the following two conditions: • This device may not cause harmful interference, and • This device must accept any interference received including interference that may cause undesired operation. -
Page 155: Ul Safety Notices
UL Safety Notices Required for UL 1459 covering telecommunications (telephone) equipment intended to be electrically connected to a telecommunication network that has an operating voltage to ground that does not exceed 200V peak, 300V peak-to-peak, and 105V rms, and installed or used in accordance with the National Electrical Code (NFPA 70). - Page 156 Appendix...