Advertisement
Quick Links
Advertisement

Related Manuals for Sharper Image T.E.N.S. Massager with Remote Control


Summary of Contents for Sharper Image T.E.N.S. Massager with Remote Control
- Page 1 SharperImage.com T.E.N.S. Massager with Handheld Control Operating Manual...
-
Page 2: Table Of Contents
Contents Introduction……………………………………………………..……………………….3 Safety warnings…………………………………………………………………..…4-5 Set up…………………………………………………….………..…………………….6 Operating the product…………………………………………..……………………..7-8 Cleaning and maintenance…………….………………………….……………………..9 Trouble shooting………………………………………………….……………………10 Positions for use………………………………..………………….…………………...11... -
Page 3: Introduction
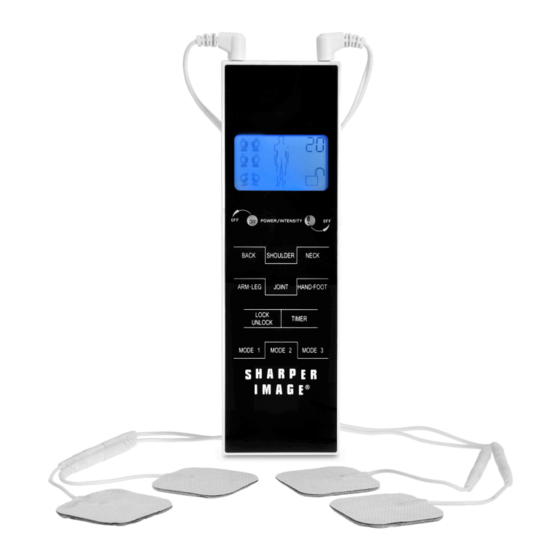
Introduction The Sharper Image T.E.N.S. Massager with Handheld Control delivers electric pulses to tired and sore muscles. These pulses are generated by the device and delivered through electrodes on the skin to trigger contractions of the muscles. It is portable, compact and stylish in design. -
Page 4: Safety Warnings
Safety warnings Do not use this device if you have an implanted defibrillator or implanted metallic devices. Such use could cause electrical shock, burns, electrical interference or death. If you have one of the following conditions, please consult with your physician before purchasing or using this device. - Page 5 (2) that the device is not effective for pain of central origin, including headache; (3) that the device is not a substitute for pain medications and other pain management therapies; (4) that the device has no curative value; (5) that the device is a symptomatic treatment and, as such, suppresses the sensation of pain that would otherwise serve as a protective mechanism;...
-
Page 6: Setup
Setup Unpack the box of the product, take the product and batteries out, place the batteries into the device at its back compartment, and connect the electrode pads into the device through the wires. -
Page 7: Operating The Product
Operating the product To begin 1. Install 4 AAA batteries into the device. Match the positive electrode and negative electrode in the right direction; 2. Connect 1 pair of electrode wire into the upper left hole of the device and another pair of electrode wire in the upper right hole. - Page 8 Right output hole Left output hole Timer LCD screen Auto program buttons Auto program buttons Function buttons Electrode wire Electrode pads E lectrode pads E lectrode pads Recommended practices: 1. Duration is 10-15 minutes for each treatment area. 2. Frequency is 2 times per day per area. 3.
-
Page 9: Cleaning And Maintenance
Cleaning and maintenance Please use water or neutral detergent to clean the device first then using the dry cloth to wipe it again. The electrode pads coming with the device are disposable, and should be replaced when their adhesiveness becomes worse. Contact the seller for replacements. Do not let the sticky side of the pad touch anything, including the greasy finger tips. -
Page 10: Trouble Shooting
Are batteries dead? Replace the batteries. Pads are not sticky Pads get deteriorative Contact vendor for replacements. Customer Service Sharper Image branded items purchased from SharperImage.com include a 1-year limited warranty. For assistance, please call 1 (877) 210-3449. -
Page 11: Positions For Use
Positions for use...