Table of Contents
Advertisement
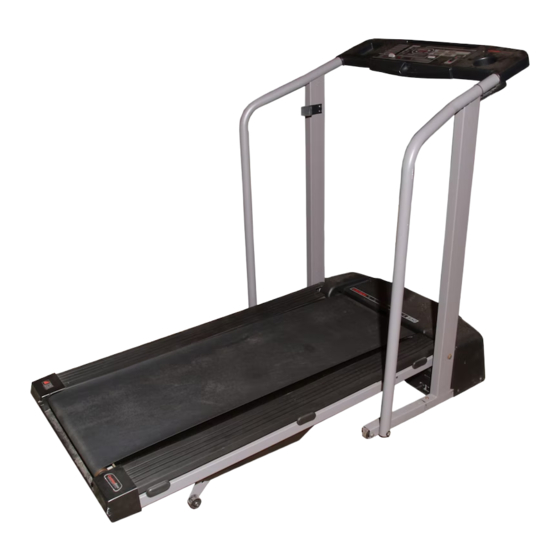
Model No. 831.297191
Serial No.
The serial number is found in the location
shown below. Write the serial number in
the space above for future reference.
Serial Number
Decal
CAUTION
Read all precautions and instruc-
tions in this manual before using
this equipment. Save this manual
for future reference.
USER'S MANUAL
SEARS, ROEBUCK AND CO., HOFFMAN ESTATES, IL 60179
Advertisement
Table of Contents

Related Manuals for LIFESTYLER Expanse 850 831.297191


Summary of Contents for LIFESTYLER Expanse 850 831.297191
- Page 1 Model No. 831.297191 Serial No. The serial number is found in the location shown below. Write the serial number in the space above for future reference. Serial Number Decal CAUTION Read all precautions and instruc- USER'S MANUAL tions in this manual before using this equipment.
-
Page 2: Table Of Contents
TABLE OF CONTENTS IMPORTANT PRECAUTIONS ..............2 BEFORE YOU BEGIN . - Page 3 13. Never move the walking belt while the power ASSEMBLY on page 5, and HOW TO MOVE is turned off. Do not operate the treadmill if THE TREADMILL on page 10.) You must be the power cord or plug is damaged, or if the able to safely lift 45 pounds (20 kg) in order to treadmill is not working properly.
-
Page 4: Before You Begin
Congratulations for purchasing the new SEARS ® Monday through Saturday, 7 a.m. until 7 p.m. Central LIFESTYLER EXPANSE 850 treadmill. The EXPANSE Time (excluding holidays). To help us assist you, 850 treadmill combines advanced technology with in- please note the product model number and serial num- novative design to let you enjoy an excellent form of ber before calling. -
Page 5: Assembly
ASSEMBLY Assembly requires two people. Set the treadmill in a cleared area and remove all packing materials. Do not dispose of the packing materials until assembly is completed. Refer to the drawings below to identify the small parts used in assembly. Assembly requires the included allen wrench and your own phillips screw- driver , adjustable wrench... -
Page 6: Screws
3. With the help of a second person, hold the Console Base (6) and the Right Handrail (32) near the right Upright (14) as shown. Insert the Wire Harness (26) down into the right Upright; bend the Wire Harness, if necessary. Next, route Bracket the Wire Harness through the bracket on the Right Handrail and insert the bracket into the right Upright. -
Page 7: Operation And Adjustment
OPERATION AND ADJUSTMENT THE PERFORMANT LUBE WALKING BELT This product is for use on a nominal 120-volt circuit, and has a grounding plug that looks like the plug illus- Your treadmill features a walking belt coated with trated in drawing 1 below. A temporary adapter that PERFORMANT LUBE , a high-performance lubricant. - Page 8 DIAGRAM OF THE CONSOLE Monitor Displays LED Track Incline Control Note: If there is a thin sheet of clear Speed Control Clip plastic on the console, remove it. CAUTION: Before operating the con- • Adjust the speed in small increments. sole, read the following precautions.
- Page 9 Reset the speed control. The TIME display— This display shows Slide the speed control the total time that you down to the RESET have walked or run on position. Note: Each the treadmill. time the walking belt is stopped, the speed The DISTANCE dis- control must be moved play—This display...
-
Page 10: How To Fold And Move The Treadmill
HOW TO FOLD AND MOVE THE TREADMILL HOW TO FOLD THE TREADMILL FOR STORAGE Unplug the power cord. Caution: You must be able to safely lift 45 pounds (20 kg) in order to raise, lower, or move the treadmill. 1. Hold the treadmill with your hands in the locations shown at the right. - Page 11 HOW TO LOWER THE TREADMILL FOR USE 1. Hold the upper end of the treadmill with your right hand as shown. Using your left thumb, press the storage latch and hold it. Pivot the treadmill until the frame and foot rail are past the storage latch.
-
Page 12: Maintenance And Trouble-Shooting
MAINTENANCE AND TROUBLE-SHOOTING Most treadmill problems can be solved by following the simple steps below. If further assistance is needed, call our toll-free HELPLINE at 1-800-736-6879, Monday through Saturday, 7 a.m. until 7 p.m. Central Time (excluding holidays). PROBLEM: The power does not turn on SOLUTION: a. - Page 13 PROBLEM: The walking belt slows when walked on SOLUTION: a. Use only a single-outlet surge suppressor that is UL 1449 listed as a transient voltage surge sup- pressor (TVSS). The surge suppressor must have a UL suppressed voltage rating of 400 volts or less and a minimum surge dissipation of 450 joules.
-
Page 14: Conditioning Guidelines
CONDITIONING GUIDELINES heart rate is near one of the lower two numbers in your WARNING: training zone. It may also be helpful to set the speed Before beginning control on the console to FAT BURN to help you main- this or any exercise program, consult your tain the proper intensity level. - Page 15 Training Zone Exercise muscles and will help to prevent post-exercise problems. After warming up, increase the intensity of your exer- Exercise Frequency cise until your heart rate is in your training zone for 20 to 60 minutes. (During the first few weeks of your exer- cise program, do not keep your heart rate in your train- To maintain or improve your condition, complete three ing zone for longer than 20 minutes.)
- Page 16 PART LIST—Model No. 831.297191 R0298A Key No. Qty. Description Key No. Qty. Description Key/Clip Belly Pan Left Handrail Releasable Tie Cage Nut Cable Tie Clamp Incline Control Motor Belly Pan Rear Isolator Screw 11 1/2” Cable Tie Console Base 8” Cable Tie Speed Control Knob Flange Nut Speed Potentiometer...
- Page 17 EXPLODED DRAWING—Model No. 831.297191 R0298A...
-
Page 18: Replacement Parts
The model number and serial number of your SEARS ® Model No. 831.297191 LIFESTYLER EXPANSE 850 treadmill are listed on a decal attached to the treadmill. See the front cover of this manual to find the location of the decal.