
Related Manuals for Hotpoint OSX 896 DC 0 X


Summary of Contents for Hotpoint OSX 896 DC 0 X
-
Page 1: Table Of Contents
OSX 896 DC 0 X OSX 896L DC 0 X English Operating Instructions OVEN Contents Operating Instructions,1 Warnings,2 Description of the appliance,3 Description of the appliance,4 Installation,5 Electrical Connection,5 Oven structure,7 Start-up and use,8 Cooking modes,9 Precautions and tips,15 Maintenance and care,15... -
Page 2: Warnings
Warnings WARNING: The appliance and its accessible parts become hot during use. Care should be taken to avoid touching heating elements. Children less than 8 years of age shall be kept away unless continuously supervised. This appliance can be used by children aged from 8 years and above and persons with reduced physical, sensory or mental capabilities or lack of experience and knowledge if they have been... -
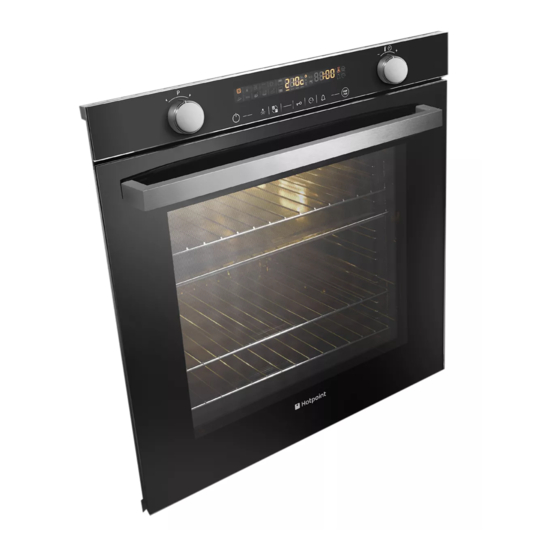
Page 3: Description Of The Appliance
Description of the appliance Overall view 1. POSITION 1 2. POSITION 2 3. POSITION 3 4. POSITION 4 5. POSITION 5 6. DIVIDER “D” POSITION 7. POSITION 6 8. POSITION 7 9. GUIDES for the sliding racks 10. DRIPPING PAN 11. -
Page 4: Description Of The Appliance
Description of the appliance Control panel 1. SELECTOR knob 2. CONTROL PANEL POWER BUTTON 3. DISPLAY 4. THERMOSTAT / TIMER knob 5. START / STOP 6. MINUTE MINDER icon 7. TIMER icon 8. CONTROL PANEL LOCKED icon 9. SELECT CAVITY icon 10. -
Page 5: Installation
Installation Centring and fixing Secure the appliance to the cabinet: • open the oven door. ! Please keep this instruction booklet in a safe place for future reference. If • slide out the side gaskets at the top until the 2 fixing holes are exposed; the appliance is sold, given away or moved, please make sure the booklet is •... -
Page 6: Position 3
Power cable supply connection to the electrical mains: We recommend you use a power supply cable which is long enough to allow you to take the oven out of its recess in the event of maintenance operations (only use HAR - H 05 - RRF quality cables fitted with a plug conforming to the regulations in force. -
Page 7: Oven Structure
Oven structure The two Main and Small Space compartments may be used at the same time to cook different dishes more quickly, or they may be used separately so that only the space necessary is used. The OPEN SPACE oven has a capacity of 70 litres and offers users the option When the two compartments are used at the same time, the cooking of cooking on 4 shelves at the same time or cooking large quantities which temperature of each may be adjusted to a value between 30°... -
Page 8: Start-Up And Use
Start-up and use 3. Once you have reached the correct hour value, press the icon. 4. Repeat the above process to set the minutes. WARNING! The oven is provided If a blackout occurs, it will be necessary to reset the clock. If the icon with a stop system to extract the flashes on the display, this indicates that the clock has not been set correctly. -
Page 9: Cooking Modes
pressed for 30 minutes and the control panel/door lock has not been activated, CREATION cooking modes ! All cooking modes have a default cooking temperature which may be the appliance automatically reverts to standby mode. The standby mode is visualised by the high luminosity “Watch Icon”. As soon as interaction with adjusted manually to a value between 30°C and 250°C as desired (300°C for the machine resumes, system operation is restored. -
Page 10: The Divider
ECO mode Method: The back heating element is turned on and the fan starts working, ensuring • Mix the flour and salt in a large bowl. a smooth and uniform heat level inside the oven. • Dilute the yeast in lukewarm water (approximately 35 degrees). This programme is indicated for slow cooking of any type of food with •... -
Page 11: Programming Cooking
2. Follow the above instructions for the EXTRALARGE cavity when carrying duration can be customised according to personal tastes, modifying it - before out the various adjustment and setting procedures. the start time - by ±5/20 minutes depending on the selected programme. Once cooking has begun, it is still possible to modify its duration. -
Page 12: Practical Cooking Advice
1. Follow steps 1 to 3 to set the duration as detailed above. 2. Press the icon twice: the icon and the numerical digits on the display will begin to flash. 3. Turn the TIMER knob towards “ ” and “ ” to adjust the cooking end time value. -
Page 13: Position 1
Cooking advice table for ovens with an ExtraLarge Space cavity Function Food Weight Cook on Shelf position Preheating Recommended Cooking (Kg) shelf no. temperature duration Dripping (°C) (minutes) Rack 1 Rack 2 Rack 3 Creation Multilevel* Tarts 25-30 2 or 3 1 or 2 3 or 5 35-45... -
Page 14: Cooking Advice Table For The Main Space Feature
Cooking advice table for using the Small Space and Main Space at the same time Main Space Function Food Weight Cook on Rack position Preheating Recommended Cooking (kg) shelf temperature duration (°C) (minutes) Dripping Rack 1 Divider Creation Multilevel* Tarts 30-40 35-45 Biscuits... -
Page 15: Precautions And Tips
Precautions and tips and reduce the impact on human health and the environment. The crossed out “wheeled bin” symbol on the product reminds you of your obligation, that when you dispose of the appliance it must be ! This appliance has been designed and manufactured in compliance with separately collected. -
Page 16: Sliding Rack Kit Assembly
Sliding rack kit assembly For more thorough cleaning purposes, the oven door may be removed: 1. Open the oven door fully (see diagram). 2. Use a screwdriver to lift up and turn the small levers F located on the two To assemble the sliding racks: hinges (see diagram). -
Page 17: Troubleshooting
Troubleshooting Problem Possible cause Solution The “Clock button” and the digits on the The appliance has just been connected to the Set the clock. display flash. electricity mains or there has been a blackout. A programmed cooking mode does not There has been a blackout. -
Page 18: After Sales Service
After Sales Service No one is better placed to care for your Hotpoint appliance during the course of its working life than us – the manufacturer. Essential Contact Information Hotpoint Service We are the largest service team in the country offering you access to 400 skilled telephone advisors and 1000 fully qualified engineers on call to ensure you receive fast, reliable, local service. -
Page 19: Guarantee
5 Year Parts Guarantee Hotpoint also offers you a free 5 year parts guarantee. This additional guarantee is conditional on you registering your appliance with us and the parts being fitted by one of our authorised engineers. There will be a charge for our engineer’s time. - Page 20 195122872.00 06/2014 - XEROX FABRIANO Indesit Company S.p.A. Viale Aristide Merloni,47 60044 Fabriano (AN) www.hotpoint.co.uk PLEASE PHONE US TO REGISTER YOUR APPLIANCE AND ACTIVATE YOUR PARTS GUARANTEE ON 08448 24 24 24...