
Related Manuals for Meade LX90


Summary of Contents for Meade LX90
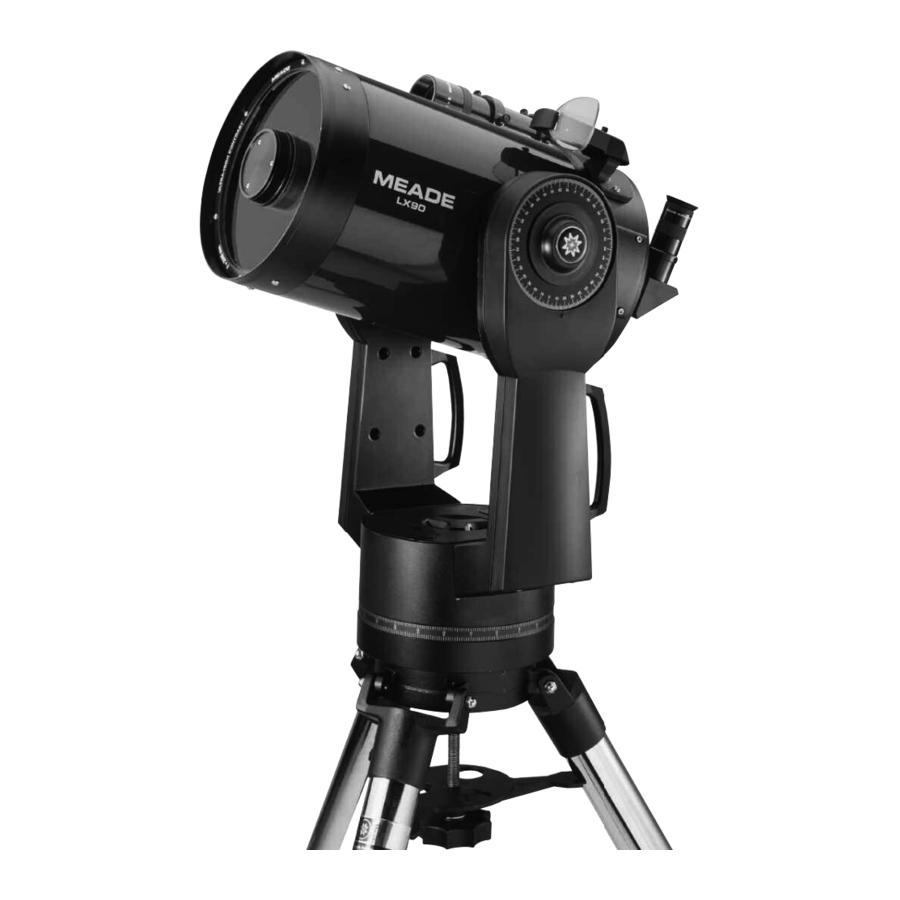
- Page 1 Instruction Manual 8" LX90 Schmidt-Cassegrain Telescope AutoStar ® — LNT ™ — SmartFinder ™...
- Page 2 Focal Plane In the Schmidt-Cassegrain design of the Meade LX90, light enters from the right, passes through a thin lens with 2-sided aspheric correction (“correcting plate”), proceeds to a spherical primary mirror, and then to a convex secondary mirror. The convex secondary mirror multiplies the effective focal length of the primary mirror and results in a focus at the focal plane, with light passing through a central perforation in the primary mirror.
-
Page 3: Table Of Contents
If you are anxious to use your telescope for the first time, read the QUICK-START GUIDE on pages 4 and 5. ® The name "Meade," “LX90,” “AutoStar” and the Meade logo are trademarks registered with the U.S. Patent Office and in principal countries throughout the world. -
Page 4: Quick-Start Guide
QUICK-START GUIDE It is recommended that you attach the supplied tripod to the LX90 for observing. Perform the telescope and AutoStar setup indoors in the light so that you become familiar with the parts and operation before moving the telescope outside into the dark for observing. - Page 5 Plug one end into the HBX port of the computer control panel and plug the other end into the Coil Cable port on the AutoStar handbox. (c) 00 Meade [2.0] A U T O S T A R Flip the Power Switch on the computer control panel to the ON position.
-
Page 6: Telescope Features
Dust Cover (not visible) Battery Compartment SmartFinder SmartFinder Alignment Screws Handbox Holder Viewfinder Viewfinder Alignment Screws Fig. 1: The LX90 Telescope and AutoStar Handbox. A. Handbox Port B. LED C. ON/OFF Switch D. Auxiliary Ports (2) E. 12v Power Connector Computer Control Panel... - Page 7 Focus Knob: Moves the telescope’s primary mirror in a finely-controlled motion to achieve precise image focus. The LX90 telescope can be focused on objects from a distance of about 25 ft. to infinity. Rotate the focus knob counterclockwise to focus on distant objects, and clockwise to focus on nearby objects.
- Page 8 If necessary, loosen the lock knob (1, Fig. A) and place the clamp (2, Fig. A) on either one of the LX90 fork arm handles. Tighten the lock knob to a firm feel. Slide the AutoStar handbox into the holder (3, Fig. A and Fig B). You may also snap the handbox into the holder: Slide one side of the handbox into the holder and then firmly press the other side of the handbox into the holder until it snaps in place.
-
Page 9: Autostar Features
Fig. 2: The LX90 AutoStar Handbox. Tour the Cosmos with Just the Push of a Button Control of the LX90 is through the operation of the standard-equipment AutoStar. Nearly all functions of the telescope are accomplished with just a few pushes of AutoStar’s buttons. Some of the major features of AutoStar are: •... - Page 10 “ENTER to Sync” is displayed. "ENTER to Sync" is relevant only (horizontal). Alt/Az is after the telescope has been aligned and is pointing at an object. If the "ENTER to just one of many Sync" feature is accessed by mistake, press MODE to return to the previous methods used by screen.
- Page 11 GO TO. Pressing GO TO again resumes the slew to the object. Arrow Keys: Slew the telescope in a specific direction (up, down, left, and right), at any one of nine different speeds. Speed selection is explained in “SLEW SPEEDS,” page 17.
-
Page 12: Getting Started
Getting the telescope ready for first observations requires only a few minutes. When first opening the packing box, note carefully the following parts: • LX90 Telescope with fork mount system and attached SmartFinder • AutoStar handbox and interface coil cord •... -
Page 13: How To Assemble Your Telescope
Do not mix battery types. If these precautions are not followed, batteries may explode, catch fire, or leak. Improperly installed batteries Battery void your Meade warranty. Always remove the batteries if they are not to be used Holder for a long period of time. -
Page 14: Choosing An Eyepiece
To calculate eyepiece power, divide the telescope's focal length by the eyepiece's focal length. For example, a 26mm eyepiece is supplied with the LX90. The focal length of the LX90 is 2000mm (see "SPECIFICATIONS," NOTE: page 45). -
Page 15: Aligning Smartfinder And The Viewfinder
If you have not already done so, insert the Super Plössl 26mm eyepiece into the diagonal prism. Unlock the R.A. (9, Fig. 1) and Dec (7, Fig. 1) locks so that the telescope moves freely on both axes. Point the telescope at some well-defined and stationary land object at least 200 yards dis- tant, such as the top of a telephone pole or street sign. -
Page 16: Observing
Practice focusing objects with the focus knob (8, Fig. 1). reversed left-for-right. Once you get a feel for how your telescope moves and focuses, try to view something more This image inversion is challenging, like a bird or a distant moving train. -
Page 17: Slew Speeds
Point your telescope at the Moon (note that the Moon is not visible every night) and practice rapidly moving. Children using the Arrow keys and the slew speeds to view different features. The Moon contains many should always have interesting features, including craters, mountain ranges, and fault lines. -
Page 18: Astronomical Observing
As the Earth rotates beneath the night sky, the stars appear to move from East to West. The speed at which the stars move is called the sidereal rate. You can setup your telescope to move at the sidereal rate so that it automatically tracks the stars and other objects in the night sky. If the telescope is not tracking an astronomical object, the object will drift out of the eyepiece field of view. -
Page 19: Observe A Star Using Automatic Tracking
(see the margin Note to the left) by default the first time you power it on, so you do not option of the Setup need to select this mode. If you wish to align your telescope in the equatorial (polar) mode, see menu is set to "Alt/Az" as the default alignment by “... -
Page 20: Go To Saturn
However, when the telescope slews to the first star, it may not appear in the field of view in the eyepiece. Use the SmartFinder (17, Fig. 1) and /or the viewfinder (1, Fig. 20) to locate the star. The alignment star will be easy to recognize—it will be the brightest star in the area of the sky where the telescope is pointing. -
Page 21: Basic Autostar Operation
See “INITIALIZING AUTOSTAR,” page 18, before proceeding with this exercise. OBJECT Select from over 30, 220 database objects and press GO TO to move the telescope automatically to the object and place it in the telescopic field of view. SETUP... -
Page 22: Entering Data Into Autostar
SmartFinder. If your viewfinder and SmartFinder have been aligned with the telescope, the alignment star should now be in the eyepiece. Set the slew speed to 4 or less and center the star in the eyepiece. -
Page 23: Complete Autostar Menu Structure
AUTOSTAR’S MENUS... -
Page 24: Menus And Menu Options
LX90. constellation. Press GO TO a second time to slew the telescope to that star. Use the Scroll keys to cycle through the list of stars in the constellation, from brightest to dimmest. The available objects... -
Page 25: Event Menu
Use the Scroll Up and Down keys to display the available data. Remember, never use a telescope to look at the Sun! See “WARNING!” to the left. Lunar Eclipse lists upcoming Lunar Eclipses, including the date and type (total, partial, penumbral) of eclipse. - Page 26 See "LANDMARKS," page 36. Sleep Scope is a power saving option that shuts down AutoStar and the telescope without for- getting its alignment. With "Sleep Scope" selected, press ENTER to activate the Sleep function.
-
Page 27: Setup Menu
Cord Wrap, when set to "On," moves the telescope in such a way as to prevent the cords and cables attached to your telescope assembly from getting wound around the assembly and tangled as the telescope slews to objects. - Page 28 ENTER. Smart Drive: Allows you to perform periodic error correction (PEC) on the R.A. worm gear performed with a high powered reticle (eg. 9mm). PEC Training for the the LX90 telescopes will take about 8 minutes.
- Page 29 AutoStar handbox. Software: Sends only the basic AutoStar software. This is useful if one user has downloaded a new version of AutoStar software from the Meade website (www.meade.com) and wants to pass this software along to friends.
-
Page 30: Advanced Autostar Features
Join an Astronomy Club, Attend a Star Party One of the best ways to increase your knowledge of astronomy is to join an astronomy club. Check your local newspaper, school, library or telescope dealer/store to find out if there’s a club in your area. -
Page 31: Finding Objects Not In The Database
Check out your local library, computer store, or bookstore Enter the R.A. and Dec for astronomy books, CD Roms, or magazines (such as Sky & Telescope or Astronomy), to find coordinates of any coordinates of celestial objects. -
Page 32: Observing Satellites
Satellite orbits change and new satellites (including the Space Shuttle) are launched. Visit the Meade web site (www.meade.com) approximately once a month to get updated information and instructions on how to download this data to AutoStar. If orbital parameters are more than one month old, the satellite pass may not happen at the time predicted by AutoStar. -
Page 33: How To Create Your Own Guided Tour
"text only" or as a "MS-DOS text" file). • The Meade #505 Cable Connector Kit to download tour information to the AutoStar handbox. Tour Modes The objects chosen for a tour list are selected from AutoStar's database or by entering the object's RA and Dec coordinates. - Page 34 Writing a Tour Using the list of commands listed above, a custom tour can be created. Placing the word AUTO SELECT before any of the command lines activates Automatic Mode and, when selected, AutoStar automatically searches and finds the designated object. The following is a list of command lines, complete with keywords and necessary strings: TITLE Title must be the first keyword in your tour after any comment lines and must be 15 characters...
- Page 35 ASTEROID "name" Enter ASTEROID and then the name of the desired asteroid in quotes. AutoStar displays information about the asteroid from its database. For example: ASTEROID: "Ceres" COMET "name" Enter COMET and then the name of the desired comet in quotes. AutoStar displays information about the comet from its database.
-
Page 36: Landmarks
In this procedure, you will store the location of terrestrial landmarks in AutoStar's memory. Set the telescope in the home position, if necessary. Note for future reference where the telescope is located and if you have aligned the telescope, which alignment method is used. -
Page 37: Identify
In this procedure, you will center an object you wish to have identified by AutoStar in the telescope eyepiece and use the "Identify" menu to find out information about the object or the nearest object to it in the AutoStar database. -
Page 38: Browse
Use the Scroll keys to scroll to a star on the list that you wish to align upon. Select a star that you can easily locate in the night sky. Press ENTER. The telescope slews to the star. Use the Arrow keys to move the telescope until the star is centered in the eyepiece. Press ENTER. -
Page 39: Photography With The Lx90
35mm frame (Fig. 15). Photography through a long lens such as the LX90 requires special technique for good results, and the photographer should probably expect to waste a roll or two of film in acquiring this technique. - Page 40 Sky Imager • Automatically takes multiple exposures. AutoStar Suite Software includes powerful tools to help you get the most from your Meade LX90 telescope: • Sophisticated planetarium program with over 19 million objects. • Select objects from the planetarium display and the telescope slews to those objects.
-
Page 41: Optional Accessories
#909 Accessory Port Module (APM): The #909 APM (Fig. 19) attaches to the rear cell of the LX90 and connects by cable to the Aux port on the telescope's control panel. The APM includes auxiliary connectors for plug-in of such accessories as corded models of illuminated reticle eyepieces, the #1206 Electric Focuser, or a CCD autoguider. - Page 42 #607 Power Cord: Powering the LX90 telescope by means of an automobile cigarette lighter plug requires the #607 Power Cord. With this 25 ft. cord, the LX90 may be powered for a full night’s observing without risk of car-battery drain.
-
Page 43: Maintenance
If the LX90 is not to be used for an extended period, perhaps for one month or more, it is advisable to remove the batteries from the telescope. Batteries left in the telescope for prolonged periods may leak, causing damage to the telescope’s electronic circuitry. - Page 44 Follow these steps for collimation of the optical system: The only adjustments possible, or necessary, on the LX90 are from the three screws (Fig. 25) located at the edge of the outer surface of the secondary mirror housing.
-
Page 45: Inspecting The Optics
Also check if "Astronomical" is selected in the "Targets" option of the setup menu. Meade Customer Service If you have a question concerning your LX90 telescope, call the Meade Instruments Customer Service Department at (949) 451-1450. Customer Service hours are 7:00 AM to 6:00 PM, Pacific Time, Monday through Friday. -
Page 46: Specifications
SmartFinder ...Red dot projected onto finder’s lens LNT Module ...High accuracy, temperature-compensated ...oscillator, updatable using Meade’s ...optional ATUM accessory Coatings ...Meade EMC Super Multi-Coatings Mounting ...Cast-aluminum, double-tine forks Gears ...4.9"-dia worm gears, both axes Alignment ...Altazimuth or equatorial w/optional wedge ...5 arc-minutes in GO TO mode... -
Page 47: Appendix A: Equatorial (Polar) Alignment
In order to Polar align your telescope, it is essential to have an understanding of how and where to locate celestial objects as they move across the sky. This section provides a basic introduction to the terminology of Polar-aligned astronomy, and includes instructions for finding the celestial pole and for finding objects in the night sky using Declination and Right Ascension. -
Page 48: Locating The Celestial Pole
Telescope" menu. Setting Circles Setting circles included with the LX90 permit the location of faint celestial objects not easily found by direct visual observation. R.A. circle is located on the top surface of the telescope’s drive base. The Declination circle (11, Fig. 1) is located on the fork arm. With the telescope pointed at the North Celestial Pole, the Dec circle should read 90°... -
Page 49: Equatorial Wedge
If you do not immediately see the object you are seeking, try searching the adjacent sky area. Keep in mind that, with the 26mm eyepiece, the field of view of the LX90 is about 0.5°. Because of its much wider field, the viewfinder may be of significant assistance in locating and centering objects, after the setting circles have been used to locate the approximate position of the object. -
Page 50: Precise Polar Alignment
Declination corrections required is a direct function of the precision of polar alignment. Precise polar alignment requires the use of a crosshair eyepiece. The Meade Illuminated Reticle Eyepiece (see “OPTIONAL ACCESSORIES but it is also preferable to increase the effective magnification through the use of a 2X or 3X Barlow lens as well. -
Page 51: Star Charts
(or eyepiece/Barlow combination) into the eyepiece holder of the telescope. 2. Point the telescope, with the motor drive running, at a moderately bright star near where the meridian (the North-South line passing through your local zenith) and the celestial equator intersect. For best results, the star should be located within ±30 minutes in R.A. -
Page 52: Appendix B: Helpful Charts
APPENDIX B: HELPFUL CHARTS Latitude Chart for Major Cities of the World To aid in the Polar Alignment procedure (see page 46), latitudes of major cities around the world are listed below. To determine the latitude of an observing site not listed on the chart, locate the city closest to your site. Then follow the procedure below: Northern Hemisphere observers (N): If the site is over 70 miles (110 km) North of the listed city, add one degree for every 70 miles. -
Page 53: Appendix C: Training The Drive
APPENDIX C: TRAINING THE DRIVE Train the telescope motors using AutoStar. Perform this procedure if you are experiencing any pointing accuracy problems. Fig. 31 depicts the complete Drive Training procedure. NOTE: Use a terrestrial object, such as a telephone pole or lamp post, to train the drive. -
Page 54: Appendix D: Changing The Lnt Module's Battery
LNT Module assembly. After you replace the battery, you will need to recalibrate the telescope’s sensors and reset the time and date. You will need a new battery. Also, you may use Meade’s optional Atomic Time Update Module, although this is not necessary. -
Page 55: Appendix E: Basic Astronomy
In the early 17th century Italian Scientist Galileo, using a crude telescope considerably smaller than the LX90, turned it to look towards the sky instead of distant trees and mountains. What he saw, and what he realized about what he saw, forever changed the way mankind thought of the universe. - Page 56 Listed below are the best planets for viewing through the LX90. Venus is about nine-tenths the diameter of Earth. As Venus orbits the Sun, observers can see it go through phases (crescent, half, and full) much like those of the Moon.
- Page 60 ONE YEAR from the date of original purchase in the U.S.A. and Canada. Meade will repair or replace a product, or part thereof, found by Meade to be defective, provided the defective part is returned to Meade, freight-prepaid, with proof of purchase.