Table of Contents
Advertisement
Manufactured under license from Dolby Laboratories. "Dol-
by", "MLP Lossless" and the double-D symbol are trademarks
of Dolby Laboratories.
HDMI, the HDMI long and High-Definition Multimedia
Interface are trademarks or registered trademarks of HDMI
Licensing LLC.
This product incorporates copyright protection technology
that is protected by U.S. patents and other intellectual property
rights. Use of this copyright protection technology must be
authorized by Macrovision, and is intended for home and other
limited viewing uses only unless otherwise authorized by
Macrovision. Reverse engineering or disassembly is prohib-
ited.
McIntosh Laboratory, Inc. 2 Chambers Street Binghamton, New York 13903-2699 Phone: 607-723-3512 FAX: 607-724-0549
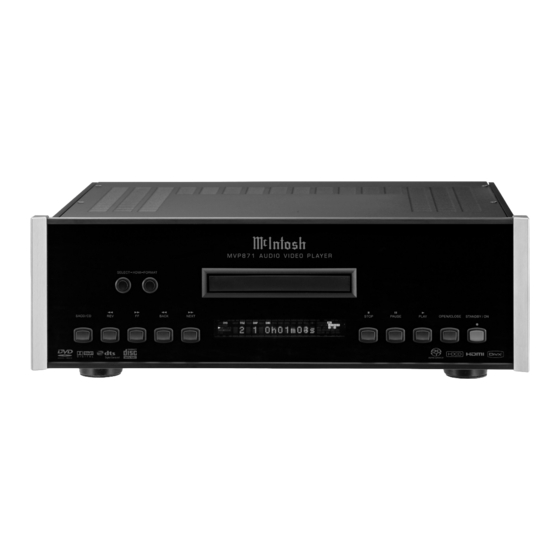
Audio Video Player
"DTS" and "DTS Digital Surround" are registered trademarks
of DTS, Inc.
, HDCD
®
Microsoft
Microsoft Corporation, Inc. in the United States and/or other
countries. HDCD system manufactured under license from
Microsoft Corporation, Inc. This product is covered by one
or more of the following: In the USA: 5,479,168, 5,638,074,
5,640,161, 5,808,574, 5,838,274, 5,854,600, 5,864,311,
5,872,531, and in Australia: 669114. Other patents pending.
DivX, DivX Certified, and associated logos are trademarks of
DivX, Inc. and are used under licence.
MVP871
Owner's Manual
, High Definition Compatible Digital
®
are either registered trademarks or trademarks of
®
and
®
Advertisement
Chapters
Table of Contents

Related Manuals for McIntosh MVP871

Summary of Contents for McIntosh MVP871
- Page 1 Macrovision. Reverse engineering or disassembly is prohib- ited. McIntosh Laboratory, Inc. 2 Chambers Street Binghamton, New York 13903-2699 Phone: 607-723-3512 FAX: 607-724-0549 Audio Video Player “DTS” and “DTS Digital Surround” are registered trademarks of DTS, Inc.
-
Page 2: Safety Instructions
The lightning flash with arrowhead, within an equilateral triangle, is intended to alert the user to the presence of uninsulated “danger- ous voltage” within the product’s enclosure that may be of sufficient magnitude to constitute a risk of electric shock to persons. WARNING - TO REDUCE RISK OF FIRE OR ELECTRICAL SHOCK, DO NOT EXPOSE THIS EQUIPMENT TO... - Page 3 IMPORTANT SAFETY INSTRUCTIONS! PLEASE READ THEM BEFORE OPERATING THIS EQUIPMENT. 1. Read these instructions. 2. Keep these instructions. 3. Heed all warnings. 4. Follow all instructions. 5. Do not use this apparatus near water. 6. Clean only with a dry cloth. 7.
-
Page 4: Table Of Contents
Phone: 607-723-1545 Fax: 607-724-0549 Customer Service If it is determined that your McIntosh product is in need of repair, you can return it to your Dealer. You can also return it to the McIntosh Laboratory Service Department. For assistance on factory repair return procedure, contact the McIntosh Service Department at: McIntosh Laboratory, Inc. -
Page 5: General Information
1. For additional connection information, refer to the owner’s manual(s) for any component(s) connected to the MVP871 Audio Video Player. 2. If the MVP871 will be connected to a TV/Monitor us- ing the Component Video connections, please refer to the Setup Section entitled “Component Video Out” on page 27 of this Owner’s Manual for important informa-... -
Page 6: Disc Information
CD Audio Discs that conform to the Of- ficial Compact Disc Standards which is indicated by the Symbol 3. The MVP871 will play most of the following discs, how- ever some recorded discs may not be able to play due to the condition of the recording:... -
Page 7: Introduction
192kHz with 24 Bits of resolution. Introduction and Performance Features • Balanced Outputs The MVP871 has Balanced Outputs for the Left and Right Channels when playing a CD. When a Multichannel Disc is playing, the Balanced Left and Right Outputs provide a two channel mix down of the Multichannel Recording. -
Page 8: Dimensions
Dimensions The following dimensions can assist in determining the best location for your MVP871. There is additional in- formation on the next page pertaining to installing the MVP871 into cabinets. Front View of the MVP871 Rear View of the MVP871 Side View of the MVP871 "... -
Page 9: Installation
Installation The MVP871 can be placed upright on a table or shelf, standing on its four feet. It also can be custom installed in a piece of furniture or cabinet of your choice. The four feet may be removed from the bottom of the MVP871 when it is custom installed as outlined below. -
Page 10: Rear Panel Connections
Rear Panel Connections Connect the MVP871 power cord to a live AC outlet. Refer to informa- tion on the back panel of your MVP871 to deter- mine the correct voltage for your unit DATA IN receives op- erating data... -
Page 11: How To Connect Control, Analog And Digital Audio
1. Connect a Power Control Cable from the MVP871 POWER CONTROL IN to the POWER CONTROL ACC Output jack of a McIntosh A/V Control Center. 2. Connect a Data Cable from the MVP871 DATA IN jack to the DVD DATA jack on the McIntosh A/V Control Center. -
Page 12: How To Connect Video And Ac Power
VIDEO OUT jack to the DVD Video input jack on the OUTPUT McIntosh A/V Control Center 5. Connect the MVP871 power cord to a live AC outlet. Note: When AC Power is initially applied to the MVP871 OUTPUT the unit will momentarily switch On and then go into the Standby Mode. - Page 13 Notes...
-
Page 14: Front Panel Features: Front Panel Indicators And Push-Buttons
Front Panel Use to Pause Information during play- Display back Standby Power On Indicator STANDBY/ON Push-button switch- es the MVP871 ON or OFF (Standby) and resets the micro- processors Opens and Closes the disc tray for loading or un- loading discs... -
Page 15: Front Panel Information Display
Film based, Circuit is V for Video active based or G for Graphic based Note: Items not identified above are for use with other McIntosh Components Indicates when Indicates the disc con- the Random tains multiple Play Mode viewing angles... -
Page 16: Remote Control Push-Buttons
HDMI Output Select a different picture Angle Note: Push-buttons whose function is not identified above are for use with other McIntosh Components Use to change the brightness of the Front Panel Alphanumeric Display from bright to off ��������... -
Page 17: How To Operate By Remote Control
How to use the Remote Control The Remote Control is capable of performing both basic Operating Functions and Setup Options for the MVP871 Disc Player. Notes: Refer to the “How to Operate” and “How to Operate Setup Mode” Sections of this manual for additional information using this Remote Control. -
Page 18: How To Operate The Setup Mode
If a disc is play- ing in the MVP871 and the STOP Push-button is pressed once (the disc playback is paused), some but not all menu items are available for change. -
Page 19: Default Settings
Setup Mode Default Settings The following listings indicate the factory default settings. Refer to the listed page number for instructions on how to change a default setting. MAIN SETTINGS FOR: Language Setup: Name Selection Dialog ... English ...20 Subtitle ... Off ...20 Disc Menu ... -
Page 20: Language Setup
1. Press the SETUP Push-button on the supplied Remote Control to access the Language Setup Menu. Refer to figures 4 and 5. Note: If there is a Disc playing in the MVP871 press the STOP Push-button twice before pressing the SETUP Push-button. -
Page 21: Digital Interface Setup
Control to access the Language Setup Menu. Then press the Right directional Push-button to select the OSD Setup Menu Icon Tab. Refer to figures 4 and 5. Note: If there is a Disc playing in the MVP871 press the STOP Push-button twice before pressing the SETUP Push-button. -
Page 22: Hdmi Audio Setup
Menu. Then press the Right directional Push-but- ton to select the Digital Interface Setup Tab. Refer to figures 5 (on page 20) and 9. Note: If there is a Disc playing in the MVP871, press the STOP Push-button twice before pressing the SETUP Push-button. -
Page 23: Speaker Configuration Settings: Speaker Size: Name Selection Refer To Page Front Sp
Listening/Viewing Area, either by listening or with a sound pressure meter. Level adjustments are made in small steps (1dB) by using the MVP871 Remote Control Up or Down directional Push-buttons. The level can be adjust- ed over a 10dB range. -
Page 24: Front L Ch
Digital Interface Setup, con’t to the next Loudspeaker three seconds after user adjustments have stopped. Refer to figure 16 if the Automatic Mode will be used. 3. Use the Down directional Push-button to select the different Louspeakers and the Right or Left... -
Page 25: Hdmi Auto Format
Menu. Then press the Right directional Push-but- ton to select the Digital Interface Setup Tab. Refer to figures 5 (on page 20) and 21. Note: If there is a Disc playing in the MVP871, press the STOP Push-button twice before pressing the SETUP Push- button. -
Page 26: Video Setup
Right directional Push-button to select the Video Setup Menu Icon Tab. Refer to figure 23. Note: If there is a Disc playing in the MVP871 press the STOP Push-button twice before pressing the SETUP Push-button. 2. Use the Down directional Push-button followed by the SELECT Push-button on the Remote Control to select the TV ASPECT Menu. -
Page 27: Component Video Out
Right directional Push-button to select the Video Menu Icon Tab. Refer to figure 24. Note: If there is a Disc playing in the MVP871 press the STOP Push-button twice before pressing the SETUP Push-button. 2. Use the Down directional Push-button on the Re- mote Control to select the TV TYPE Menu. -
Page 28: Audio/Video Sync
Right directional Push-button to select the Video Menu Icon Tab. Refer to figure 24. Note: If there is a Disc playing in the MVP871 press 2. Use the Down directional Push-button on the Re- mote Control to select the SQUEEZE MODE Menu. -
Page 29: Progressive Mode
When the Component Video Output (Analog Video) is connected to the TV/Monitor and the Progessive Mode is set to Auto (default setting) the MVP871 will produce the best possible picture quality. The two additional Modes of Progressive Scan “Video1” and “Video2” allow for manual override when the Progressive Scan Circuits can not detemine whether the video signal is film or video based. -
Page 30: Audio Setup
Tab. Refer to figures 5 (on page 20), 36 and 37. Notes: If there is a Disc playing in the MVP871, press the STOP Push-button twice before pressing the SETUP Push-button. When the HDMI “MULTI (LPCM)” Mode has been selected, this AUDIO CHANNEL Setup is not active. -
Page 31: Front
Listening/Viewing Area, either by listening or with a sound pressure meter. Level adjustments are made in small steps (1dB) by using the MVP871 Remote Control Up or Down directional Push-buttons. The level can be adjust- ed over a 10dB range. -
Page 32: Sw+10
How to Set the Audio, con’t In the Auto- matic Mode, MVP871 will switch to the next Loud- speaker three seconds after user adjustments have stopped. Refer to figure 44 if the Automatic Mode will be used. 3. Use the Down directional Push-button to select the different Loudspeakers and the Right... -
Page 33: Digital Out
Control to access the On-Screen Language Setup Menu. Then press the Right directional Push-button to select the Audio Setup Tab. Note: If there is a Disc playing in the MVP871, press the STOP Push-button twice before pressing the SETUP Push-button. -
Page 34: Bass Enhancer
Control to access the On-Screen Language Setup Menu. Then press the Right directional Push-button to select the Audio Setup Tab. Note: If there is a Disc playing in the MVP871, press 2. Use the Down directional Push-button followed by the Right directional Push-button on the Remote Control to select COMPRESSION. -
Page 35: Set The Ratings
Right directional Push-button to select the Ratings Menu Icon Tab. Refer to figure 55. Note: If there is a Disc playing in the MVP871 press 2. Use the Down directional Push-button on the Re- mote Control to select the PASSWORD Menu. Refer to figure 58. -
Page 36: Registration
Control to access the Language Setup Menu. Then press the Right directional Push-button to select the Ratings Menu Icon Tab. Note: If there is a Disc playing in the MVP871 press the STOP Push-button twice before pressing the SETUP Push-button. -
Page 37: Other Setup
Menu. Then press the Right directional Push-button to select the OTHER Setup Menu Icon Tab. Note: If there is a Disc playing in the MVP871 press 2. Use the Down directional Push-button on the Re- mote Control to select the CAPTIONS Menu. Refer to figure 66. -
Page 38: Screen Saver
Control to access the On-Screen Language Setup Menu. Then press the Right directional Push-button to select the OTHER Setup Menu Icon Tab. Note: If there is a Disc playing in the MVP871 press the STOP Push-button twice before pressing the SETUP Push-button. -
Page 39: Slide Show
SETUP Push-button may be also pressed to exit the setup mode. Slide Show The MVP871 has a feature to view photos from a disc and the interval time between photos is adjustable from 5 to 15 seconds. To change the interval time perform the following steps: 1. -
Page 40: How To Operate
Front Panel Push-buttons can also be performed with the Remote Control. Note: Some of the MVP871 operating functions such as Disc Languages, Video Angle or Menu Language are active only if the function is supported by data encoded on the disc. - Page 41 Using the Pause Push-button instead of the Stop Push- button, will retain the video on the screen for viewing. It is not advisable to keep the MVP871 in the Stop Mode (one push-button press) for any length of time as the Laser Transport is still active.
- Page 42 AUDIO or SEARCH Push-button will switch off the On- Screen Icon. DVD-Video Direct Title Selection The MVP871 Front Panel Display indicates the Disc Title currently playing. Use the Remote Control NUMERIC Push-button(s) to enter the desired Title Number. Note: The desired disc Title may also be selected by using the Search Function.
- Page 43 Tracks in a Group on a DVD-Audio Disc in ran- dom order. Refer to figure 77. Note: The MVP871 must be in STOP Mode with the Disc Loaded (Table of Contents) read first before the Ran- dom Playback Mode Feature can be activated.
- Page 44 SACD and CD Disc Program Playback Mode This feature allows for the playback of Tracks of SACD and CD Discs in the desired order. Refer to figure 78. Notes: 1. The MVP871 must be in full STOP Mode (two presses of the STOP...
- Page 45 CD Disc with JPEG file format. To view a JPEG Photo disc perform the following steps: 1. Load a JPEG Disc into the MVP871, about 5 to 20 seconds later a Disc Information On-screen Icon will appear on the Monitor/TV indicating the Folder/Photo Organization of the Disc.
- Page 46 To start playback of the Video CD Disc perform the fol- lowing steps: 1. Load a Video CD Disc into the MVP871, about 5 to 20 seconds later a Disc Menu On-screen Icon will appear on the Monitor/TV indicating the available choices for playback.
-
Page 47: Video Settings And Adjustments
Always refer to the TV/Monitor Owner’s Manual for information on the correct video signal format and resolu- tion when setting the MVP871 HDMI Output as this will provide the best possible image quality. In the event the in- formation is not available, set the MVP871 HDMI Format to AUTO. - Page 48 MVP871 Video Settings and Adjustments, con’t access the Memory 1 Picture Adjust 1 Settings. Refer to figure 86. 3. Press the Down directional Push-but- ton to activate the Picture Contrast Setting; use the Up or Down directional Push-but- tons to adjust the Contrast from a setting of -6 to +6.
- Page 49 Black and the color White with different intensi- ties of the color Gray, e.g. Black and White Movie. The Gamma Correction Adjustment in the MVP871 allows for very fine adjustment of 10 different segments in the “Gray Scale”, one segment at a time. When these adjustments are...
-
Page 50: Additional Information: Specifications
120 Volts, 50/60Hz at 60 watts 220 Volts, 50/60Hz at 60 watts 230 Volts, 50/60Hz at 60 watts 240 Volts, 50/60Hz at 60 watts Note: Refer to the rear panel of the MVP871 for the correct voltage. Overall Dimensions Width is 17-1/2 inches (44.45cm) Height is 6 inches (15.24cm) -
Page 51: Packing Instruction
If a shipping carton or any of the interior part(s) are needed, please call or write Customer Service Department of McIntosh Laboratory. Refer to page 4. Please see the Part List for the correct part numbers. - Page 52 McIntosh Laboratory, Inc. 2 Chambers Street Binghamton, NY 13903 The continuous improvement of its products is the policy of McIntosh Laboratory Incorporated who reserve the right to improve design without notice. Printed in the U.S.A. McIntosh Part No. 04101801...