NETGEAR R6400 Quick Start Manual
Ac1750 smart wifi router
Hide thumbs
Also See for R6400:
- User manual (180 pages) ,
- Configuration manual (11 pages) ,
- Quick start manual
Table of Contents
Advertisement
Quick Links
Support
Thank you for purchasing this NETGEAR product.
After installing your device, locate the serial number on the label of your product and use it to
register your product at
https://my.netgear.com
.
You must register your product before you can use NETGEAR telephone support. NETGEAR
recommends registering your product through the NETGEAR website.
http://support.netgear.com.
For product updates and web support, visit
NETGEAR recommends that you use only the official NETGEAR support resources.
You can get the user manual online at
http://downloadcenter.netgear.com
the product's user interface.
Trademarks
© NETGEAR, Inc., NETGEAR and the NETGEAR Logo are trademarks of NETGEAR, Inc.
Any non‑NETGEAR trademarks are used for reference purposes only.
Compliance
For the current EU Declaration of Conformity, visit
http://support.netgear.com/app/answers/detail/a_id/11621/.
For regulatory compliance information, visit
http://www.netgear.com/about/regulatory/
.
See the regulatory compliance document before connecting the power supply.
NETGEAR, Inc.
350 East Plumeria Drive
San Jose, CA 95134 USA
May 2015
Quick Start
or through a link in
AC1750 Smart WiFi Router
Model R6400
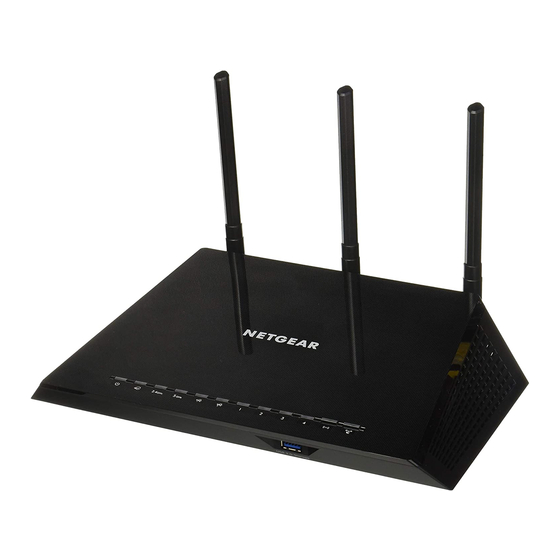
Package Contents
The box contains the following items.
Router
In some regions, a resource CD is included in the package.
Ethernet cable
Power adapter
(varies by region)
Advertisement
Table of Contents

Related Manuals for NETGEAR R6400


Summary of Contents for NETGEAR R6400
-
Page 1: Package Contents
After installing your device, locate the serial number on the label of your product and use it to register your product at https://my.netgear.com You must register your product before you can use NETGEAR telephone support. NETGEAR recommends registering your product through the NETGEAR website. http://support.netgear.com. - Page 2 Position the antennas for the best WiFi Launch a web browser. performance. NETGEAR genie displays. NETGEAR recommends that the center If you do not see genie, enter antenna be vertical and that you aim the www.routerlogin.net in the address field others outward at 45‑degree angles as...
-
Page 3: Front Panel
Front Panel The LEDs and USB 3.0‑Storage port are shown in the following figure. For more information about the LEDs, see LEDs on page 2. LEDs USB 3.0-Storage port Rear Panel The rear panel connections and buttons are shown in the following figure. -
Page 4: Led Description
USB 3.0‑Storage The USB 3.0‑Storage LED is for the USB 3.0‑Storage port port on the front panel. NETGEAR recommends that you connect a USB storage device to the USB 3.0‑Storage port and connect a USB printer to the USB 2.0‑Printer port. - Page 5 USB 2.0‑Printer The USB 2.0‑Printer LED is for the USB 2.0‑Printer port on port the front panel. NETGEAR recommends that you connect a USB storage device to the USB 3.0‑Storage port and connect a USB printer to the USB 2.0‑Printer port.
-
Page 6: Install Your Router
¾ To install your router: 1. Position the antennas. Position the antennas for the best WiFi performance. NETGEAR recommends that the center antenna be vertical and that you aim the others outward at 45‑degree angles as shown. Note: The antennas are not detachable. - Page 7 3. Connect your modem. Internet Cable or Router Ethernet cable Modem a. Plug in, then turn on your modem. b. If you removed the batteries, replace them. c. With the Ethernet cable that came with the router, connect your modem to the yellow WAN (Internet) port on your router.
- Page 8 5. Connect a device. Ethernet cable Internet Cable or Router Ethernet cable Computer Modem Power adapter You can use an Ethernet cable to connect a computer to the router or you can use WiFi to connect a computer or WiFi device to the router: • For a wired connection, use an Ethernet cable (not included) to connect your computer to an Ethernet port on...
- Page 9 6. Launch a web browser. The first time that you connect to the router, the genie page displays. Follow the genie steps to connect to the Internet. If the genie page does not display, try the following: • Close and reopen the browser. • Make sure that your computer is connected to one of the four Ethernet ports on the router, or that you are connected to your router’s WiFi network.
-
Page 10: Wifi Network Name And Password
NETGEAR recommends that you use the preset WiFi settings because you can check the product label if you forget them. NETGEAR genie lets you change these settings. If you do so, write down the new WiFi settings and store them in a safe place. -
Page 11: Join The Wifi Network
Join the WiFi Network You can either use Wi‑Fi Protected Setup (WPS) or select your WiFi network and type its password. For help with the WPS button on your computer or WiFi device, check the instructions or online help that came with that computer or device. Some older equipment cannot use WPS. -
Page 12: View Or Change The Router Settings
View or Change the Router Settings After you use genie to set up the router, you can log in to the router to view or change its settings. Log In to the Router ¾ To log in to the router: 1. - Page 13 5. Type your old password and type the new password twice. 6. To be able to recover the password, select the Enable Password Recovery check box. NETGEAR recommends that you enable password recovery. 7. Select two security questions and provide answers to them. 8. Click the Apply button.
- Page 14 5. Click the Continue button. A page displays requesting the answers to your security questions. 6. Enter the saved answers to your security questions. 7. Click the Continue button. A page displays your recovered password. 8. Click the Login button. A login page displays.
- Page 15 USB 3.0‑Storage port. (If your USB device has special drivers, it is not compatible.) Note: NETGEAR recommends that you connect a USB storage device to the USB 3.0‑Storage port and connect a USB printer to the USB 2.0‑Printer port.
- Page 16 For more information about access control, see the user manual, which is available online at http://downloadcenter.netgear.com or through a link in the router’s user interface. 5. Click the Connect button.
-
Page 17: Readyshare Vault Backup App
Connect a USB hard disk drive (HDD) to the USB 3.0‑Storage port on your router for centralized, continuous, and automatic backup. Note: NETGEAR recommends that you connect a USB storage device to the USB 3.0‑Storage port and connect a printer to the USB 2.0‑Printer port. Note: The following operating systems support ReadySHARE Vault: • Windows XP SP3... -
Page 18: Share A Usb Printer
On each computer that will share the printer, do the following: a. Install the current USB printer driver software (available from the printer manufacturer). b. Download the NETGEAR USB Control Center utility from www.netgear.com/readyshare and install it. c. Select the language. -
Page 19: More Premium Features
More Premium Features Your router lets you do the following and more: • Play music from a USB device with iTunes Server. • Set up a secure VPN service connection to your home network. • Create a personal FTP server with a custom URL. iTunes Server iTunes Server lets you play music with your Windows or Mac iTunes app from a USB device that is connected to the router’s USB... -
Page 20: Vpn Service
1. Specify the VPN service. 2. Install OpenVPN software on your computer. 3. Use a VPN tunnel. These steps are explained in detail in the user manual, which is available online at http://downloadcenter.netgear.com or through a link in the router’s user interface. - Page 21 With your customized free URL, you can use FTP to access your network when you aren’t home through Dynamic DNS. To set up your FTP server, follow these high‑level steps: 1. Register for a free NETGEAR Dynamic DNS (DDNS) service account. 2. Provide the account settings to your router.
-
Page 22: Netgear Genie App
NETGEAR genie App The free NETGEAR genie app lets you easily monitor, connect, and control your home network from a Windows or Mac computer, tablet, or smartphone. You can share and stream music or videos, diagnose and repair network issues, set up parental controls, and more: • Access your router and change its settings or diagnose and...