Sign In
Upload
Manuals
Brands
Toshiba Manuals
All in One Printer
E-STUDIO 3500C
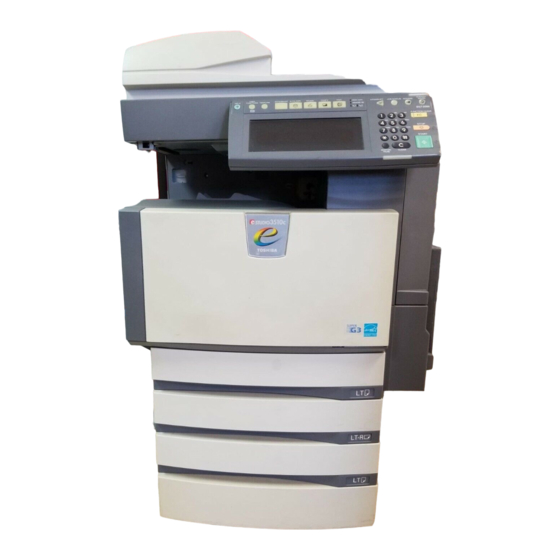
Toshiba E-STUDIO 3500C Manuals
Manuals and User Guides for Toshiba E-STUDIO 3500C. We have
10
Toshiba E-STUDIO 3500C manuals available for free PDF download: Operator's Manual, Manual, User Functions Manual, Scanning Manual, Quick Start Manual, Network Administration Manual
Toshiba E-STUDIO 3500C Operator's Manual (418 pages)
Toshiba e-STUDIO Multifunctional Digital Colour Systems Operator's manual for basic functions
Brand:
Toshiba
| Category:
All in One Printer
| Size: 11.99 MB
Table of Contents
Notice to Users
3
Lineup of Our Manuals
5
Before Reading this Manual
8
Contents
11
Table of Contents
11
Contents
13
Contents
15
Toshiba Quality Is Second to None
19
Features of the E-Studio2500C/3500C/3510C
21
General Precautions
23
When Using the Multifunctional Digital Colour Systems
25
During Maintenance or Inspection
28
When Handling Supplies
28
Disclaimer Notice
29
Forgery Prevention Function/Storage of Colour Copies
30
Chapter 1 BEFORE USING EQUIPMENT
32
Description of each Component
32
Front / Right Side
32
Left Side / Inner Side
34
Configuration of Options
36
Control Panel
39
Adjustment of the Angle of the Control Panel
41
Touch Panel
43
Adjusting the Contrast of the Touch Panel
45
Clearing Functions Selected
45
Setting Letters
46
Preparation 1- Turning Power On/Off
47
Turning Power on
47
When Department or User Management Is Used
48
User Management
49
Turning Power off (Shutdown)
52
Energy Saving Mode
54
Preparation 2- Setting Copy Paper
56
Acceptable Copy Paper
56
Recommended Paper
57
Handling and Storing Paper
57
Setting Copy Paper (Size Change)
58
Changing the Setting of Paper Size
63
Drawer for Special Uses
64
Clearing the Drawer for Special Uses
66
Placing Paper in the Large Capacity Feeder (Optional)
67
Chapter 2 HOW to MAKE COPIES
70
Setting Originals
70
Acceptable Originals
70
Placing Originals on the Glass
72
Book-Type Originals
73
Using the Reversing Automatic Document Feeder (Optional)
74
Original Width
76
Making Copies
78
Initial (Default) Settings
78
Copying Procedure
79
Stopping the Copying Operation
83
Scanning the Next Originals During Copying (Auto Job Start)
84
Confirming and Cancelling Auto Job
85
Interrupt Copying in Progress and Make Other Copies (Interrupt Copying)
86
Bypass Copying
87
Bypass Copying on Standard Size Paper
88
Bypass Copying on Non-Standard Size Paper
93
Registering Non-Standard Size in the Memory
96
Proof Copy
97
Chapter 3 SETTING of BASIC COPY MODES
100
Paper Selection
100
Automatic Paper Selection (APS)
100
Manual Paper Selection
102
Copying Mixed-Sized Originals in One Operation (Mixed Original Size)
103
Switching Colour Mode
105
Enlargement and Reduction Copying
106
Automatic Magnification Selection (AMS)
106
Specifying both Original Size and Copy Size Separately
108
Using the Zoom Buttons or the One-Touch Zoom Buttons
110
Copying Photo Originals in the Best Reproduction Ratio for Copy Paper Size
112
Selecting Finishing Modes
116
Type of Finishing Mode
116
Name of each Part in the Finisher (Optional)
117
Sort/Group Copying
118
Rotate Sort Mode
120
Staple Sort Mode
122
Magazine Sort & Saddle Stitch Mode (Booklet Mode)
124
Hole Punch Mode (Optional)
127
Manual Stapling (MJ-1101 Only)
129
Duplex Copying
131
1-Sided Original -> 1-Sided Copy (Default Setting at Installation)
132
1-Sided Original -> 2-Sided Copy
133
2-Sided Original -> 2-Sided Copy
134
2-Sided Original -> 1-Sided Copy
135
Book-Type Original -> 2-Sided Copy
136
Original Mode
140
Copy Density Adjustment
142
Automatic Copy Density Mode
142
Manual Copy Density Mode
143
Chapter 4 IMAGE ADJUSTMENT
146
Colour Balance (YMCK Adjustment)
146
RGB Adjustment
148
One-Touch Adjustment
149
Background Adjustment
150
Sharpness
151
Twin Colour (2-Colour) Copy
152
Twin Colour Selectable
152
Red & Black
155
Monocolour Copying
158
Hue
159
Saturation
160
Chapter 5 Using the Editing Functions
161
Image Shift
163
Creating a Right or Left Margin
163
Creating a Top or Bottom Margin
165
Creating a Bookbinding Margin
167
Edge Erase
169
Book Centre Erase
171
Dual Page
173
2In1 / 4In1
175
Magazine Sort
178
Editing
180
Trimming / Masking
180
Mirror Image
183
Negative/Positive Reversal
184
Xy Zoom
185
Cover Sheet
187
Sheet Insertion
190
Time Stamp
193
Page Number
194
Job Build
196
Image Direction
200
Book - Tablet
202
Adf / Sadf
203
Continuous Feed Mode
203
Single Feed Mode
204
Full Image
206
Image Repeat
208
Chapter 6 E-FILING
212
E-Filing
212
Creating User Boxes
214
Changing Data of User Boxes
217
Deleting User Boxes
220
Storing Documents in E-Filing
222
Printing Stored Documents
227
Printing the Whole Document
227
Test Printing
229
Printing the Stored Document after Changing the Settings
230
Deleting Folders or Documents
232
Appendix
234
Storing Documents in the Shared Folder
234
Chapter 7 TEMPLATE
240
Template
240
Template in "Useful Template
240
Registering User Groups and Templates
242
Registering a Template in the Public Template Group
242
Registering the New User Group
248
Registering a Template in the User Group
251
Changing Data of User Groups and Templates
256
Changing the Data of a User Group
256
Changing the Data of a Template
259
Recalling Templates
264
When Recalling a Template in a Public Group
264
When Recalling a Template in a User Group
266
Deleting User Groups or Templates
269
Deleting a User Group
269
Deleting a Template
271
Advertisement
Toshiba E-STUDIO 3500C Operator's Manual (412 pages)
MULTIFUNCTIONAL DIGITAL COLOR SYSTEMS
Brand:
Toshiba
| Category:
All in One Printer
| Size: 11.88 MB
Table of Contents
Notice to Users
3
Lineup of Our Manuals
4
Before Reading this Manual
7
Table of Contents
9
Toshiba Quality Is Second to None
17
Features of the E-Studio2500C/3500C/3510C
19
General Precautions
21
When Using the Multifunctional Digital Color Systems
23
During Maintenance or Inspection
26
When Handling Supplies
26
Disclaimer Notice
27
Forgery Prevention Function/Storage of Color Copies
28
Chapter 1 BEFORE USING EQUIPMENT
30
Description of each Component
30
Front / Right Side
30
Left Side / Inner Side
32
Configuration of Options
34
Control Panel
37
Adjustment of the Angle of the Control Panel
39
Touch Panel
41
Adjusting the Contrast of the Touch Panel
43
Clearing Functions Selected
43
Setting Letters
44
Preparation 1- Turning Power On/Off
45
Turning Power on
45
When Department or User Management Is Used
46
User Management
47
Turning Power off (Shutdown)
50
Energy Saving Mode
52
Preparation 2- Setting Copy Paper
54
Acceptable Copy Paper
54
Recommended Paper
55
Handling and Storing Paper
55
Setting Copy Paper (Size Change)
56
Changing the Setting of Paper Size
61
Drawer for Special Uses
62
Clearing the Drawer for Special Uses
64
Placing Paper in the Large Capacity Feeder (Optional)
65
Chapter 2 HOW to MAKE COPIES
68
Setting Originals
68
Acceptable Originals
68
Placing Originals on the Glass
70
Book-Type Originals
71
Using the Reversing Automatic Document Feeder (Optional)
72
Original Width
74
Making Copies
76
Initial (Default) Settings
76
Copying Procedure
77
Stopping the Copying Operation
81
Scanning the Next Originals During Copying (Auto Job Start)
82
Confirming and Canceling Auto Job
83
Interrupt Copying in Progress and Make Other Copies (Interrupt Copying)
84
Bypass Copying
85
Bypass Copying on Standard Size Paper
86
Touch Panel
88
Bypass Copying on Non-Standard Size Paper
92
Registering Non-Standard Size in the Memory
95
Proof Copy
96
Chapter 3 SETTING of BASIC COPY MODES
100
Paper Selection
100
Automatic Paper Selection (APS)
100
Basic Menu
101
Manual Paper Selection
102
Copying Mixed-Sized Originals in One Operation (Mixed Original Size)
103
Switching Color Mode
105
Enlargement and Reduction Copying
106
Automatic Magnification Selection (AMS)
106
Specifying both Original Size and Copy Size Separately
108
Using the Zoom Buttons or the One-Touch Zoom Buttons
110
Copying Photo Originals in the Best Reproduction Ratio for Copy Paper Size
112
Selecting Finishing Modes
116
Type of Finishing Mode
116
Name of each Part in the Finisher (Optional)
117
Sort/Group Copying
118
Rotate Sort Mode
120
Staple Sort Mode
121
Magazine Sort & Saddle Stitch Mode (Booklet Mode)
123
Hole Punch Mode (Optional)
126
Manual Stapling (MJ-1101 Only)
128
Duplex Copying
130
1-Sided Original -> 1-Sided Copy (Default Setting at Installation)
131
1-Sided Original -> 2-Sided Copy
132
2-Sided Original -> 2-Sided Copy
133
2-Sided Original -> 1-Sided Copy
134
Book-Type Original -> 2-Sided Copy
135
Original Mode
139
Copy Density Adjustment
141
Automatic Copy Density Mode
141
Manual Copy Density Mode
142
Chapter 4 IMAGE ADJUSTMENT
144
Color Balance (YMCK Adjustment)
144
RGB Adjustment
146
One-Touch Adjustment
147
Background Adjustment
148
Sharpness
149
Twin Color (2-Color) Copy
150
Twin Color Selectable
150
Red & Black
153
Monocolor Copying
156
Hue
157
Saturation
158
Chapter 5 USING the EDITING FUNCTIONS
161
Image Shift
161
Creating a Right or Left Margin
161
Creating a Top or Bottom Margin
163
Creating a Bookbinding Margin
165
Edge Erase
167
Book Center Erase
169
Dual Page
171
2In1 / 4In1
173
Magazine Sort
176
Editing
178
Trimming / Masking
178
Mirror Image
181
Negative/Positive Reversal
182
Xy Zoom
183
Cover Sheet
185
Sheet Insertion
188
Time Stamp
191
Page Number
192
Job Build
194
Image Direction
198
Book - Tablet
200
Adf / Sadf
201
Continuous Feed Mode
201
Single Feed Mode
202
Full Image
204
Image Repeat
206
Chapter 6 E-FILING
210
E-Filing
210
Creating User Boxes
212
Changing Data of User Boxes
215
Deleting User Boxes
218
Storing Documents in E-Filing
220
Printing Stored Documents
225
Printing the Whole Document
225
Test Printing
227
Printing the Stored Document after Changing the Settings
228
Deleting Folders or Documents
230
Appendix
232
Storing Documents in the Shared Folder
232
Chapter 7 TEMPLATE
238
Template
238
Template in "Useful Template
238
Registering User Groups and Templates
240
Registering a Template in the Public Template Group
240
Registering the New User Group
246
Registering a Template in the User Group
249
Changing Data of User Groups and Templates
254
Changing the Data of a User Group
254
Changing the Data of a Template
257
Recalling Templates
262
When Recalling a Template in a Public Group
262
When Recalling a Template in a User Group
264
Deleting User Groups or Templates
267
Deleting a User Group
267
Deleting a Template
268
Toshiba E-STUDIO 3500C Operator's Manual (400 pages)
Toshiba e-studio Multifunctional Digital Colour Systems
Brand:
Toshiba
| Category:
All in One Printer
| Size: 11.71 MB
Table of Contents
Notice to Users
3
Lineup of Our Manuals
5
Before Reading this Manual
8
Table of Contents
11
TOSHIBA Quality Is Second to None
19
Features of the E-Studio2500C/3500C/3510C
21
General Precautions
23
When Using the Multifunctional Digital Colour Systems
25
During Maintenance or Inspection
28
When Handling Supplies
28
Disclaimer Notice
29
Forgery Prevention Function/Storage of Colour Copies
30
Chapter 1 BEFORE USING EQUIPMENT
32
Description of each Component
32
Main Components
32
Configuration of Options
36
Control Panel
39
Adjustment of the Angle of the Control Panel
41
Touch Panel
43
Adjusting the Contrast of the Touch Panel
45
Clearing Functions Selected
45
Setting Letters
46
Preparation 1- Turning Power On/Off
47
Turning Power on
47
When Department or User Management Is Used
48
User Management
49
Preparation 2- Turning Power off (Shutdown)
52
Turning Power off (Shutdown)
52
Energy Saving Mode
54
Preparation 3- Setting Copy Paper
56
Acceptable Copy Paper
56
Recommended Paper
57
Handling and Storing Paper
57
Setting Copy Paper (Size Change)
58
Changing the Setting of Paper Size
63
Drawer for Special Uses
64
Clearing the Drawer for Special Uses
66
Placing Paper in the Large Capacity Feeder (Optional)
67
Chapter 2 HOW to MAKE COPIES
70
Setting Originals
70
Acceptable Originals
70
Placing Originals on the Glass
72
Book-Type Originals
73
Using the Reversing Automatic Document Feeder (Optional)
74
Single Feed Mode
76
Original Width
76
Making Copies
78
Initial (Default) Settings
78
Copying Procedure
79
Stopping the Copying Operation
83
Scanning the Next Originals During Copying (Auto Job Start)
84
Confirming and Cancelling Auto Job
85
Interrupt Copying in Progress and Make Other Copies (Interrupt Copying)
86
Bypass Copying
87
Bypass Copying on Standard Size Paper
88
Bypass Copying on Non-Standard Size Paper
93
Registering Non-Standard Size in the Memory
96
Proof Copy
97
Chapter 3 SETTING of BASIC COPY MODES
100
Paper Selection
100
Automatic Paper Selection (APS)
100
Manual Paper Selection
102
Copying Mixed-Sized Originals in One Operation (Mixed Original Size)
103
Switching Colour Mode
105
Enlargement and Reduction Copying
106
Automatic Magnification Selection (AMS)
106
Specifying both Original Size and Copy Size Separately
108
Using the Zoom Buttons or the One-Touch Zoom Buttons
110
Selecting Finishing Modes
112
Type of Finishing Mode
112
Name of each Part in the Finisher (Optional)
113
Sort/Group Copying
114
Rotate Sort Mode
116
Staple Sort Mode
118
Magazine Sort & Saddle Stitch Mode (Booklet Mode)
120
Hole Punch Mode (Optional)
123
Manual Stapling (MJ-1101 Only)
125
Duplex Copying
127
1-Sided Original -> 1-Sided Copy (Default Setting at Installation)
128
1-Sided Original -> 2-Sided Copy
129
2-Sided Original -> 2-Sided Copy
130
2-Sided Original -> 1-Sided Copy
131
Book-Type Original -> 2-Sided Copy
132
Original Mode
136
Copy Density Adjustment
138
Automatic Copy Density Mode
138
Manual Copy Density Mode
139
Chapter 4 IMAGE ADJUSTMENT
142
Colour Balance (YMCK Adjustment)
142
RGB Adjustment
144
One-Touch Adjustment
145
Background Adjustment
146
Sharpness
147
Twin Colour (2-Colour) Copy
148
Twin Colour Selectable
148
Red & Black
151
Monocolour Copying
154
Hue
155
Saturation
156
Chapter 5 USING the EDITING FUNCTIONS
159
Image Shift
159
Creating a Right or Left Margin
159
Creating a Top or Bottom Margin
161
Creating a Bookbinding Margin
163
Edge Erase
165
Book Centre Erase
166
Dual Page
168
2In1 / 4In1
170
Magazine Sort
173
Editing
175
Trimming / Masking
175
Mirror Image
178
Negative/Positive Reversal
179
Xy Zoom
180
Cover Sheet
182
Sheet Insertion
185
Time Stamp
188
Page Number
189
Job Build
191
Image Direction
195
Book - Tablet
197
Adf / Sadf
198
Continuous Feed Mode
198
Single Feed Mode
199
Full Image
201
Chapter 6 E-FILING
204
E-Filing
204
Creating User Boxes
206
Changing Data of User Boxes
208
Deleting User Boxes
211
Storing Documents in E-Filing
213
Printing Stored Documents
218
Printing the Whole Document
218
Test Printing
220
Printing the Stored Document after Changing the Settings
221
Deleting Folders or Documents
223
Appendix
225
Storing Documents in the Shared Folder
225
Chapter 7 TEMPLATE
230
Template
230
Template in "Useful Template
230
Registering User Groups and Templates
232
Registering a Template in the Public Template Group
232
Registering the New User Group
237
Registering a Template in the User Group
240
Changing Data of User Groups and Templates
245
Changing the Data of a User Group
245
Changing the Data of a Template
248
Recalling Templates
253
When Recalling a Template in a Public Group
253
When Recalling a Template in a User Group
255
Deleting User Groups or Templates
258
Deleting a User Group
258
Deleting a Template
260
Advertisement
Toshiba E-STUDIO 3500C Manual (346 pages)
Brand:
Toshiba
| Category:
All in One Printer
| Size: 9.52 MB
Table of Contents
Software License Agreement
3
Limitation of Liability
4
Trademarks and Copyright
5
Preface
6
Precautions in this Manual
9
Table of Contents
11
Chapter 1 Overview
15
Topaccess Overview
16
Accessing Topaccess End-User Mode
17
Accessing Topaccess by Entering Url
18
Topaccess Web Site
25
Chapter 2 Checking Device Status
27
Topaccess Device Tab Page
28
Device Status Indicators
29
Chapter 3 Managing Jobs
34
Managing Print Jobs
34
Displaying Print Jobs
34
Deleting a Print Job
35
Releasing a Print Job
36
Managing Fax/Internet Fax Jobs
37
Displaying Fax/Internet Fax Jobs
37
Deleting a Fax Transmission Job
38
Managing Scan Jobs
39
Displaying Scan Jobs
39
Deleting a Scan Job
40
Chapter 4 Displaying Job Logs
42
Displaying Print Job Logs
42
Displaying Transmission Journals
43
Displaying Reception Journals
45
Displaying Scan Job Logs
47
Chapter 5 Registering from Topaccess
50
Managing Templates
50
Registering Private Template Groups
50
Setting Group Password
53
Resetting Group Information
56
Registering Private Templates
58
Setting Template Password
86
Resetting Private Templates
91
Displaying Public Templates
94
Managing Address Book
96
Managing Contacts in the Address Book
96
Deleting a Contact
100
Adding New Contact from the Ldap Server
101
Managing Groups in the Address Book
103
Deleting a Group
105
Managing Mailboxes
106
Setting up an Open Mailbox
107
Mailbox Setting
110
Deleting an Open Mailbox
113
Chapter 6 Managing Counters
115
Viewing Counters
116
Displaying the Total Counter
116
Displaying the Department Counter
117
Toshiba E-STUDIO 3500C Manual (232 pages)
Brand:
Toshiba
| Category:
All in One Printer
| Size: 11.43 MB
Table of Contents
Table of Contents
6
1 General Adjustments - Copying, Printing and E-Filing (Output from Box)
10
To Obtain a Darker Image
10
To Adjust the Density of an Entire Copy
14
To Adjust the Density on a Solid Colored Image
14
To Adjust the Density on a Photo or Gradational Image
17
To Achieve the Image Quality most Suitable for the Paper Used
20
(To Eliminate Blur and Graininess from an Image)
20
To Minimize Variations in the Image Quality under the Operating Conditions
24
(To Optimally Program Image Quality Control)
24
To Correct Out-Of-Registration Colors
28
2 Copier-Specific Adjustments
32
(To Eliminate Faint, Smudged or Blurred Text)
32
To Adjust the Copy Image Quality in the Black Mode
33
Original Mode
35
Original Mode
36
Text/Photo
36
Text
36
To Adjust the Copy Image Quality in the Auto Color Mode
38
To Adjust the Copy Image Quality in the Full Color Mode
36
Text/Photo
38
To Closely Match the Color Balance of the Original
40
Text
42
Precautions after the Completion of the Adjustment
43
To Improve the Reproducibility of Gray
44
To Copy in VIVID Colors
46
To Make the Pale Area of the Original Look Darker and Sharper
50
(To Improve the Highlight Reproducibility)
50
To Eliminate the Background Color
53
To Adjust the Copy Image Quality in the Black Mode
54
To Scan an Original Fed from the RADF Original Mode
55
Copy Density Recommended Value Mode Ten's Place One's Place Ten's Place One's Place Manual
55
Mode Ten's Place One's Place Ten's Place One's Place
55
Current Value 2
55
To Adjust the Copy Image Quality in the Full Color Mode
57
To Avoid Copying the Image Seen through the Back of a Page Printed on Thin Paper
60
To Adjust the Copy Image Quality in the Black Mode
61
Current Value
62
Current Value 2
62
To Adjust the Copy Image Quality in the Full Color Mode
64
To Eliminate Moir
65
To Eliminate Moiré
66
To Copy Sharply (to Enhance Sharpness)
70
To Make Photo Edges Look Softer
72
To Make Solid Filled Bold Text (Logo) Highly Colored
76
To Adjust the Copy Image Quality of a Black Logo
77
To Adjust the Copy Image Quality of a Colored Logo
79
To Sharply Contrast the Hues of Highlighters on the Copy
81
To Obtain a Good Color Balance on Thick Paper
84
To Obtain Smooth Gray-Scale Photo Images
88
To Change the Threshold in Auto Color Mode
90
To Adjust the Twin-Color Copy Image Quality
92
To Adjust the Tint of Colors Other than Black
93
To Adjust the Reproducibility of Black in the Red and Black Mode
94
To Adjust the Boundary between Black and Colors Other than Black
95
To Adjust the Image Quality Scanned from the RADF
96
Copy Density Recommended Value
55
3 Printer-Specific Adjustments
98
To Maintain a Steady Color Balance on Thick Paper or Special Paper
100
To Obtain the Desired Color Balance
102
To Closely Match the Color Balance on the Monitor
110
To Maintain a Uniform Gray Hue
113
(To Maintain Consistency in Gray Among Text, Photos and Graphics)
113
To Use Only the Black Toner to Reproduce Gray Areas
116
To Easily Adjust the Overall Brightness
119
To Adjust the Overall Saturation
122
For Windows
123
To Easily Adjust the Overall Contrast
126
To Obtain a Sharper Print Image
129
To Obtain a Softer Image
132
To Make Low-Resolution Data Look Finer
135
(To Soften an Image)
135
To Eliminate Smudges from Highly Colored Text and Lines
138
To Clearly Print Light-Colored Thin Lines or Text
145
To Adjust the Print Image Quality in the Color Mode
146
To Adjust the Print Image Quality in the Black and White Mode
153
To Make the Light-Colored Area Darker on the Printout
156
To Clearly Print Thin Lines/Double Lines
161
To Decrease the Image Density and Save Toner
164
(To Print in the Toner Save Mode)
164
To Adjust the Image Density in the Toner Save Mode
167
To Print Illegible Gray or Colored Text in Black
170
To Ignore Blank Pages for Printing
172
To Sharply Print Black Text
175
To Prevent Dark Toner from Coming off
184
To Register the Image Quality Adjusted Corresponding to a Preference
186
(To Use the Custom Color Settings)
186
To Print a Full-Color Original in Two Colors
189
4 E-Filing-Specific Adjustments
196
To Clearly Store a B/W Image in the Auto Color Mode
196
To Store an Original While Reducing the File Size
198
To Store a Color Photo Image, While Minimizing Moiré
200
To Match the Color Balance on the Original
202
(To Adjust the Color Balance in Print to Box)
202
To Scan and Print, While Minimizing Moiré
204
To Finely Print the Image Stored in the E-Filing Box
206
To Store an Image Suitable for Displaying on the Monitor or Image Editing
208
To Finely Print Color Images Scanned and Stored
210
(To Print Images Stored through Scan to Box)
210
5 Scanning-Specific Adjustments
212
To Clearly Scan Text
212
(To Reduce Noise Around Text)
212
To Scan an Original, While Eliminating the Background Color
214
(To Eliminate the Background Density)
214
To Clearly Scan and Print an Original in Black and White
216
(To Improve Gradation and Reduce Graininess)
216
To Scan the Original, While Reducing the File Size
218
To Reduce the File Size by Changing the Options When Scanning the Original
219
To Reduce the File Size in Slim PDF
222
To Sharply Scan the Original
224
(To Increase the Sharpness Intensity)
224
To Scan an Original, While Enhancing Black
226
To Scan an Original with the Desired Gradation
228
To Register the Original Mode Optimal for a Particular Type of Original
230
Toshiba E-STUDIO 3500C User Functions Manual (226 pages)
MULTIFUNCTIONAL DIGITAL COLOR SYSTEMS
Brand:
Toshiba
| Category:
All in One Printer
| Size: 5.1 MB
Table of Contents
Trademarks and Copyright
2
Table of Contents
3
Preface
7
Precautions in this Manual
10
Chapter 1 MANAGING ADDRESS BOOK (ADDRESS MENU)
12
Managing Address Book
12
About Managing Contacts in Address Book
12
Registering Contacts
12
Editing Contacts
16
Deleting Contacts
18
Searching Contacts
20
Managing Groups
24
About Managing Groups in Address Book
24
Creating New Group
24
Editing Groups
27
Deleting Groups
33
Searching Groups
35
Confirming the Members of the Groups
38
Chapter 2 MANAGING COUNTERS (COUNTER MENU)
42
Total Counter
42
Displaying Print Counter
42
Displaying Scan Counter
45
Print out Total Counter
47
Department Counter
48
Displaying Print Counter for Department Code
48
Displaying Scan Counter for Department Code
51
Displaying Fax Communication Counter for Department Code
53
Managing Deparment Code
55
Logging on as Administrator
55
Printing Department Codes List
57
Enabling Department Code
57
Resetting All Department Counters
59
Deleting All Department Codes
60
Registering a New Department Code
61
Editing the Department Code
65
Deleting the Department Code
69
Resetting the Counter of each Department
71
Setting Output Limitations for All Departments
73
Setting no Limit Black
75
Checking Toner Amount
76
Chapter 3 SETTING ITEMS (USER)
78
Setting General Functions
78
Setting the Auto Clear Mode
78
Changing the Display Language
80
Setting the Reversed Display Mode
81
Replacing the Toner Cartridge
83
Setting the Calibrations
85
Setting the Registration
87
Setting Copy Functions
88
Setting Fax Functions
90
Setting Scan Functions
92
Setting E-Filing Functions
95
Printing Lists
96
Printing the Address Book List
96
Printing the Group Numbers List
98
Printing the Function List (User)
99
Setting Drawer
100
Checking E-Mail
102
Turn off the Power (Shut Down)
103
Setting Bip Printing
105
Toshiba E-STUDIO 3500C Scanning Manual (146 pages)
MULTIFUNCTIONAL DIGITAL COLOR SYSTEMS
Brand:
Toshiba
| Category:
All in One Printer
| Size: 3.82 MB
Table of Contents
Scanning Guide
1
Software License Agreement
3
Trademarks and Copyright
5
Preface
6
About this Guide
6
Conventions
6
Lineup of Our Manuals
6
To Read Manuals in PDF (Portable Document Format) Files
8
Precautions in this Manual
9
Table of Contents
11
Chapter 1 Overview
14
About Scan Features
14
About Scan Mode
14
Scan to E-Filing Mode
14
Scan to File or USB Mode
15
Scan to E-Mail Mode
15
About Expansion Memories
16
About Scan Speed
16
How to Perform Scan Operations
18
Confirming the Scan Job Status
24
Confirming the Scan Log
25
Chapter 2 Scan to E-Filing
28
How to Perform Scan to E-Filing
28
How to Use Scanned Data Stored in E-Filing
36
Using Scanned Data in E-Filing from Touch Panel Display
36
Using Scanned Data in E-Filing from E-Filing Web Utility
36
Chapter 3 Scan to File or USB
38
How to Perform Scan to File or USB
38
How to Use Scanned Data Stored as Files
50
When Scanned Data Is Stored in MFP LOCAL
50
When Scanned Data Is Stored in USB Media
50
When Scanned Data Is Stored in REMOTE 1 or 2
51
Chapter 4 Scan to E-Mail
53
How to Perform Scan to E-Mail
54
Specifying Destinations
61
Chapter 5 Using Template
77
Scanning Using Template
78
Registering Scan Template
86
Chapter 6 Copy & File
95
How to Perform Copy & File
96
Chapter 7 Internet Fax
104
About Internet Fax
104
Precaution for Internet Transmission
104
Internet Fax Transmission Overview
104
How to Perform Internet Fax
106
Specifying Destinations
109
Advanced Function
120
Sending 2-Sided Originals
120
Priority Transmission
121
Receiving Internet Fax
123
Toshiba E-STUDIO 3500C Quick Start Manual (90 pages)
Brand:
Toshiba
| Category:
All in One Printer
| Size: 3.83 MB
Table of Contents
Quick Start Guide
1
Table of Contents
3
Preface
5
Disclaimer Notice
6
Chapter 1 SOFTWARE LICENSE AGREEMENT
7
Software License Agreement
8
Grant of License
8
Term
8
Disclaimer of Warranty
8
Limitation of Liability
9
U.S. Government Restricted Rights
9
General
9
Security Precautions
10
Trademarks and Copyright
11
Trademarks
11
Copyright
11
Chapter 2 INTRODUCTION
13
Items Included with the Product
14
Lineup of Our Manuals
15
To Read Manuals in PDF (Portable Document Format) Files
17
About the CD-Rom
18
About the Client Software
19
Client Software for Printing Features
19
Client Software for Scan Features
19
Client Software for E-Filing Features
20
Client Software for Network Management
20
Client Software for Network Fax Features
20
Chapter 3 SYSTEM REQUIREMENTS
21
System Requirements
22
General Requirements
22
Printing Features
22
Scanning Features
23
Fax/Internet Fax Features
24
Electronic Filing (E-Filing) Features
25
Chapter 4 CONNECTING to the DEVICE
27
Connecting to the Usb Port
28
Connecting to the Network
29
Chapter 5 SETUP FLOW
32
Overview of Connections
32
Connecting the E-Studio2500C/3500C/3510C
32
Available Features under each Connection
33
Internet Connection
34
About Setup
35
Initial Device Setup
35
Setup the Network Document Processing System
35
Initial Device Setup
36
SETUP FLOW for Topaccess
37
Setup Flow for User Management
38
Setup Flow for Department Management
38
Setup Flow for User Management Setting
39
Setup Flow for User Authentication for Scan to E-Mail
40
Setup Flow for Printing Features
41
Setup Flow for Microsoft Windows Workstation
41
Setup Flow for Usb Printing
42
Setup Flow for Smb Printing
45
Setup Flow for Printing Via Windows Print Server
49
Setup Flow for Novell Printing
51
Setup Flow for Macintosh Workstation
54
Setup Flow for Lpr Printing
55
Setup Flow for UNIX Workstation
60
Setup Flow for FTP Printing
64
Setup Flow for E-Mail Printing
66
Setup Flow for Scanning Features
68
Setup Flow for Scan to File
68
Setup Flow for Scan to E-Mail
70
Setup Flow for Remote Scan
72
Setup Flow for Fax Features
73
Setup Flow for Network-Fax
73
Setup Flow for Internet Fax
76
Setup Flow for Onramp Gateway
78
Setup Flow for Offramp Gateway
81
Setup Flow for E-Filing Feature
84
Setup Flow for E-Filing Web Utility
84
Setup Flow for E-Filing Client Software
86
Toshiba E-STUDIO 3500C Quick Start Manual (84 pages)
E-STUDIO SERIES
Brand:
Toshiba
| Category:
All in One Printer
| Size: 3.61 MB
Table of Contents
Quick Start Guide
1
Table of Contents
3
Preface
5
Disclaimer Notice
6
Chapter 1 SOFTWARE LICENSE AGREEMENT
7
Software License Agreement
8
Grant of License
8
Term
8
Disclaimer of Warranty
8
Limitation of Liability
9
U.S. Government Restricted Rights
9
General
9
Security Precautions
10
Trademarks and Copyright
11
Trademarks
11
Copyright
11
Chapter 2 INTRODUCTION
13
Items Included with the Product
14
Lineup of Our Manuals
15
To Read Manuals in PDF (Portable Document Format) Files
17
About the CD-Rom
18
About the Client Software
19
Client Software for Printing Features
19
Client Software for Scan Features
19
Client Software for E-Filing Features
19
Client Software for Network Management
20
Client Software for Network Fax Features
20
Chapter 3 SYSTEM REQUIREMENTS
21
System Requirements
22
General Requirements
22
Printing Features
22
Scanning Features
23
Fax/Internet Fax Features
25
Electronic Filing (E-Filing) Features
26
Chapter 4 CONNECTING to the DEVICE
27
Connecting to the Usb Port
28
Connecting to the Network
29
Chapter 5 SETUP FLOW
32
Overview of Connections
32
Connecting the E-Studio2500C/3500C/3510C
32
Available Features under each Connection
33
Internet Connection
34
About Setup
35
Initial Device Setup
35
Setup the Network Document Processing System
35
Initial Device Setup
36
SETUP FLOW for Topaccess
37
Setup Flow for User Management
38
Setup Flow for Department Management
38
Setup Flow for User Management Setting
39
Setup Flow for User Authentication for Scan to E-Mail
41
Setup Flow for Printing Features
42
Setup Flow for Microsoft Windows Workstation
42
Setup Flow for Usb Printing
43
Setup Flow for Smb Printing
46
Setup Flow for Ipp Printing
48
Setup Flow for Printing Via Windows Print Server
50
Setup Flow for Novell Printing
52
Setup Flow for Macintosh Workstation
55
Setup Flow for Lpr Printing
56
Setup Flow for Unix Workstation
60
Setup Flow for FTP Printing
63
Setup Flow for E-Mail Printing
64
Setup Flow for Scanning Features
66
Setup Flow for Scan to File
66
Setup Flow for Scan to E-Mail
68
Setup Flow for Remote Scan
70
Setup Flow for Fax Features
71
Setup Flow for Network-Fax
71
Setup Flow for Internet Fax
73
Setup Flow for Onramp Gateway
75
Setup Flow for Offramp Gateway
77
Setup Flow for E-Filing Feature
79
Setup Flow for E-Filing Web Utility
79
Setup Flow for E-Filing Client Software
80
Toshiba E-STUDIO 3500C Network Administration Manual (78 pages)
Multifunction Digital Color Systems
Brand:
Toshiba
| Category:
All in One Printer
| Size: 2.46 MB
Table of Contents
Software License Agreement
3
Limitation of Liability
4
Trademarks and Copyright
5
Preface
6
Precautions in this Manual
9
Chapter 1 Setting up Network Server
11
Table of Contents
11
About Network Server Setup
14
Setting up Windows Print Server
15
Configuring the Windows Print Server
15
Setting up the Clients
16
Setting up Netware Print Server
17
Setting up the Netware in Bindery Mode
17
Setting up the Netware in NDS Mode
19
Setting up the Netware in NDPS Mode
20
Setting up the Netware in Iprint Mode
28
Setting up DNS and Mail Servers
31
Tips of Setting up the DNS and Mail Servers for Email
32
Tips of Setting up the DNS and Mail Servers for Internet Fax
33
Tips of Setting up the DNS and Mail Servers for Offramp Gateway
33
Setting up LDAP Authentication Service
34
Configuring DNS Forward and Reverse Lookup Zones
34
Configuring the Equipment Using Topaccess
38
Setting up Role Based Access Control
40
Configuring Role Based Access Control for Windows Server 2003
40
Chapter 2 Troubleshooting
46
Troubleshooting Overview
46
Network Connectivity Problems
46
Macintosh Environment
49
Cannot Discover Device
50
Cannot Ping the Device
52
Cannot Print from Client
53
Network or Touch Panel Display Disabled after LDAP Search
53
LDAP Authentication Takes a Long Time
54
Troubleshooting Hardware Errors
55
Common Errors
55
Device Status Indicators
56
Topaccess Error Messages
58
Troubleshooting Network Errors
62
Cannot See this Equipment
62
Cannot Print to this Equipment
63
Chapter 3 Appendix
65
Default Setting List
66
Default Settings for General Setting
66
Default Settings for Network Setting
66
Ldap Session
67
Dns Session
67
Ddns Session
67
Smb Session
67
Netware Session
68
Http Network Service
68
Smtp Client
68
Smtp Server
68
Pop3 Network Service
68
Ftp Client
69
Ftp Server
69
Snmp Network Service
69
Default Settings for Copier Setting
70
Default Settings for Fax Setting (Optional)
70
Default Settings for Save as File Setting
70
Default Settings for Email Setting
71
Default Settings for Internet Fax Setting
71
Default Settings for Printer Setting
71
Default Settings for Print Service
72
Index
75
Advertisement
Related Products
Toshiba 350/450
Toshiba e-Studio 350
Toshiba e-studio 3508a
Toshiba e-studio 3505ac
Toshiba 352/452
Toshiba 355
Toshiba E-STUDIO 351C
Toshiba E-STUDIO 3510C
Toshiba e-STUDIO 352
Toshiba e-studio 3555c
Toshiba Categories
Laptop
Air Conditioner
TV
LCD TV
All in One Printer
More Toshiba Manuals
Login
Sign In
OR
Sign in with Facebook
Sign in with Google
Upload manual
Upload from disk
Upload from URL