Sign In
Upload
Manuals
Brands
Brother Manuals
Scanner
ImageCenter ADS-2400N
Brother ImageCenter ADS-2400N Manuals
Manuals and User Guides for Brother ImageCenter ADS-2400N. We have
5
Brother ImageCenter ADS-2400N manuals available for free PDF download: User Manual, Service Manual, Product Safety Manual
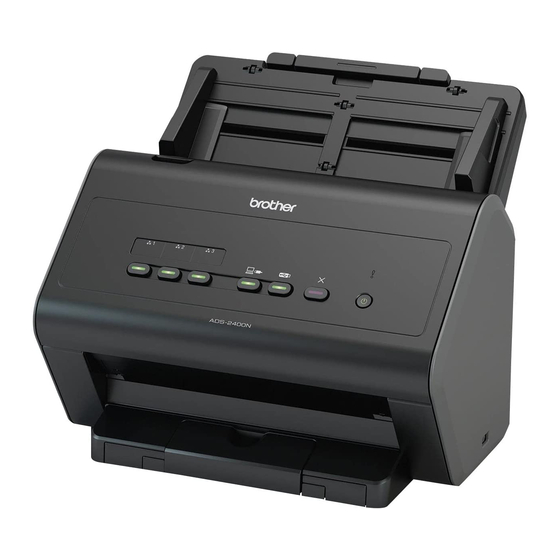
Brother ImageCenter ADS-2400N User Manual (321 pages)
Brand:
Brother
| Category:
Scanner
| Size: 28.06 MB
Table of Contents
Brother Numbers
2
For Customer Service
3
Getting Started
5
Table of Contents
12
Using the Documentation
17
Symbols and Conventions Used in the Documentation
17
About this Machine
18
Control Panel Overview (ADS-2400N / ADS-3000N)
19
Control Panel Overview (ADS-2800W / ADS-3600W)
21
Touchscreen LCD
22
Basic Operations
26
Shortcut Settings (ADS-2800W / ADS-3600W)
28
Adding Scan Shortcuts
28
Adding Web Connect Shortcuts
30
Adding Apps Shortcuts
31
Adding ID Card Shortcuts (ADS-3600W Only)
32
Changing Shortcuts
32
Editing Shortcut Names
33
Deleting Shortcuts
33
Recalling Shortcuts
33
Accessing Brother Utilities (Windows )
34
General Setup (ADS-2400N / ADS-3000N)
35
Set Date&Time
35
Set Sleep Time
39
Select Your Language
43
Assign the Scan Feature to the Network Device Key 1-3
47
General Setup (ADS-2800W / ADS-3600W)
50
Set the Backlight Brightness
50
Set the DIM Timer for the Backlight
50
Set the Home Screen
50
Select Your Language
51
Memory Storage
51
Beep Volume
51
Automatic Daylight Saving Time
52
Sleep Time
52
Auto Power off
53
Multifeed Detection
54
Setting Lock (ADS-2800W / ADS-3600W)
55
Set the Password
55
Change the Password
55
Turn Setting Lock On/Off
56
Secure Function Lock 3.0
57
Before You Use Secure Function Lock 3.0
58
Turning Secure Function Lock On/Off
59
Configure Secure Function Lock 3.0 Using Web Based Management
60
Setting up Card Authentication for Users (for ADS-3600W)
62
Setting up and Changing the Public Mode
62
Switching Users
64
Active Directory Authentication (ADS-2800W / ADS-3600W)
65
Turning Active Directory Authentication Lock On/Off
65
LDAP Authentication (ADS-2800W / ADS-3600W)
66
Turning LDAP Authentication Lock On/Off
66
2 Document Specifications
67
Acceptable Documents
67
Unacceptable Documents
69
Loading Capacity
70
Area Not to be Perforated
71
Conditions for Multifeed Detection
71
Scanning a Mixed Batch
72
Carrier Sheet Recommendations
73
Notes for Using Carrier Sheets
74
3 Scan Preparation
75
Set up Your Scanner
75
Load Documents
76
Standard-Size Documents
76
Business Cards
78
Plastic Cards
80
Documents Longer than Standard Size
81
Documents Printed on Non-Standard Size Paper
82
Documents with Facing Pages
83
Receipts, Clippings, Photos, and Other Documents
83
4 Prepare Your Network for Scanning with Your Computer
85
Before Scanning
85
Before Network Scanning
86
Network License (Windows )
86
Configure Network Scanning for Windows
86
Configure Network Scanning for Macintosh
90
Launch the Bradmin Utility (Windows )
92
5 Before Scanning
93
6 Scan Using Your Computer
94
Change the Controlcenter4 User Interface (Windows )
94
Scan Using Controlcenter4 in Home Mode (Windows )
97
Basic Scan
97
Scan Documents Using the Carrier Sheet
98
Scan Plastic Cards
100
Scan Documents to Sharepoint
102
Scan Using Controlcenter4 in Advanced Mode (Windows )
104
Basic Scan
104
Scan to Image
105
Scan to OCR
106
Scan to E-Mail
107
Scan to File
108
Change a Scan Button's Default Settings
109
Scan Using the Carrier Sheet
109
Scan Plastic Cards
110
Scan Documents to Sharepoint
112
Create a Custom Tab (Controlcenter4 Advanced Mode) (Windows ® )
114
Create a Custom Tab
114
Create a Custom Button in a Custom Tab
115
Change Scan Settings (Controlcenter4) (Windows )
116
Scan Using Controlcenter2 (Macintosh)
123
Scan to Image
124
Scan to OCR
125
Scan to E-Mail
126
Scan to File
127
Change a Scan Button's Default Settings
128
Scan Specific and Irregular Sized Documents Using the Carrier Sheet
128
Scan Plastic Cards
130
Register Your Favorite Scan Settings Using Controlcenter2 (Macintosh)
132
User-Defined Button
133
Change Scan Settings (Controlcenter2) (Macintosh)
136
Scan Using Nuance™ Paperport™ 14SE or Other Windows ® Applications
142
Scan Using Nuance™ Paperport™ 14SE
142
Scan Using Windows ® Photo Gallery or Windows ® Fax and Scan
158
Use ABBYY Finereader
159
Scan Using TWAIN Applications (Macintosh)
160
Scan Using TWAIN Applications (for Example, Presto
160
TWAIN Driver Settings
161
Scan Using Apple Image Capture (ICA Driver)
164
Scan Using Apple Image Capture
164
ICA Driver Settings
166
7 Scan Using the Control Panel
168
Save Scanned Documents on Your Computer in Home Mode
168
Save Scanned Documents on Your Computer in Advanced Mode
171
Save Scanned Documents on a USB Flash Drive
174
Save Scanned Documents on Mobile Devices
178
Scan Documents to an FTP Server
180
Start Web Based Management
180
Configure the FTP Default Settings
183
Scan Using FTP Server Profiles
188
Scan Documents to an SFTP Server
190
Start Web Based Management
190
Configure the SFTP Default Settings
193
Scan Using SFTP Server Profiles
198
Scan Documents to a Shared Folder / Network Location (Windows ® )
200
Start Web Based Management
200
Configure the Scan to Network Default Settings
203
Scan Using Scan to Network Profiles
208
Scan Documents to Sharepoint
210
Start Web Based Management
210
Set up a Scan to Sharepoint Profile
213
Scan Using Web Services (Windows Vista ® SP2 or Later, Windows ® 7, Windows ® 8 and Windows ® 8.1)
218
Configuring Settings for Scanning
219
Send Scanned Documents Directly to an Email Address (ADS-2800W / ADS-3600W)
220
Select an Email Address from the Address Book
221
Enter an Email Address Manually
222
Set up the Address Book (ADS-2800W / ADS-3600W)
223
Register an Email Address
223
Change an Email Address
223
Delete an Email Address
224
Set up a Group
225
Change a Group
225
Delete a Group
226
Upload Scanned Documents to the Web (ADS-2800W / ADS-3600W)
227
Change Scan to PC Settings (Windows )
228
Change Scan to PC Settings (Macintosh)
236
Scan Options Using the Touchscreen (ADS-2800W / ADS-3600W)
243
Skip Blank Page Function
243
Adjust the Scanning Position
243
Scan a Specific Area
244
Adjust Brightness
244
Adjust Contrast
244
Automatically Detect Whether a Document Uses Color
245
Color Tone Adjustment
245
Auto Color Detect Adjust
245
8 Managing the Machine from Your Computer
246
Monitor the Machine's Status from Your Computer (Windows ® )
246
Status Monitor Indicators
247
Monitor the Machine's Status from Your Computer (Macintosh)
249
Turn the Autoload Feature On/Off (Controlcenter2)
250
Set up the Brother Machine from Your Computer
251
9 Routine Maintenance
255
Clean the Outside of the Machine
255
Clean the Scanner and Rollers
257
Replace Supplies
261
Part Names, Numbers, and Life Cycles
261
Check Supplies Replacement Cycle (ADS-2400N / ADS-3000N)
263
Check Supplies Replacement Cycle (ADS-2800W / ADS-3600W)
266
Replace the Pick up Roller
266
Replace the Reverse Roller
269
Reset the Usage Counters
271
Reset the Usage Counters (ADS-2800W / ADS-3600W)
274
Packing and Shipping the Machine
275
10 Troubleshooting
278
Overview
278
Identifying Your Problem
278
Error and Maintenance Messages
278
Document Jam
282
Operational and Software Difficulties
284
Machine Information
291
Check the Serial Number (ADS-2400N / ADS-3000N)
291
Check the Serial Number (ADS-2800W / ADS-3600W)
293
WLAN Enable/Disable (ADS-2800W / ADS-3600W)
293
Reset Functions
294
Reset the Machine (ADS-2400N / ADS-3000N)
294
Reset the Machine (ADS-2800W / ADS-3600W)
295
A Specifications
296
General
296
Scanner
298
Direct Scan Feature (Scan to USB)
298
Interfaces
299
Network
299
Computer Requirements
300
B Appendix
301
Entering Text (ADS-2800W / ADS-3600W)
301
Inserting Spaces
301
Making Corrections
301
LED Indications (ADS-2400N / ADS-3000N)
302
Service Call Indications
313
Scan Settings
314
Index
320
Advertisement
Brother ImageCenter ADS-2400N User Manual (312 pages)
Brand:
Brother
| Category:
Scanner
| Size: 28.67 MB
Table of Contents
Brother Numbers
2
For Customer Service
3
Getting Started
4
Table of Contents
11
Using the Guide
16
Symbols and Conventions Used in the Guide
16
About this Machine
17
Control Panel Overview (ADS-2400N / ADS-3000N)
18
Control Panel Overview (ADS-2800W / ADS-3600W)
20
Touchscreen LCD
21
Basic Operations
24
Shortcut Settings (ADS-2800W / ADS-3600W)
25
Adding Scan Shortcuts
25
Adding Web Connect Shortcuts
27
Adding Apps Shortcuts
28
Adding ID Card Shortcuts (ADS-3600W Only)
29
Changing Shortcuts
29
Editing Shortcut Names
30
Deleting Shortcuts
30
Recalling Shortcuts
30
Accessing Brother Utilities (Windows )
31
General Setup (ADS-2400N / ADS-3000N)
32
Set Date&Time
32
Set Sleep Time
36
Select Your Language
40
Assign the Scan Feature to the Network Device Key 1-3
44
General Setup (ADS-2800W / ADS-3600W)
47
Set the Backlight Brightness
47
Set the DIM Timer for the Backlight
47
Set the Home Screen
47
Select Your Language
48
Memory Storage
48
Beep Volume
48
Automatic Daylight Saving Time
49
Sleep Time
49
Auto Power off
50
Multifeed Detection
51
Setting Lock (ADS-2800W / ADS-3600W)
52
Set the Password
52
Change the Password
53
Turn Setting Lock On/Off
53
Secure Function Lock 3.0 (ADS-2800W / ADS-3600W)
54
Before You Begin to Use Secure Function Lock 3.0
55
Turning Secure Function Lock On/Off
56
Configure Secure Function Lock 3.0 Using Web Based Management
57
Setting up the Card Authentication for Users (for ADS-3600W)
59
Setting up and Changing the Public User Mode
59
Switching Users
61
Active Directory Authentication (ADS-2800W / ADS-3600W)
63
Turning Active Directory Authentication Lock On/Off
63
LDAP Authentication (ADS-2800W / ADS-3600W)
64
Turning LDAP Authentication Lock On/Off
64
2 Document Specifications
65
Acceptable Documents
65
Unacceptable Documents
67
Loading Capacity
68
Area Not to be Perforated
69
Conditions for Multifeed Detection
70
Scanning a Mixed Batch
70
Carrier Sheet Recommendations
72
3 Scan Preparation
73
Set up Your Scanner
73
Load Documents
74
Standard-Size Documents
74
Business Cards
76
Plastic Cards
78
Documents Longer than Standard-Size
79
Documents Not Printed on Standard-Size Paper
80
Documents with Facing Pages
81
Receipts, Clippings, Photos, and Other Documents
81
4 Prepare Your Network for Scanning with Your Computer
83
Before Scanning
83
Before Network Scanning
83
Network Licence (Windows )
83
Configure Network Scanning for Windows
83
Configure Network Scanning for Macintosh
87
Launch the Bradmin Utility
89
5 Before Scanning
90
6 Scan Using Your Computer
91
Change the Controlcenter4 User Interface (Windows )
91
Scan Using Controlcenter4 in Home Mode (Windows )
94
Basic Scan
94
Scan Documents Using the Carrier Sheet
95
Scan Plastic Cards
97
Scan Documents to Sharepoint
99
Scan Using Controlcenter4 in Advanced Mode (Windows )
101
Basic Scan
101
Scan to Image
102
Scan to OCR
103
Scan to E-Mail
104
Scan to File
105
Change a Scan Button's Default Settings
106
Scan Using the Carrier Sheet
106
Scan Plastic Cards
108
Scan Documents to Sharepoint
110
Create a Custom Tab (Controlcenter4 Advanced Mode) (Windows ® )
112
Create a Custom Tab
112
Create a Custom Button in a Custom Tab
113
Change Scan Settings (Controlcenter4) (Windows )
114
Scan Using Controlcenter2 (Macintosh)
120
Scan to Image
121
Scan to OCR
122
Scan to E-Mail
123
Scan to File
124
Change a Scan Button's Default Settings
125
Scan Specific and Irregular-Sized Documents Using the Carrier Sheet
125
Scan Plastic Cards
127
Set up Your Favourite Scan Settings Using Controlcenter2 (Macintosh)
129
User-Defined Button
130
Change Scan Settings (Controlcenter2) (Macintosh)
133
Scan Using Nuance™ Paperport™ 14SE or Other Windows ® Applications
139
Scan Using Nuance™ Paperport™ 14SE
139
Scan Using Windows ® Photo Gallery or Windows ® Fax and Scan
154
Use ABBYY Finereader
155
Scan Using TWAIN Applications (Macintosh)
156
Scan Using TWAIN Applications (for Example, Presto
156
TWAIN Driver Settings
157
Scan Using Apple Image Capture (ICA Driver)
160
Scan Using Apple Image Capture
160
ICA Driver Settings
162
7 Scan Using the Control Panel
164
Save Scanned Documents on Your Computer in Home Mode
164
Save Scanned Documents on Your Computer in Advanced Mode
167
Save Scanned Documents on a USB Flash Drive
171
Save Scanned Documents on Mobile Devices
176
Scan Documents to an FTP Server
178
Start Web Based Management
179
Configure the FTP Default Settings
181
Scan Using FTP Server Profiles
185
Scan Documents to an SFTP Server
187
Start Web Based Management
188
Configure the SFTP Default Settings
190
Scan Using SFTP Server Profiles
194
Scan Documents to a Shared Folder / Network Location (Windows ® )
196
Start Web Based Management
197
Configure the Scan to Network Default Settings
199
Scan Using Scan to Network Profiles
203
Scan Documents to Sharepoint
205
Start Web Based Management
206
Set up a Scan to Sharepoint Profile
208
Scan Using Web Services (Windows Vista ® , Windows ® 7, Windows ® 8, Windows ® 8.1 and Windows ® 10)
213
Configuring Settings for Scanning
214
Send Scanned Documents Directly to an Email Address (ADS-2800W / ADS-3600W)
215
Select an Email Address from the Address Book
216
Enter an Email Address Manually
216
Set up the Address Book (ADS-2800W / ADS-3600W)
217
Register an Email Address
217
Change an Email Address
217
Delete an Email Address
218
Set up a Group
219
Change a Group
219
Delete a Group
220
Upload Scanned Documents to the Web (ADS-2800W / ADS-3600W)
221
Change Scan to PC Settings (Windows )
222
Change Scan to PC Settings (Macintosh)
230
Scan Options Using the Touchscreen (ADS-2800W / ADS-3600W)
237
Skip Blank Page Function
237
Adjust the Scanning Position
237
Scan Specify Area
238
Automatically Detect Whether a Document Uses Colour
238
Auto Colour Detect Adjust
238
8 Managing the Machine from Your Computer
239
Monitor the Machine's Status from Your Computer (Windows ® )
239
Status Monitor Indicators
240
Monitor the Machine's Status from Your Computer (Macintosh)
242
Turn the Autoload Feature On/Off (Controlcenter2)
243
Set up the Brother Machine from Your Computer
244
9 Routine Maintenance
248
Clean the Outside of the Machine
248
Clean the Scanner and Rollers
250
Replace Supplies
254
Part Names, Numbers, and Life Cycles
254
Check Supplies Replacement Cycle (ADS-2400N / ADS-3000N)
255
Check Supplies Replacement Cycle (ADS-2800W / ADS-3600W)
258
Replace the Pick-Up Roller
258
Replace the Reverse Roller
262
Reset the Usage Counters
264
Reset the Usage Counters (ADS-2800W / ADS-3600W)
267
Packing and Shipping the Machine
268
10 Troubleshooting
270
Overview
270
Identifying the Problem
270
Error and Maintenance Messages
270
Document Jam
274
Operational and Software Difficulties
276
Machine Information
282
Check the Serial Number (ADS-2400N / ADS-3000N)
282
Check the Serial Number (ADS-2800W / ADS-3600W)
284
WLAN Enable/Disable (ADS-2800W / ADS-3600W)
284
Reset Functions
285
Reset the Machine (ADS-2400N / ADS-3000N)
285
Reset the Machine (ADS-2800W / ADS-3600W)
286
A Specifications
287
General
287
Scanner
289
Direct Scan Feature (Scan to USB)
289
Interfaces
290
Network
290
Computer Requirements
291
B Appendix
292
Entering Text (ADS-2800W / ADS-3600W)
292
Inserting Spaces
292
Making Corrections
292
LED Indications (ADS-2400N / ADS-3000N)
293
Service Call Indications
304
Scan Settings
305
Index
311
Brother ImageCenter ADS-2400N User Manual (291 pages)
Brand:
Brother
| Category:
Scanner
| Size: 28.19 MB
Table of Contents
Brother Numbers
2
For Customer Service
3
Getting Started
5
General Information
17
About this Machine
18
Control Panel Overview (ADS-2400N / ADS-3000N)
19
Control Panel Overview (ADS-2800W / ADS-3600W)
21
Touchscreen LCD
22
Basic Operations
26
Shortcut Settings (ADS-2800W / ADS-3600W)
28
Adding Web Connect Shortcuts
30
Adding Apps Shortcuts
31
Adding ID Card Shortcuts (ADS-3600W Only)
32
Editing Shortcut Names
33
Accessing Brother Utilities (Windows ® )
34
General Setup (ADS-2400N / ADS-3000N)
35
Set Sleep Time
39
Select Your Language
43
Assign the Scan Feature to the Network Device Key 1-3
47
General Setup (ADS-2800W / ADS-3600W)
50
Select Your Language
51
Automatic Daylight Saving Time
52
Auto Power off
53
Multifeed Detection
54
Setting Lock (ADS-2800W / ADS-3600W)
55
Turn Setting Lock On/Off
56
Secure Function Lock 3.0 (ADS-2800W / ADS-3600W)
57
Before You Use Secure Function Lock 3.0
58
Turning Secure Function Lock On/Off
59
Configure Secure Function Lock 3.0 Using Web Based Management
60
Setting up Card Authentication for Users (for ADS-3600W)
62
Switching Users
64
Active Directory Authentication (ADS-2800W / ADS-3600W)
65
LDAP Authentication (ADS-2800W / ADS-3600W)
66
Document Specifications
67
Unacceptable Documents
69
Loading Capacity
70
Area Not to be Perforated
71
Scanning a Mixed Batch
72
Carrier Sheet Recommendations
73
Notes for Using Carrier Sheets
74
Scan Preparation
75
Load Documents
76
Business Cards
78
Plastic Cards
80
Documents Longer than Standard Size
81
Documents Printed on Non-Standard Size Paper
82
Documents with Facing
83
Before Scanning
85
Prepare Your Network for Scanning with Your Computer
86
Configure Network Scanning for Macintosh
90
Launch the Bradmin Utility (Windows ® )
91
Before Scanning
92
Scan Using Your Computer
93
Scan Using Controlcenter4 in Home Mode (Windows ® )
96
Scan Documents Using the Carrier Sheet
97
Scan Plastic Cards
99
Scan Documents to Sharepoint
101
Scan Using Controlcenter4 in Advanced Mode (Windows ® )
103
Scan to Image
104
Scan to E-Mail
106
Scan to File
107
Change a Scan Button's Default Settings
108
Scan Plastic Cards
109
Scan Documents to Sharepoint
111
Create a Custom Tab (Controlcenter4 Advanced Mode) (Windows ® )
113
Create a Custom Button in a Custom Tab
114
Change Scan Settings (Controlcenter4) (Windows ® )
115
Scan Using Brother Iprint&Scan (Mac)
122
Scan Using Nuance™ Paperport™ 14SE or Other Windows ® Applications
123
Use ABBYY Finereader
139
Scan Using TWAIN Applications (Macintosh)
140
TWAIN Driver Settings
141
Scan Using Apple Image Capture (ICA Driver)
144
ICA Driver Settings
146
Scan Using the Control Panel
148
Save Scanned Documents on Your Computer in Advanced Mode
151
Save Scanned Documents on a USB Flash Drive
154
Scan Documents to an FTP Server
158
Configure the FTP Default Settings
161
Scan Using FTP Server Profiles
166
Scan Documents to an SFTP Server
168
Configure the SFTP Default Settings
171
Scan Using SFTP Server Profiles
176
Scan Documents to a Shared Folder / Network Location (Windows ® )
178
Configure the Scan to Network Default Settings
181
Scan Using Scan to Network Profiles
186
Scan Documents to Sharepoint
188
Set up a Scan to Sharepoint Profile
191
Configuring Settings for Scanning
197
Send Scanned Documents Directly to an Email Address (ADS-2800W / ADS-3600W)
198
Select an Email Address from the Address Book
199
Enter an Email Address Manually
200
Set up the Address Book (ADS-2800W / ADS-3600W)
201
Delete an Email Address
202
Change a Group
203
Delete a Group
204
Upload Scanned Documents to the Web (ADS-2800W / ADS-3600W)
205
Change Scan to PC Settings (Windows ® )
206
Scan Options Using the Touchscreen (ADS-2800W / ADS-3600W)
214
Scan a Specific Area
215
Monitor the Machine's Status from Your Computer (Windows ® )
216
Managing the Machine from Your Computer
217
Set up the Brother Machine from Your Computer
219
Routine Maintenance
223
Clean the Scanner and Rollers
225
Replace Supplies
229
Check Supplies Replacement Cycle (ADS-2400N / ADS-3000N)
231
Check Supplies Replacement Cycle (ADS-2800W / ADS-3600W)
234
Replace the Reverse Roller
238
Reset the Usage Counters
240
Reset the Usage Counters (ADS-2800W / ADS-3600W)
243
Packing and Shipping the Machine
244
Troubleshooting
246
Document Jam
250
Operational and Software Difficulties
252
Machine Information
259
Check the Serial Number (ADS-2800W / ADS-3600W)
261
LAN Enable/Disable
262
Reset Functions
263
Reset the Machine (ADS-2800W / ADS-3600W)
264
A Specifications
265
Scanner
267
Interfaces
268
Computer Requirements
269
B Appendix
270
LED Indications (ADS-2400N / ADS-3000N)
271
Service Call Indications
282
Scan Settings
283
Advertisement
Brother ImageCenter ADS-2400N Service Manual (123 pages)
Advanced
Brand:
Brother
| Category:
Scanner
| Size: 12.07 MB
Table of Contents
Table of Contents
4
Safety Information
8
Chapter 1 Supplemental Specifications
15
General
15
Network Connectivity
17
Service Information
17
Consumable Parts
17
Paper
18
Paper Handling
18
Media Specifications
18
Scanner
19
Chapter 2 Error Indications & Troubleshooting
20
Introduction
20
Precautions
20
Checks before Commencing Troubleshooting
21
Overview
22
Cross-Section Drawing
22
Paper Feeding
23
Operation of each Part
24
Block Diagram
25
Main Components
26
Error Indications
27
LED Display When an Error Occurs
27
Status Error Messages
30
Troubleshooting
31
Troubleshooting for Error Display
31
All Scanned Data Are Printed as Blank Page
31
The Scanned Data Has Exceeded the Memory Capacity When Using USB
31
The Number of Files or Folders Has Exceeded the Upper Limit When Using USB
31
Security Communication Failed
31
Authentication by Set User Name and Password Failed
31
Access Request to the Server Timed out
31
Transmission with "To FTP", "To SFTP", "To Network" or "To Sharepoint" Failed
31
The Scanned Data Has Exceeded the Memory Capacity of the Machine
31
Time Setting Error
32
A Document Jam Occurred
32
The Document Scanning Sensor Detected that the Document was Longer than 5 M When the Long Paper Setting was Used
32
The Multi Feeding Sensor Detected Multiple Documents
33
The Front Cover Sensor Detected an Open
33
The Page Counter for the Reverse Roller Has Reached the Limit
33
The Page Counter for the Reverse Roller and Pick up Roller Have Reached the Limit
33
The Cleaning Counter Has Exceeded the Specified Amount
33
The Page Counter for the Pick up Roller Has Reached the Limit
33
The Page Counter of the Pick up Roller Has Reached the Limit and Its Cleaning Counter Has Exceeded the Specified Value
34
The Page Counter of the Reverse Roller Has Reached the Limit and Its Cleaning Counter Has Exceeded the Specified Value
34
The [X] Key was Pressed During the Scanning
34
An USB Device Not Within the Specification Is Connected to the USB Terminal, Resulting in Overcurrent
34
A Non-Supported USB Device Is Connected to the USB Terminal
34
USB Flash Memory Is Blocked from Writing
34
USB Flash Memory Is Disconnected or Inaccessible
34
Color Parameter in the ROM Does Not Match the First Side or Second Side CIS Unit
34
A Scanning Error Occurred While Scanning the Image
35
Email Address Has more than 64 Characters
35
The Number of Email Addresses Has Exceeded the Specified Amount
35
Cannot Connect to PC
35
Troubleshooting for Image Defects
36
Defect Examples
36
Troubleshooting According to Image Defect
36
Troubleshooting for Document Paper Feeding Problems
40
No Document Is Fed
40
Multiple Documents Are Fed
40
Document Becomes Jammed
41
Document Becomes Wrinkled
41
Troubleshooting for Software Problems
42
Does Not Respond to Operation from a Computer
42
Cannot Read Data
42
Troubleshooting for Control Panel Problems
43
Nothing Is Displayed on the LED
43
Control Panel Is Inoperable
43
Troubleshooting for Network Problems
43
Cannot Scan Via Network Connection
43
Troubleshooting for Other Problems
44
Machine Does Not Turn on
44
Cannot Update Firmware
44
Cannot Save Data in USB Flash Memory
44
Chapter 3 Disassembly/Reassembly
45
Safety Precautions
45
Packing
46
Screw Catalogue
47
Screw Torque List
48
Lubrication
49
Overview of Gears
50
Harness Routing
51
Disassembly Flow Chart
54
Disassembly Procedure
55
Reverse Roller / Pick up Roller
56
Bottom Cover ASSY / Exit Stopper
58
Back Cover
59
Side Cover L/R
61
USB Host PCB ASSY
63
Main PCB ASSY
64
Front Cover L/R
71
Front Cover ASSY
73
Panel Unit / Panel Flat Cable / Key PCB ASSY / Rubber Key
74
Second Side CIS Unit / Second Side CIS Flat Cable / Flat Cable Support Film
76
Eject Jam Sensor PCB
78
Document Scanning Position Sensor PCB
79
Paper Feed Jam Sensor PCB / Multi Feeding Sensor PCB ASSY (Sent)
82
Document Detection Sensor PCB ASSY
84
First Side CIS Unit / First Side CIS Flat Cable
85
Front Cover Sensor
87
Feed Belt / Feed Motor
88
Paper Feed Belt / Paper Feed Motor
90
Multi Feeding Sensor PCB ASSY (Receive)
92
Chapter 4 Adjusting and Updating Settings as Required after Parts Replacement
94
If You Replace the Main Pcb Assy
94
Installing Firmware
95
Checking Firmware Version
95
Installing Firmware
97
Setting by Country
99
Initializing the EEPROM of the Main PCB ASSY
99
Activating Memory Writing
99
Setting Serial Number
100
Setting Multi Feeding Sensor Threshold
103
Check Sensor Operation
104
Check Multi Feeding Operation
105
Checking Operation after Repair
105
Resetting to Factory Shipping State
106
If You Replace the Cis Unit
107
Acquire White Level Data and Set CIS Scan Area
107
Check Multi Feeding Operation
108
Checking Operation after Repair
108
If You Replace the Multi Feeding Sensor
110
Setting Multi Feeding Sensor Threshold
110
Checking Multi Feeding Sensor Operation
111
If You Replace the Pick up Roller / Reverse Roller
112
Resetting Pick up Roller / Reverse Roller Counters
112
Chapter 5 Service Functions
113
Maintenance Mode
113
How to Enter Maintenance Mode
113
Method of Entering Maintenance Mode for Service Personnel
113
Method of Entering End-User Accessible Maintenance Mode
113
List of Maintenance Mode Functions
114
Details of Maintenance Mode Functions
115
Change USB No. Return Value (End-User Accessible Maintenance Mode Only)
115
Initialize User Setting
115
Check ADF
115
Check Sensor Operation
116
Acquire White Level Data and Set CIS Scan Area
116
Save Netconfig Data
118
Chapter 6 Wiring Diagram
119
Wiring Diagram
119
Chapter 7 Periodical Maintenance
120
Periodical Maintenance Parts
120
Appendix 1 Serial Numbering System
121
Appendix 2 Deleting User Setting Information
122
Appendix 3 Installing the Maintenance Printer Driver
123
Brother ImageCenter ADS-2400N Product Safety Manual (17 pages)
Brand:
Brother
| Category:
Printer
| Size: 0.34 MB
Table of Contents
Compilation and Publication Notice
2
Choose a Safe Location for the Unit
2
General Precautions
4
Connecting the Unit Safely
6
Servicing the Unit
7
Lan Connection
9
Radio Interference
9
LAN Enable/Disable
10
Recycling Information in Accordance with the WEEE and Battery Directives
11
Open Source Licensing Remarks
14
Service Centre Locations
14
Unlawful Use of Scanning Equipment
14
Notice Regarding the Faithful Reproduction of Scanned Documents
15
Advertisement
Related Products
Brother ImageCenter ADS2500W
Brother ADS-2100
Brother ADS-2500We
Brother ADS-2000e
Brother ImageCenter ADS-2800W
Brother ADS-2200
Brother ADS-2700W
Brother ADS-4900W
Brother ADS-4700W
Brother ADS-3300W
Brother Categories
Sewing Machine
All in One Printer
Printer
Label Maker
Fax Machine
More Brother Manuals
Login
Sign In
OR
Sign in with Facebook
Sign in with Google
Upload manual
Upload from disk
Upload from URL