
Related Manuals for Miele KWT6832SGS


Summary of Contents for Miele KWT6832SGS
- Page 1 Operating and Installation Instructions Wine Storage Unit To prevent accidents and damage to the appliance, you must read all instructions supplied before installing for using the appliance. en - US M.-Nr. 10002240...
-
Page 2: Table Of Contents
Contents IMPORTANT SAFETY INSTRUCTIONS....... . . 5 Guide to the appliance ..........9 Accessories . - Page 3 Contents Bottle presenter ........... 33 Maximum capacity.
- Page 4 Contents Appliance dimensions ..........61 Dimensions when the door is opened .
-
Page 5: Important Safety Instructions
Inappropriate use can, however, explosion. lead to personal injury and damage Miele cannot be held liable for damage to property. resulting from improper or incorrect use of the appliance. To avoid the risk of accidents and... -
Page 6: Technical Safety
If the power cord is damaged, it In the event of any damage: must be replaced by a Miele authorized technician in order to protect the user – avoid open flames and anything that from harm. - Page 7 If storing alcohol with a high percentage proof, make sure it is tightly Defective components should only closed and stored upright in the be replaced by Miele original parts. appliance. Danger of explosion! Only with these parts can the manufacturer guarantee the safety of...
- Page 8 IMPORTANT SAFETY INSTRUCTIONS Disposal of your old appliance Use only genuine original Miele parts. If parts or accessories from other Before disposing of an old manufacturers are used, the warranty appliance, first make the door latches may become invalid. or locks unusable.
-
Page 9: Guide To The Appliance
Guide to the appliance a On/Off f X To lower the temperature of the entire appliance g Confirmation of a selection (OK b Optical interface button) (for Service use only) h Y To raise the temperature c Selection of the upper, middle, or i For accessing or leaving lower wine storage zone settings mode... - Page 10 Guide to the appliance Symbols in settings mode: Symbol Meaning Function Safety Lock For preventing inadvertent turning off changing of settings Acoustic Signals For turning the button tone on or off and the door alarm if it has been activated Demo Mode For turning off Demo mode (only visible when Demo...
- Page 11 Guide to the appliance a Lighting strip (in all three wine storage zones) b Selector* bottle presenter c Active charcoal filter (in all three wine storage zones) d Wooden shelves with labels (FlexiFrames with Noteboard) e Operation of the upper, middle, or lower wine storage zone f Isolator pads for the thermal insulation of the storage zones with decanting...
-
Page 12: Accessories
Stainless steel maintenance – Each application of the Miele Stainless steel maintenance stainless steel conditioner forms a The stainless steel cleaning cloth is water and dirt repellent protective soaked with the stainless steel coating. -
Page 13: How To Save Energy
How to save energy Normal Increased energy consumption energy consumption Installation / In a well-ventilated room. In an enclosed, Maintenance poorly ventilated room. Protected from direct In direct sunlight. sunlight. Away from heat sources Near a heat source (radiator, (radiator, range/oven). range/oven). -
Page 14: Turning The Appliance On And Off
Cleaning and Care ^ Immediately after removing the protective foil, treat stainless steel The electrical supply symbol t will surfaces with the Miele stainless steel then go out and the appliance will start conditioning agent supplied with the to cool. -
Page 15: Turning The Appliance Off
Turning the appliance on and off Turning the appliance off A different setting can be set for each storage zone. ^ Touch the On/Off button. ^ Tap the sensor button for the wine If this does not work, the safety lock storage zone for which you want to 0 is activated. -
Page 16: Turning Off For Longer Periods Of Time
Turning the appliance on and off Turning off for longer periods of time If the appliance is not going to be used for a longer period of time, ^ turn the appliance off, ^ unplug the appliance or trip the circuit breaker, ^ clean the appliance out and ^ leave the door slightly ajar to air the... -
Page 17: Selecting Additional Settings
Selecting additional settings Certain appliance settings can only be selected in the settings mode. The door alarm is automatically disabled when the appliance is in ^ By touching the X or Y button, you settings mode. can now select whether the safety lock is activated or deactivated: Safety lock 0 0: the safety lock is deactivated... -
Page 18: Acoustic Signals )
Selecting additional settings Acoustic signals ) The appliance features acoustic signals such as a keypad tone and acoustic alarm for the door and temperature ^ By touching the X or Y button you alarm. can now select: 0: Button tone off; Door alarm off You can turn the button tone or the door 1: Button tone off;... -
Page 19: Display Brightness S
Selecting additional settings Display brightness s You can adjust the brightness of the display to suit the light conditions in the room. ^ By touching the X or Y button, you can now alter the brightness of the The display brightness can be adjusted display: in steps from 1 to 3. -
Page 20: Sabbath Mode
Selecting additional settings Sabbath mode ¬ Turning on Sabbath mode The appliance offers a Sabbath mode for the purposes of religious observance. The following are turned off: ^ Touch the settings button. – the interior lighting when the door is All symbols available for selection will opened, appear in the display and the 0 symbol... - Page 21 Selecting additional settings The selected setting is applied, the ¬ symbol lights up. As soon as the ¬ symbol goes out in the display, Sabbath mode is turned ^ Turn off Sabbath mode after the Sabbath has passed. Turning off Sabbath mode ^ Touch the settings button to leave Sabbath mode.
-
Page 22: Temperature And Air Quality
Temperature and air quality Wine continues to mature depending on the surrounding conditions. The Type of wine Recommended length of time for which wine can be drinking kept in good condition will therefore temperature depend not only on the temperature but Light, fruity red +157°F to 60°F also on the air quality. -
Page 23: Setting The Temperature
Temperature and air quality Safety device in case of low ambient Setting the temperature temperatures The temperature can be set in all three zones independently of each other. The appliance is equipped with a safety thermostat to protect your wine against a sharp drop in temperature. -
Page 24: Possible Setting Values For The Temperature
Temperature and air quality The temperature being set will flash in Possible setting values for the the display. temperature The following information shows in the In all three zones, it is possible to set display when the buttons are tapped: temperatures between 41°F and 68°F (5°C and 20°C). -
Page 25: Air Quality And Humidity
Temperature and air quality DynaCool (constant humidity) m Air quality and humidity A conventional refrigerator with its low DynaCool raises the relative humidity humidity level is not the best place to inside the appliance. store wine. It is very important to store It also distributes the humidity and the wine in an atmosphere with a high temperature evenly around the interior... -
Page 26: Air Filtering With The Active Charcoal Filter
Temperature and air quality Turning off DynaCool The appliance uses slightly more energy and is a little noisier when the DynaCool function is turned on. You can turn it off occasionally if you wish. ^ Tap the button for constant humidity until it no longer lights up yellow. -
Page 27: Temperature And Door Alarm
Temperature and door alarm The appliance is equipped with an Turning off the audio alarm alarm system so that the temperature in If the audio alarm bothers you, it can be the three temperature zones cannot rise silenced. or fall unnoticed, thus possibly damaging the wine. -
Page 28: Door Alarm
Temperature and door alarm Door alarm An alarm will sound if the door has been left open for longer than 2 minutes. The three sensor buttons of the wine storage zones flash on the control panel. The alarm symbol ; lights up in the display. -
Page 29: Feature Lighting
Feature lighting The interior lighting can be set to Setting the brightness of the feature remain on when the door is closed so lighting your wines can be on display at all The brightness of the feature lighting times. can be adjusted. Each zone has its own light so all three zones are lit up. -
Page 30: Lighting Duration Of The Feature Lighting
Feature lighting The selected brightness is saved for all By tapping the button: three wine storage zones. The temperature reappears in the display. As soon as the appliance door is closed, the set brightness for the – lighting duration is reduced by 30 feature lighting takes effect. -
Page 31: Storing Wine Bottles
Storing wine bottles Wooden shelves Vibration and movement have a negative effect on the maturing process which can affect the taste of the wine. To avoid disturbing other bottles when removing a bottle of wine, store bottles of the same type beside each other on the same shelf. -
Page 32: Moving The Wooden Shelves
Storing wine bottles Moving the wooden shelves Adjusting the wooden shelves The wooden shelves can be removed The slats in the wooden shelves can be and replaced again if required. individually adjusted to suit, so that every bottle is stored in perfect safety ^ Pull the wooden shelf forward to the regardless of shape or size. -
Page 33: Labeling Wooden Shelves
Storing wine bottles Bottle presenter Labeling wooden shelves For quick and easy identification of the With the display rack, you can give wines in storage, you can use the chalk prominence to selected bottles so that supplied to annotate the magnetic they can be seen even with the door strips on the wooden shelves. -
Page 34: Maximum Capacity
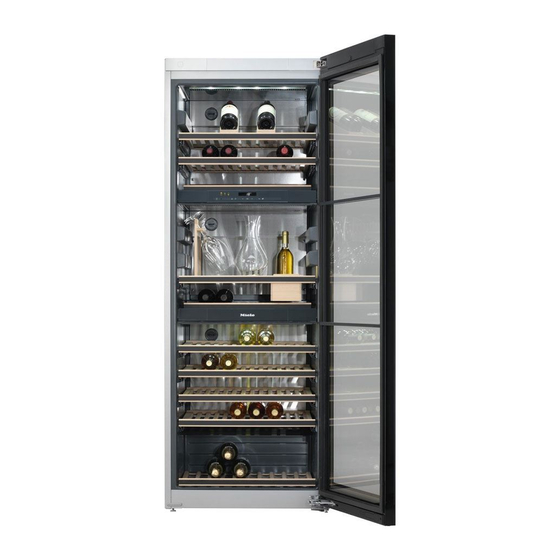
Storing wine bottles Maximum capacity Each wooden shelf has a maximum load-bearing capacity of 77 lbs (35 kg). Do not stack bottles on the wooden shelves. A total of 178 Bordeaux bottles (0.75 l) can be stored in the appliance, with 46 in the upper zone, 46 in the middle zone, and 86 in the lower zone. -
Page 35: Sommelier Set
Sommelier set Covering the runners ^ Place the four covers supplied a over the runners which are now visible with the thicker side of the The sommelier set can be used to have cover pointing forwards. your wine ready for drinking. You can store wine glasses and accessories in Glass holder the appliance, decant your wine, and... -
Page 36: Bottle Holder
Sommelier set Bottle holder Accessory box You can store opened wine bottles in You can place accessories like a the bottle holder c: corkscrew, sommelier knife, or chalk on, in, and under the accessory box e. ^ Remove the necessary number of slats on the wooden shelf and place bottle holder c on it. -
Page 37: Decanting Shelves
Sommelier set ^ Place the decanting shelf above an Decanting shelves isolator plate (see "Appliance Before you open a bottle of wine, we overview") so that it latches in the recommend that you let it lie on the rear. decanting shelf for a few days. Due to If you place the decanting shelf the incline of the decanting shelf, the below the accessory box, pull the top... -
Page 38: Additional Bottle Presenter
Sommelier set Additional bottle presenter For the proper presentation of your wines, you will receive two additional bottle presenters together with the sommelier set (see "Storing wine bottles – Bottle presenter"). -
Page 39: Automatic Defrosting
Automatic defrosting Condensate and frost can build up on the back wall of the appliance while the compressor is running. These are automatically removed and defrosted by the appliance. The condensate is drained away through a channel and drain hole, then fed into an evaporation system at the back of the appliance. -
Page 40: Cleaning And Care
Cleaning and Care – hard, abrasive sponges and WARNING! brushes, such as pot scrubbers, Danger of electric shock. – eraser sponges, Unplug refrigerator or disconnect – sharp metal scrapers. power. Danger of fire. Before cleaning Do not damage the refrigerant ^ Turn off the appliance. -
Page 41: Cleaning The Outer Casing, The Door, The Interior And Accessories
Clean the appliance at least once a ^ To clean stainless steel surfaces on month. the appliance, use the Original Miele Remove any soiling immediately so ceramic and stainless steel cooktop that it does not dry up. cleaner. This product contains... -
Page 42: Ventilation Slits
Cleaning and Care Ventilation slits After cleaning ^ The ventilation slits should be ^ Put all shelves and accessories back cleaned on a regular basis with a into the appliance. brush or vacuum cleaner. A build-up ^ Connect the appliance again and of dust will increase the energy turn it on. -
Page 43: Active Charcoal Filter
^ Touch the symbols for setting the place. temperature (X or Y), until the 2 Active charcoal filters can be symbol is displayed (means: the obtained from Miele or via the counter has been reset). Mieleusa.com website... - Page 44 Active charcoal filter ^ Touch the OK button to confirm your selection. The selected setting will be adopted and the — symbol will flash. ^ Touch the settings button to leave the settings mode. Otherwise the appliance will exit the settings mode automatically after approximately one minute.
-
Page 45: Frequently Asked Questions
With the aid of the following guide minor problems can be corrected without a ser- vice call. If, having followed the suggestions below, you still cannot resolve the problem, please contact Miele Service. To prevent cold from escaping, open the appliance doors as little as possible until the malfunction has been corrected. - Page 46 Frequently asked questions The compressor runs more and more often and for longer periods of time, and the temperature in the appliance drops. Problem Possible cause Solution ^ Correct the temperature The temperature in The temperature setting is setting. the appliance is too too low.
- Page 47 A dash is lit up Only temperatures within up/flashing in the the range of the appliance display. temperature will be displayed. ^ Contact Miele Service. "F1" to "F3" or "S1" There is a fault. to "S9" appear.
- Page 48 Frequently asked questions Interior lighting Problem Possible cause Solution ^ Contact Miele Service. The interior To avoid overheating, the lighting turns itself off lighting is not automatically after approx. Do not remove the working. 15 minutes if the door is left lighting covers.
- Page 49 Frequently asked questions Other problems Problem Possible cause Solution There is no This is not a fault. The alarm acoustic alarm tone has been turned off in although the door settings mode (see "Selecting has been open for additional settings - Acoustic a long time.
-
Page 50: Noises
Noises Normal noises What causes them Brrrrr... This noise may get louder for brief periods when the motor kicks on. Blub, blub..A gurgling noise can be heard when the refrigerant circulates through the pipes. Click..Clicking sounds occur whenever the thermostat turns the motor on or off. -
Page 51: After Sales Service
Miele appliance. Warranty Please note that unless expressly approved in writing by the Miele Ser- For additional information, please refer vice department, Extended Service to your warranty booklet. Contracts offered by other providers for... -
Page 52: Information For Dealers
Information for dealers Demo mode r The appliance can be demonstrated in the showroom or at exhibitions in "Demo mode". In this mode the control ^ Keep your finger on the X button until panel and interior lighting are active but the r symbol appears in the display. - Page 53 Information for dealers ^ Touch the X or Y button so that 0 appears in the display (Demo mode is inactive). ^ Touch the OK button to confirm your selection. The selected setting will be adopted and the s symbol will flash. ^ Touch the settings button to leave the settings mode.
-
Page 55: Installation Instructions
Installation Instructions Information is subject to change. Please refer to our website to obtain the most current product specification, technical & warranty information. To prevent accidents and machine damage read these instructions before installation or use. -
Page 56: Caring For The Environment
Caring for the environment Disposing of the packaging Disposal of your old appliance materials Old appliances may contain materials that can be recycled. Please contact The packaging is designed to protect your local recycling authority about the the appliance from damage during possibility of recycling these materials. -
Page 57: Electrical Connection
Electrical connection Failure to follow these Electrocution hazard instructions can result in death, fire, Electrical grounding required. This or electrical shock. appliance is equipped with a three-prong (grounding) polarized Improper connection of the plug for your protection against equipment grounding conductor possible shock hazards. - Page 58 Electrical connection The appliance must be connected to an Do not use an extension cord to electrical outlet that is properly connect the appliance to the power grounded. The electrical installation supply. Extension cords do not must comply with the applicable guarantee the required safety of the electrical code.
-
Page 59: Installation
Installation Climate class WARNING! The appliance is designed for use Danger of tilting! To avoid a hazard within a certain climate range (ambient due to instability of the appliance, it temperatures) and should not be used must be secured in accordance with outside this range. -
Page 60: Niche Floor
Aligning the appliance example. Door opening angle limiters are available from your Miele dealer or through Miele Service. ^ To align the appliance, adjust the front feet using the wrench supplied. -
Page 61: Appliance Dimensions
Installation Appliance dimensions Dimensions when the door is opened... -
Page 62: Adjusting The Door Hinge
Adjusting the door hinge The appliance is supplied right-hand Removing the door hinged. If left-hand hinging is required, ^ Open the appliance door as far as it the hinges must be changed. will go. You will need the following tools for changing the door hinging: Always change the door hinge with ^ Lift the cover a at the bottom of the... - Page 63 Adjusting the door hinge Turning the soft-close mechanism ^ Press the cover f together in the middle and remove it. ^ Push the soft-close mechanism c to the outer side. ^ Unscrew the screws e on the bottom of the appliance door to the left and right of the soft-close mechanism.
- Page 64 Adjusting the door hinge Caution! When the securing device b has been removed, do not move the front part of the soft-close mechanism in the direction shown! Danger of injury! ^ Remove the screw n. ^ Pull the soft-close mechanism c to the outer side and remove it.
- Page 65 Adjusting the door hinge Removing the door ^ Remove the bearing bolt l towards the top. ^ Remove the covers j at the top of Tip: Leave the screw k in the the appliance door using a small bearing bolt until the bearing bolt is slotted screwdriver.
- Page 66 Adjusting the door hinge Moving the hinge bracket ^ Place the covers m on both side front so that they lock into place. In the ^ Remove both covers m at the top of process, guide the over so that the the front of the appliance.
- Page 67 Adjusting the door hinge ^ Unscrew the hinge bracket q from ^ Remove the cover t from the bottom the bottom of the appliance. of the appliance. ^ Then remove the adjustable foot o ^ Loosen the screw u from the bottom downwards.
- Page 68 Adjusting the door hinge ^ Screw the bolt p onto the adjustable ^ Push in the bearing bolt l until the foot o from the top while making groove of the bolt is lined up with the sure it is inserted into the groove. borehole of the hinge bracket.
- Page 69 Adjusting the door hinge ^ Pull the joint of the soft-close ^ Make sure that you unscrew the mechanism c towards the mount r. adjustable foot from the hinge plate until it sits on the floor. Then unscrew the foot by a additional 90°. Adjusting the lateral alignment of the appliance door If the appliance door is not aligned with...
- Page 70 Adjusting the door hinge ^ Turn the cover downwards. ^ Loosen the three screws on the hinge bracket and push the hinge bracket to the left or right. ^ Retighten the screws. ^ Put the cover back into place. ^ Close the door and check that the side edges of the door are aligned with the side walls of the appliance.
- Page 72 KWT 6832 SGS en - US M.-Nr. 10002240 / 00...