Table of Contents
Advertisement
Advertisement
Table of Contents

Related Manuals for Bosch WAK2020SME


Summary of Contents for Bosch WAK2020SME
- Page 1 Washing machine WAK2020SME en Instruction Manual and Installation Instructions...
-
Page 2: Your New Washing Machine
Your new washing machine Display rules : Warning! You have chosen a Bosch washing machine. This combination of symbol and signal word indicates a possibly dangerous Please take a few minutes to read and situation. Not heeding the warning can become familiar with the advantages of cause death or injuries. -
Page 3: Table Of Contents
Contents I n s t r u c t i o n M a n u a l a n d I n s t a l l a t i o n I n s t r u c t i o n s . -
Page 4: Intended Use
Intended use ..After-sales service Intended use I n t e n d e d u s e ..Consumption rates For private domestic use only. ■... -
Page 5: Safety Instructions
Safety instructions Reaching into the drum Safety instructions ■ when it is turning can cause injuries to hands. S a f e t o n s u c t i i n s t r Electrical safety Do not reach into the drum when it is turning. -
Page 6: Safety For Children
Safety instructions Safety for children Warning Risk of poisoning! Warning Detergents and care products Danger of death! may be poisonous if If children play with the washing consumed. machine, they may get into life- Keep detergents and care threatening situations or injure products out of the reach of themselves. -
Page 7: Environmental Protection
Environmental protection : The display Energy-saving mode ■ Environmental panel lighting goes out after a few minutes and flashes. To protection Start activate the lighting, press any o n m e n t a l E n v i r c t i p r o t e button. -
Page 8: Main Points In Brief
Main points in brief Main points in brief M a i n p o i n t b r i e Connect the mains Turn on the water Sort the laundry. Open the door. plug. tap. -------- Select a programme Observe the Load the laundry . -
Page 9: Getting To Know The Appliance
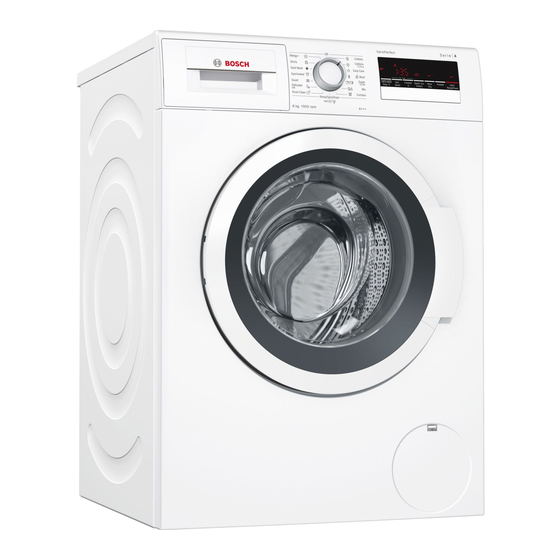
Getting to know the appliance Getting to know the appliance i n g G e t t k n o w t h e a n c e a p p l i Washing machine ( Detergent drawer ~ Page 18 8 Washing machine door with window handle 0 Controls/display elements 9S Open the washing machine door... -
Page 10: Control Panel
Getting to know the appliance Control panel ( Temp. °C (temperature), rpm 0 (spin @ Programme selector for selecting a speed), Ready in time for changing the programme and for switching the machine on programme default settings and off 0 G Speed Perfect , F Eco Perfect, H Display panel for settings and information Q Easy Iron additional programme settings 8 Start/Pause A for starting, interrupting... -
Page 11: Laundry
Laundry You can find examples of levels of Laundry soiling on ~ Page 12 – : Do not prewash, select the Light L a u n d r y Speed Perfect setting if Prepare the laundry necessary – Normal Caution! –... -
Page 12: Detergent
Detergent Detergent Saving Soiling/note Reduced temper- Light g e n t D e t e r ature and deter- No visible dirt or stains. Cloth- Correct selection of detergent gent quantity as ing has taken on some body per the recom- odour, e.g.: The care label is crucial for selecting mended dosage... -
Page 13: Overview Of Programmes
Overview of programmes Overview of programmes O v e r v i p r o g r a m m e s Programmes on the programme selector Programme/type of laundry/information Settings Max. load; Name of programme Short explanation of the programme or the fabric for which it is suita- * Reduced load for SpeedPerfect ble. - Page 14 Overview of programmes Programme/type of laundry/information Settings W l Wool Max. 2 kg Hand or machine-washable fabrics made of wool or that contain Cold - 40 °C wool; – – – ... 800 rpm particularly gentle wash programme to prevent shrinkage of laundry, with longer programme breaks (fabrics rest in the detergent solu- tion) Notes...
-
Page 15: Starching
Overview of programmes Programme/type of laundry/information Settings ; Anti-allergy Max. 7 kg / 4* kg Hard-wearing fabrics Cold - 60 °C Note: Longer washing and rinsing at a higher water level for particu- – – – ... 1000** rpm larly sensitive skin F, G, Q Max. -
Page 16: Programme Default Settings
Programme default settings The maximum speed that can be set Programme default depends on the model and programme that have been selected. settings Overview of programmes ~ Page 13 P r o g r a m m e d e f a u l i n g s s e t t The temperature, spin speed and... -
Page 17: Additional Programme Settings17
Additional programme settings The symbols and ¼ light up on Operating the the display panel. The washing machine door can be opened and appliance laundry can be added. Close the washing machine door. i n g O p e r a t t h e a n c e a p p l i... -
Page 18: Change The Programme Default Settings
Operating the appliance Change the programme Notes Mix items of laundry of varying sizes. default settings ■ Laundry items of different sizes distribute themselves better during You can use the default settings or the spin cycle. Individual items of change them. laundry may lead to imbalances. -
Page 19: Start The Programme
Operating the appliance Pull out the detergent drawer as far Measuring as possible. Measure the detergent and care Add detergent and/or care products. products according to: Close the detergent drawer. Water hardness; ask your water ■ Measuring aid* for liquid detergent supply company The manufacturer's instructions on *depending on the model... -
Page 20: Childproof Lock
Operating the appliance inadvertently adjusted, you can select If the display panel shows: the childproof lock as follows. and ¼ symbols lit up, Both ■ it is possible to add laundry. Childproof lock A flashing symbol, wait until ■ and ¼ light up. You can lock the washing machine to Do not open the door until both... -
Page 21: Programme End
Operating the appliance To end the programme, set the Always wait for the end of the ■ programme selector to 0 Spin/ programme, otherwise the appliance [ Empty or select a spin speed. Then may still be locked. Then switch on press the /Pause A button. -
Page 22: Sensors
Sensors VoltCheck Sensors The automatic voltage control system S e n s o r s detects that the voltage has fallen to an Automatic load sensing impermissible value. The colon in the "Ready in" display flashes on the display The automatic load sensing function panel. -
Page 23: Setting The Signal
Setting the signal Setting the signal i n g S e t t t h e s i g n a l 1. Activate the setting mode for the signal volume Set to Ú. Press and hold the 0 button and turn one Press and hold the button for approx. -
Page 24: Cleaning And Maintenance
Cleaning and maintenance descaling agent. Suitable descalers can Cleaning and be obtained via our website or from our after-sales service. maintenance C l e a n i a n d e n a n c e m a i n t Detergent drawer and housing Warning Danger of death! -
Page 25: The Drain Hose At The Siphon Is Blocked
Cleaning and maintenance Switch off the appliance. Disconnect the mains plug. Open and remove the service flap. To prevent unused detergent from Note: flowing straight into the drain during the next wash: Pour 1 litre of water into Take the drain hose out of the compartment and start the [ Empty... -
Page 26: Faults And What To Do About Them
Faults and what to do about them. Clean the filter on the water tap: Warning Remove the hose from the water tap. Risk of scalding! Clean the filter with a small brush. When you are washing at high temperatures, there is a risk of scalding if you come into contact with detergent solution and laundry. -
Page 27: Information On The Display Panel
Faults and what to do about them. Information on the display panel Display Cause/remedial action The washing machine door is unlocked. It is possible to add laundry. The temperature is too high. Wait until the temperature falls. ■ Water level too high. Not possible to add laundry. If necessary, close the wash- ■... - Page 28 Faults and what to do about them. Faults Cause/remedial action Washing machine door Safety function active. Programme stopped? ■ cannot be opened. – – – 0 (Rinse hold = without final spin) selected? ■ Can be opened by emergency release only? ■...
-
Page 29: After-Sales Service
After-sales service Faults Cause/remedial action Detergent residues on the Occasionally, phosphate-free detergents contain water-insoluble residues. ■ laundry. Select O Rinse or brush the laundry after washing. ■ NO appears on the dis- Water level too high. Not possible to add laundry. Close the washing ■... -
Page 30: Consumption Rates
Consumption rates Energy efficiency classes Consumption rates Annual energy consumption C o n s u m p t i r a t e s Noise levels when washing Energy label Noise levels when spinning Spin efficiency class Here, a sample energy label with Load explanations is provided. -
Page 31: Consumption Values Table
Consumption rates Consumption values table Programme Load Energy consumption*** Water*** Programme dura- tion*** i Cottons 20 °C 7 kg 0,39 kWh 69 l 2 3/4 h i Cottons 40 °C* 7 kg 1,08 kWh 69 l 2 3/4 h i Cottons 60 °C 7 kg 1,30 kWh 69 l... -
Page 32: Spin Efficiency Class
Technical data Spin efficiency class Positioning and The spin efficiency class of your connecting appliance can be seen on the energy label. ~ Page 30 i o n i n g P o s i t a n d c o n n e c t i Included with the appliance The percentage of residual moisture for the spin efficiency class in question can... -
Page 33: Safety Instructions
Positioning and connecting under high water pressure. To prevent H Elbow for securing the water drain hose* leaks and water damage, you must P Water supply hose on standard/Aqua- follow the instructions in this section. Secure models Notes *depending on the model In addition to the safety information ■... -
Page 34: Removing The Transport Locks
Positioning and connecting Do not remove the appliance covering Unscrew and remove all four plate. transport brace screws. Remove the sleeves. To do this, Notes remove the mains cable from the Recess width of 60 cm required. holders. ■ Only install the washing machine ■... -
Page 35: Water Inlet
Positioning and connecting Only tighten the screw connections ■ by hand. If the screw connections are tightened too much with a tool (pliers), the thread may be damaged. Optimum water pressure in the supply network 100 kPa (1 bar) At least 1000 kPa (10 bar) Maximum When the tap is open, the water flow is... -
Page 36: Water Outlet
Positioning and connecting Open the water tap carefully, Note: checking the leak tightness of the connection points. The screw connection is under mains water pressure. Water outlet Drainage into a siphon ■ Caution! The connection point must be Water damage secured using a hose clamp with a diameter of 24-40 mm (available If the drain hose slips out of the wash... -
Page 37: Electrical Connection
Positioning and connecting The lock nuts on all four appliance No multiple plugs/couplings or ■ feet must be screwed tightly against extension cables are used. the housing. If an earth-leakage circuit breaker is ■ used, only a type which displays this symbol is used: z. -
Page 38: Transportation
Positioning and connecting Press Insert all four sleeves. Start Switch off the appliance at the end of Clip the mains cable securely in the the programme. holders. Insert and tighten the screws. Your washing machine is now ready to use. Transportation e.g. - Page 40 01450 2655 0.03 € per minute at peak. Off peak 0.0088 € per minute. You can find the contact information for all countries in the attached after-sales service directory. Robert Bosch, Hausgeräte GmbH Carl-Wery-Straße 34 81739 München DEUTSCHLAND *9000866223* 9000866223...