Epson TM-L90 User Manual
Label printer with peeler
Hide thumbs
Also See for TM-L90:
- Technical reference manual (212 pages) ,
- Service manual (148 pages) ,
- Developer's manual (140 pages)
Table of Contents
Advertisement
Quick Links
English
TM-L90
with Peeler
User's Manual. . . . . . . . . . . . . . . . . . . . 1
Bedienungsanleitung . . . . . . . . . . . . . . 13
Gebruikershandleiding . . . . . . . . . . . . . 21
Manuel de l'utilisateur . . . . . . . . . . . . . . 29
Manual do utilizador . . . . . . . . . . . . . . . 37
Manual del usuario. . . . . . . . . . . . . . . . 45
Manuale dell'utente . . . . . . . . . . . . . . . 53
405230503
Advertisement
Table of Contents

Related Manuals for Epson TM-L90


Summary of Contents for Epson TM-L90
- Page 1 English TM-L90 with Peeler User’s Manual....1 Bedienungsanleitung ....13 Gebruikershandleiding .
-
Page 2: Printer Parts
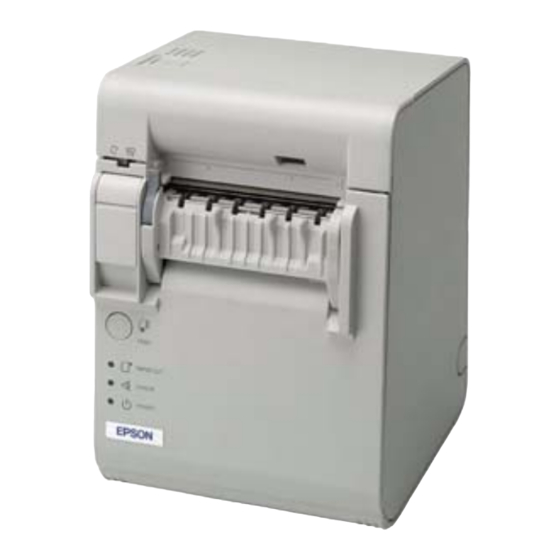
English Printer Parts power switch cutter cover peeler open lever label peeler detector peeler cover cover open lever roll paper control panel cover DIP Switch Tables Serial interface (DIP switch 1) Parallel interface (DIP switch 1) Function Function Power switch function Disabled Enabled Power switch function Disabled Enabled... - Page 3 English TM-L90 with Peeler Specifications Print method Thermal line 8 dots/mm × 8 dots/mm (203 dpi × 203 dpi) Print font Font A: 12 × 24 Font B: 9 × 17, except for Japanese (10 × 24) Font C: 8 × 16 (only for Japanese) Kanji font A: 24 ×...
- Page 4 English...
-
Page 5: Emc And Safety Standards Applied
Neither is any liability assumed for damages resulting from the use of the information contained herein. Neither Seiko Epson Corporation nor its affiliates shall be liable to the purchaser of this product or third parties for damages, losses, costs, or expenses incurred by purchaser or third parties as a result of: accident, misuse, or abuse of this product or unauthorized modifications, repairs, or alterations to this product, or (excluding the U.S.) failure to strictly comply with Seiko Epson Corporation’s operating and... -
Page 6: Safety Precautions
The connection of a non-shielded printer interface cable to this printer will invalidate the EMC standards of this device. You are cautioned that changes or modifications not expressly approved by Seiko Epson Corporation could void your authority to operate the equipment. -
Page 7: Caution Labels
It also flashes when the printer is in a wait FEED status for the button to be pressed. FEED button Feeds the roll paper. TM-L90 with Peeler User’s Manual 3... -
Page 8: Power Switch Cover
Install the printer in a location, such as at the edge of a counter, where the backing paper will not accumulate near the paper exit. 4 TM-L90 with Peeler User’s Manual... -
Page 9: Installing Roll Paper
Pull the peeler open lever forward and open the peeler cover. (See the illustration on the left below.) Pull the roll paper cover open lever forward, and open the roll paper cover. (See the illustration on the right below.) Insert the roll paper, as shown below. TM-L90 with Peeler User’s Manual 5... - Page 10 50 mm {2"}, and 1 label is issued when it is 50 mm {2"} or more. After the paper is automatically fed and the first label comes out, the PAPER OUT LED starts flashing. 6 TM-L90 with Peeler User’s Manual...
- Page 11 Do not block the label peeler detector with your fingers, or anything else while the label issuing is in progress. This may cause the printer to feed the following label. TM-L90 with Peeler User’s Manual 7...
-
Page 12: Troubleshooting
Do not damage the thermal head by touching it with your fingers or any hard object. Epson recommends cleaning the thermal head periodically (generally every 6 months) to maintain receipt print quality. - Page 13 You can clean them easily if you use a wasted label, as shown in the illustration. Note: Do not use any alcohol based solvents for cleaning. Such solvents may enter the roller shaft and cause a malfunction of the peeler. TM-L90 with Peeler User’s Manual 9...
- Page 14 Using Different Paper Widths Be sure to set the paper width with the memory switch to match printing to the print width. (For detailed information on the memory switch, see the TM-L90 with Peeler Technical Reference Guide.) Also, do not increase the paper width after you have used a narrower width. For example, do not use 60 mm {2.36"} and then change to 80 mm {3.15"}.
-
Page 15: Connecting Cables
(Even if you can see two holes, this is the only one to put the screw in.) hole for screw Connecting Cables To connect cables, first remove the bottom of the cover as shown in the illustration. TM-L90 with Peeler User’s Manual 11... - Page 16 If you use the cover operation label included in the package, attach it in one of the following locations: a) Side of the operation panel b) Beside the power switch c) Side of the printer 12 TM-L90 with Peeler User’s Manual...