Kenwood VR-606 VR-616 Instruction Manual
Kenwood audio video surround receiver instruction manual
Hide thumbs
Also See for VR-606 VR-616:
- Instruction manual (61 pages) ,
- Service manual (23 pages) ,
- Service manual (23 pages)
Table of Contents
Advertisement
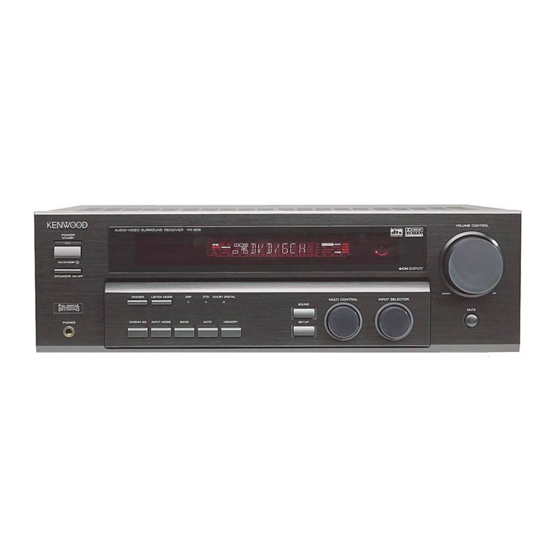
AUDIO VIDEO SURROUND RECEIVER
VR-606
VR-616
INSTRUCTION MANUAL
KENWOOD CORPORATION
This instruction manual is for some models. Model availability and features
(functions) may differ depending on the country and sales area.
About the supplied remote control
Compared to standard remote controls, the remote control supplied with this receiver has several
operation modes. These modes enable the remote control to control other audio/video components. In
order to effectively use the remote control it is important to read the operating instructions and obtain a
proper understanding of the remote control and how to switch its operation modes (etc.).
Using the remote control without completely understanding its design and how to switch the operation
modes may result in incorrect operations.
B60-5228-00 00
ID
(K, P)
0111
Advertisement
Table of Contents

Related Manuals for Kenwood VR-606 VR-616


Summary of Contents for Kenwood VR-606 VR-616
- Page 1 AUDIO VIDEO SURROUND RECEIVER VR-606 VR-616 INSTRUCTION MANUAL KENWOOD CORPORATION This instruction manual is for some models. Model availability and features (functions) may differ depending on the country and sales area. About the supplied remote control Compared to standard remote controls, the remote control supplied with this receiver has several operation modes.
-
Page 2: Before Applying The Power
If any accessories are missing, or if the unit is damaged or fails to operate, notify your dealer immediately. If your unit was shipped to you directly, notify your shipper immediately. Kenwood recommend that you retain the original carton and packing materials in case you need to move or ship the unit in the future. -
Page 3: Table Of Contents
Saving energy reduces air pollution and lowers utility bills. NERGY STAR ® Partner, Kenwood As an Corporation has determined that this product NERGY STAR ®... -
Page 4: How To Use This Manual
Before applying the power How to use this manual This manual is divided into four sections, Preparations, Operations, Remote Control, and Additional Information. Preparations Shows you how to connect your audio and video components to the receiver and prepare the surround processor. Since this receiver works with all of your audio and video components, we will guide you in setting up your system to be as easy as possible. -
Page 5: Names And Functions Of Parts
Names and functions of parts Main Unit CINEMA EQ. indicator Speaker indicator MUTE indicator CLIP indicator TONE indicator Speaker selection indicators LOUDNESS indicator Input channel indicators Output channel indicators 96kHzfs indicator POWER STANDBY ON ⁄ STANDBY SPEAKERS ON ⁄ OFF DIMMER CINEMA EQ PHONES... -
Page 6: Remote Control Unit
Names and functions of parts Remote control unit This remote control unit can be use not only for Kenwood products but also for other non-Kenwood products by setting the appropriate manufacturer’s setup codes. 1 SOURCE Use to turn the other components ON/OFF. -
Page 7: Setting Up The System
Setting up the system Make connections as shown in the following pages. When connecting the related system components, be sure to refer to the instruction manuals supplied with the components you are connecting. Do not connect the power cord to a wall outlet until all connections are completed. -
Page 8: Connecting Audio Components
Setting up the system Connecting audio components 75Ω ANTENNA VIDEO MONITOR VIDEO 2 VIDEO 1 VIDEO 1 SYSTEM CONTROL jacks S VIDEO SYSTEM CONTROL MONITOR CD / DVD OPTICAL VIDEO 2 COAXIAL DIGITAL IN FRONT CENTER SPEAKERS SPEAKER (8-16Ω) (8-16Ω) AUDIO DVD / 6CH INPUT CENTER... -
Page 9: Connecting Video Components
Setting up the system Connecting video components 75Ω ANTENNA VIDEO MONITOR VIDEO 2 VIDEO 1 VIDEO 1 VIDEO VIDEO 2 VIDEO 1 Video IN/OUT Video inputs and outputs (Yellow RCA pin cords) A video component with digital audio outputs should be connected to the VIDEO 2 jacks. S VIDEO MONITOR S VIDEO... -
Page 10: Digital Connections
DIGITAL IN To connect an LD player with a DIGITAL RF OUT, connect the LD player to the KENWOOD RF digital demodulator (DEM-9991D). Next, connect the DIGITAL OUT jacks of the demodulator to the DIGITAL IN jacks of the receiver. -
Page 11: Connecting A Dvd Player (6-Channel Input)
Setting up the system Connecting a DVD player (6-channel input) If you have connected a DVD player to the receiver with digital connection, be sure to read the “Input mode settings” section carefully. VIDEO VIDEO 2 VIDEO 1 VIDEO MONITOR VIDEO 2 VIDEO 1 VIDEO 1... -
Page 12: Connecting The Speakers
Setting up the system Connecting the speakers Front Speakers Right VIDEO MONITOR VIDEO 2 VIDEO 1 VIDEO 1 Powered sub woofer (For VR-606) Left Center Speaker FRONT CENTER SPEAKERS SPEAKER (8-16Ω) (8-16Ω) WHITE GREEN SYSTEM CONTROL MONITOR CD / DVD OPTICAL VIDEO 2 75Ω... -
Page 13: Connecting The Terminals
Setting up the system Connecting the terminals 1 Strip coating. 2 Push the lever. 3 Insert the cord. 4 Return the lever. • Never short circuit the + and – speaker cords. • If the left and right speakers are connected inversely or the speaker cords are connected with reversed polarity, the sound will be unnatural with ambiguous acoustic imaging. -
Page 14: Connecting The System Control
2. Do not connect system control cords to any components other than those specified by KENWOOD. It may cause a malfunction and damage your equipment. 3. Be sure the system control plugs are inserted all the way in to the system control terminals. -
Page 15: Preparing For Surround Sound
Preparing for surround sound Speaker settings To enable you to obtain optimum enjoyment from the receiver’s listening modes, make sure to complete the speaker settings (subwoofer, front, center, and surround speakers) as described below. It is not advisable to select “LRG” (large) for front, center, and surround speakers as this will cause the speakers to malfunction. - Page 16 Preparing for surround sound If you have selected other than “LRG” as the center speaker setting, 1 SURR ON : Surround speaker setting mode to the receiver is 2 SURR OFF : Surround speaker setting mode to the receiver is OFF.
-
Page 17: Normal Playback
Normal playback Preparing for playback Some preparatory steps are needed before starting playback. SPEAKERS POWER ON/OFF ON/STANDBY AUTO INPUT SELECTOR INPUT MODE Turning on the receiver 1 Turn on the power to the related components. 2 Turn on the power to this receiver by pressing POWER ON/ STANDBY key. -
Page 18: Adjusting The Sound
Normal playback Adjusting the sound SPEAKERS ON/OFF CINEMA EQ PHONES MULTI CONTROL MUTE Joystick (MULTI CONTROL 5/∞) LOUDNESS TONE Adjusting the TONE (remote control only) You can adjust the sound quality when the receiver is in the PCM stereo and analog stereo mode. 1 Press the TONE key to select the TONE mode. -
Page 19: Recording
Recording Recording audio (analog sources) INPUT SELECTOR Recording a music source 1 Use the INPUT SELECTOR knob to select the source (other than “MD/TAPE”) you want to record. 2 Set the MD or TAPE recorder to record. 3 Start playback, then start recording. Recording video 1 Use the INPUT SELECTOR to select the video source (other than “VIDEO 1”) you want to record. -
Page 20: Listening To Radio Broadcasts
Listening to radio broadcasts The receiver can store up to 40 stations in the memory and recall them by one-touch operation. Tuning radio stations MULTI CONTROL BAND AUTO INPUT SELECTOR Joystick (MULTI CONTROL 5/∞) TUNING 1 / ¡ AUTO Use the INPUT SELECTOR knob or TUNER key to select the tuner. -
Page 21: Receiving Preset Stations
Listening to radio broadcasts Receiving preset stations Numeric keys Press the TUNER key to select tuner as the source. Enter the number of the preset station you want to receive (up to “40”). Press the numeric keys in the following order: For “15”, press ... -
Page 22: Ambience Effects
Ambience effects This receiver is equipped with listening modes that allow you to enjoy an enhanced sonic ambience with a variety of video sources. In order to obtain the optimum effect from the surround modes, make sure to input the proper speaker settings beforehand. - Page 23 Ambience effects DSP mode The DSP mode lets you add the atmosphere of a live concert or hall to almost any type of program source. These modes are particularly effective when used with stereo program sources, like CD, television, and FM radio. You might enjoy trying the ARENA, JAZZ CLUB, THEATER, STADIUM or DISCO mode the next time you watch a concert or sporting event! Center speaker...
-
Page 24: Surround Play
Ambience effects Surround play The DTS compatible models can reproduce a CD, DVD, or LD carrying the DTS mark. DOLBY DIGITAL can be used when playing DVD or LD software bearing mark and DOLBY DIGITAL format digital broadcasts (etc.). DOLBY PRO LOGIC can be used when playing video, DVD, or LD software bearing the mark. -
Page 25: Dvd 6-Channel Playback
Ambience effects DVD 6-channel playback Using a DVD player or the like equipped with six (5.1) output channels and the receiver, you can enjoy surround sound playback. When you try to play a disc other than Dolby Digital such as DTS CD, no sound is produced or, noise may be heard. - Page 26 Ambience effects Midnight mode (Dolby Digital mode only) When watching movies at night , you might not be able to raise the volume as loud as normal. Midnight mode compresses the dynamic range of previously specified parts of the Dolby Digital sound track (like scenes with sudden increases in volume) to minimize the difference in volume between the specified and non-specified parts.
- Page 27 Ambience effects Subwoofer adjustment It is easy to adjust the volume of the subwoofer using the remote control. 1 Press the SOUND key repeatedly until “SW” appears on the display. 2 Use MULTI CONTROL knob or keys to adjust the volume. •...
-
Page 28: Basic Remote Control Operations For Other Components
Find the setup code of the component to be registered. • Refer to the setup code lists to find the setup code for the component to be registered. Example: To register a DVD made by KENWOOD, you would enter “805”. Input... -
Page 29: Operating Other Components
Basic remote control operations for other components Operating other components This operation lets you operate the registered components. KENWOOD audio components with system control turn on and off automatically with the receiver via the system control connections. INPUT SELECTOR Use the INPUT SELECTOR keys to select the component you desire. -
Page 30: Setup Code Chart
311, 312, 313 MITSUBISHI 315, 316, 317, 318 PANASONIC 309, 310 PHILIPS SANYO SHARP 319, 320 SONY 301, 302, 303, 304, 305, 306 TOSHIBA 314, 331 ZENITH DVD player Setup code Manufacturer Setup Codes KENWOOD 805, 808 PANASONIC PHILIPS PIONEER SONY TOSHIBA... -
Page 31: Cassette Deck, Cd Player & Md Recorder Operations
Basic remote control operations for other components CASSETTE deck, CD player & MD recorder operations You can perform these basic operations using the keys described below when connected to KENWOOD cassette deck, CD player or MD recorder equipped with system control operations. -
Page 32: Other Components' Operations
2 Press the keys corresponding to the operations you desire. Refer to the following sections for details. These keys can be used to perform the basic operations of KENWOOD and other manufacturers’ components which the setup code for each component had been entered beforehand. - Page 33 Basic remote control operations for other components DSS/SAT receiver operation keys POWER SOURCE SOURCE (Source power) DSS/SAT RECEIVER REMOTE MODE OTHERS LISTEN MODE INPUT MODE Numeric keys CINEMA EQ MUTE +100 CH + / – (Channel + / –) TV CONTROL ¢...
-
Page 34: In Case Of Difficulty
In case of difficulty Resetting the Microcomputer The microcomputer may malfunction (unit cannot be operated, or shows an erroneous display) if the power cord is unplugged while the power is ON, or due to some other external factor. If this happens, execute the following procedure to reset the microcom- puter and return the unit to its normal operating condition. - Page 35 In case of difficulty Remote control unit Symptom Certain inputs cannot be selected using the remote control. Remote control operation is not possible. Cause • No setup codes registered at the respective input(s). • The remote control is set to a different operation mode.
-
Page 36: Specifications
Coaxial ... 0.5 Vp-p / 75 Ω Notes 1. KENWOOD follows a policy of continuous advancements in development. For this reason specifications may be changed without notice. 2. The full performance may not be exhibited in an extremely cold location (under a water-freezing temperature).